How do I manage permissions for Intelligent Insights?
Administrators can manage user permissions for the Intelligent Insights feature. Administrators can go into the account's permission settings to enable or disable specific access and capabilities for different user roles. This allows for granular control, ensuring that each role has the appropriate level of access to the features and data within Intelligent Insights.
Note: To access Intelligent Insights, you need to have access to the Analytics Hub and Admin Analytics.
How do I manage permissions for Intelligent Insights?
1. Open Account
In the Global Navigation, click the Admin link. Then click the name of the account.

2. Open Permissions
In Account Navigation, click the Permissions link.

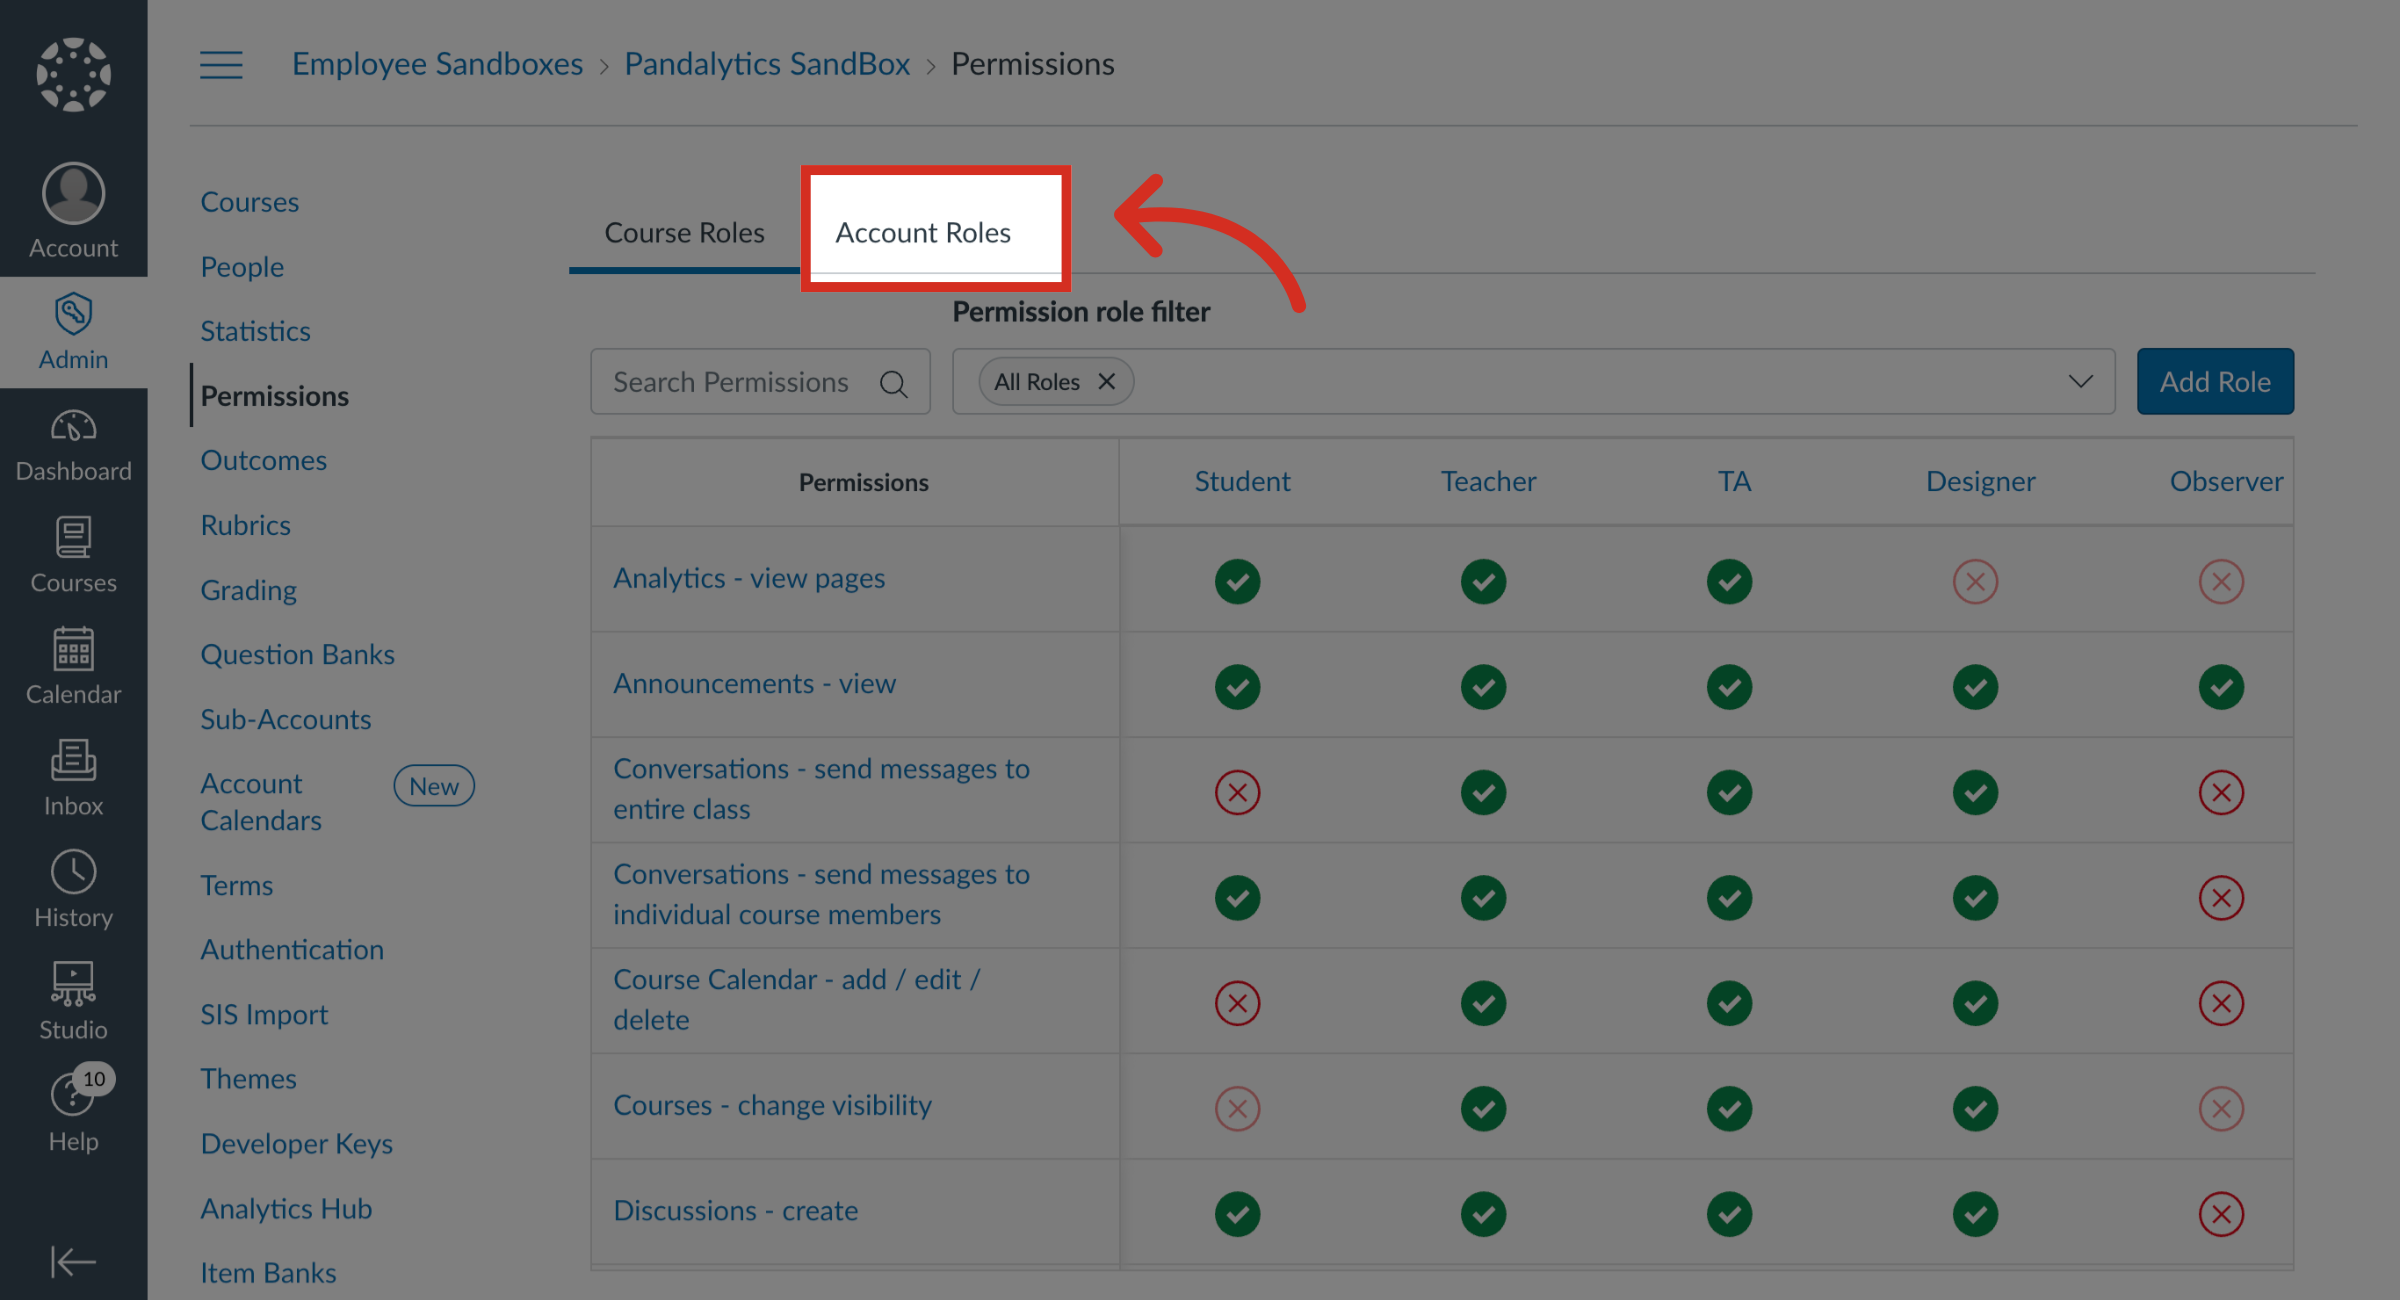
3. Open Account Roles
Click the Account Roles tab.
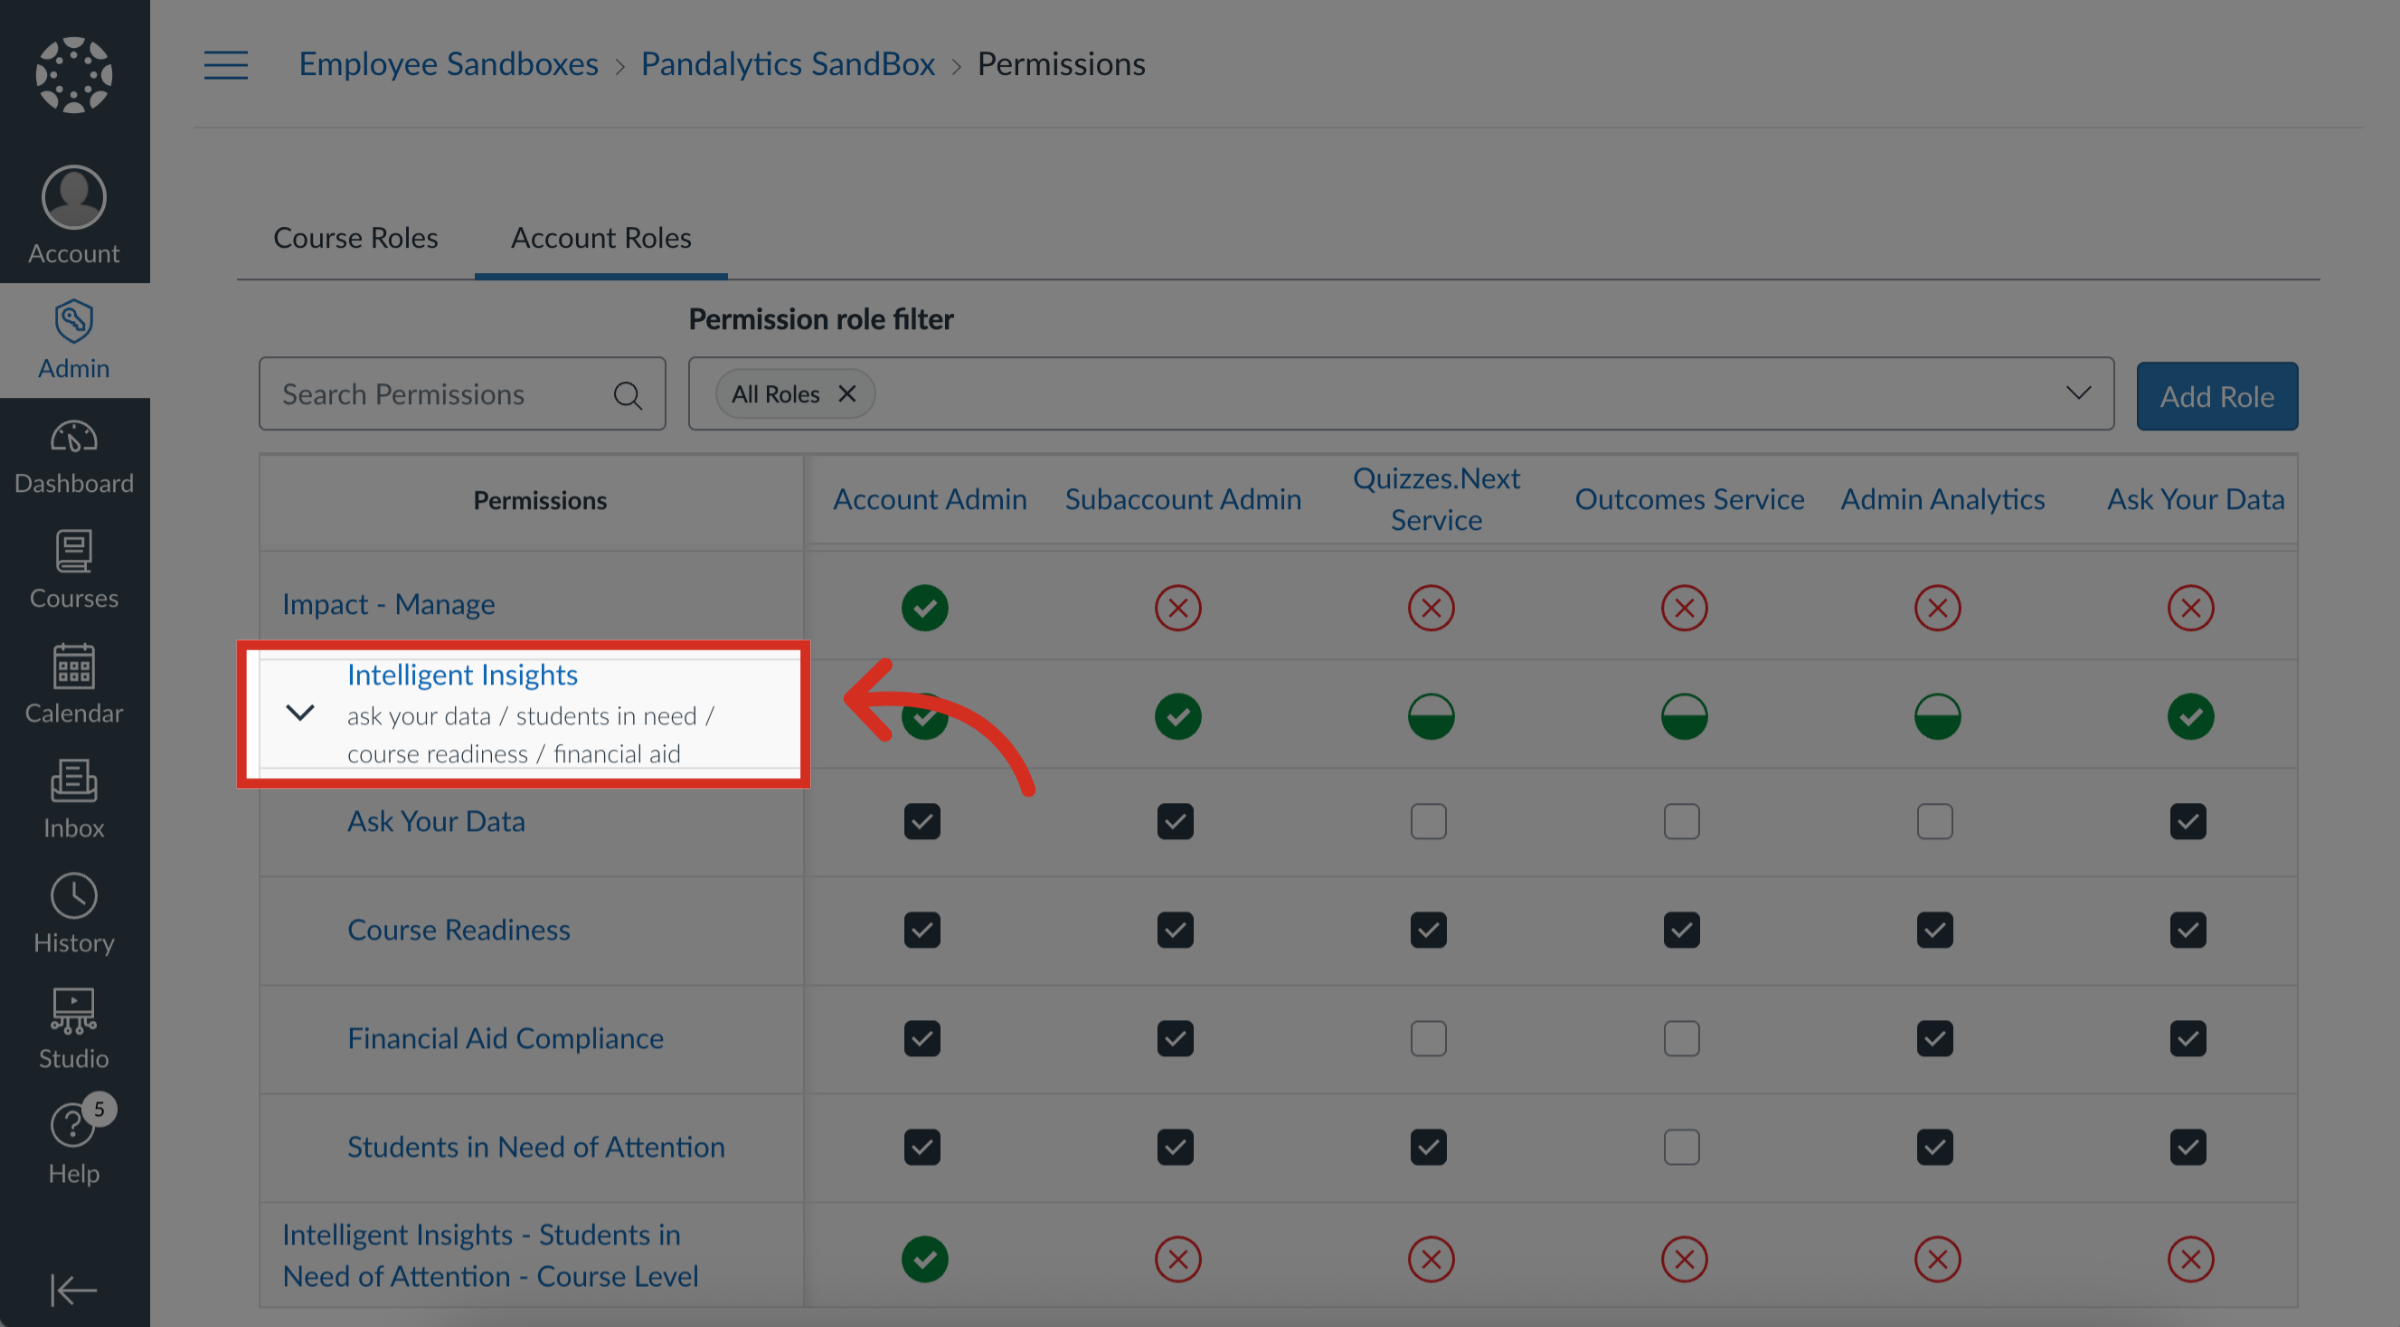
4. Open Intelligent Insights Permissions
Intelligent Insights features are grouped together to allow granularity and control over permissions.
Click the Intelligent Insights name to view all Intelligent Insights features.
5. View Account Admin Permissions
The Account Admin is selected by default.
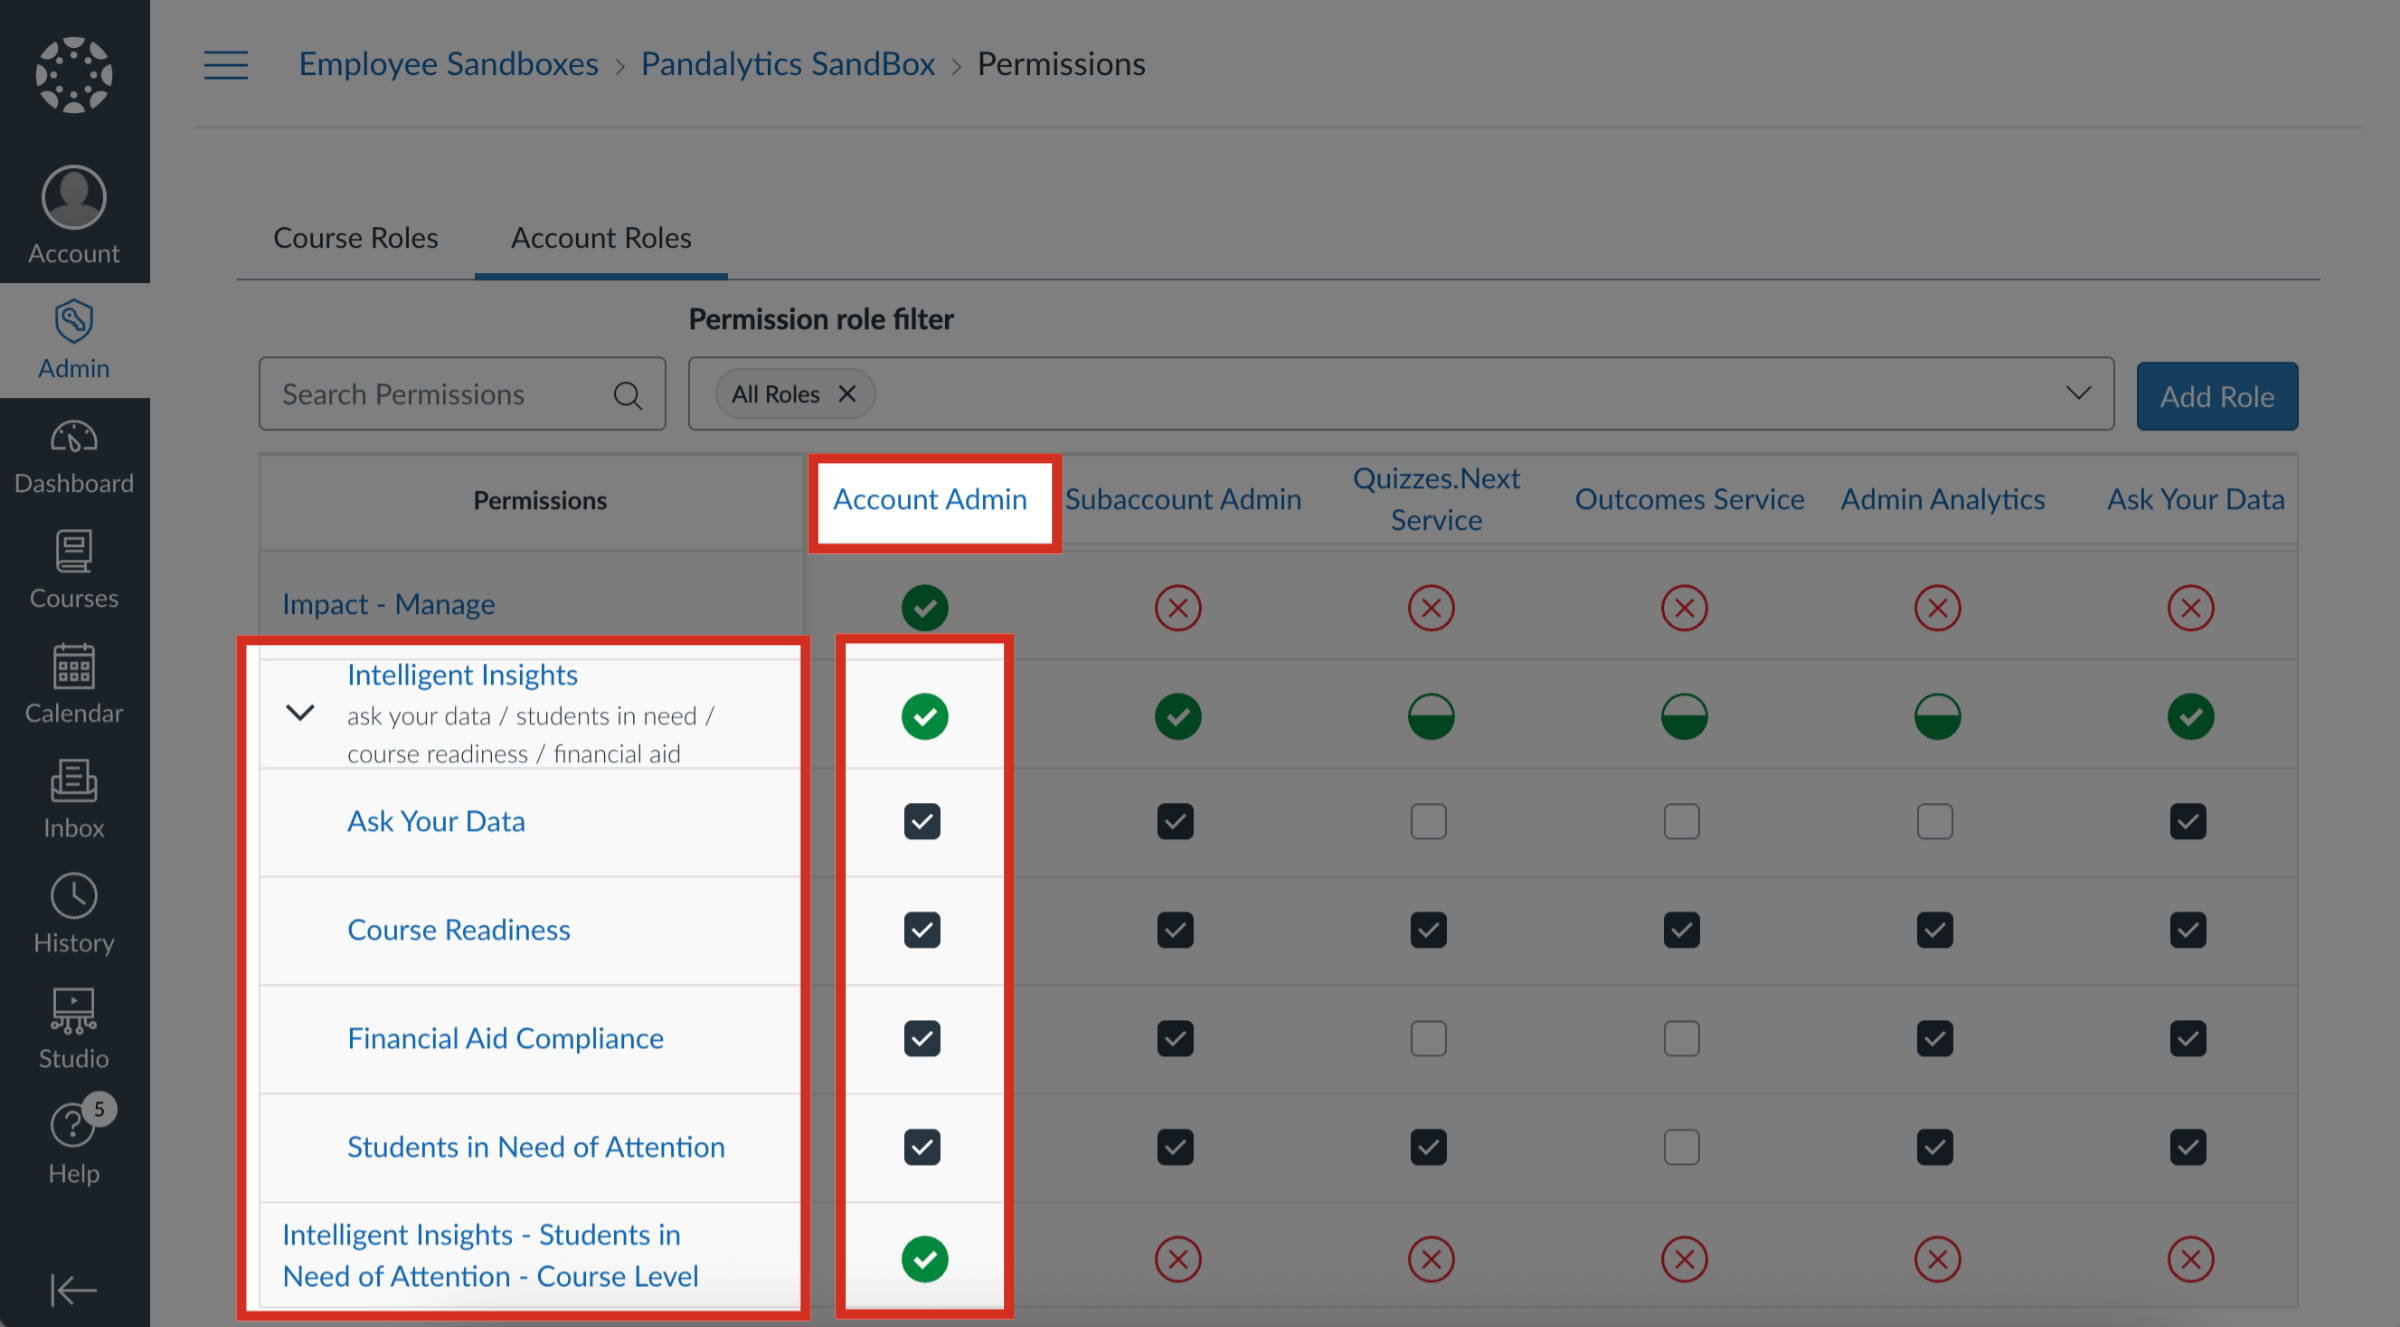
6. Manage Grouped Permissions
You can manage each granular permission within the feature with the corresponding checkboxes. To enable or disable a granular permission, click the checkbox.
A checked box indicates the permission is enabled. An unchecked box indicates the permission is disabled.
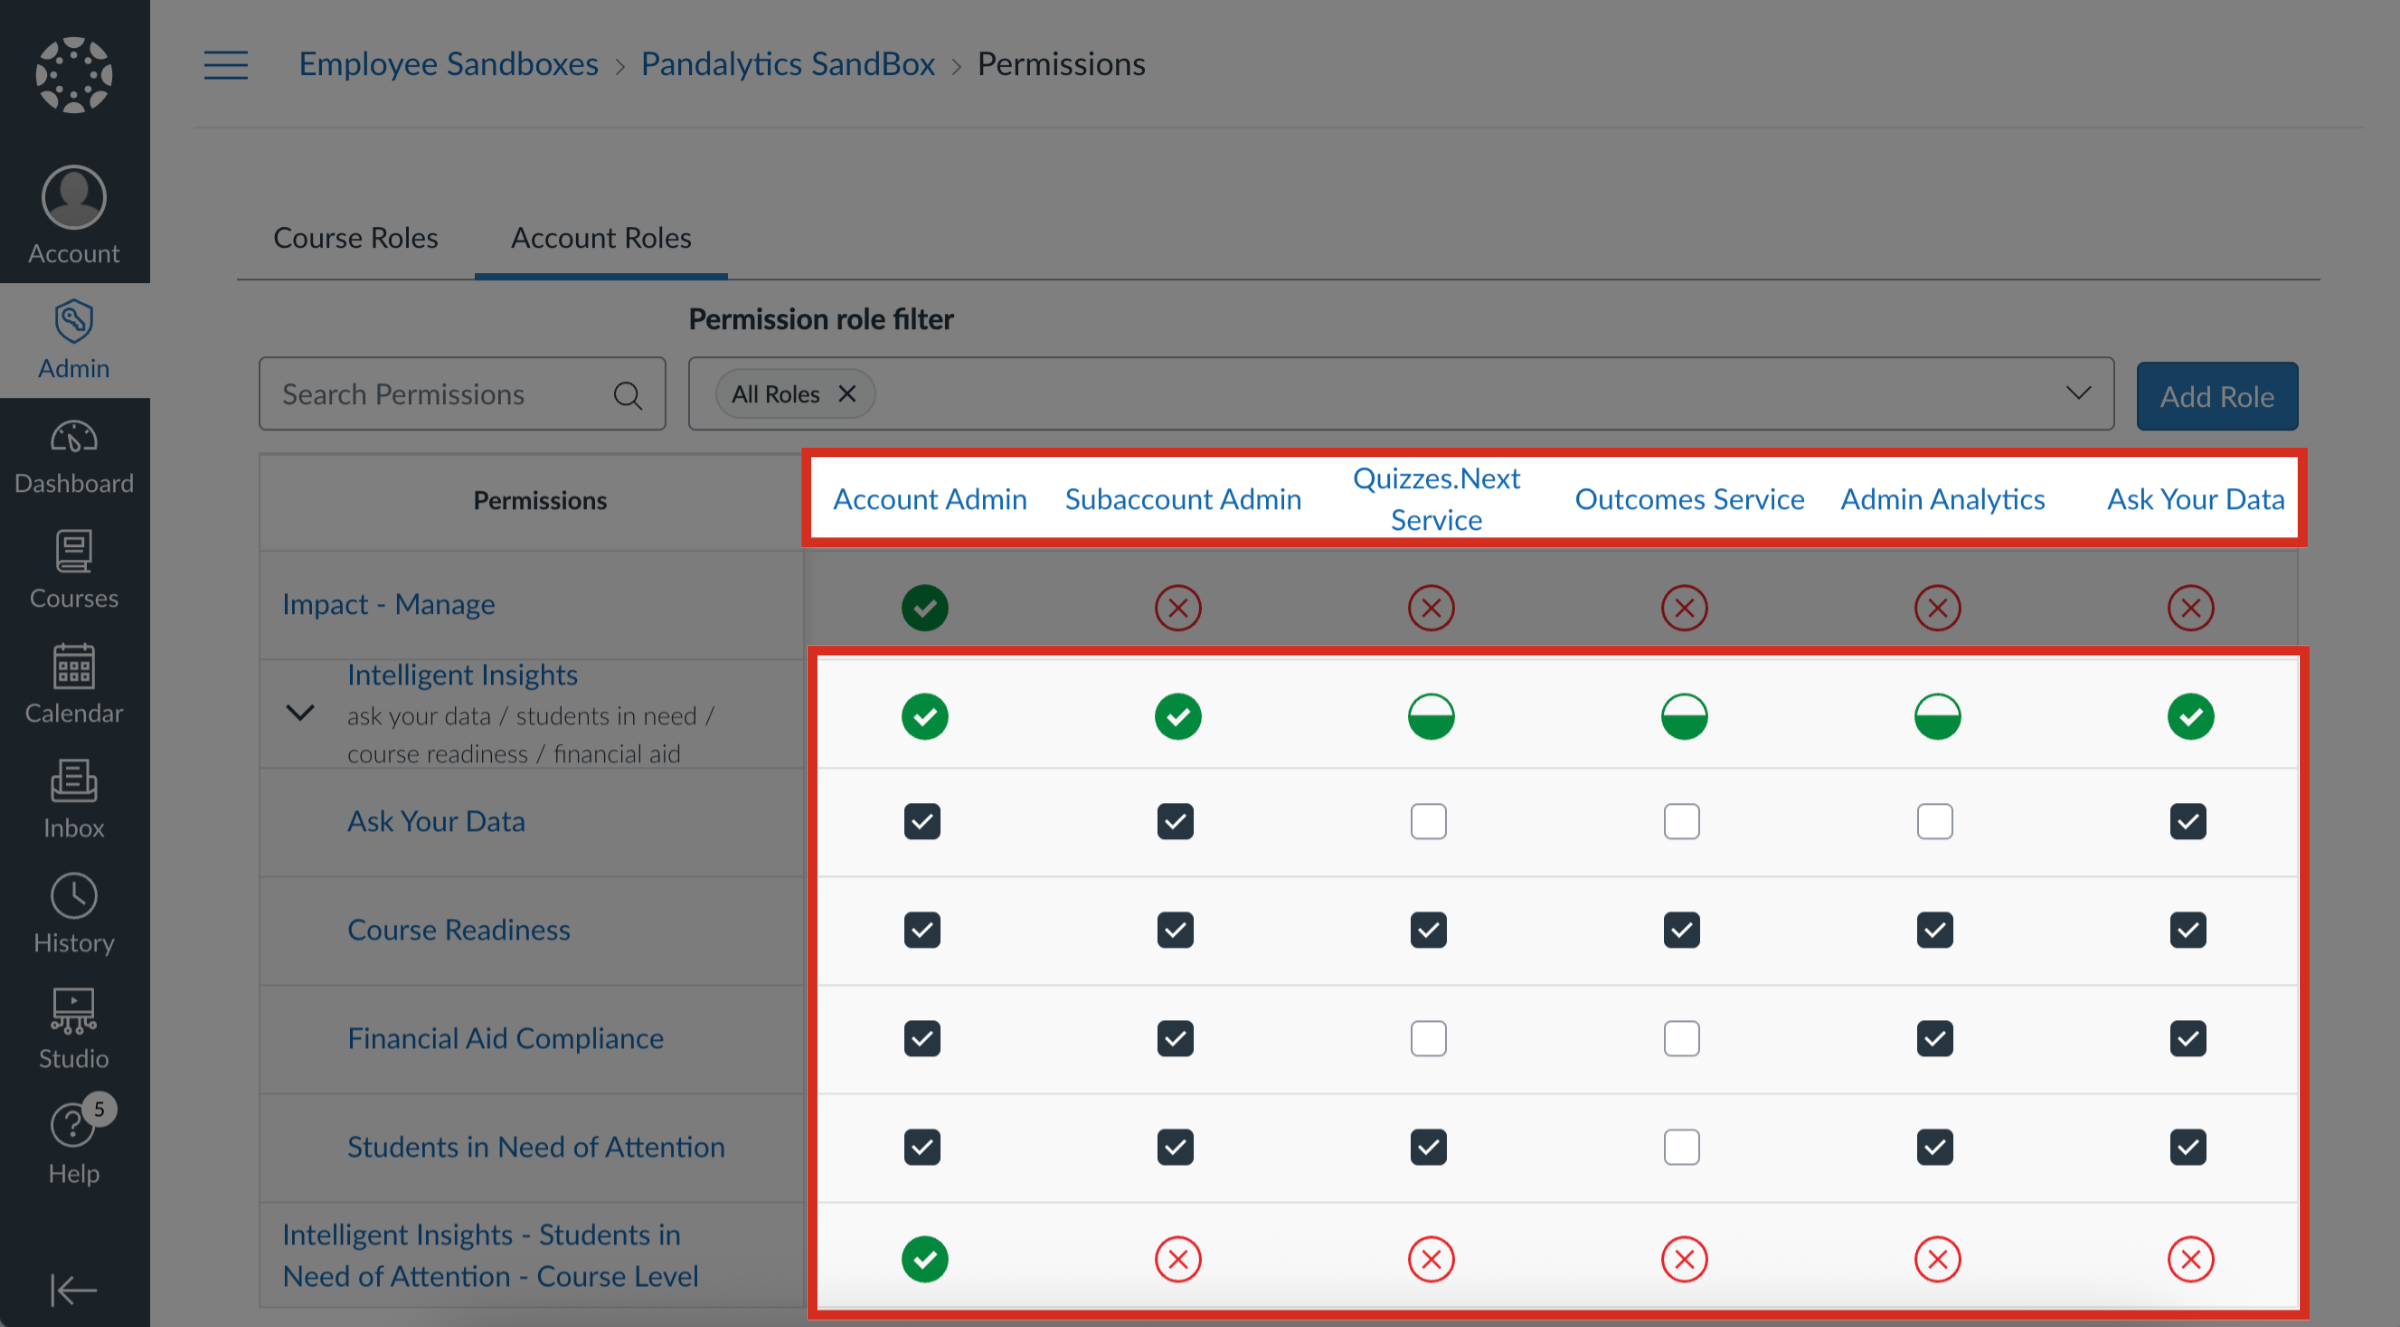
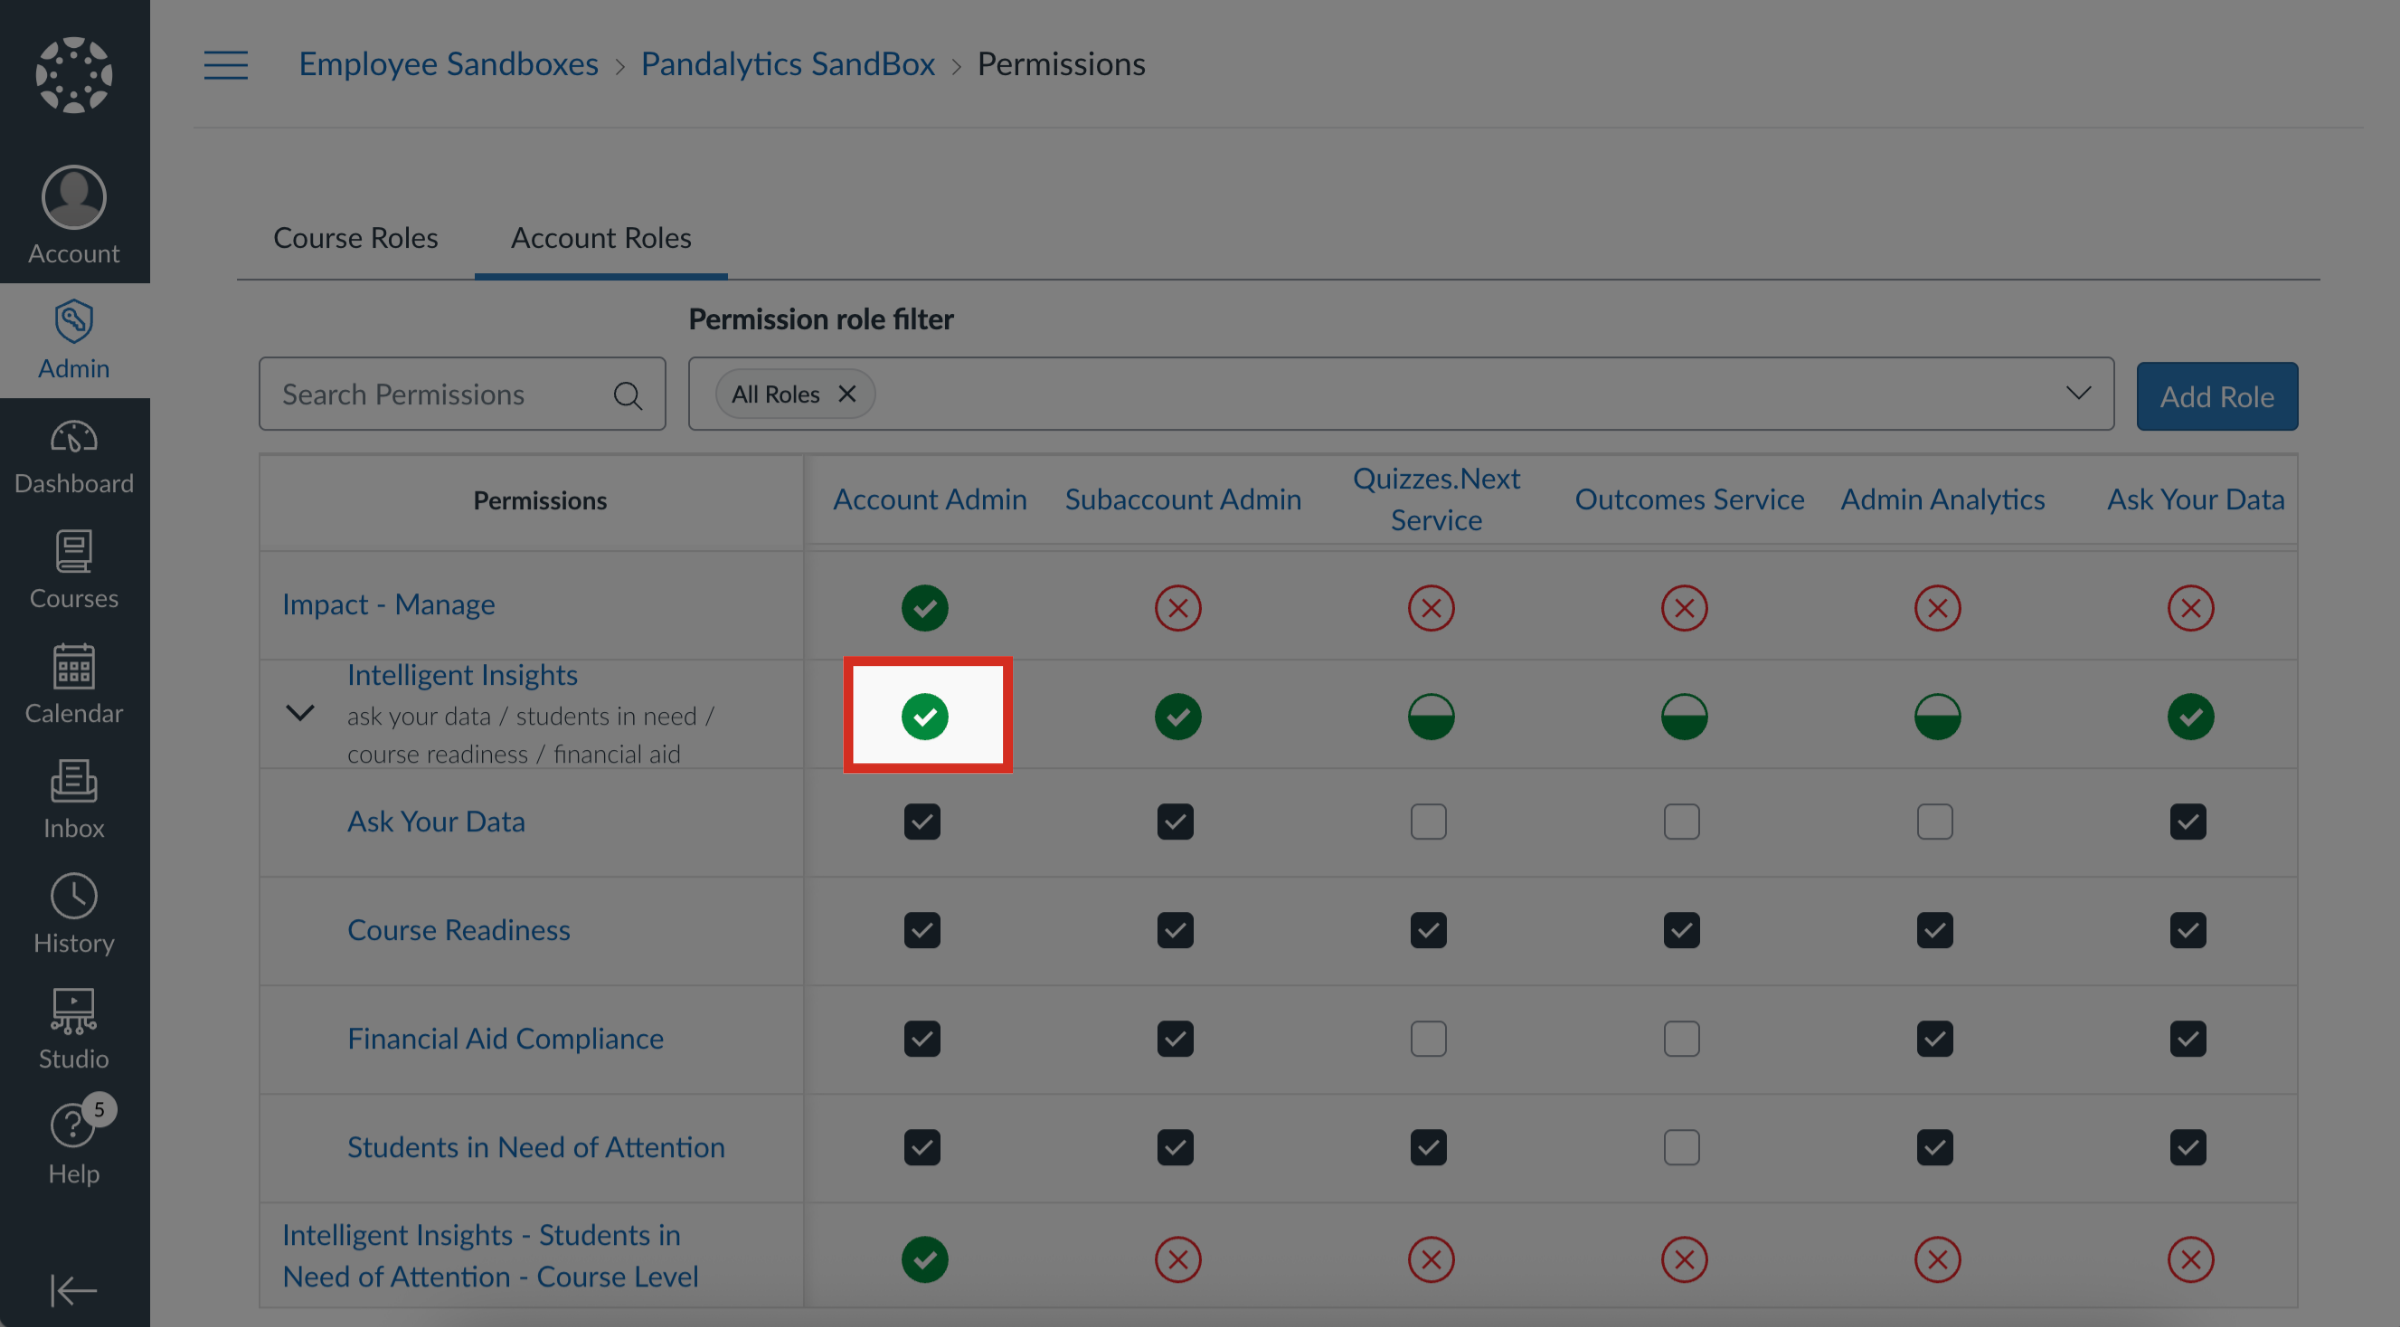
7. All Permissions Enabled
If all permissions are enabled for a user role, the permission group displays a checkmark icon.
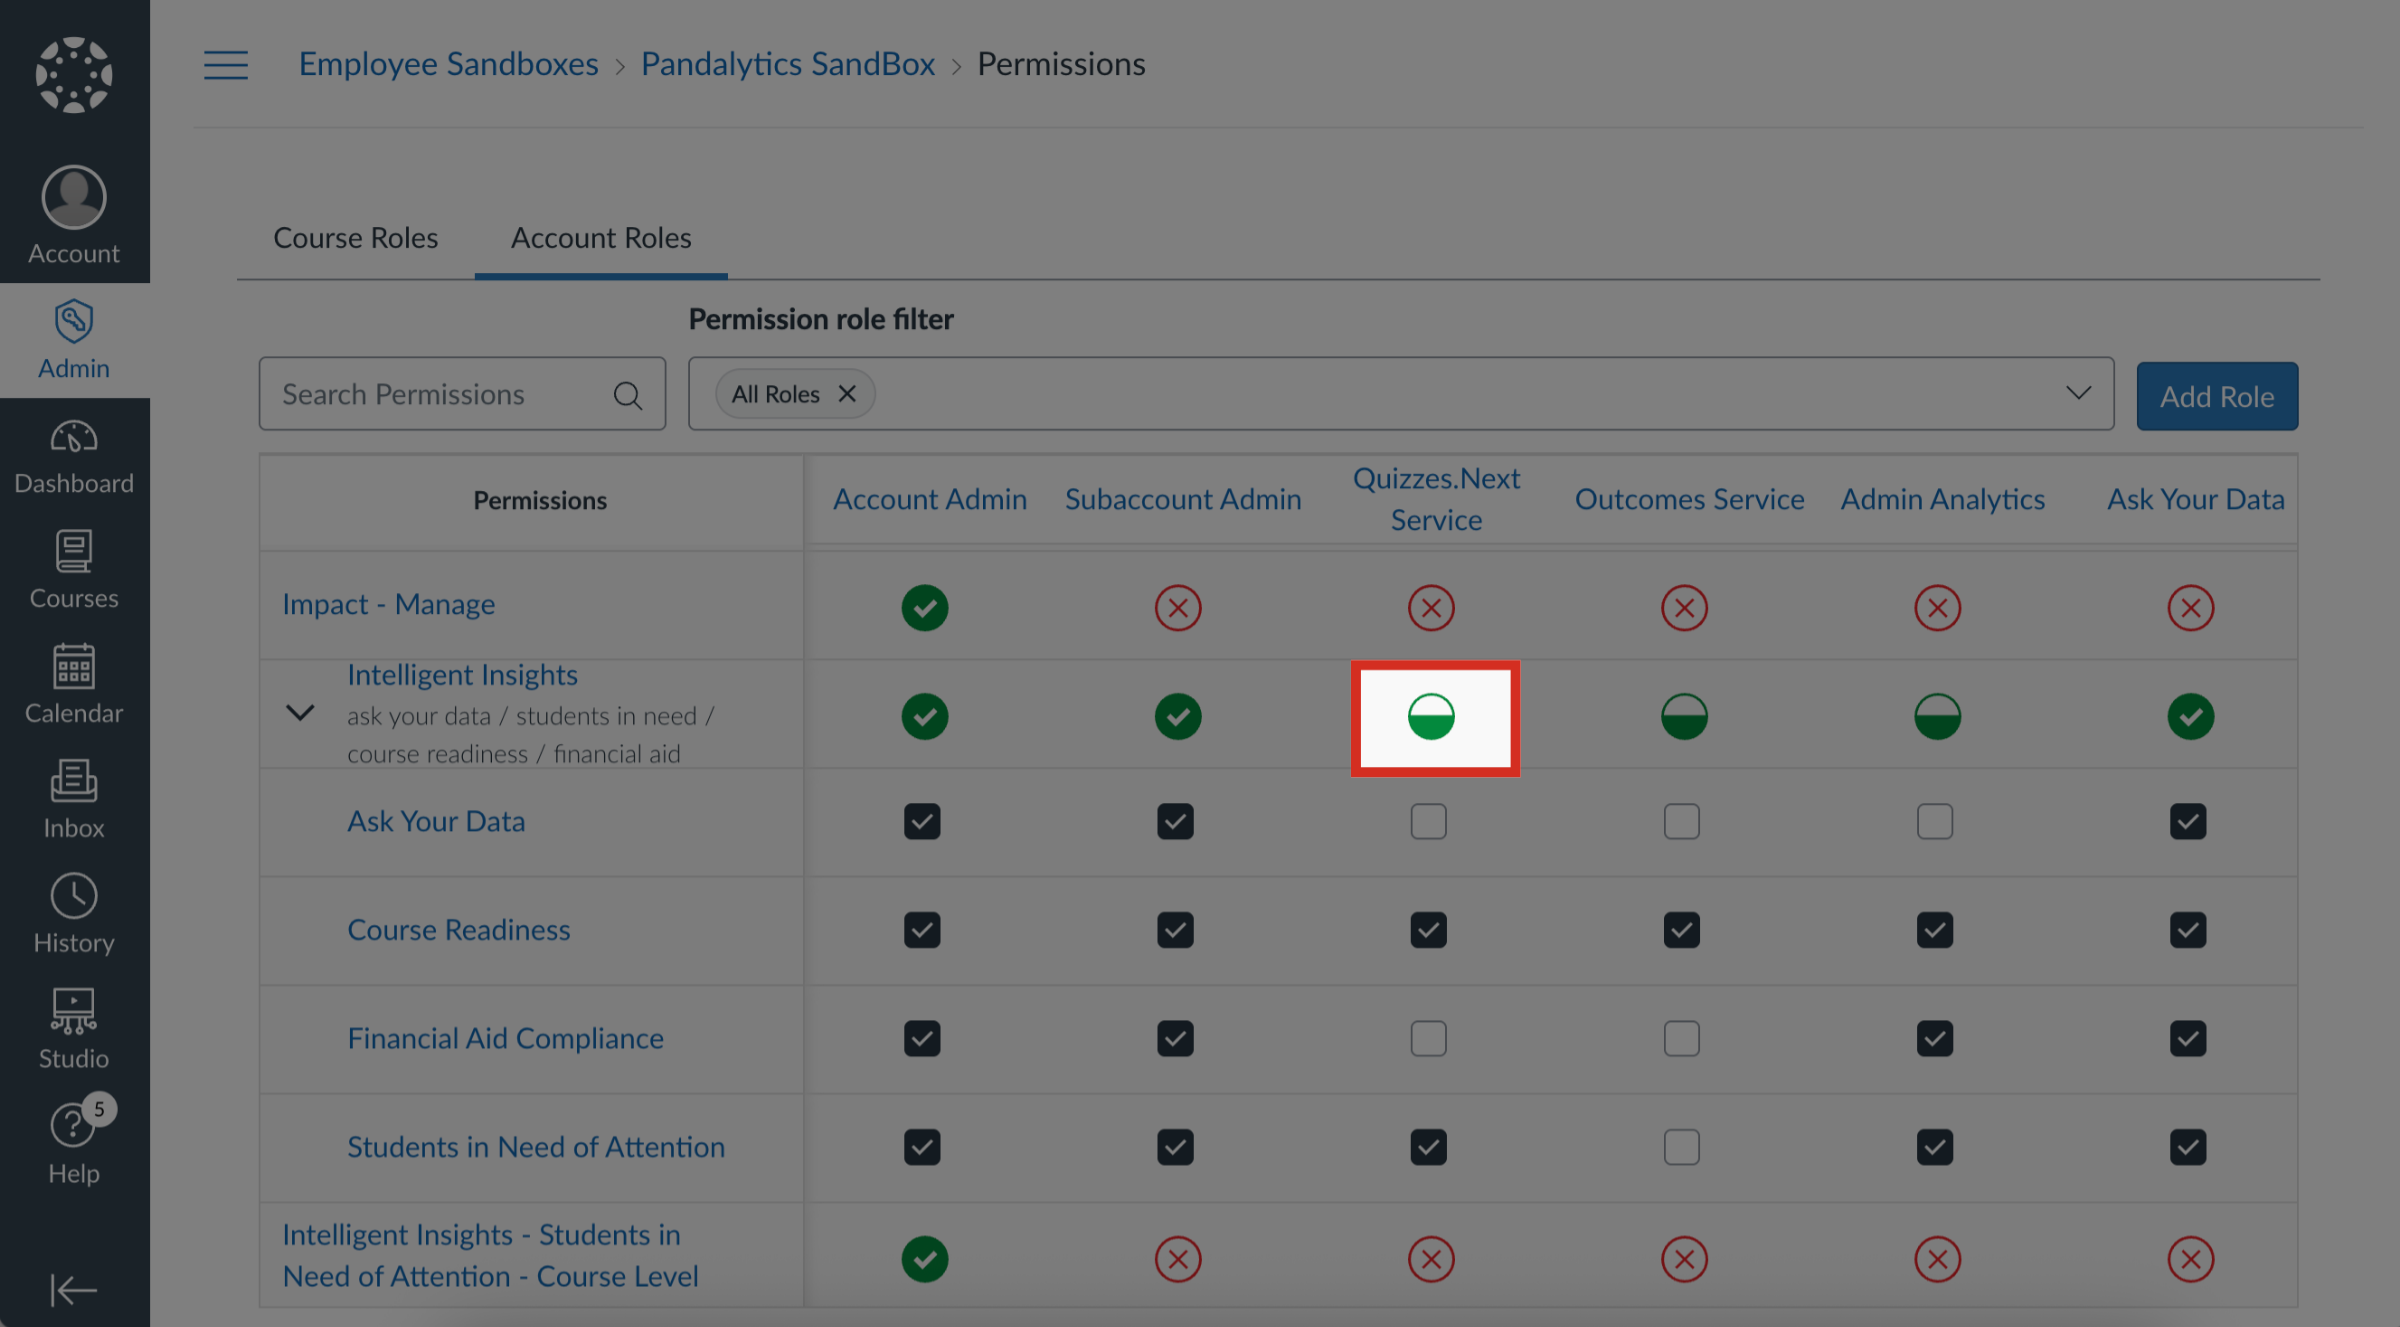
8. Some Permissions Enabled
If some permissions are enabled and some are disabled for a user role, the permission group displays a half-filled icon.
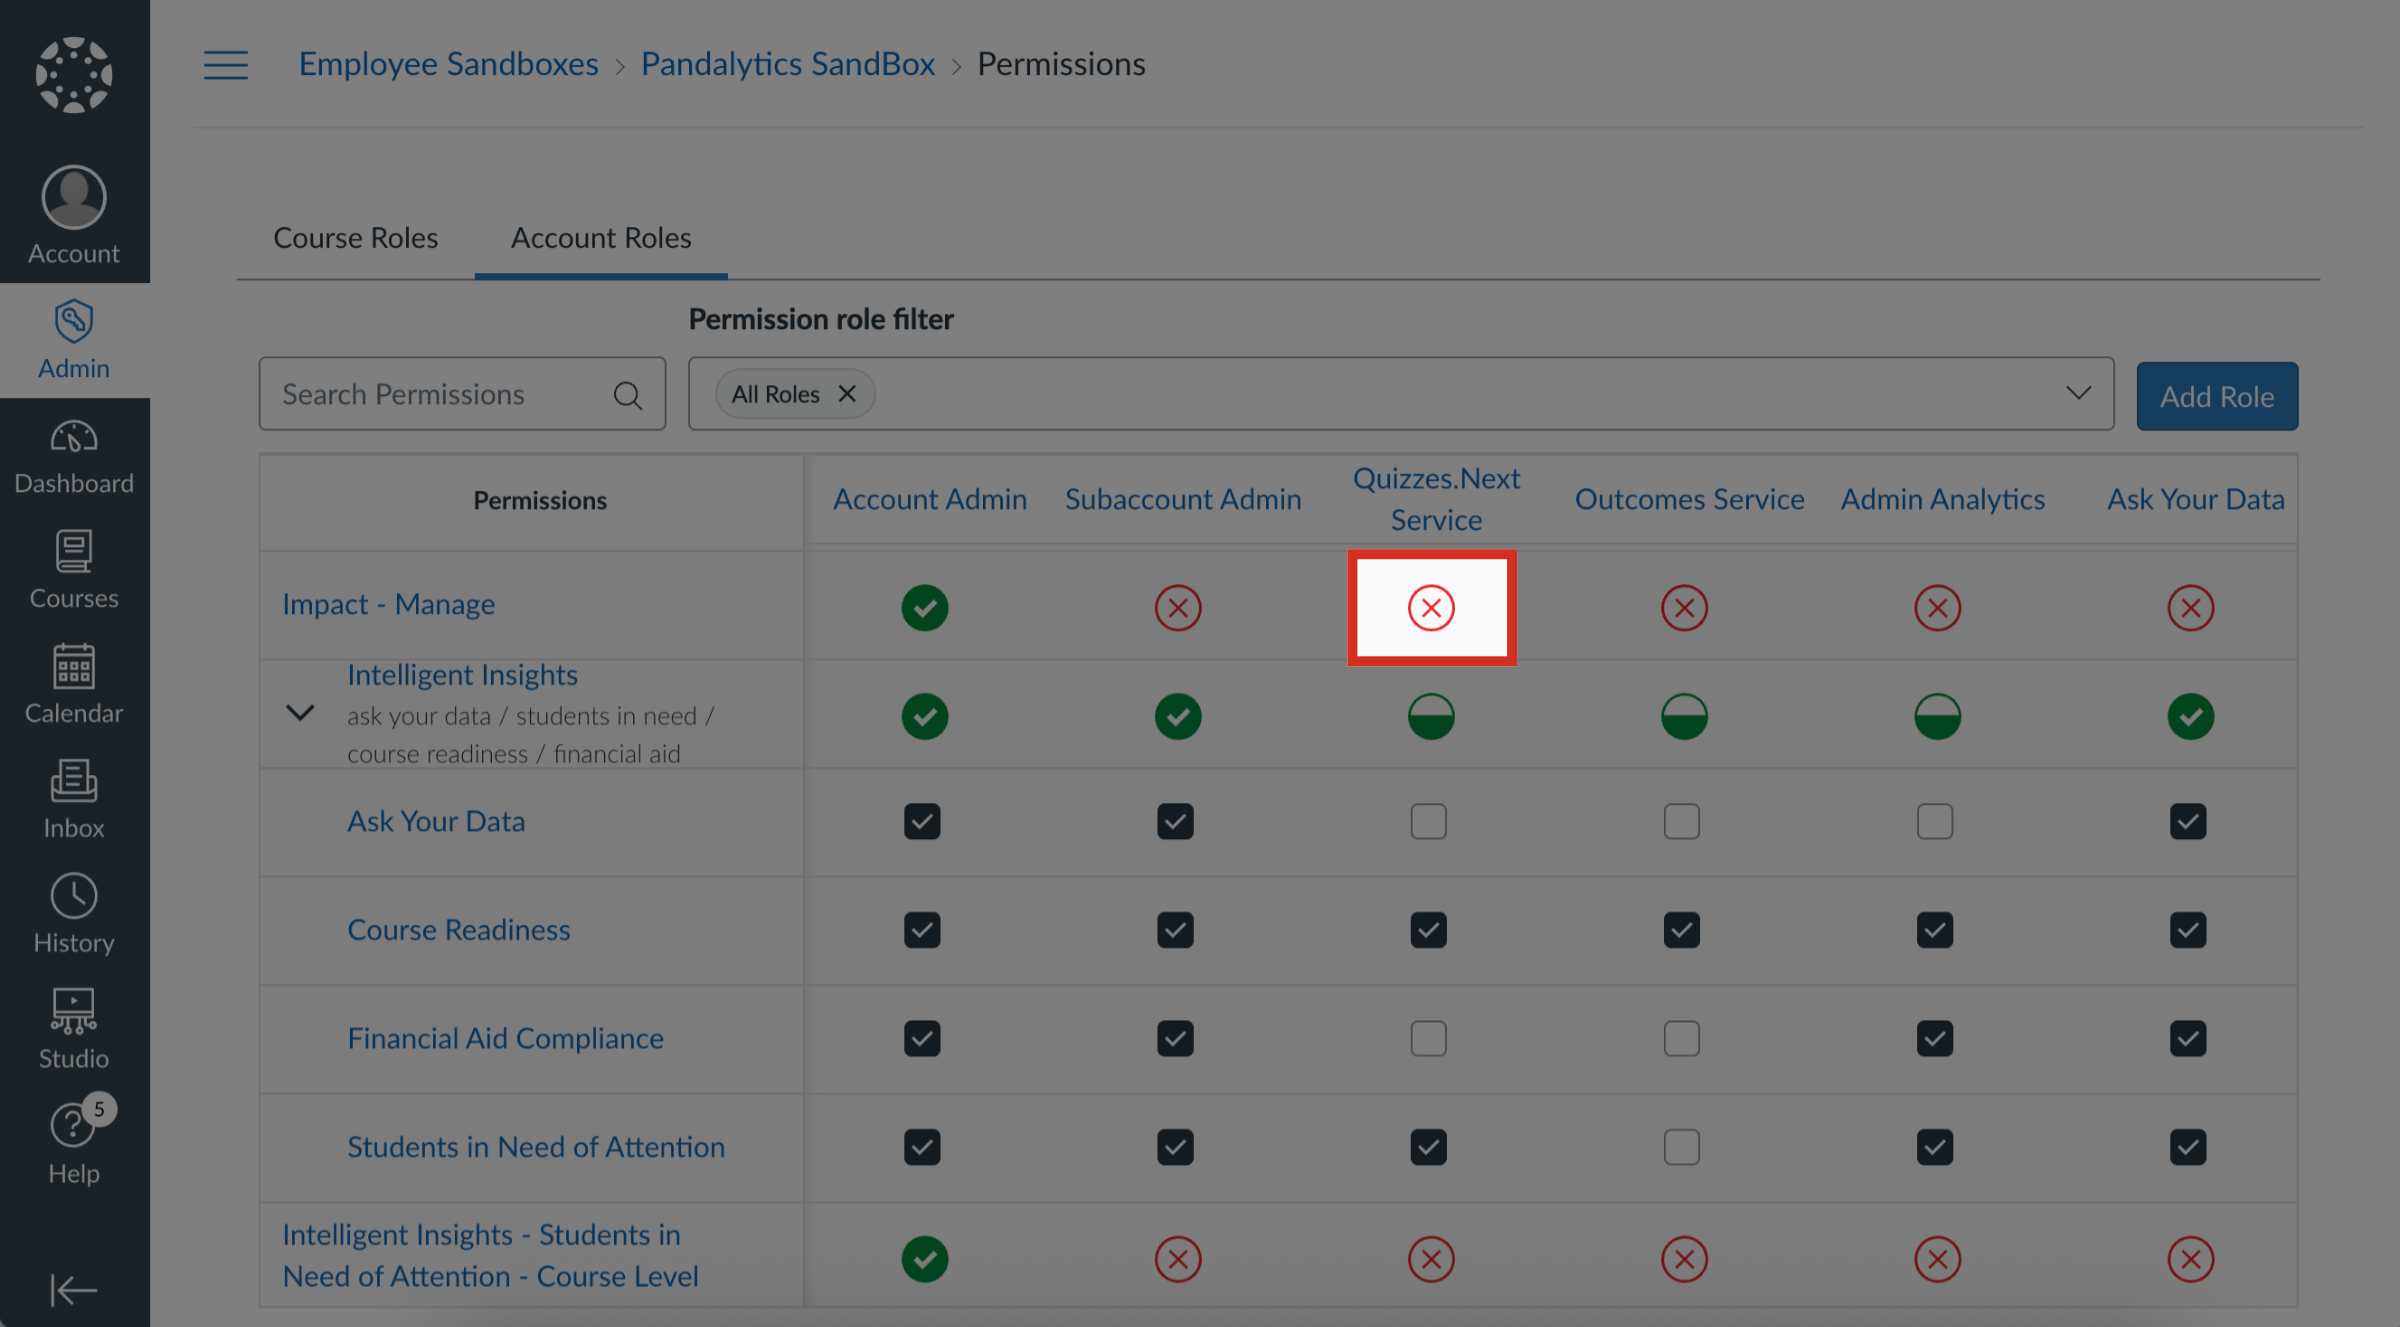
9. All Permissions Disabled
If all permissions are disabled for a user role, the permission group displays an X icon.
10. Manage Individual User Role Permissions
To add an account-level role or add a course-level role, view the tab for the appropriate role and click the Add Role button.

