How do I edit an item-based assessment as a teacher?
In Mastery Connect, item-based assessments can only be edited when they are in a draft state. If an assessment has been created but has not been used in any trackers, it must be reverted to the draft state before it can be edited.
If an assessment is in use in a tracker you can make limited edits, but the assessment will remain in its original form anywhere that it is already in use. To make additional edits, you can delete the assessment from all trackers and return it to a draft state, or you can clone it.
Notes:
- Item bank assessments can only be edited by the user who created the assessment.
- When you delete an assessment from a tracker, any existing scores in the tracker are deleted and can not be recovered.
- When you clone an assessment, it continues to exist in its original form in any trackers in which it is already being used.
How do I edit an item-based assessment as a teacher?
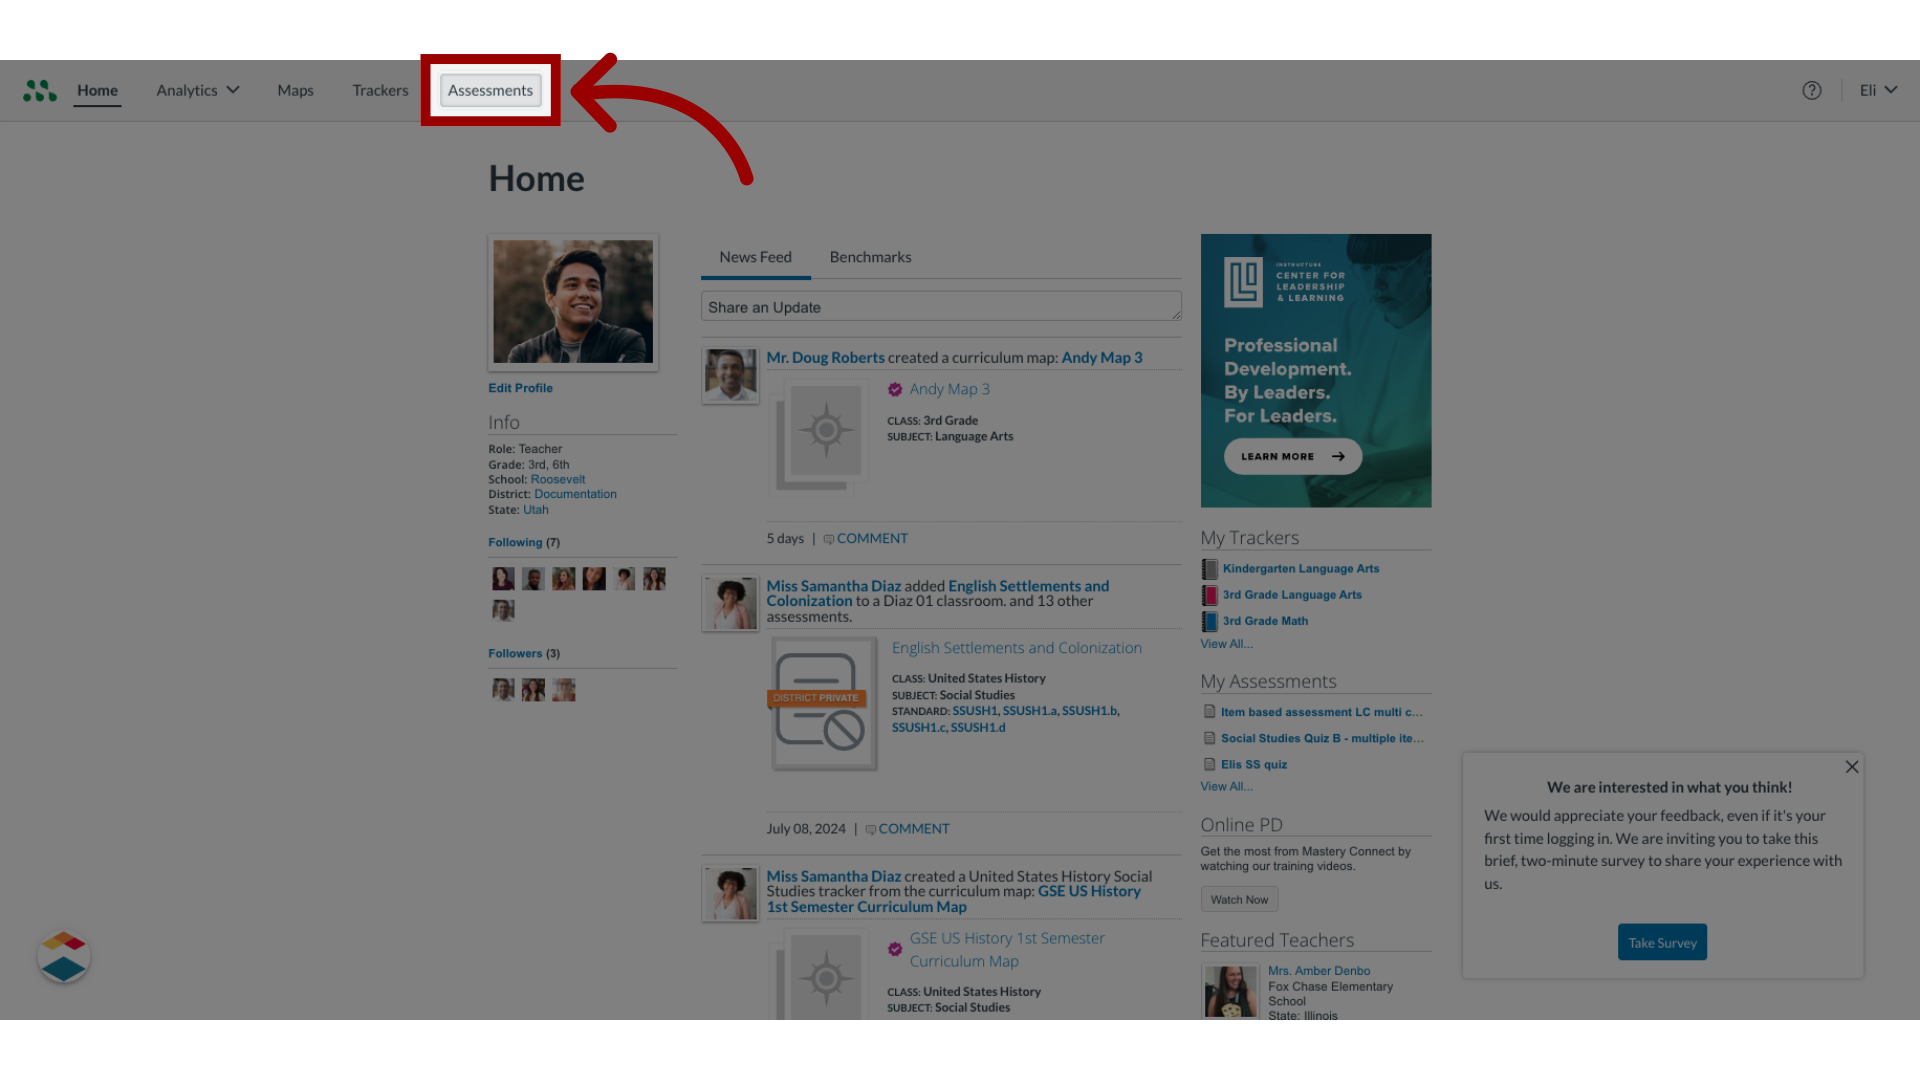
1. Open Assessments
In the global navigation, click the Assessments link.
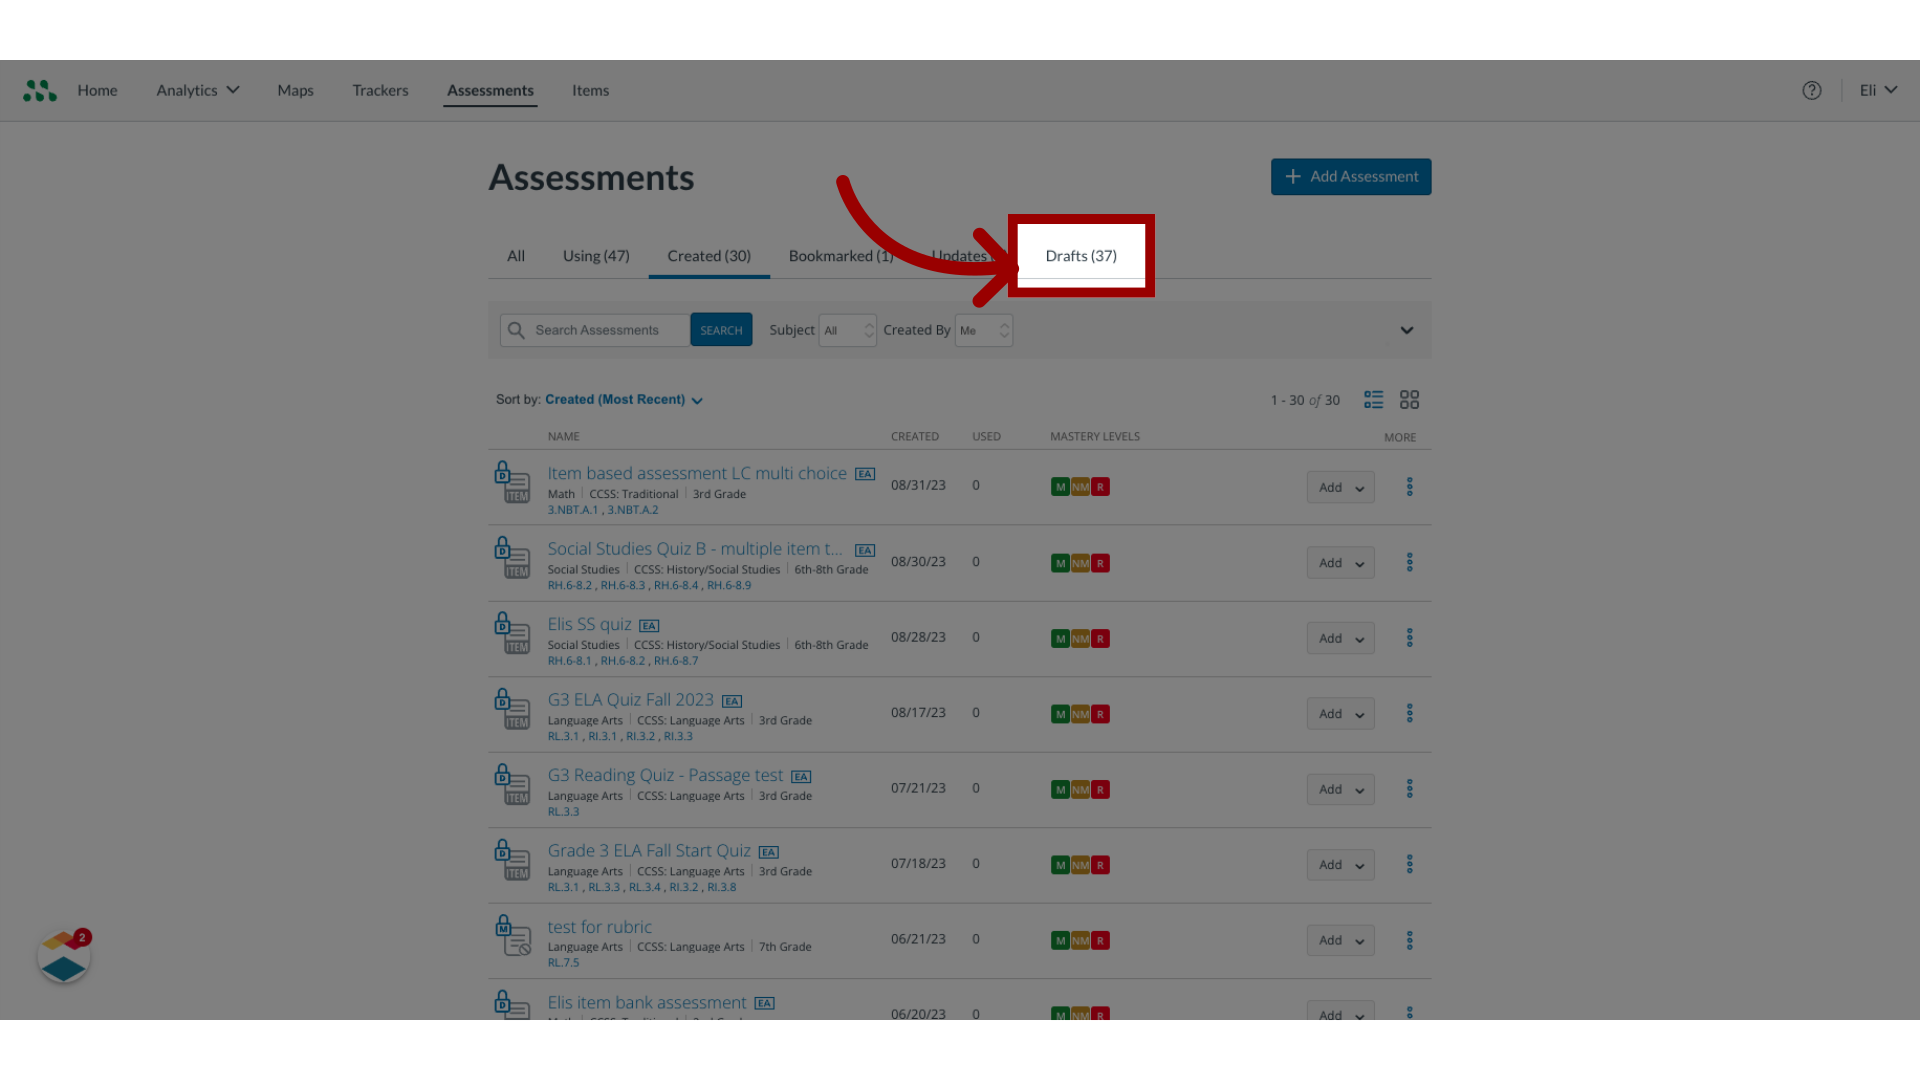
2. Open Drafts
To search for draft items only, click the Drafts tab.
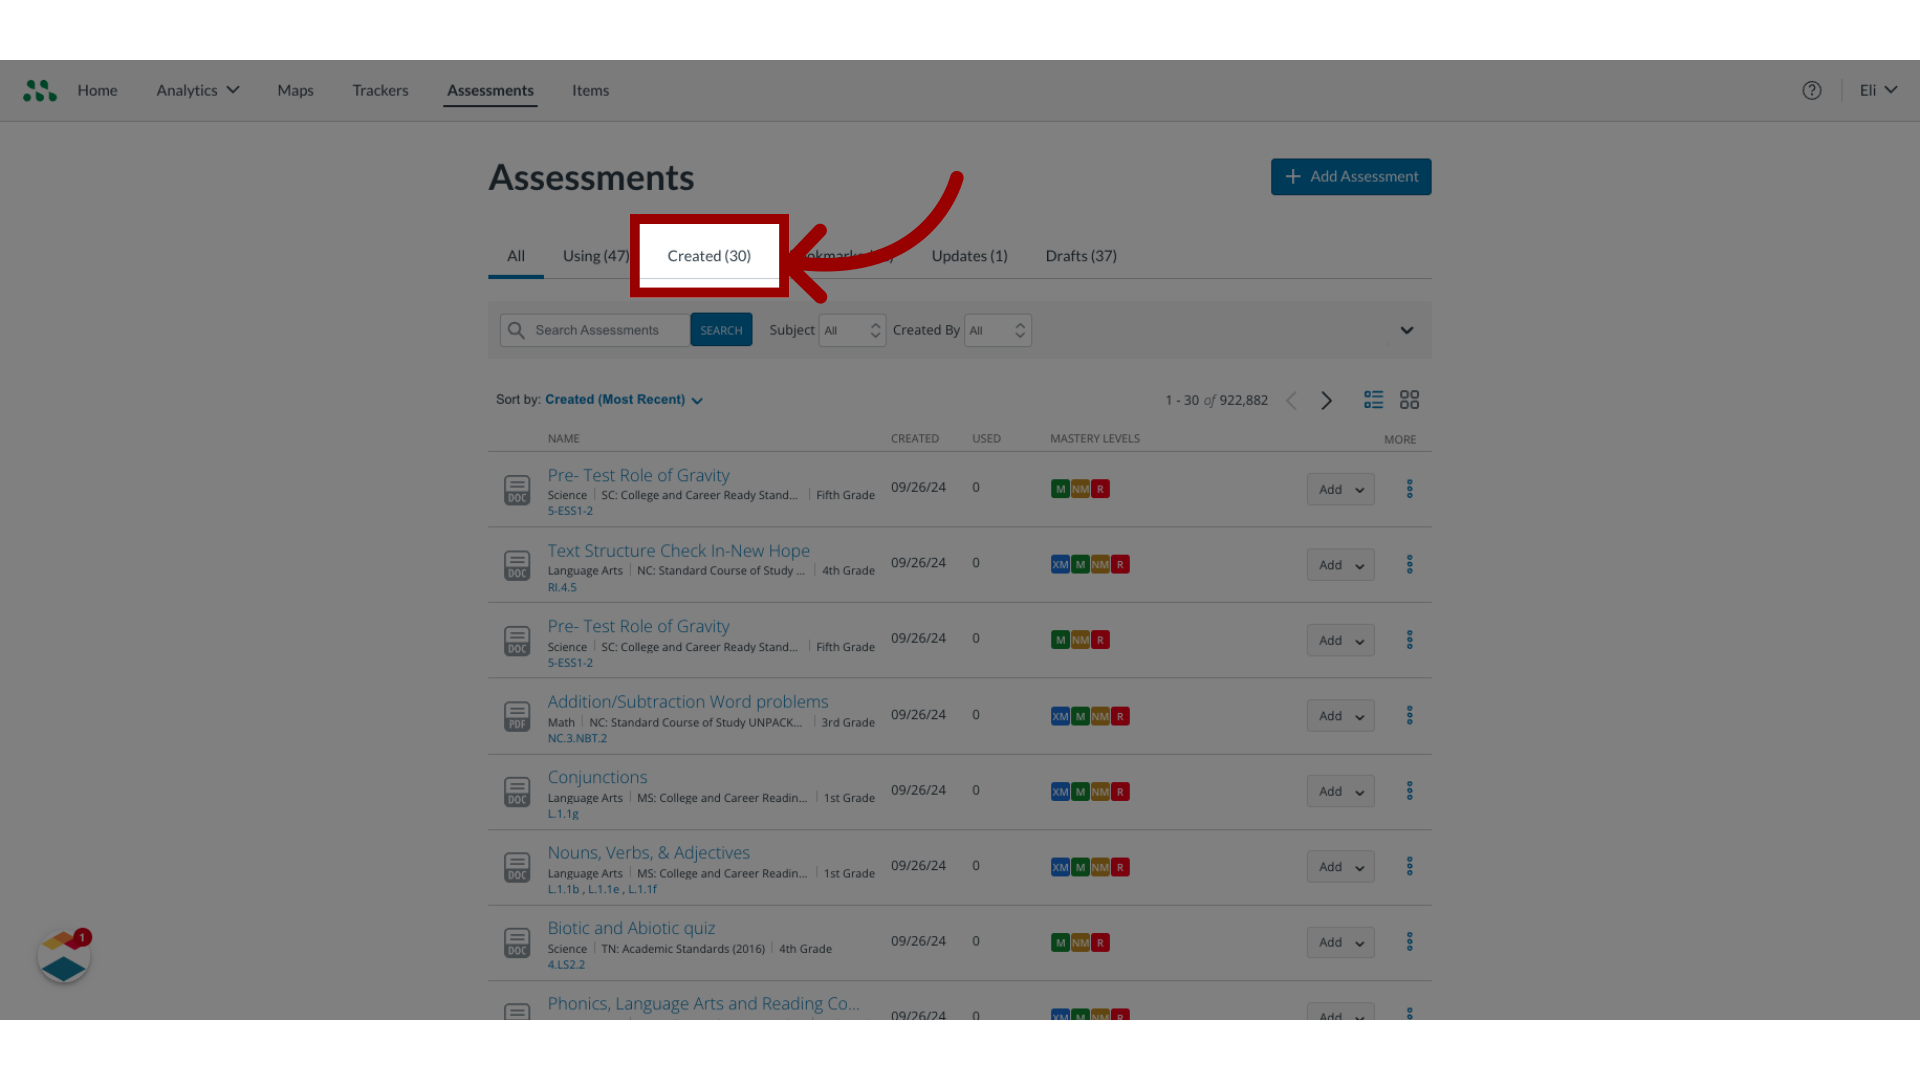
3. Open Created Tab
To search for assessments that you have created, click the Created tab.
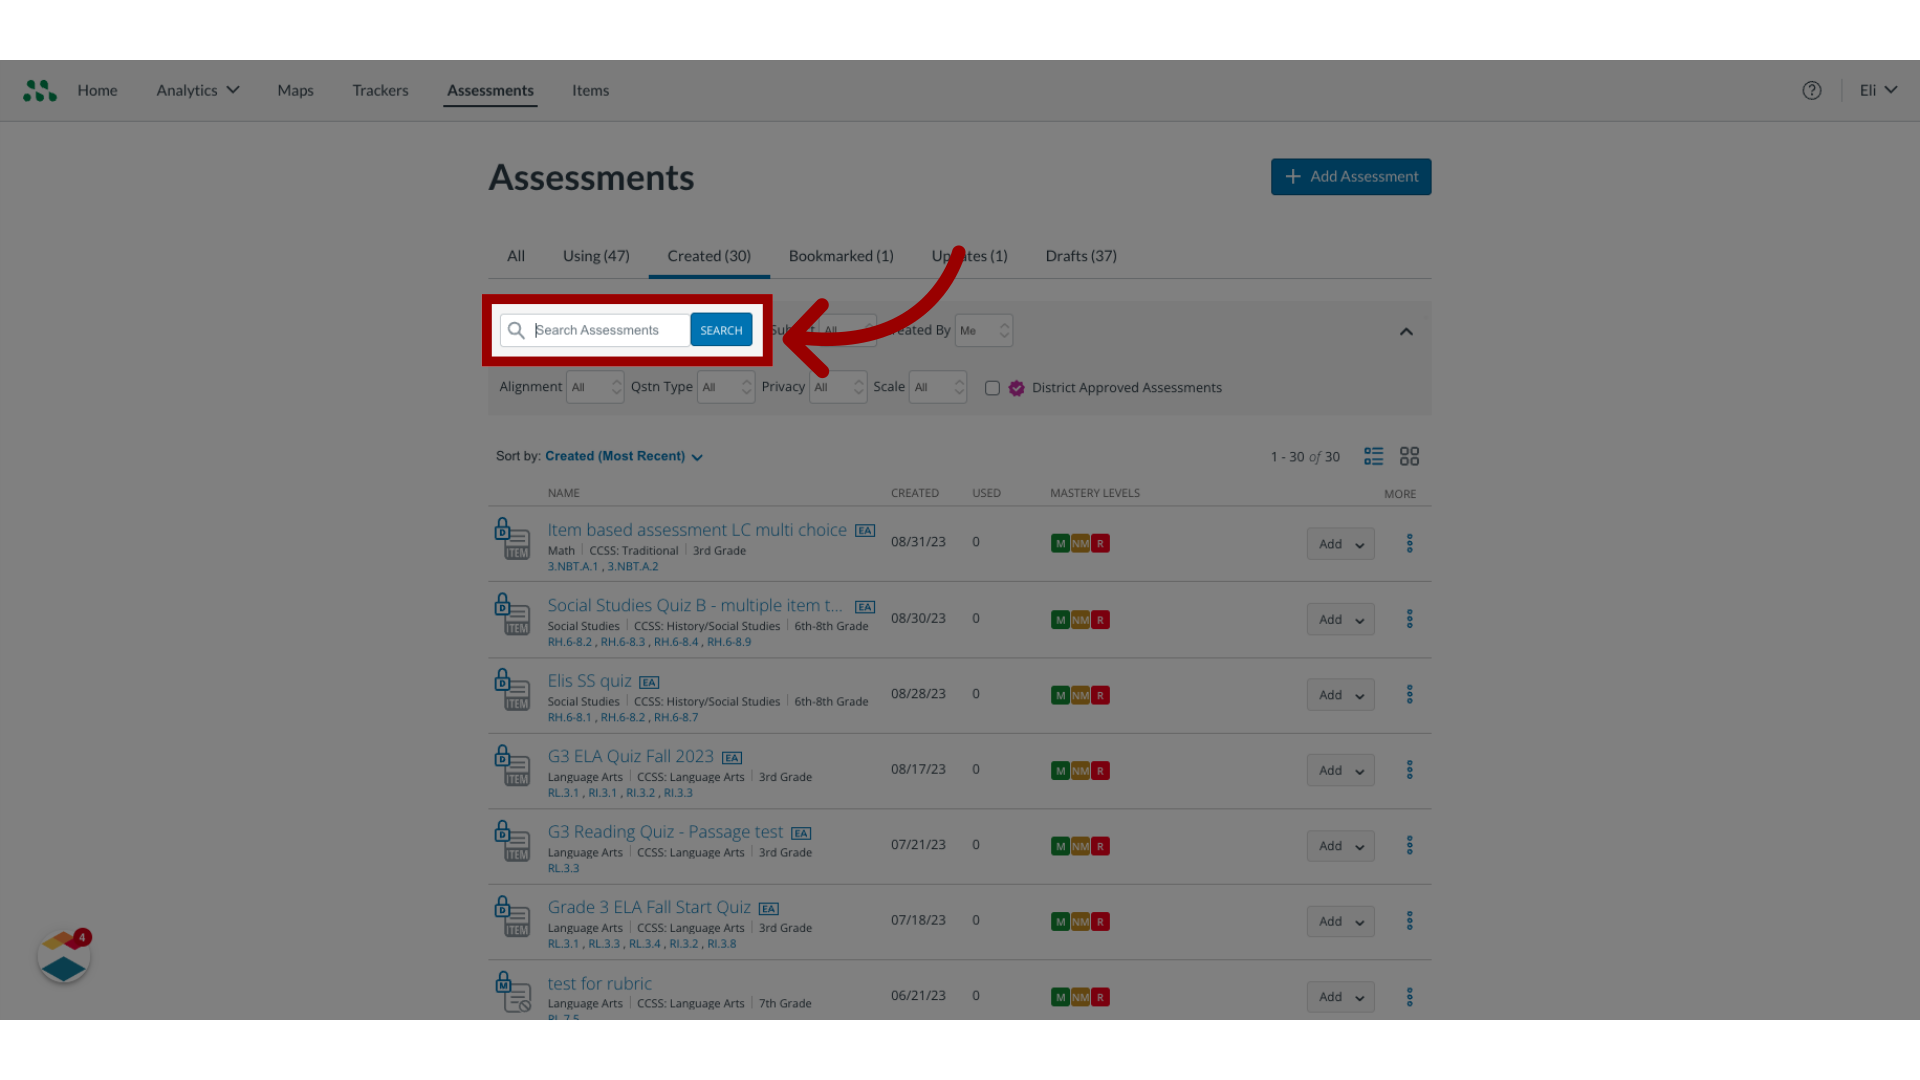
4. Search Assessment Name
To search for a specific item-based assessment, type the assessment name in the Search Assessments field and click the Search button.
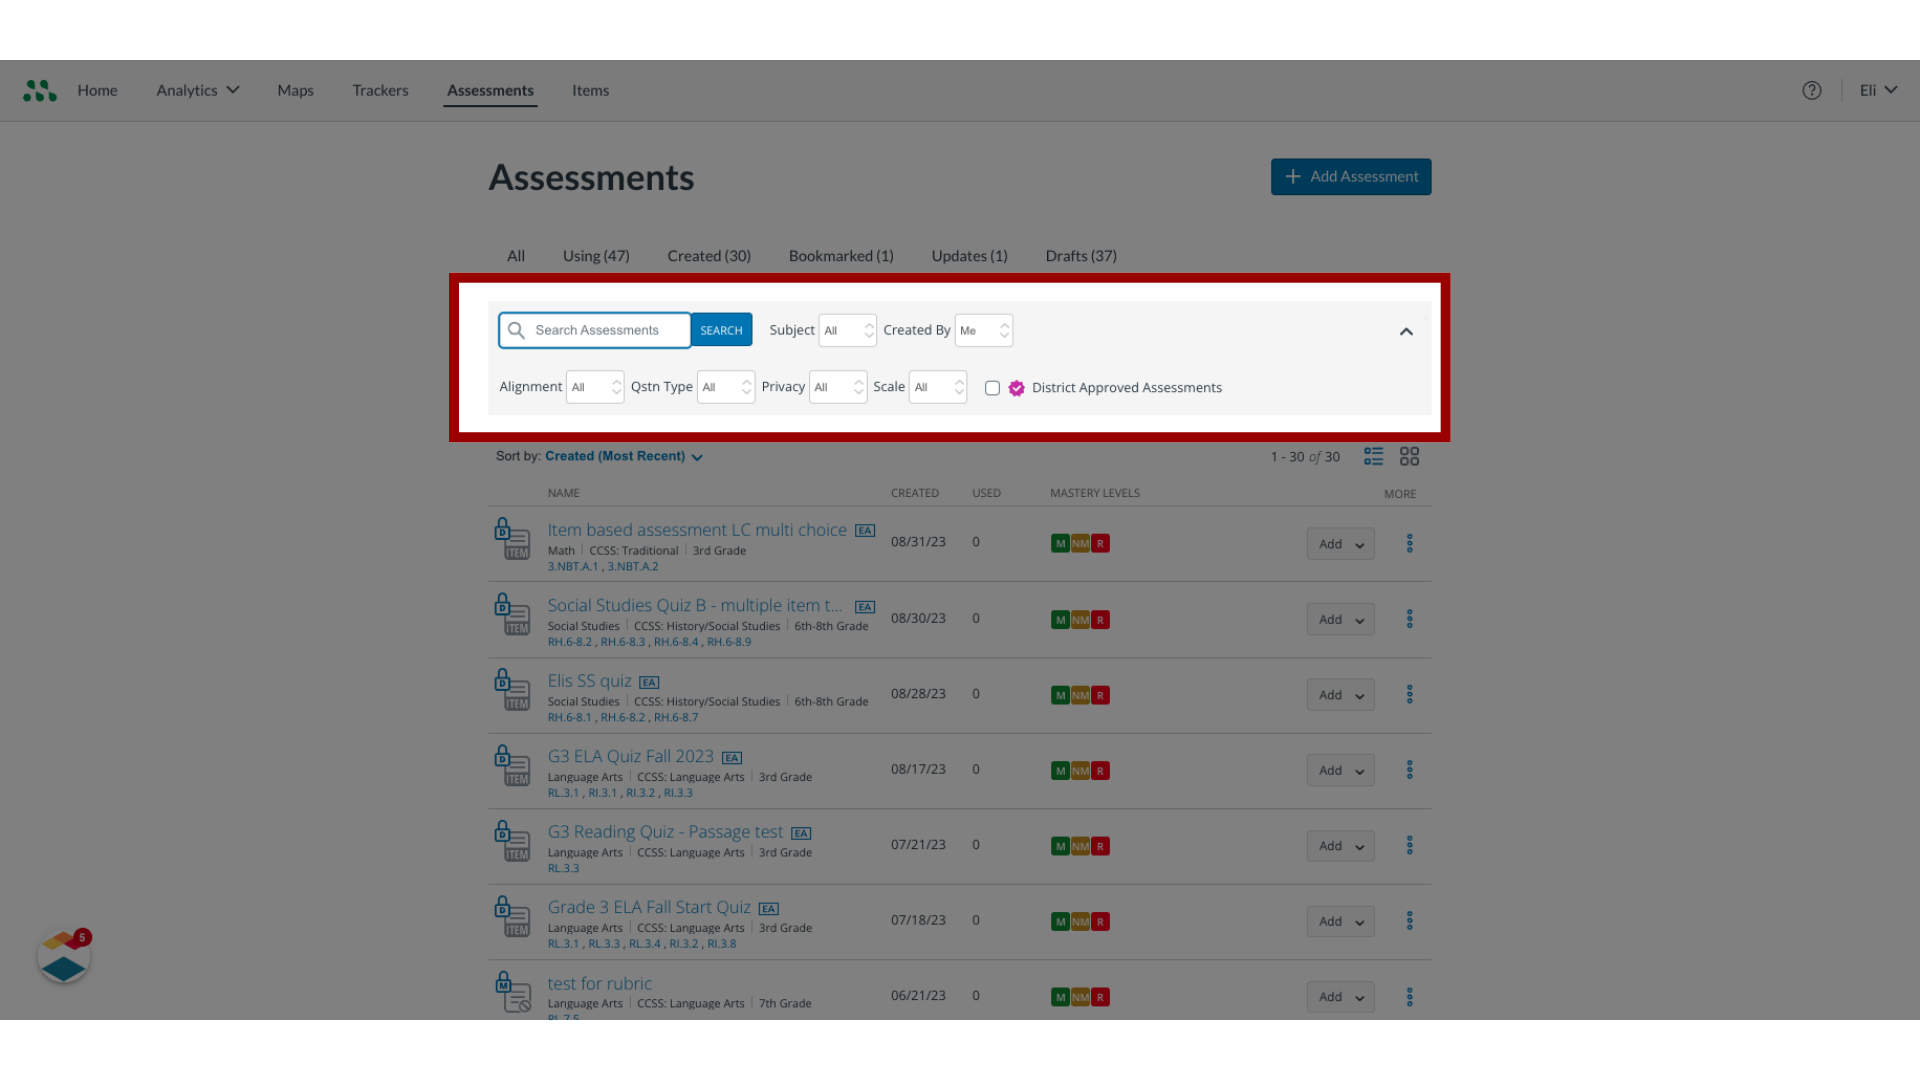
5. View filters
To view all available filters, click the Expand icon.
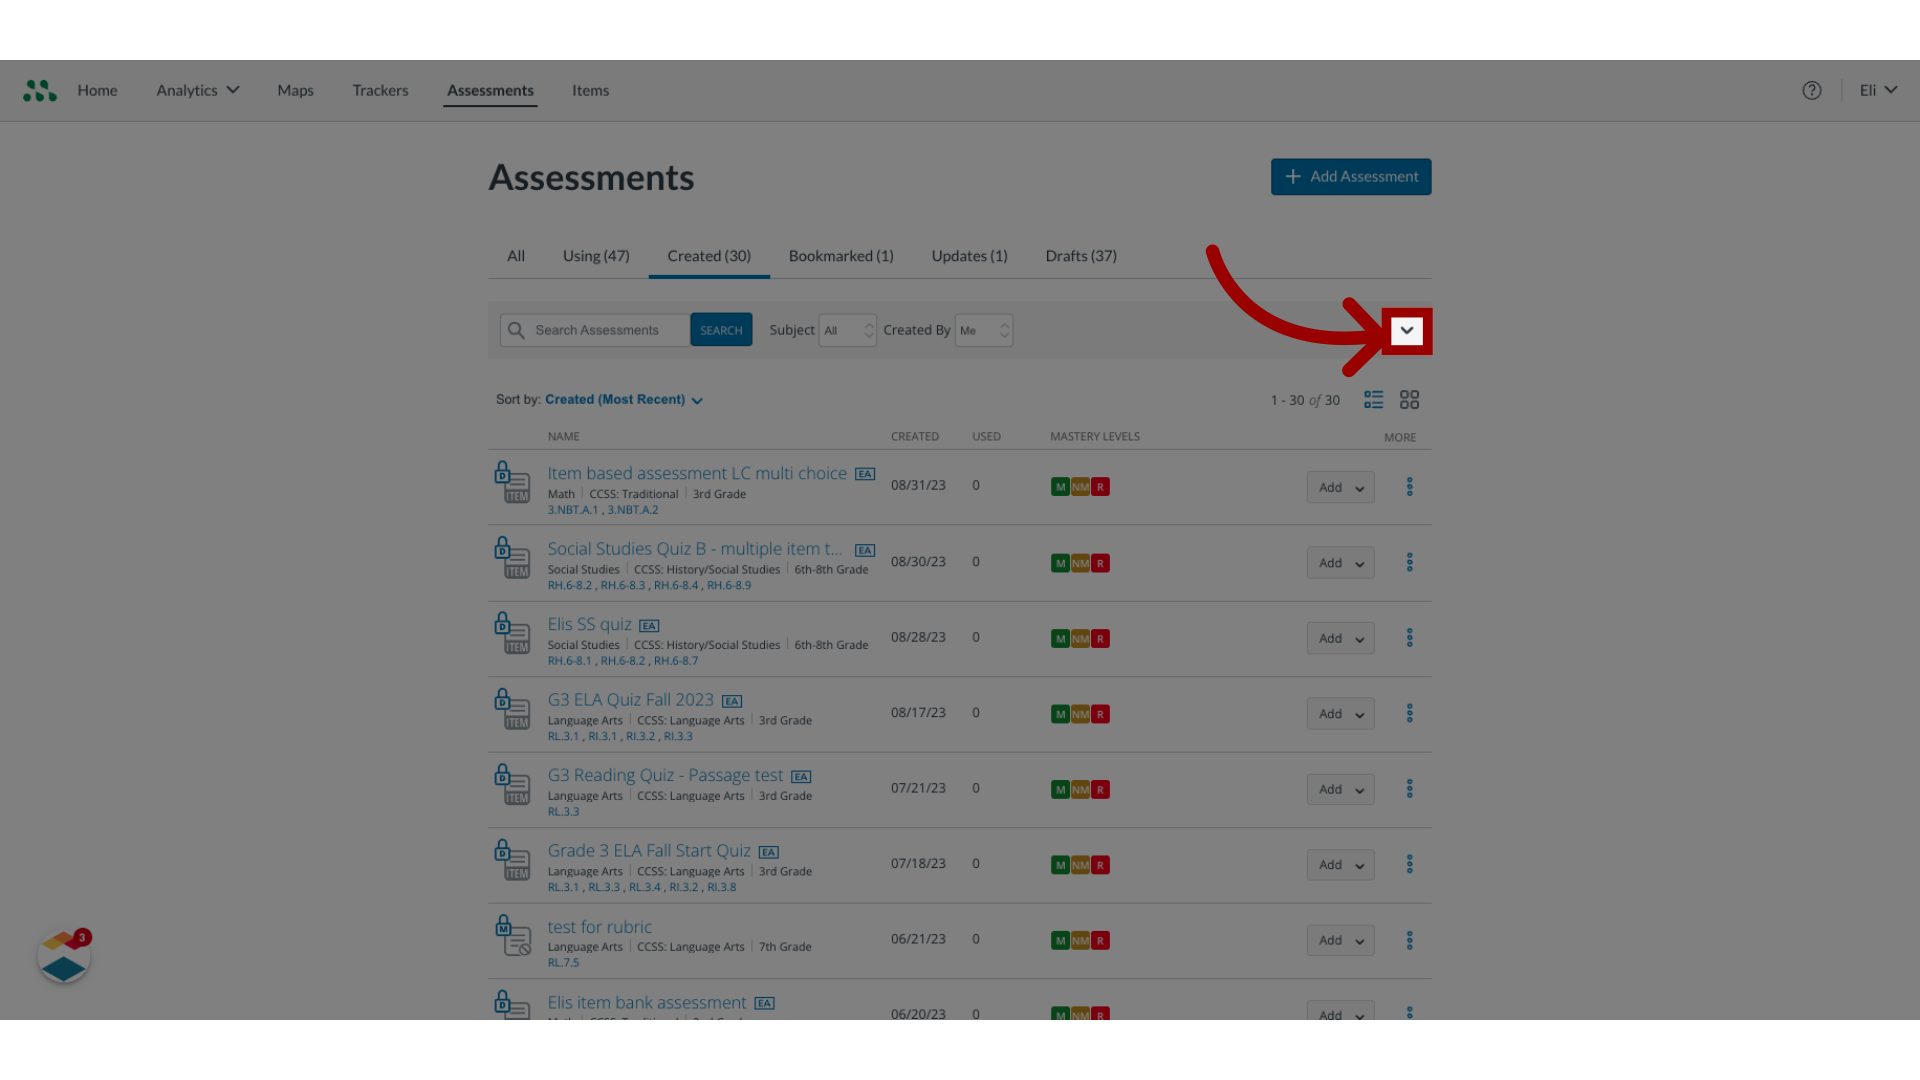
6. Select Filters
To select filter criteria, click the drop-down menus.
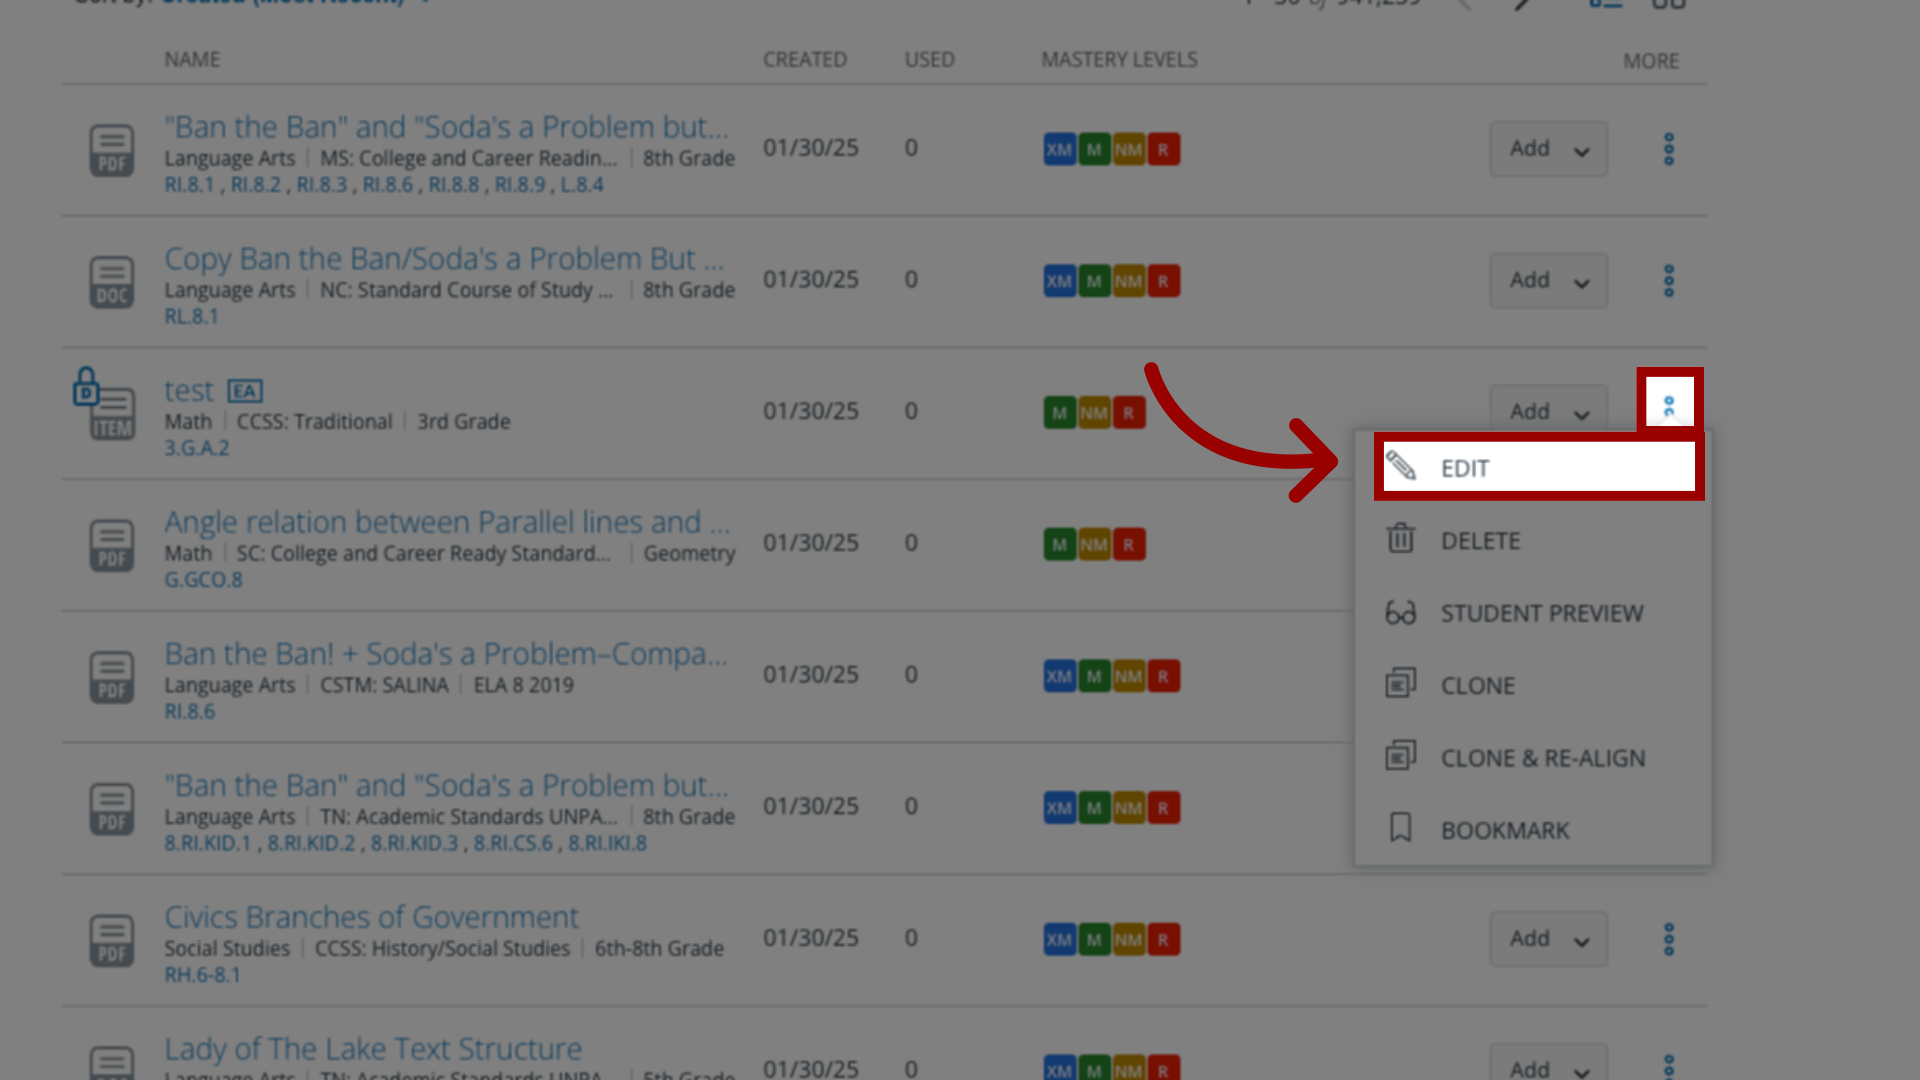
7. Edit Assessment
To edit an assessment, click the More icon.
Then, in the drop-down menu, click the Edit link.
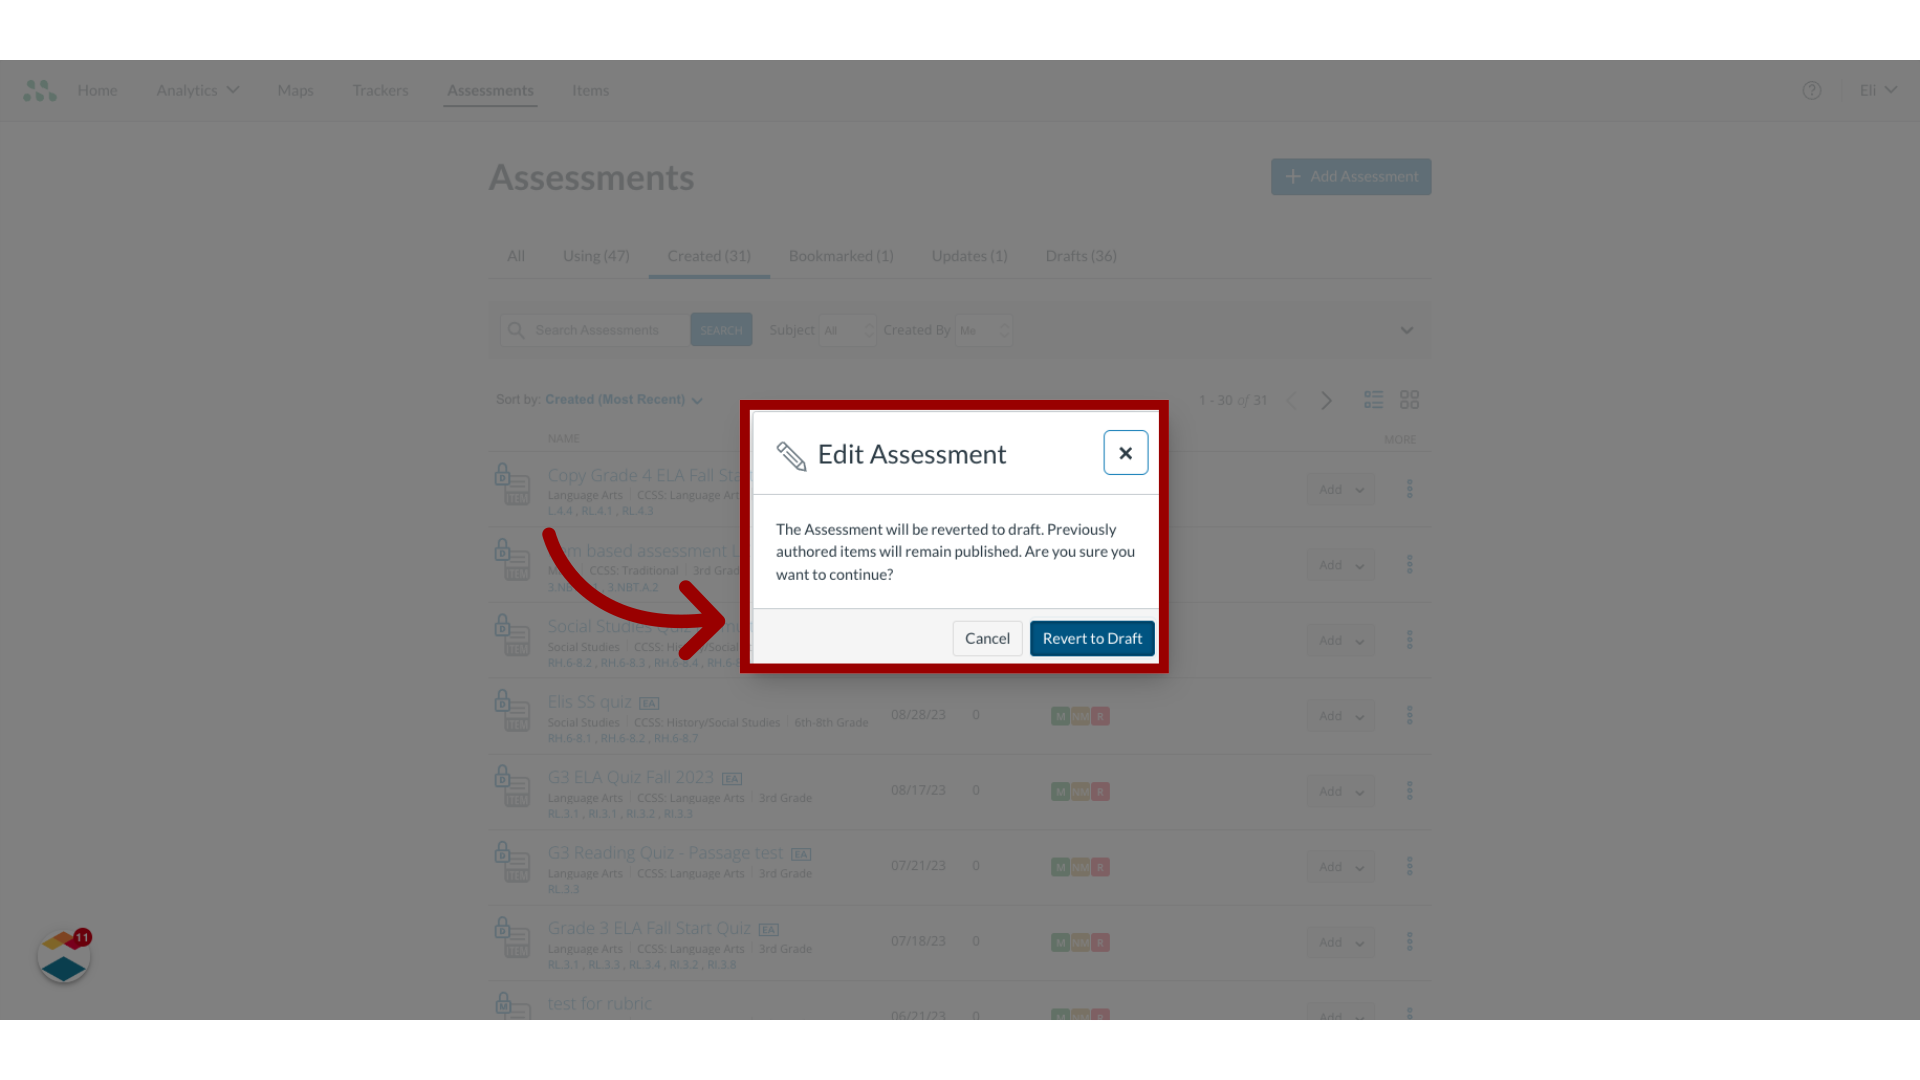
8. Revert to Draft
If the assessment you select has already been created, the Edit Assessment window displays. To revert the assessment to a draft state, click the Revert to Draft button.
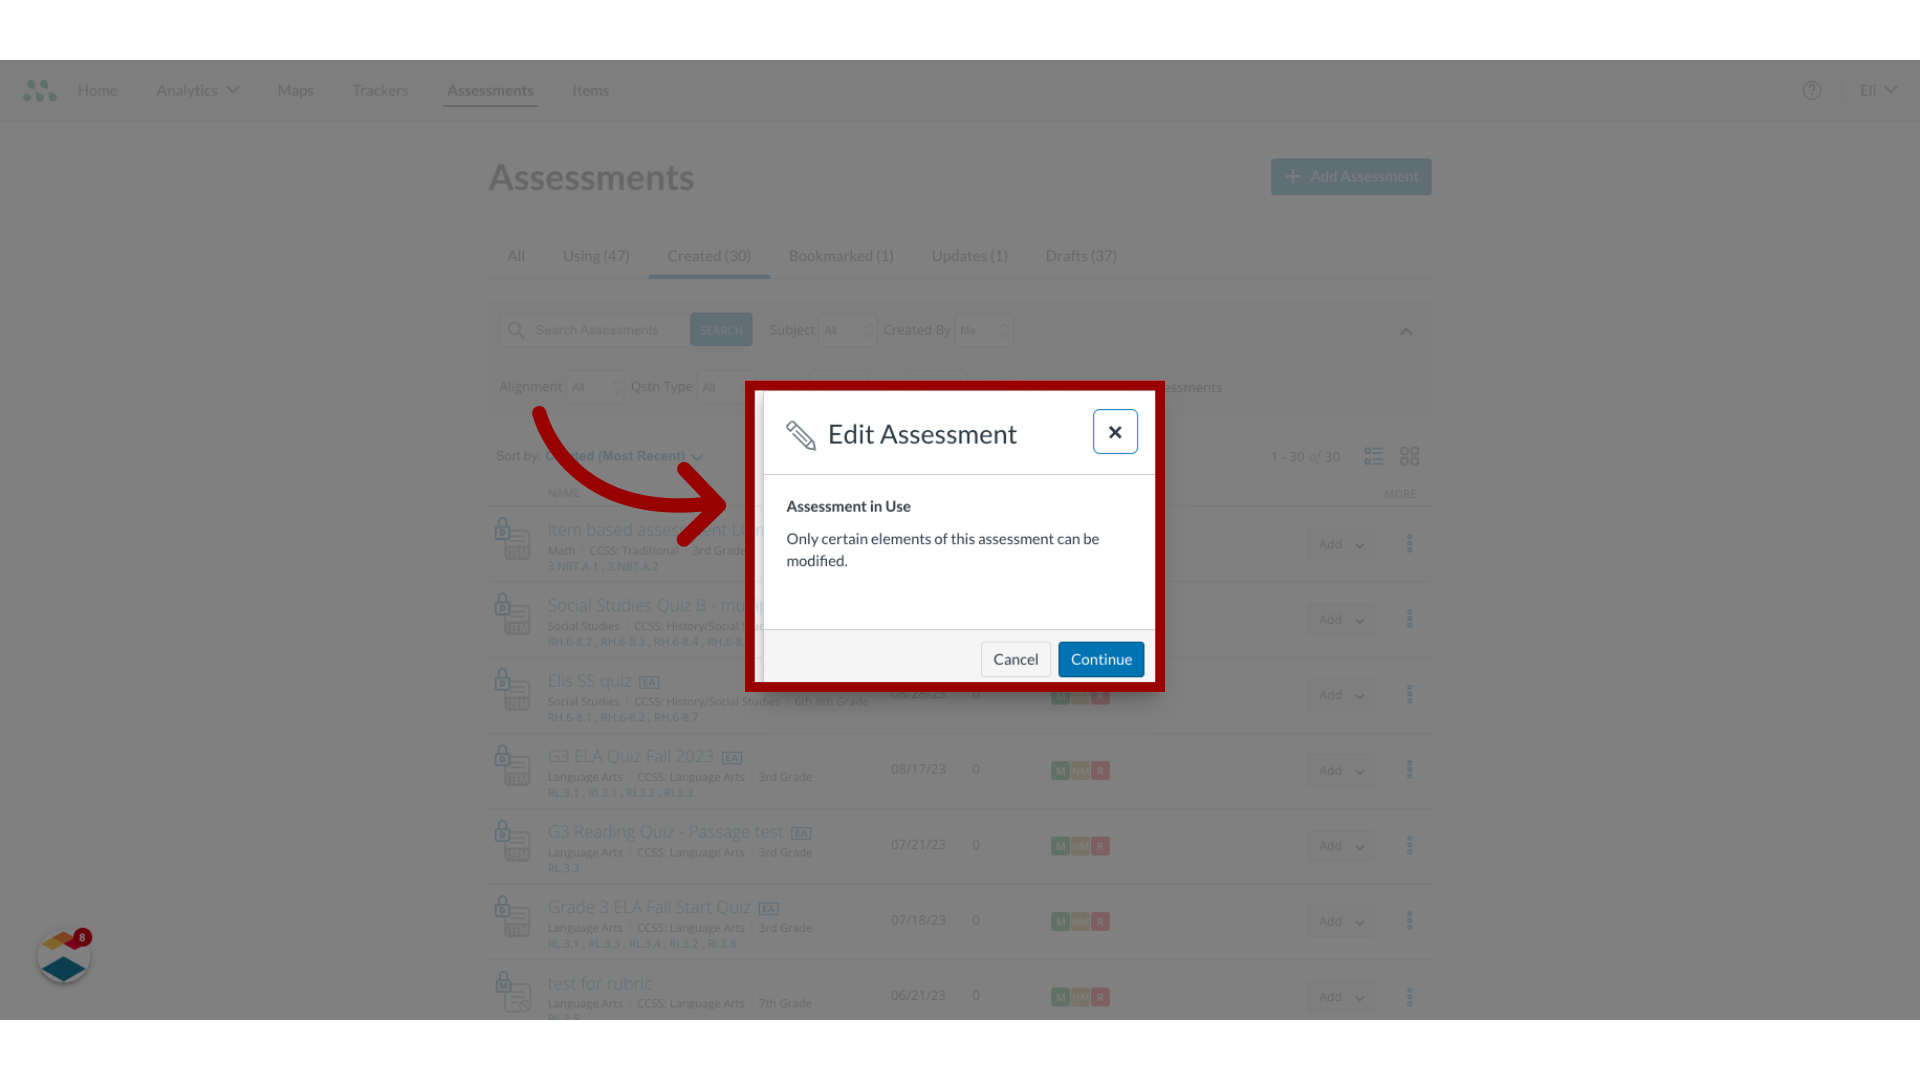
9. Edit Assessment in Use
If you are editing an assessment that has been delivered to a tracker, the Assessment in Use message displays. To open the Assessment Editor and make limited edits, click the Continue button.
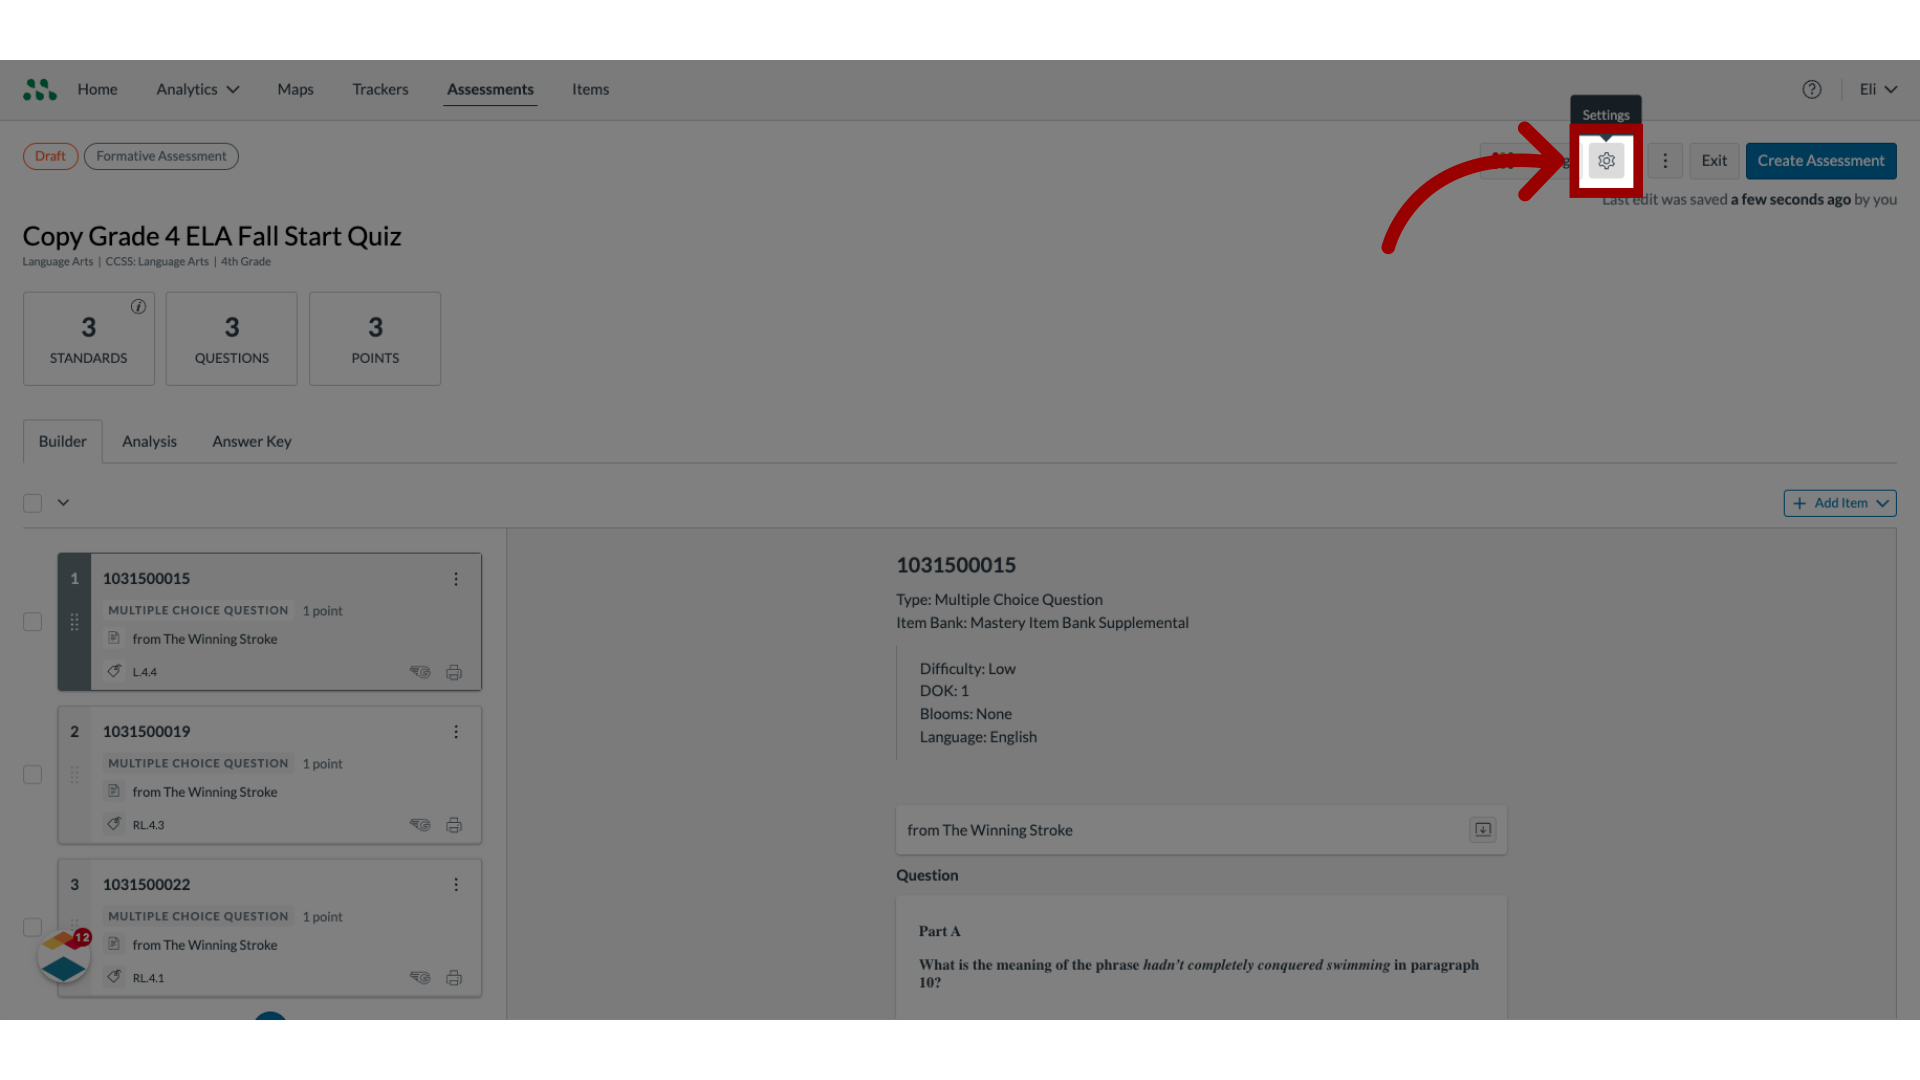
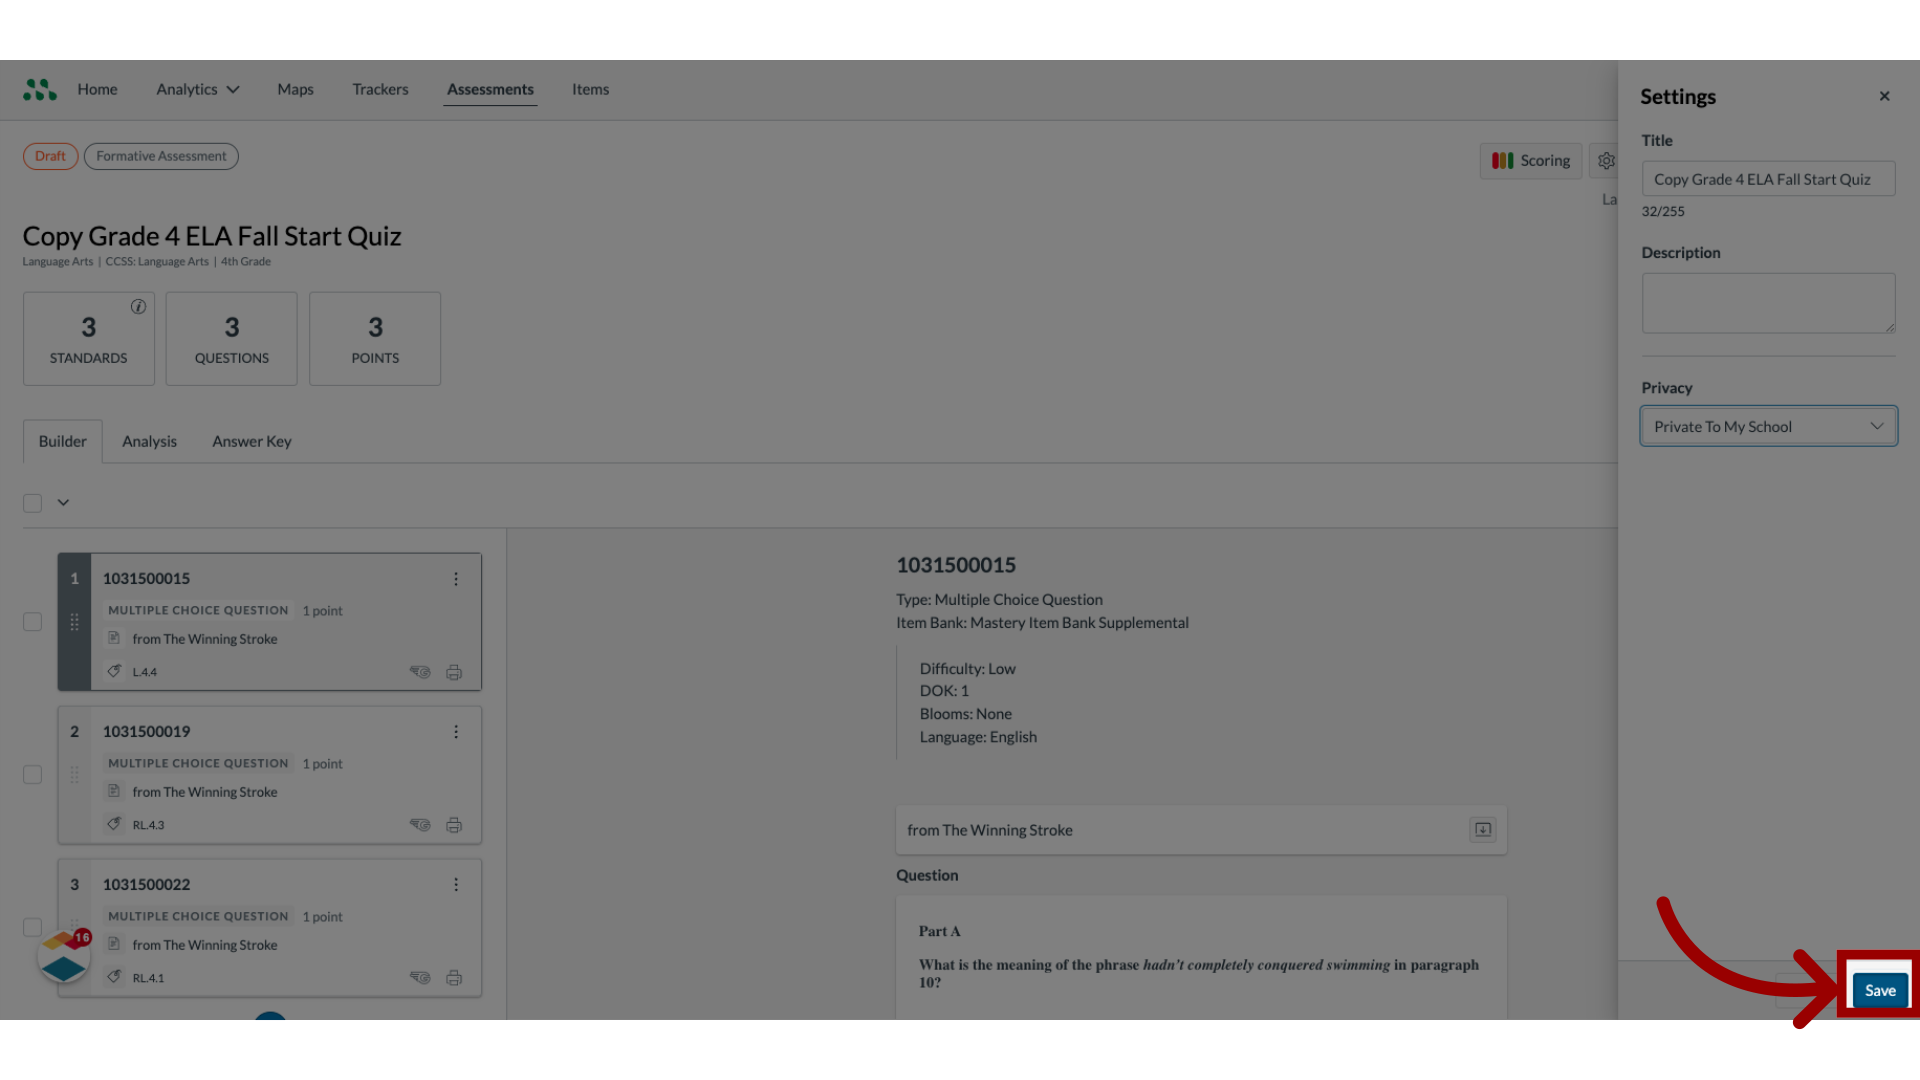
10. Open Settings
To open the settings, click the Settings icon.
11. Edit Assessment Details
In the settings, view and edit assessment details.
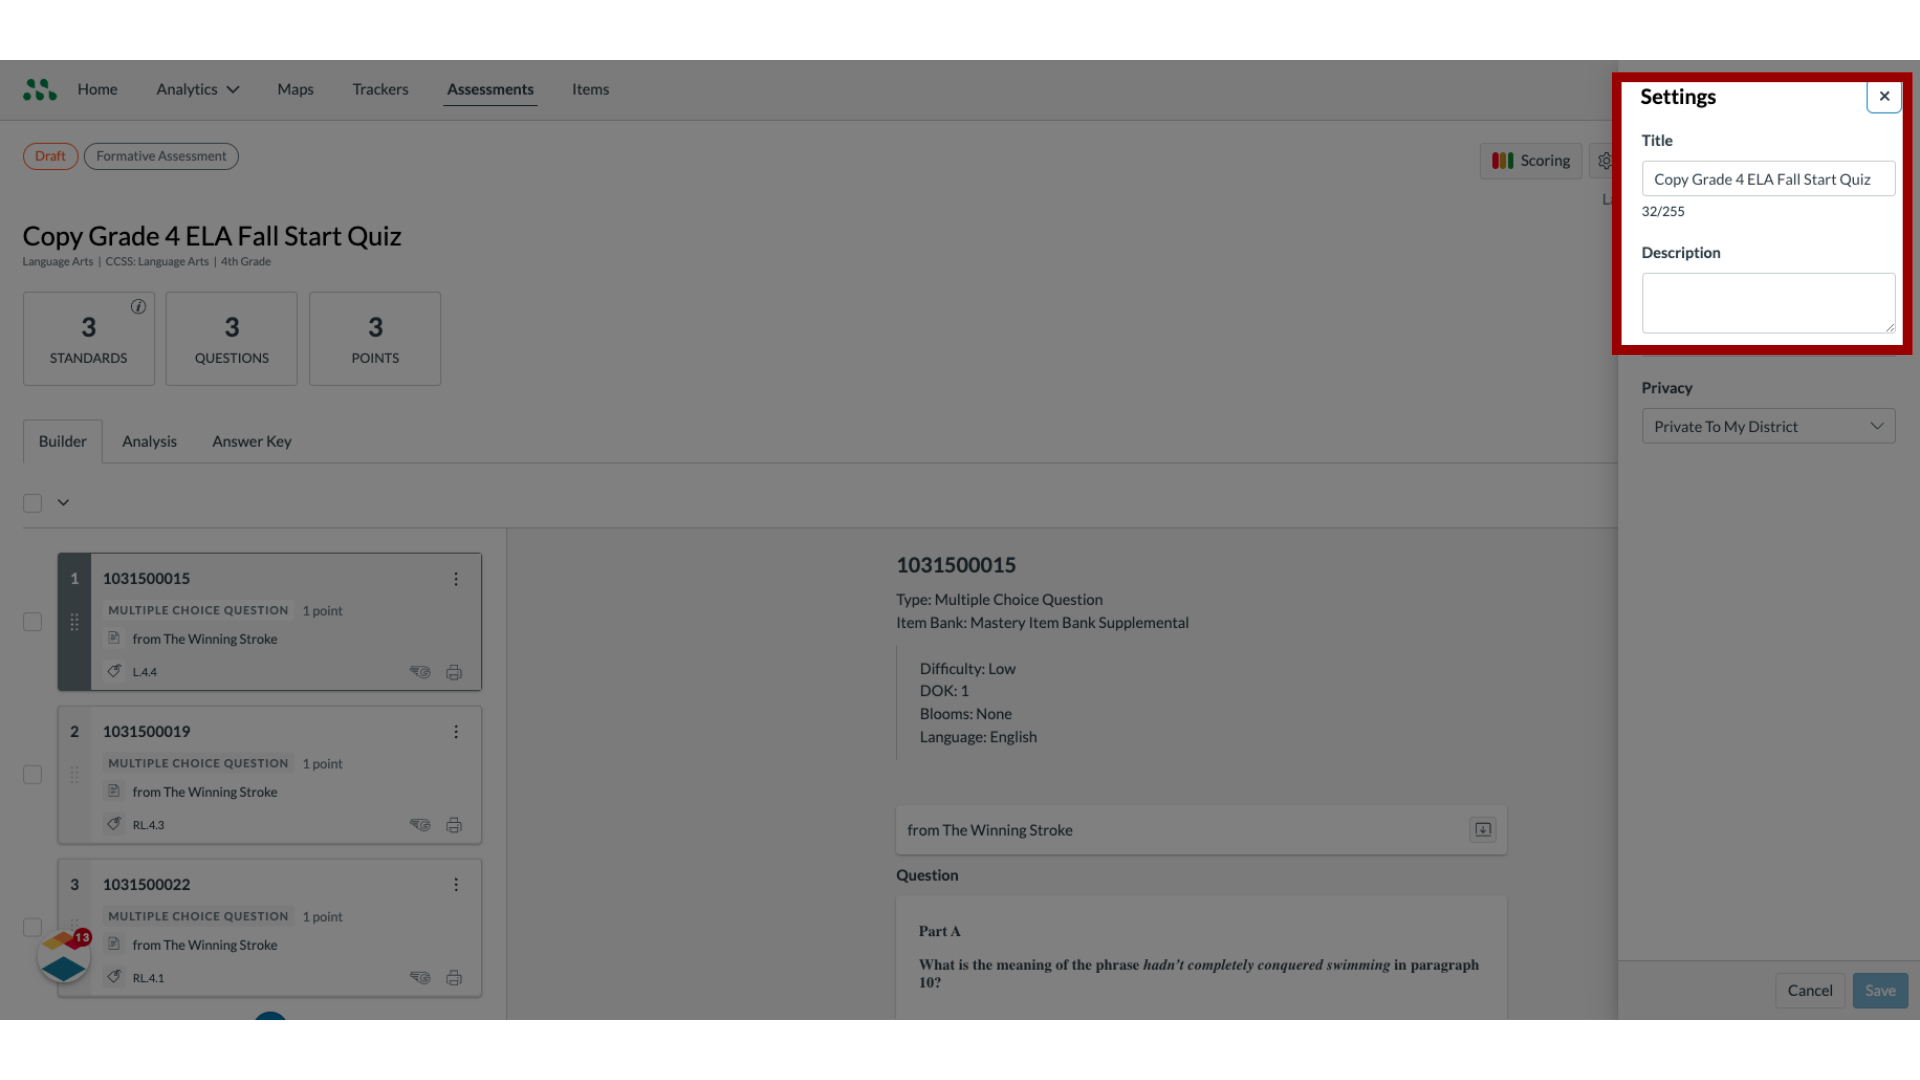
12. Edit Privacy Details
To select a new privacy setting, click the Privacy drop-down menu.
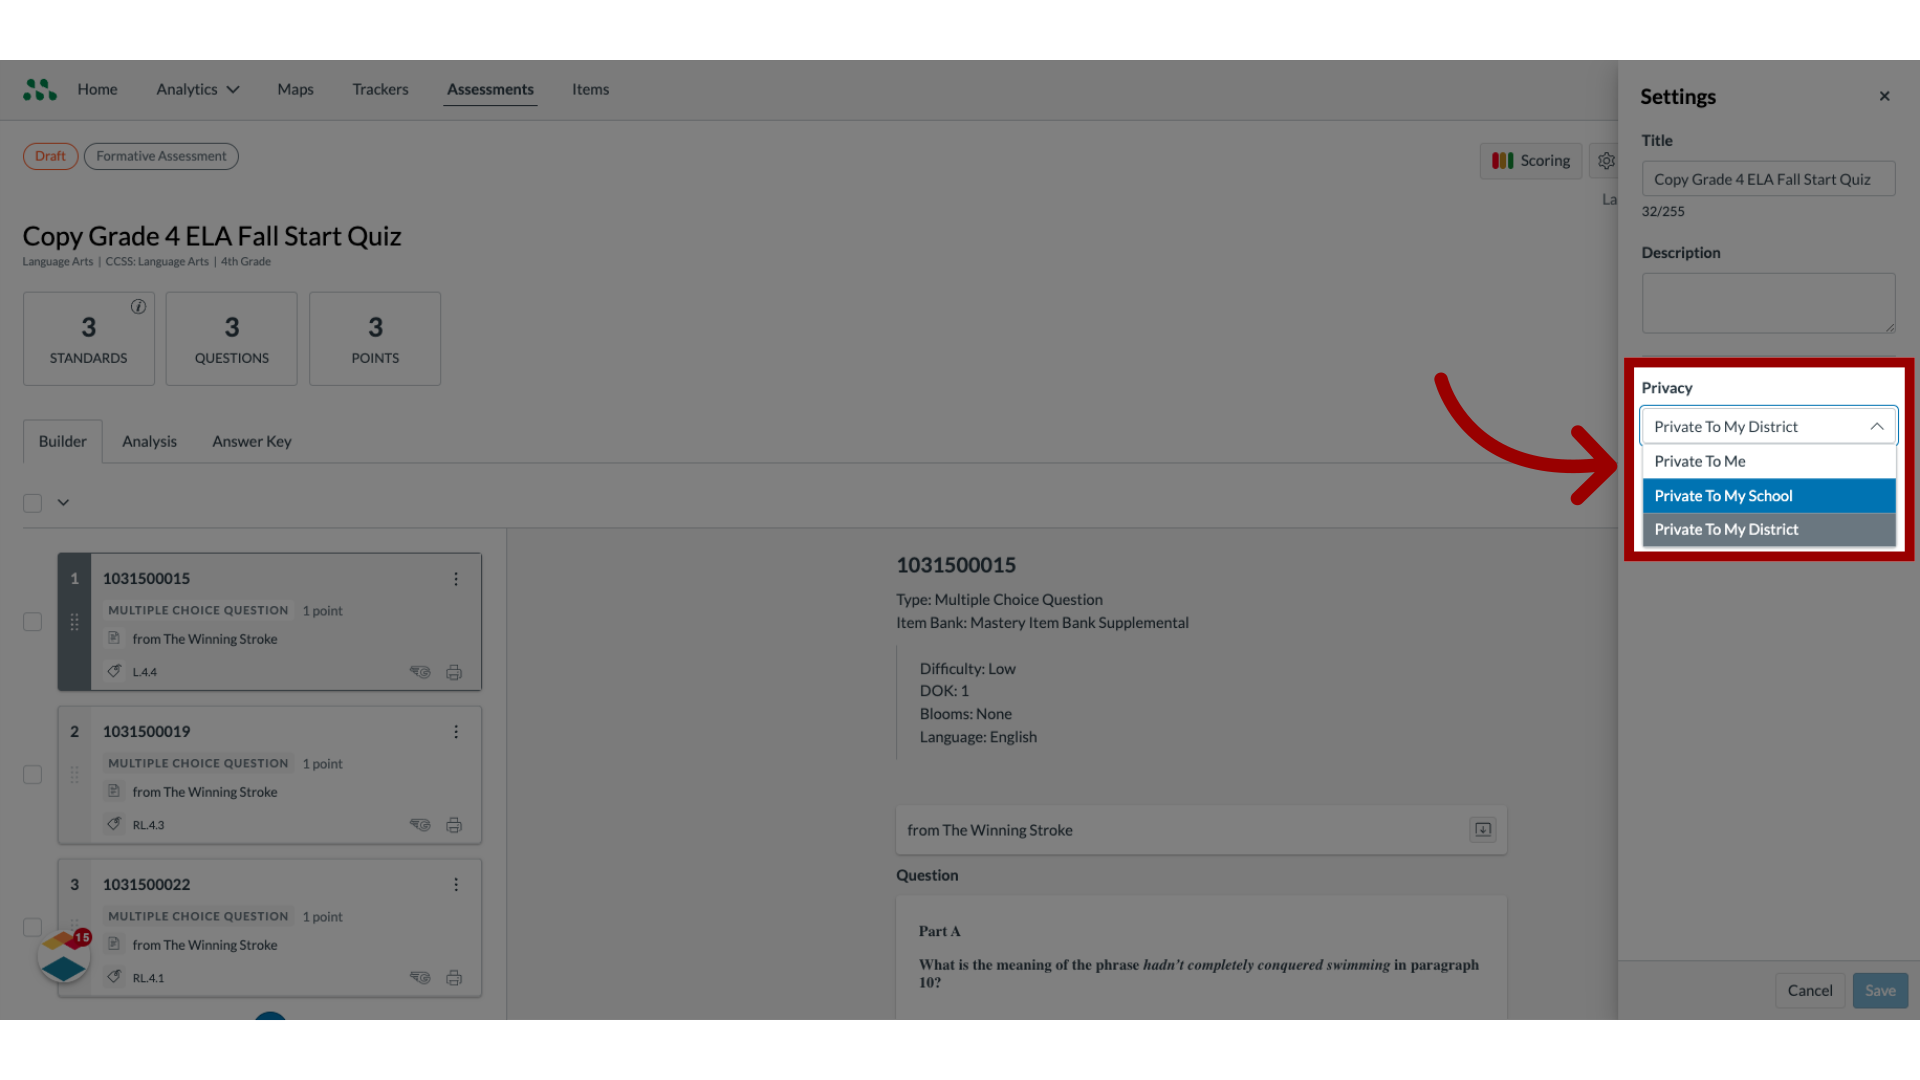
13. Save Changes
Save the changes made.
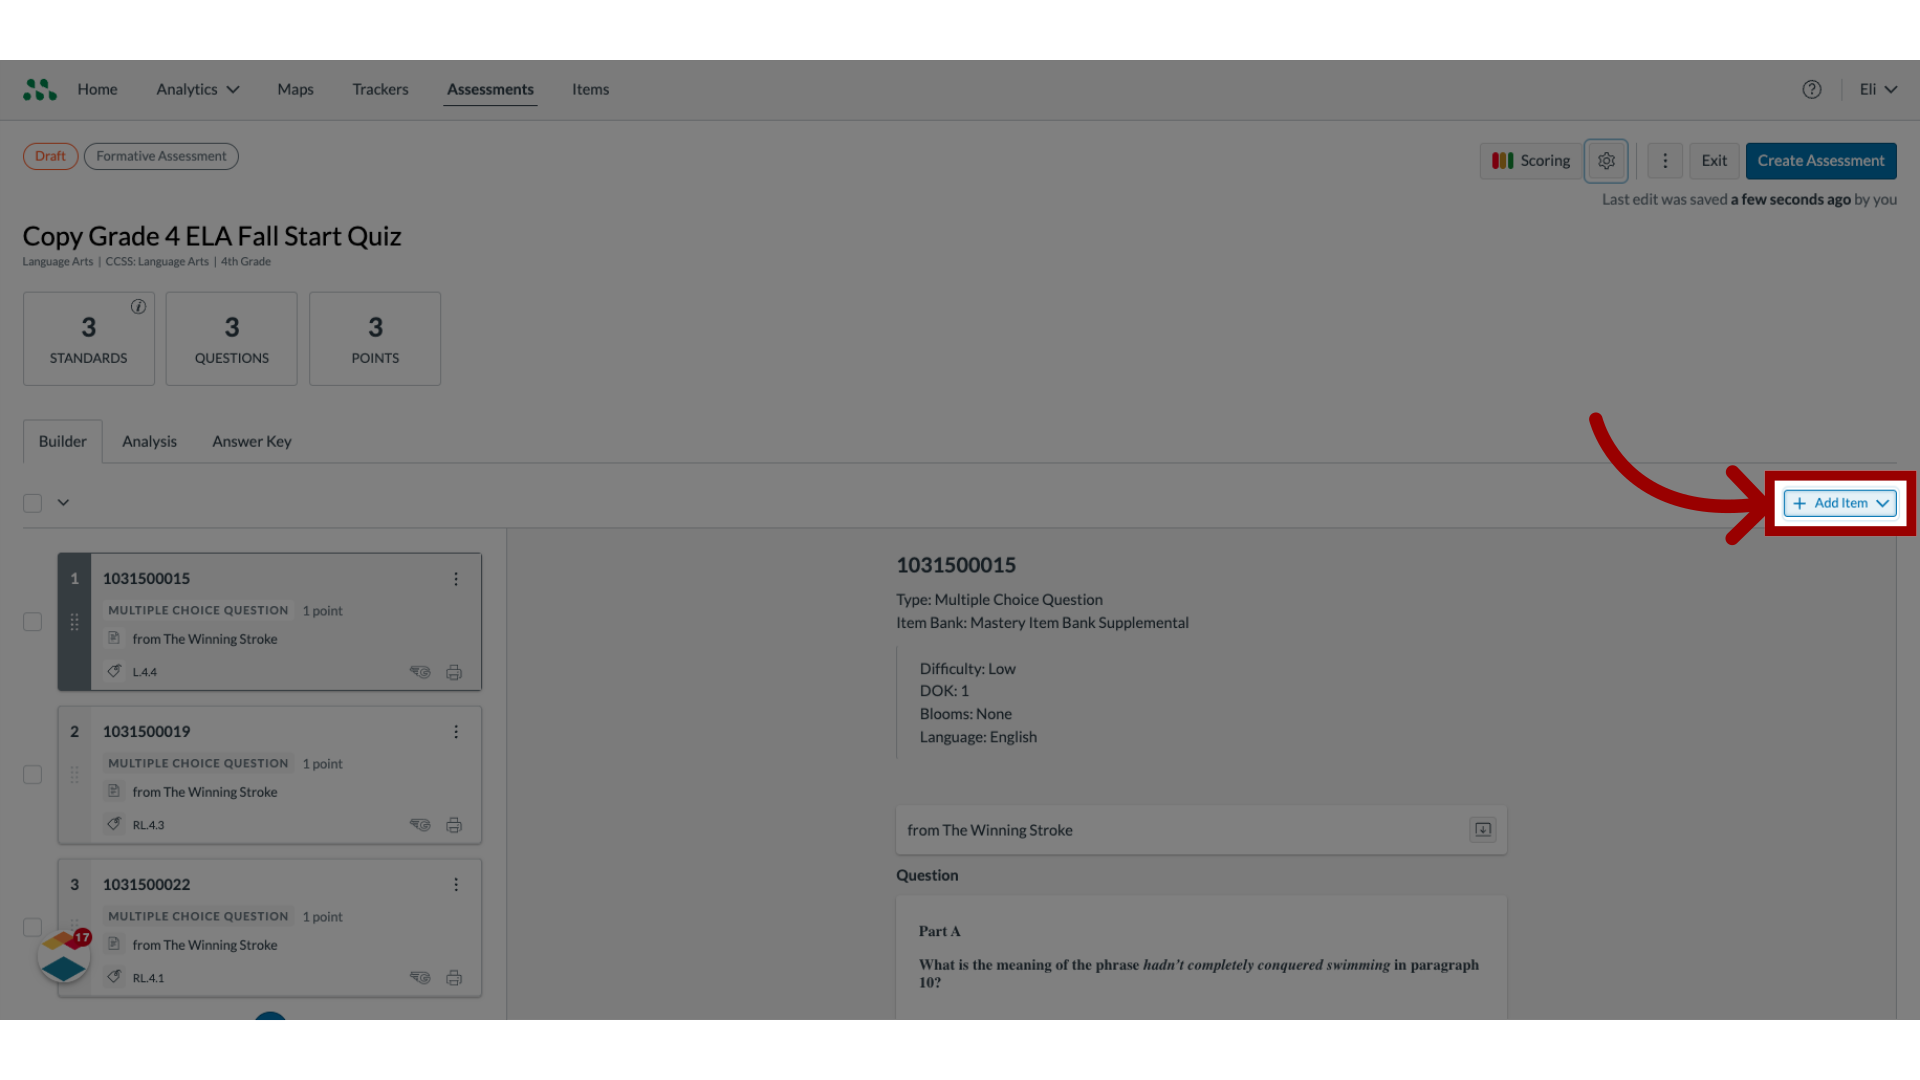
14. Add Items
Add a new item to the assessment.
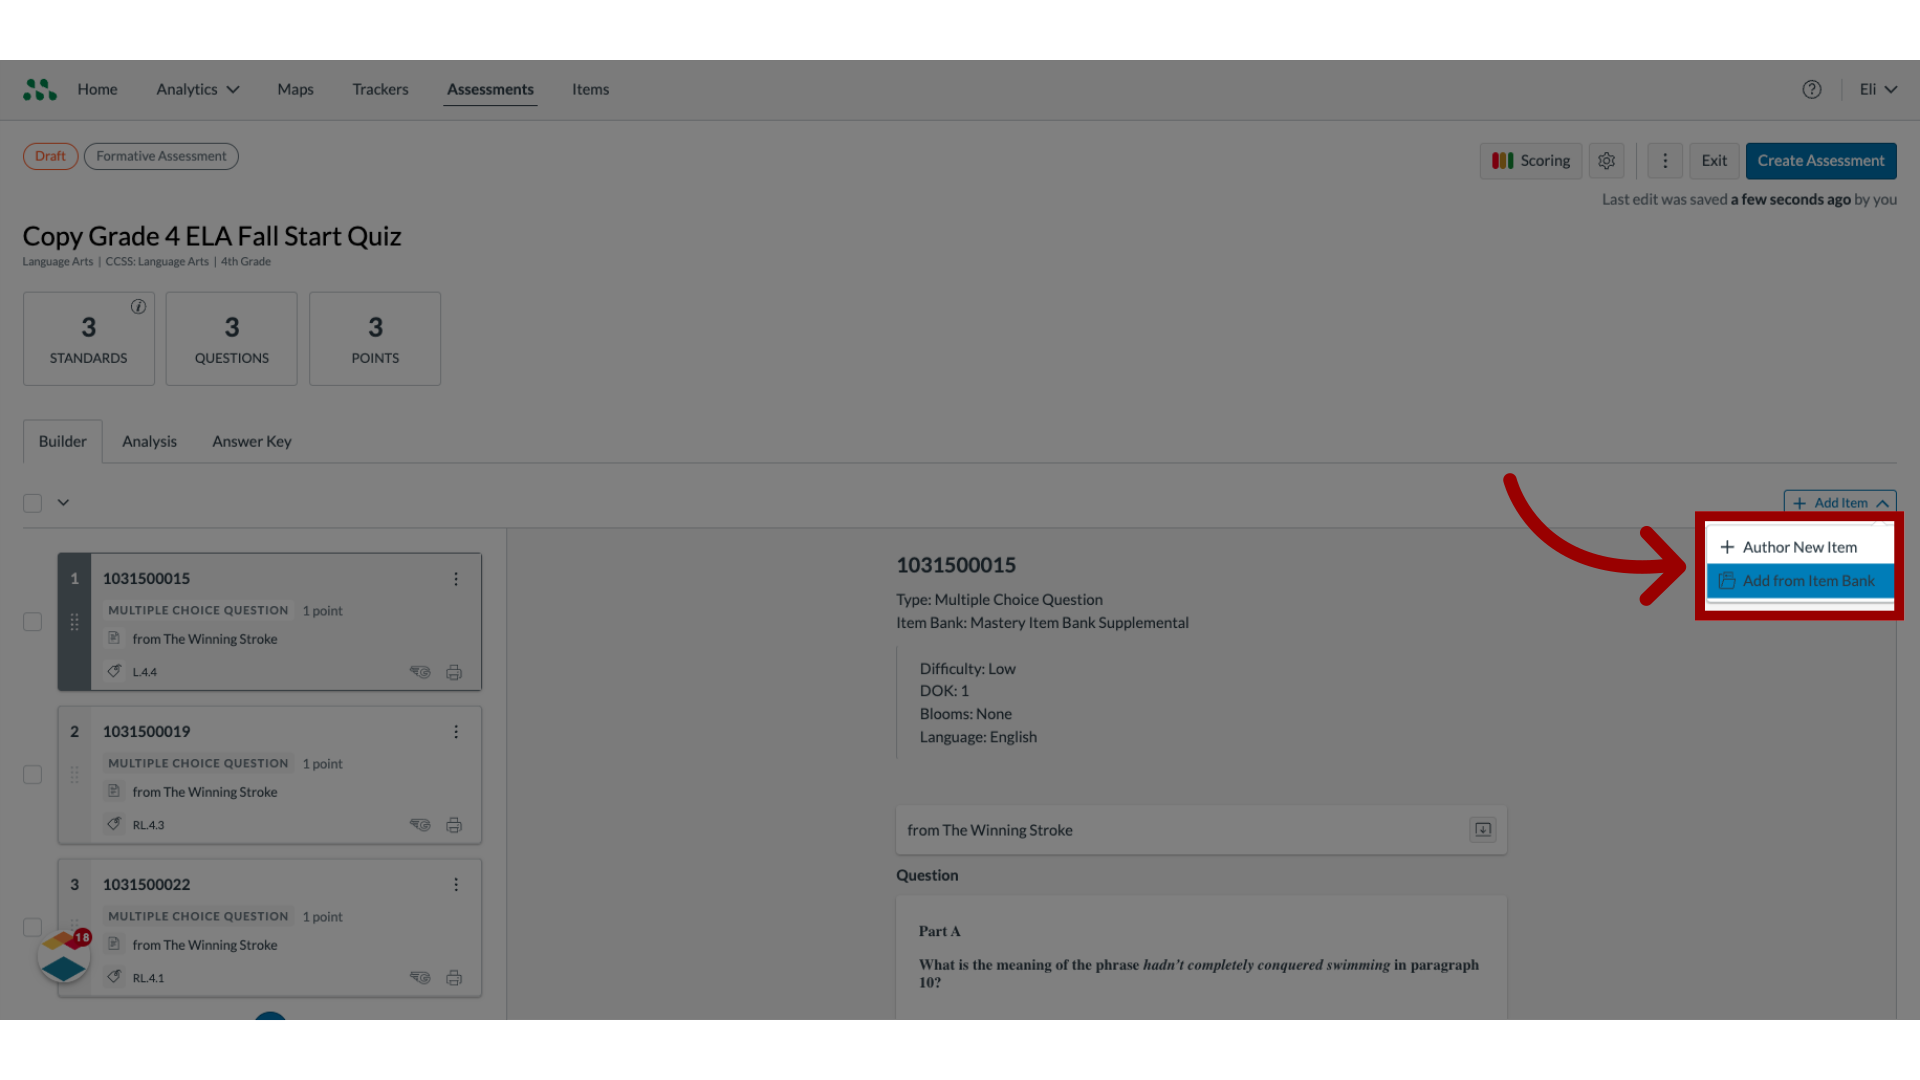
15. Select Item Type
To create a new item, click the Author New Item option. To add an item from an item bank, click the Add from Item Bank option.
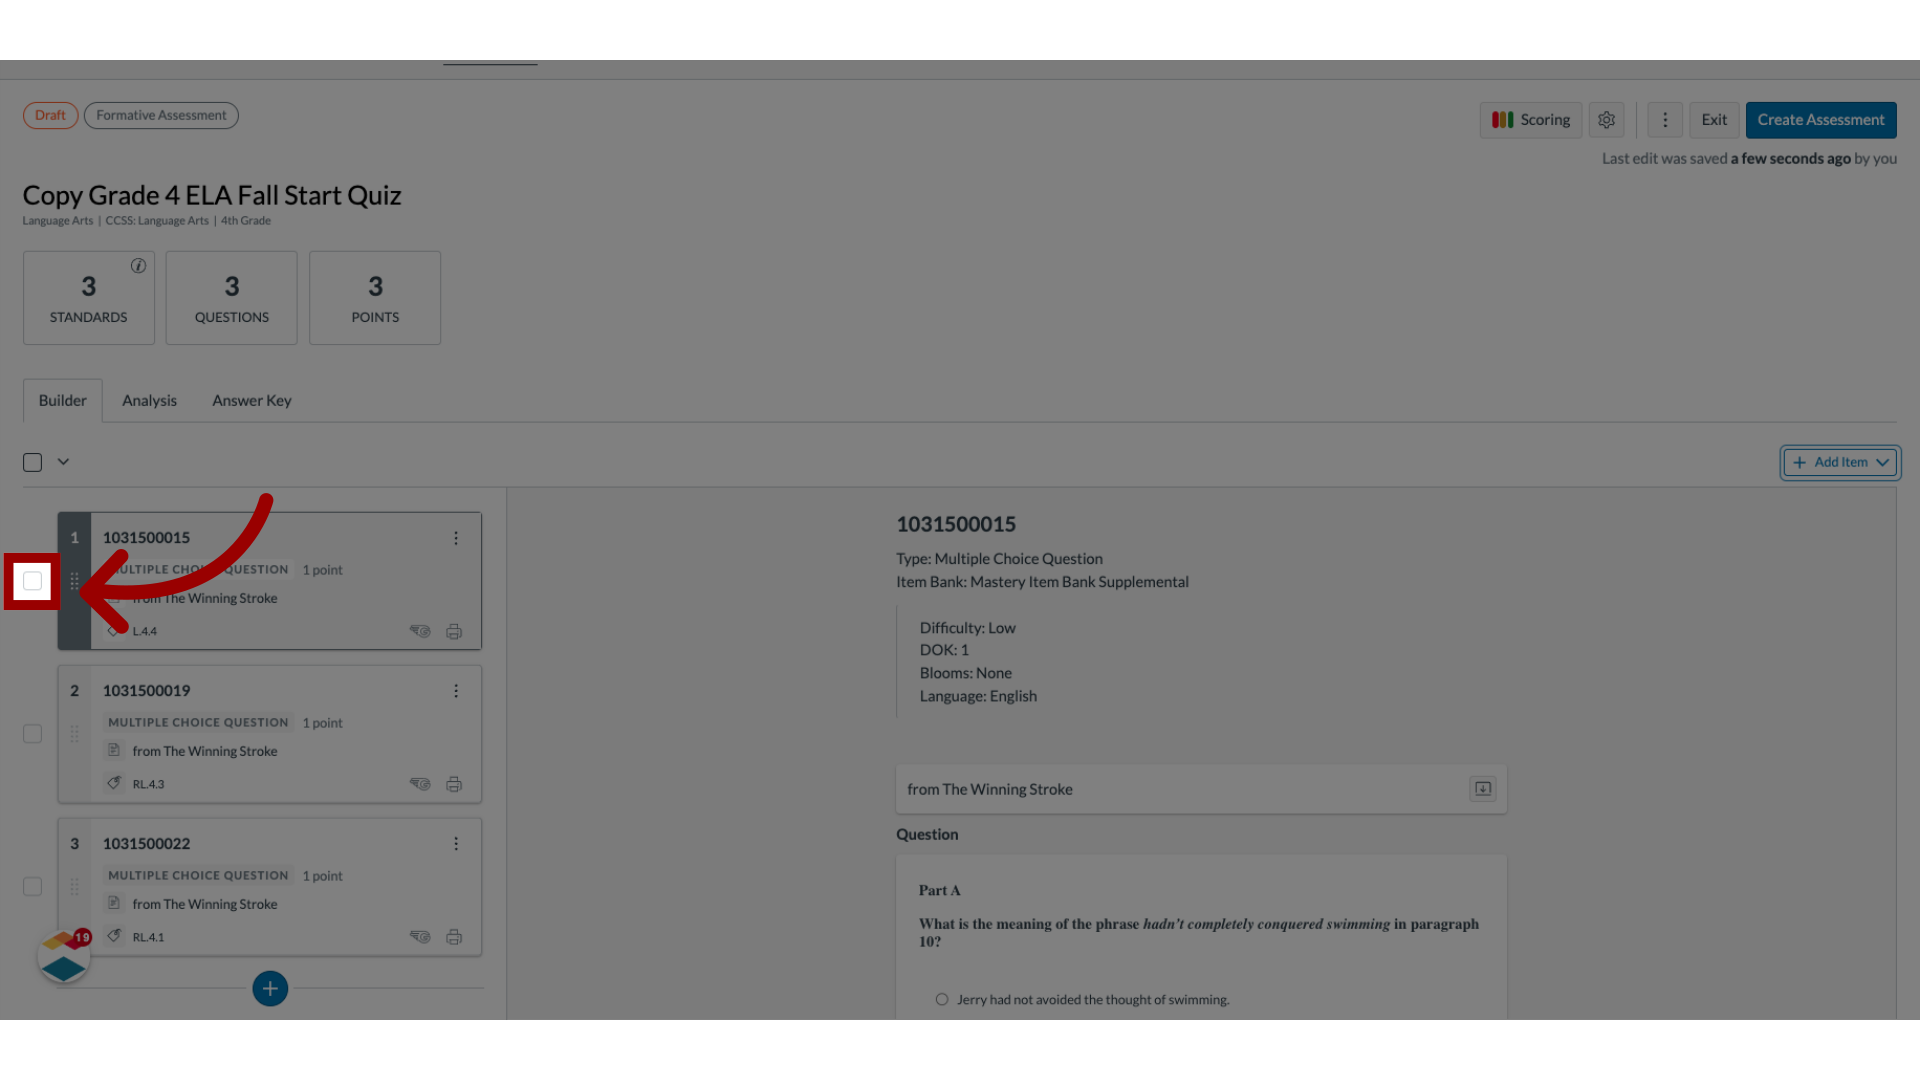
16. Select Item from list
To select an item from the list, click the item's checkbox.
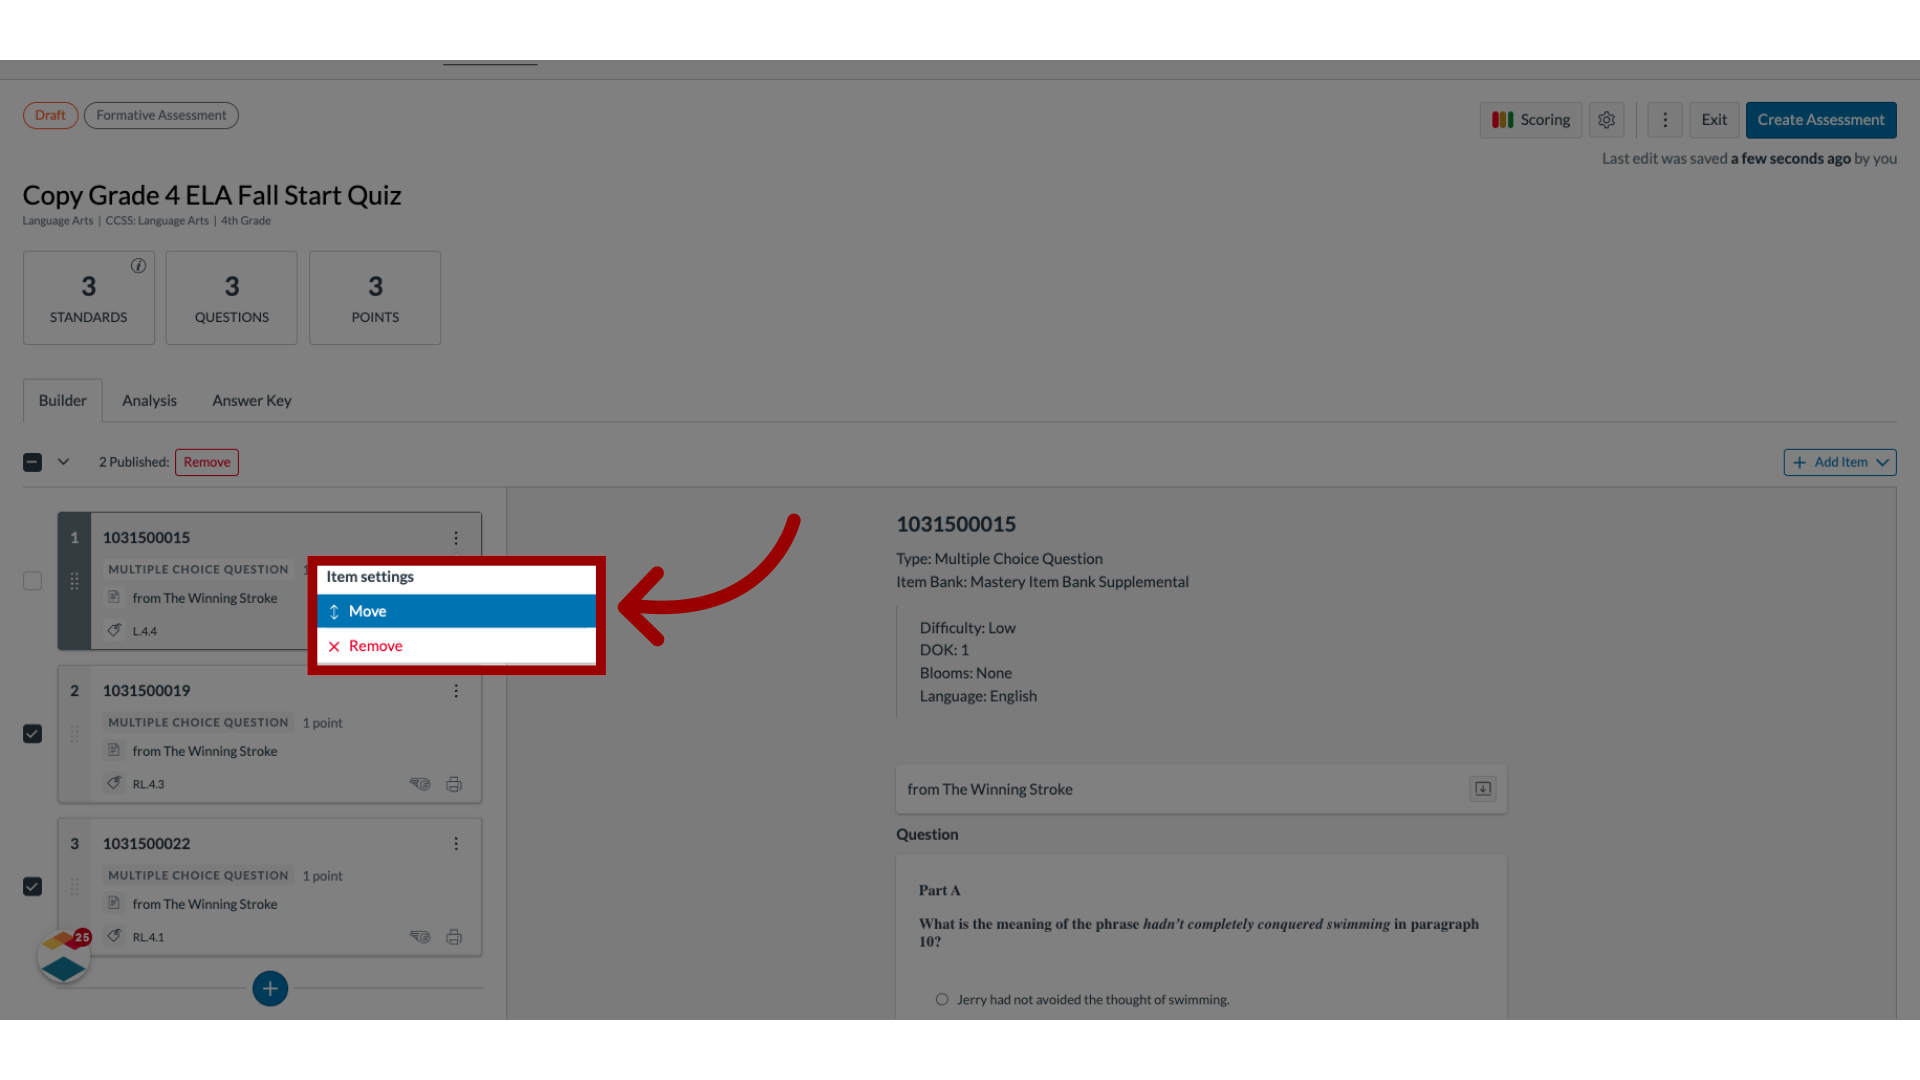
17. Open Item Settings
Then, click the Item Settings icon.
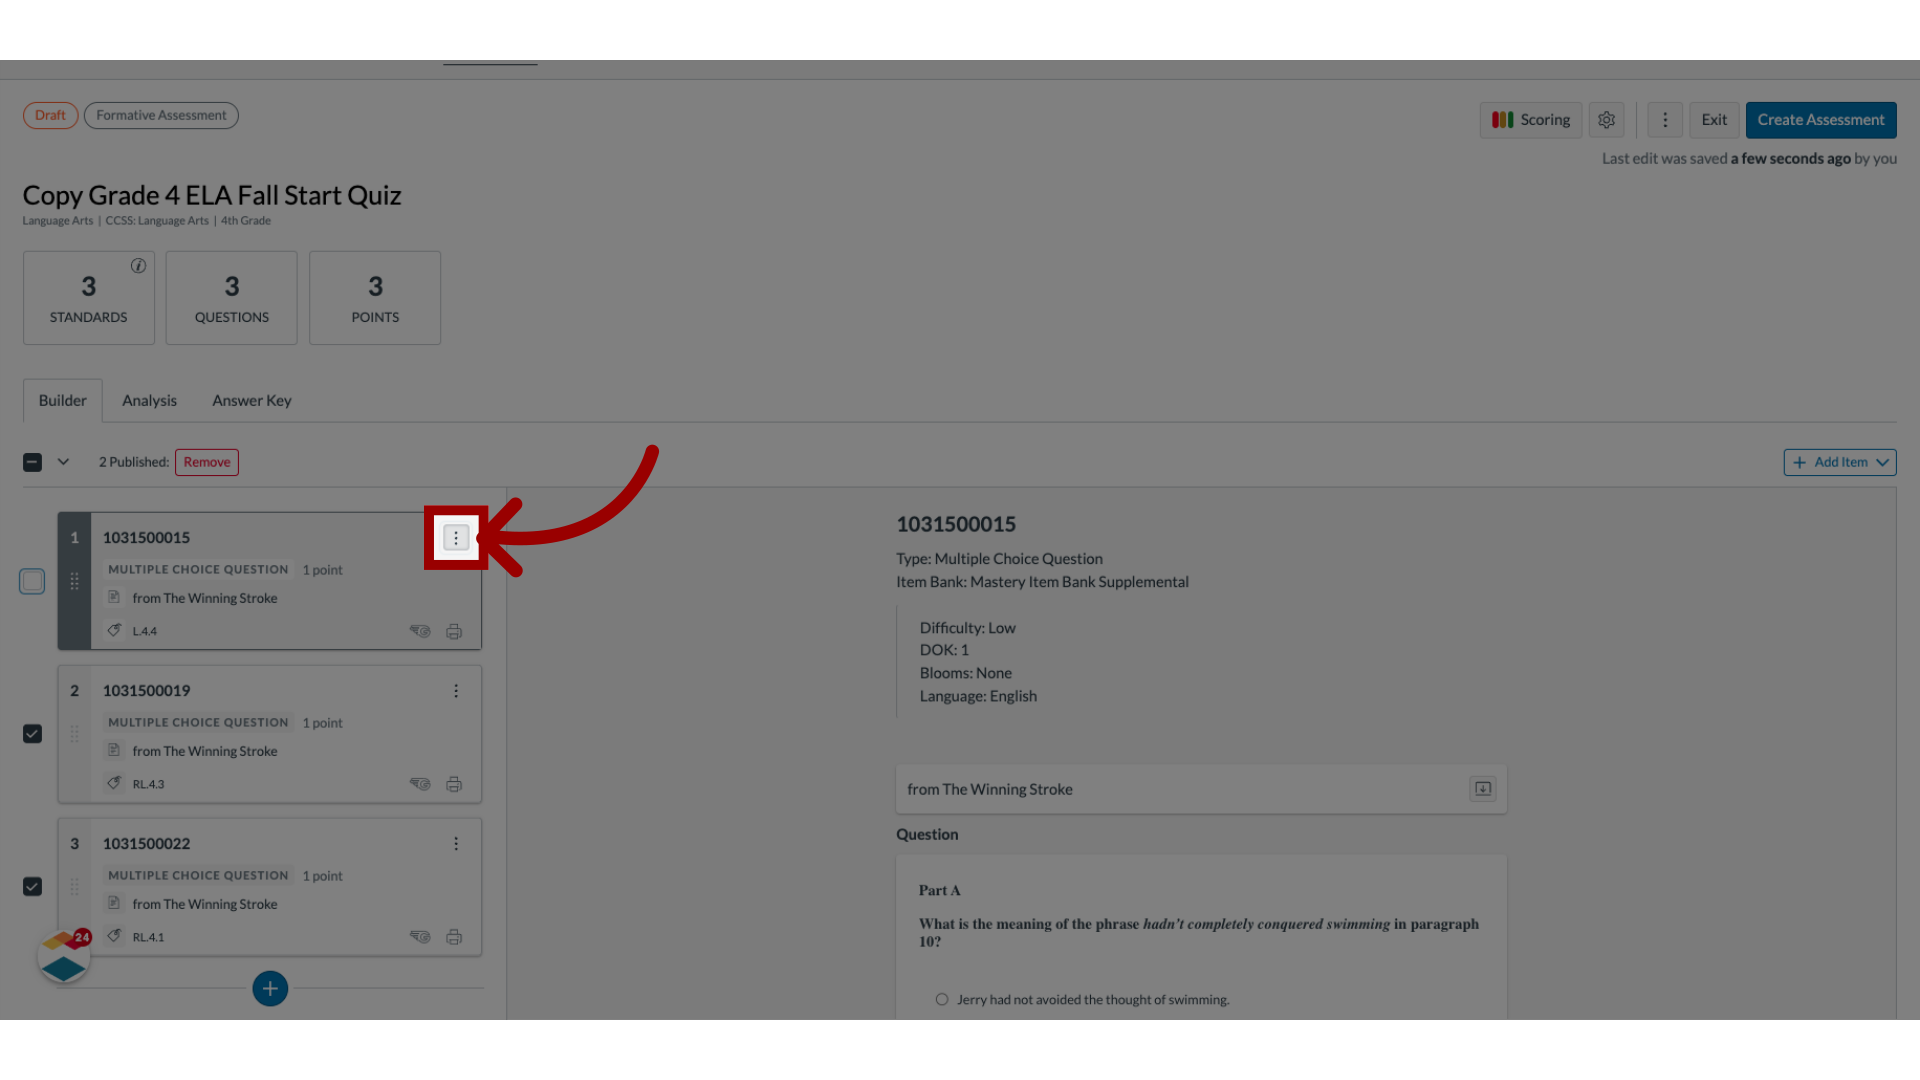
18. Select Settings
The Item settings menu displays a list of settings available for the item. To select a setting, click the setting link.
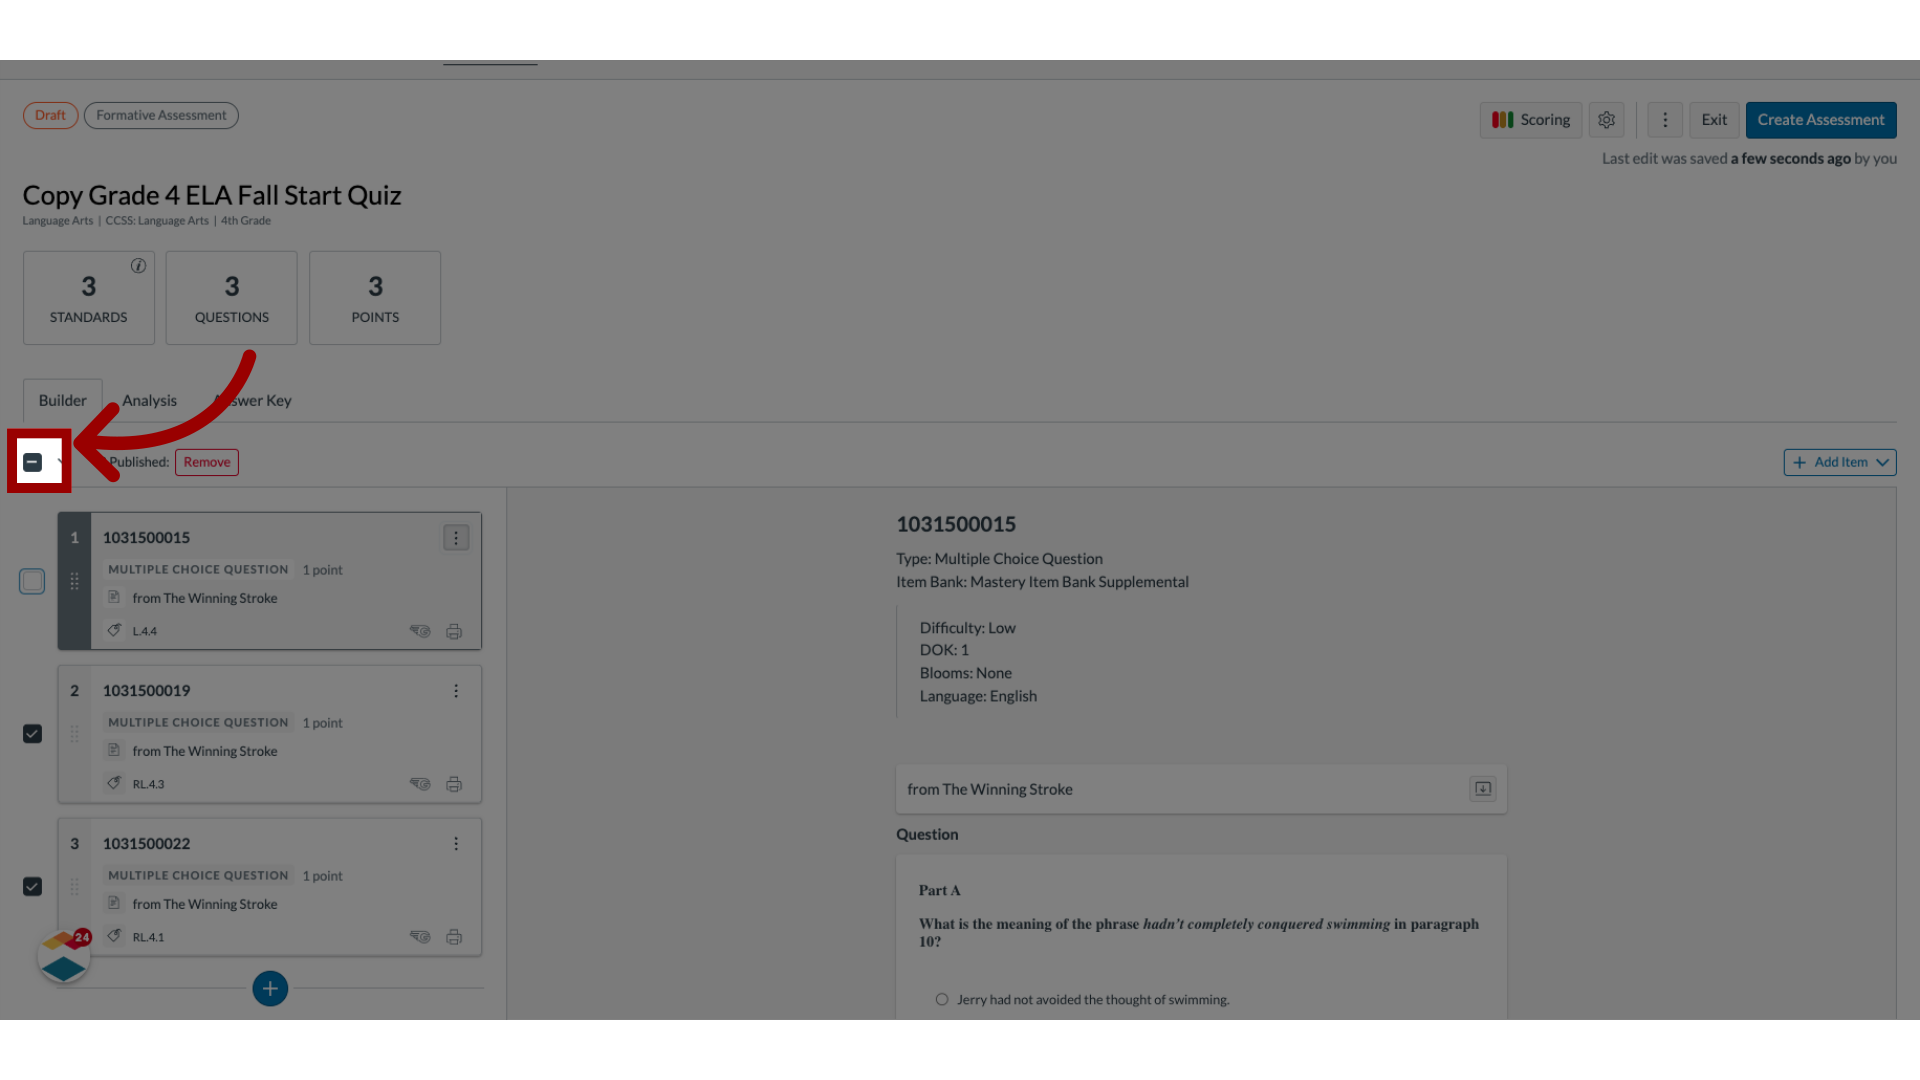
19. Select All Items
To delete all items from the list, click the All Items checkbox.
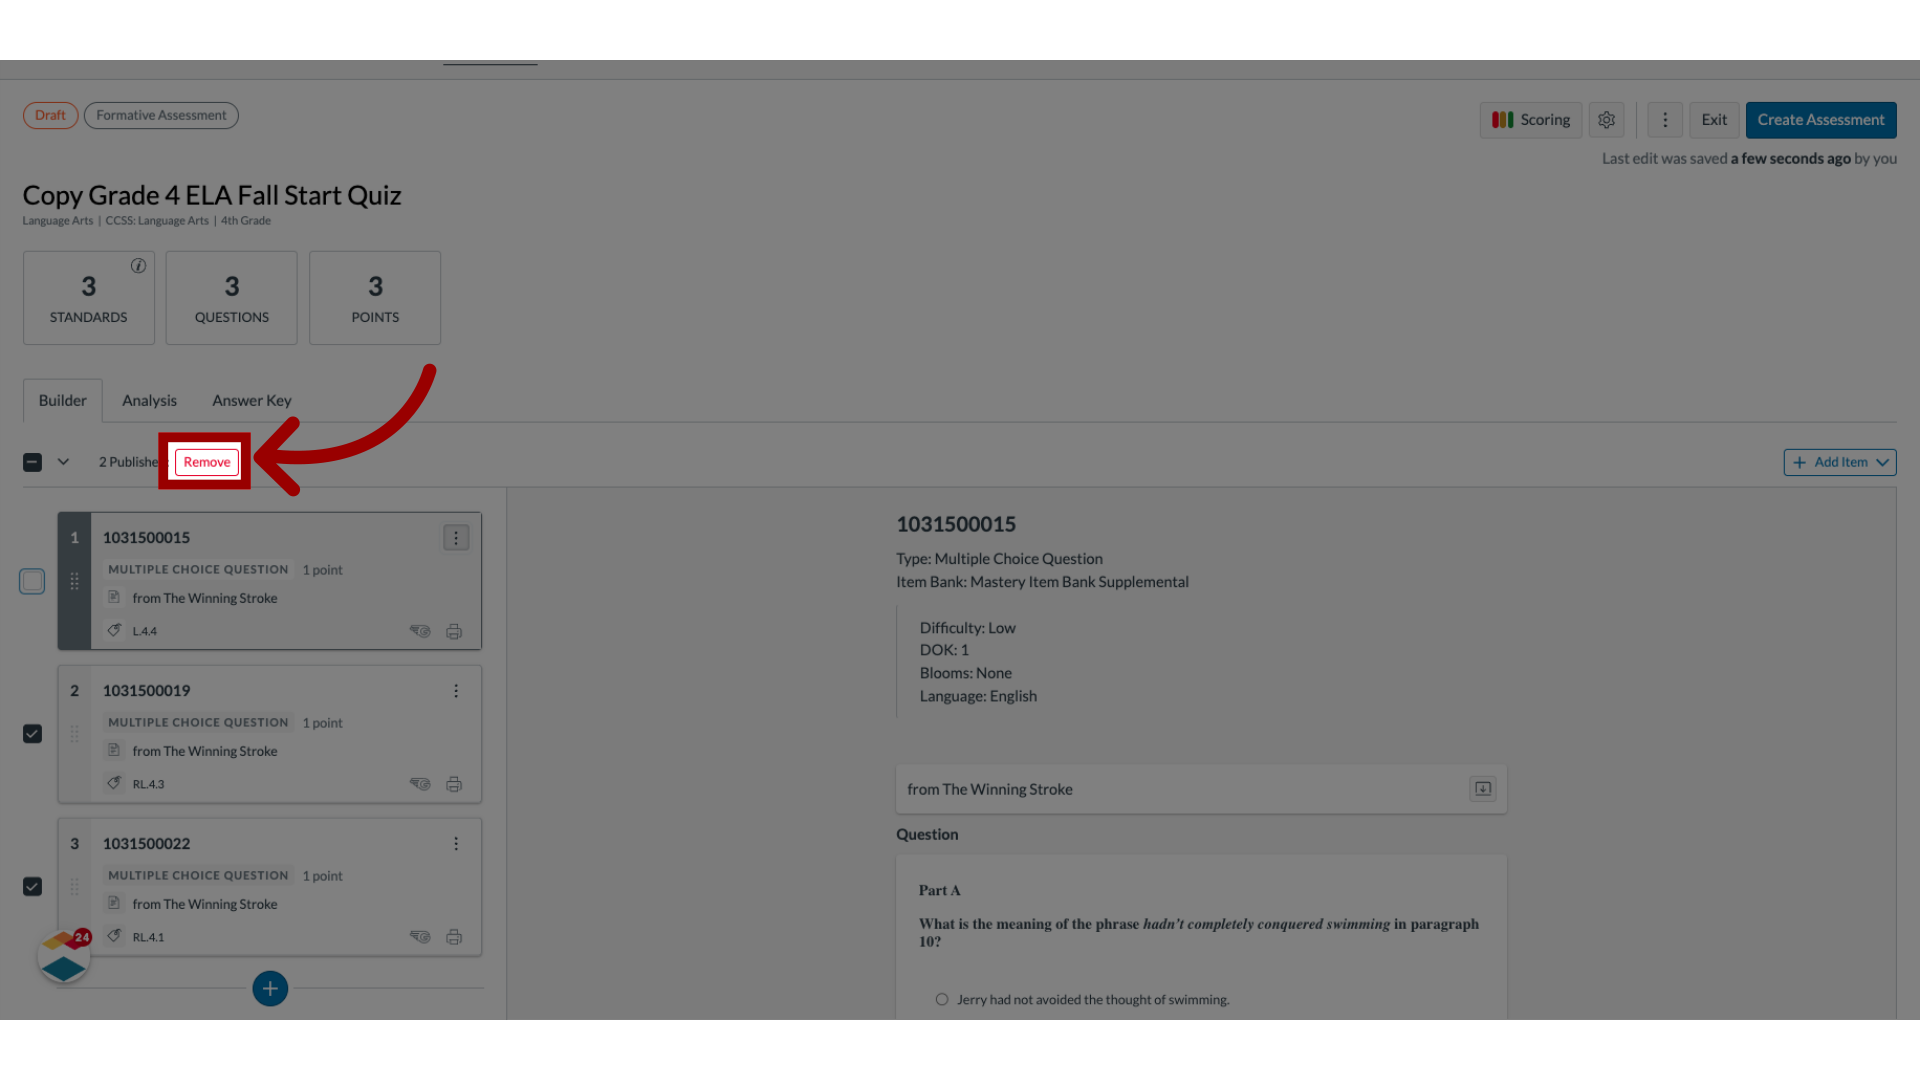
20. Remove All Items
Then, click the Remove button.
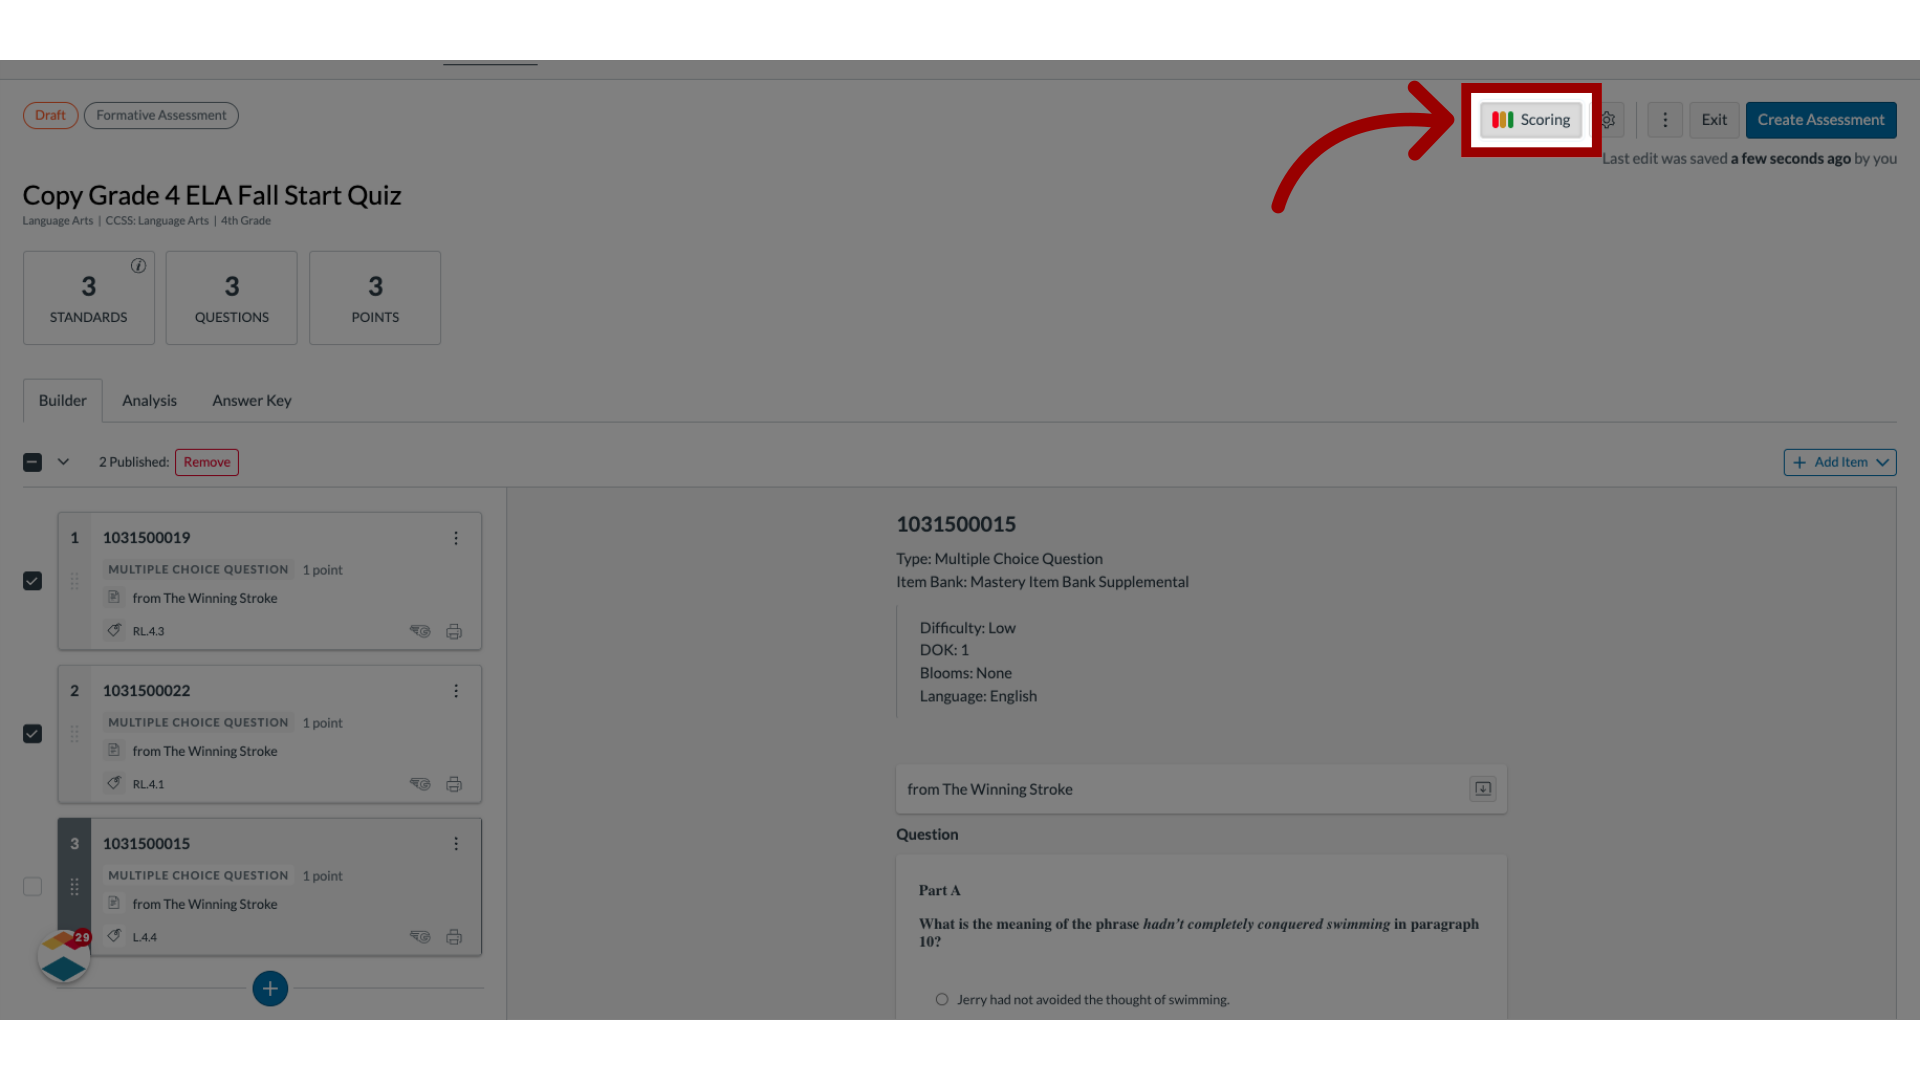
21. Open Scoring Settings
To open scoring settings, click the Scoring button.
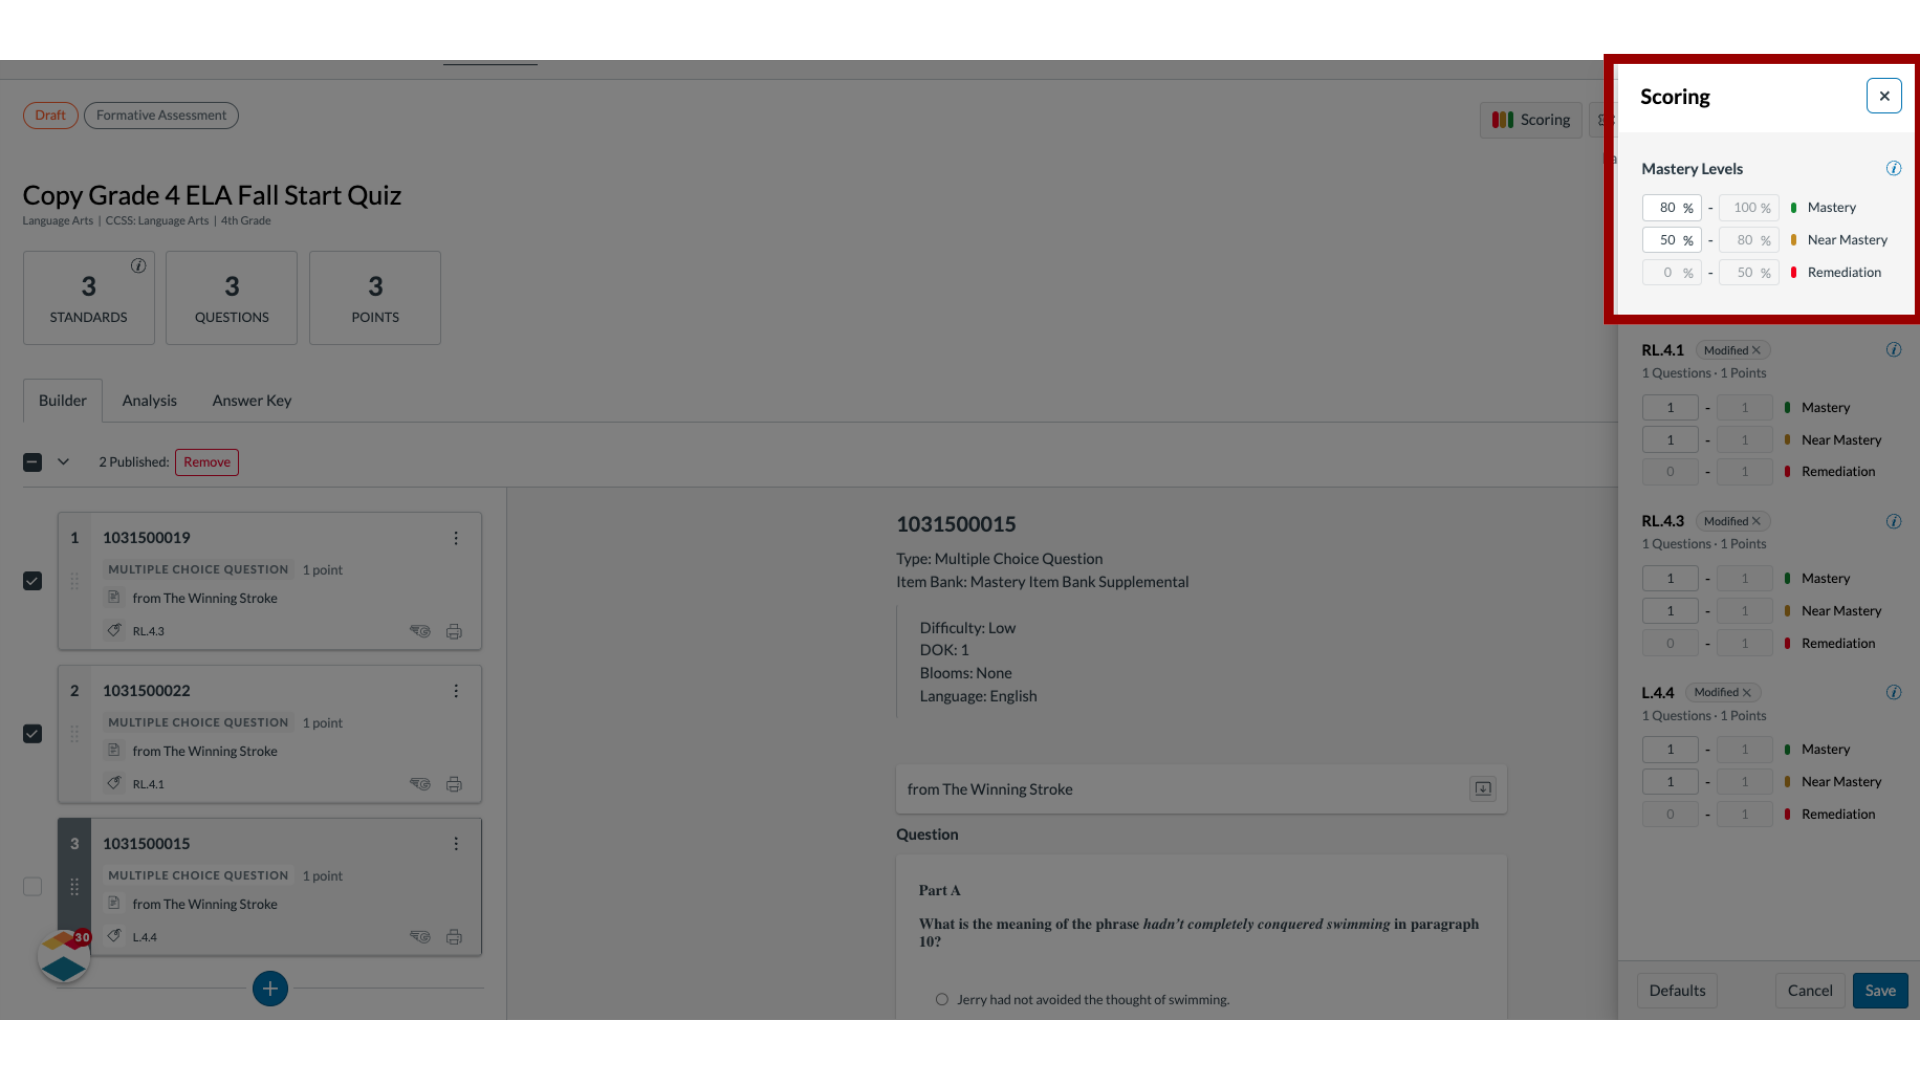
22. Edit Assessment Cut Scores
To change mastery cut scores for the assessment, enter the new minimum scores for mastery or near mastery in the Mastery Level fields.
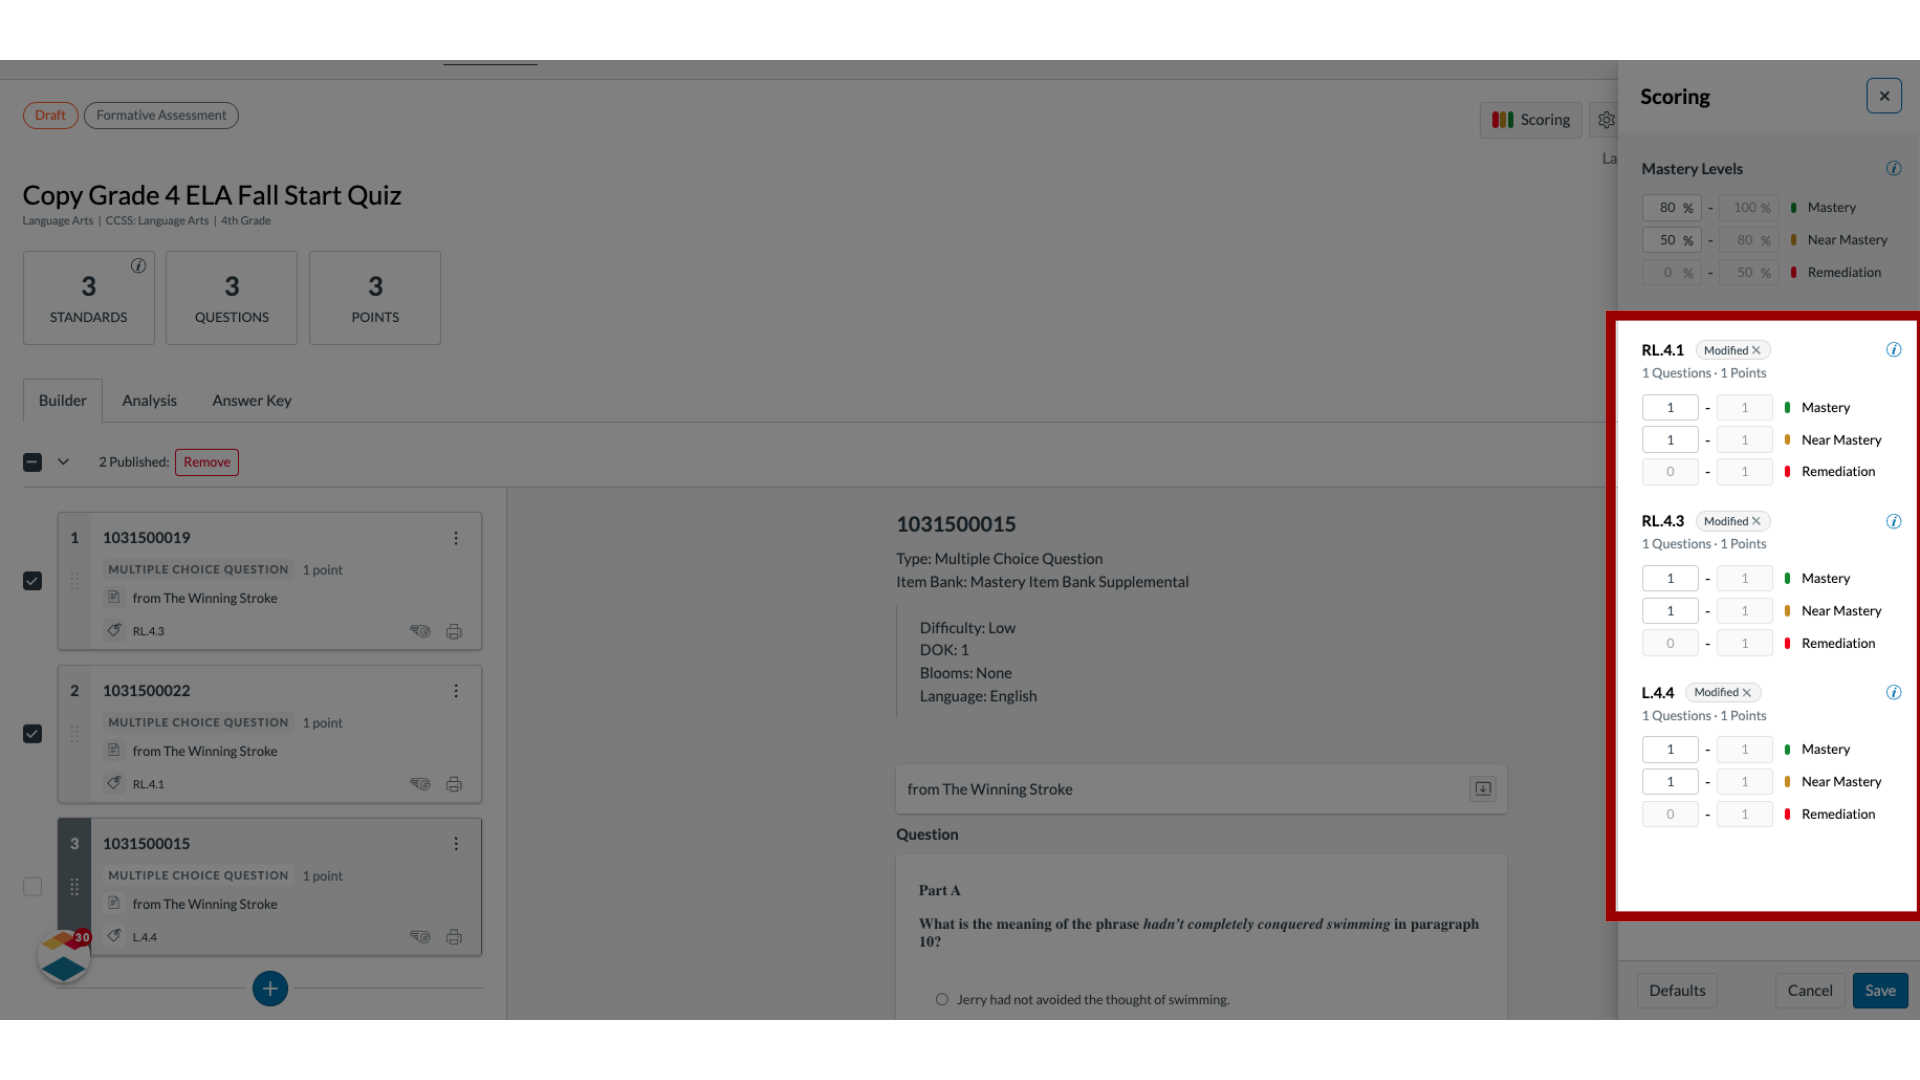
23. Edit Question Cut Scores
To change mastery cut scores for individual questions, enter the new minimum scores for mastery or near mastery in the Mastery Level fields for each question.
24. Save Changes
To save changes, click the Save button.

25. Return to Default Settings
To return to your district's default mastery settings, click the Defaults button.

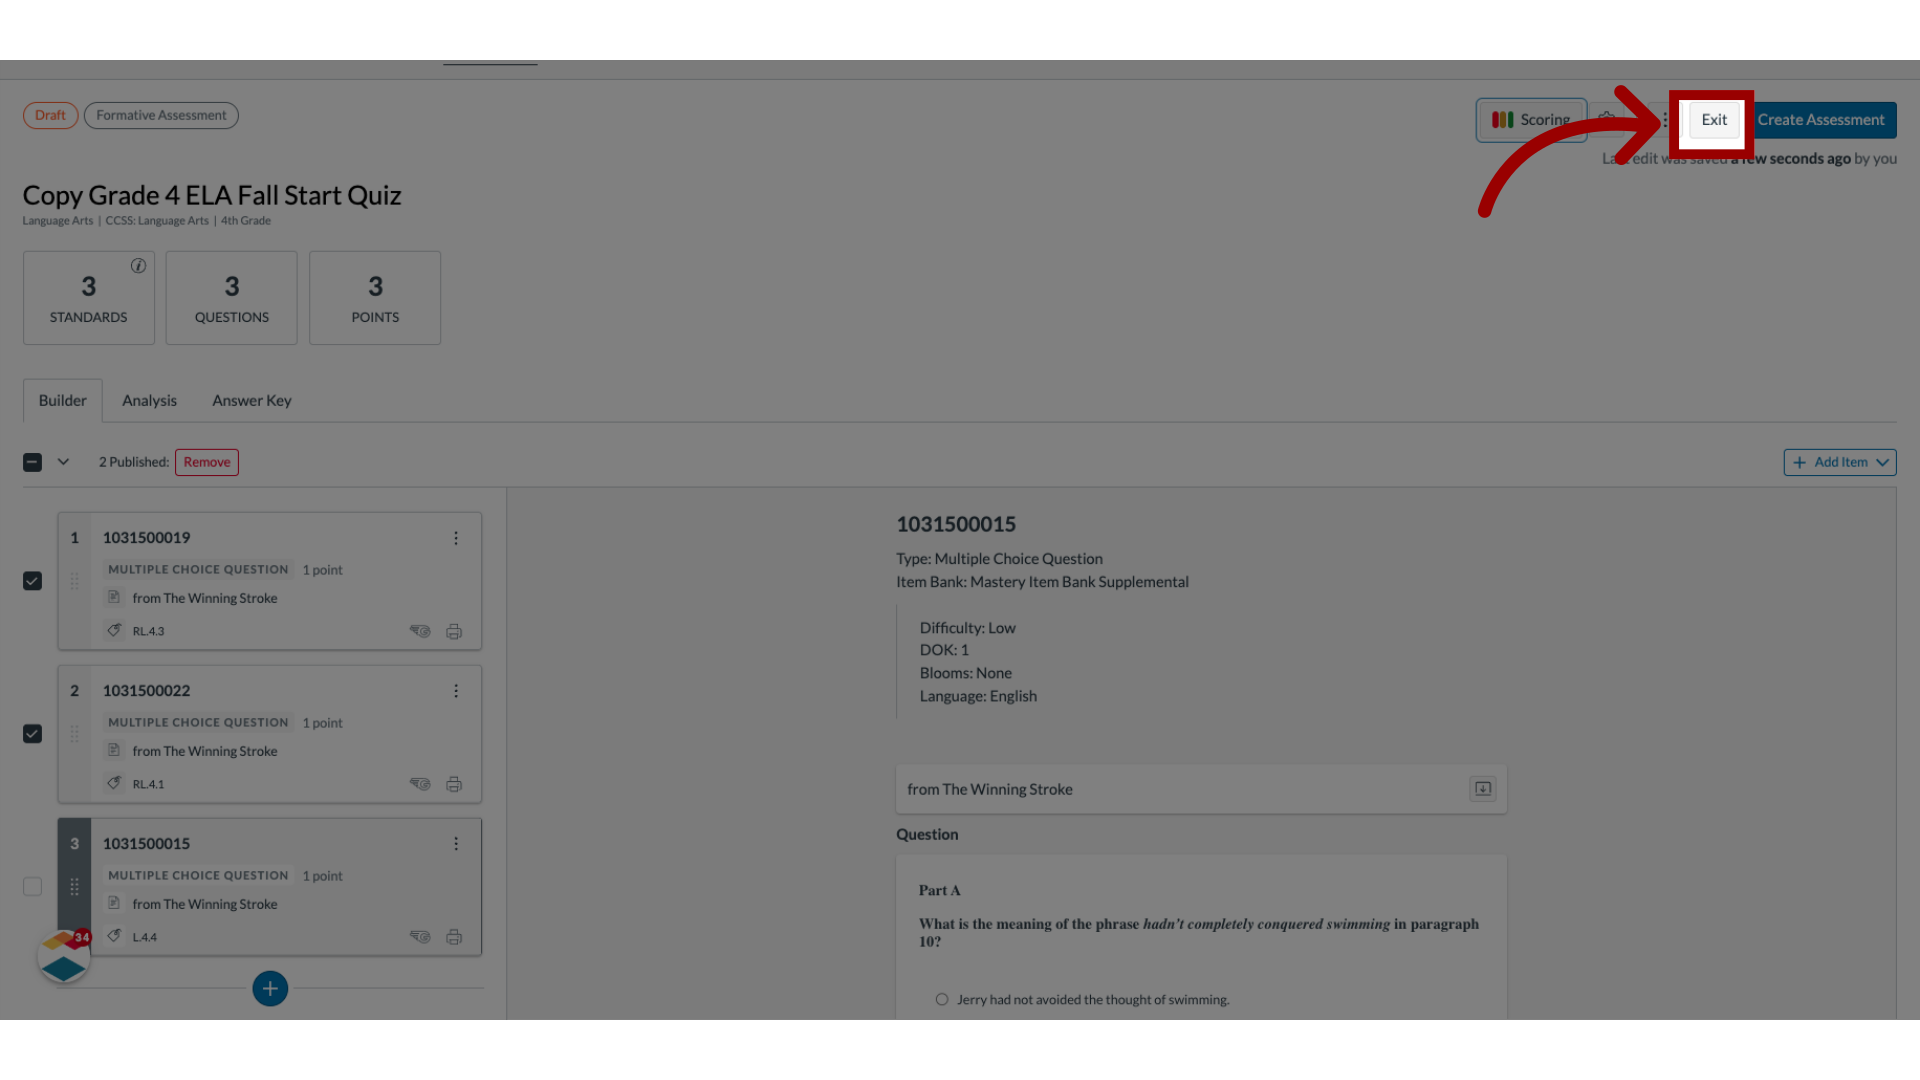
26. Exit Assessment Editor
Edits are saved automatically.
To exit the assessment editor and retain the draft state, click the Exit button.
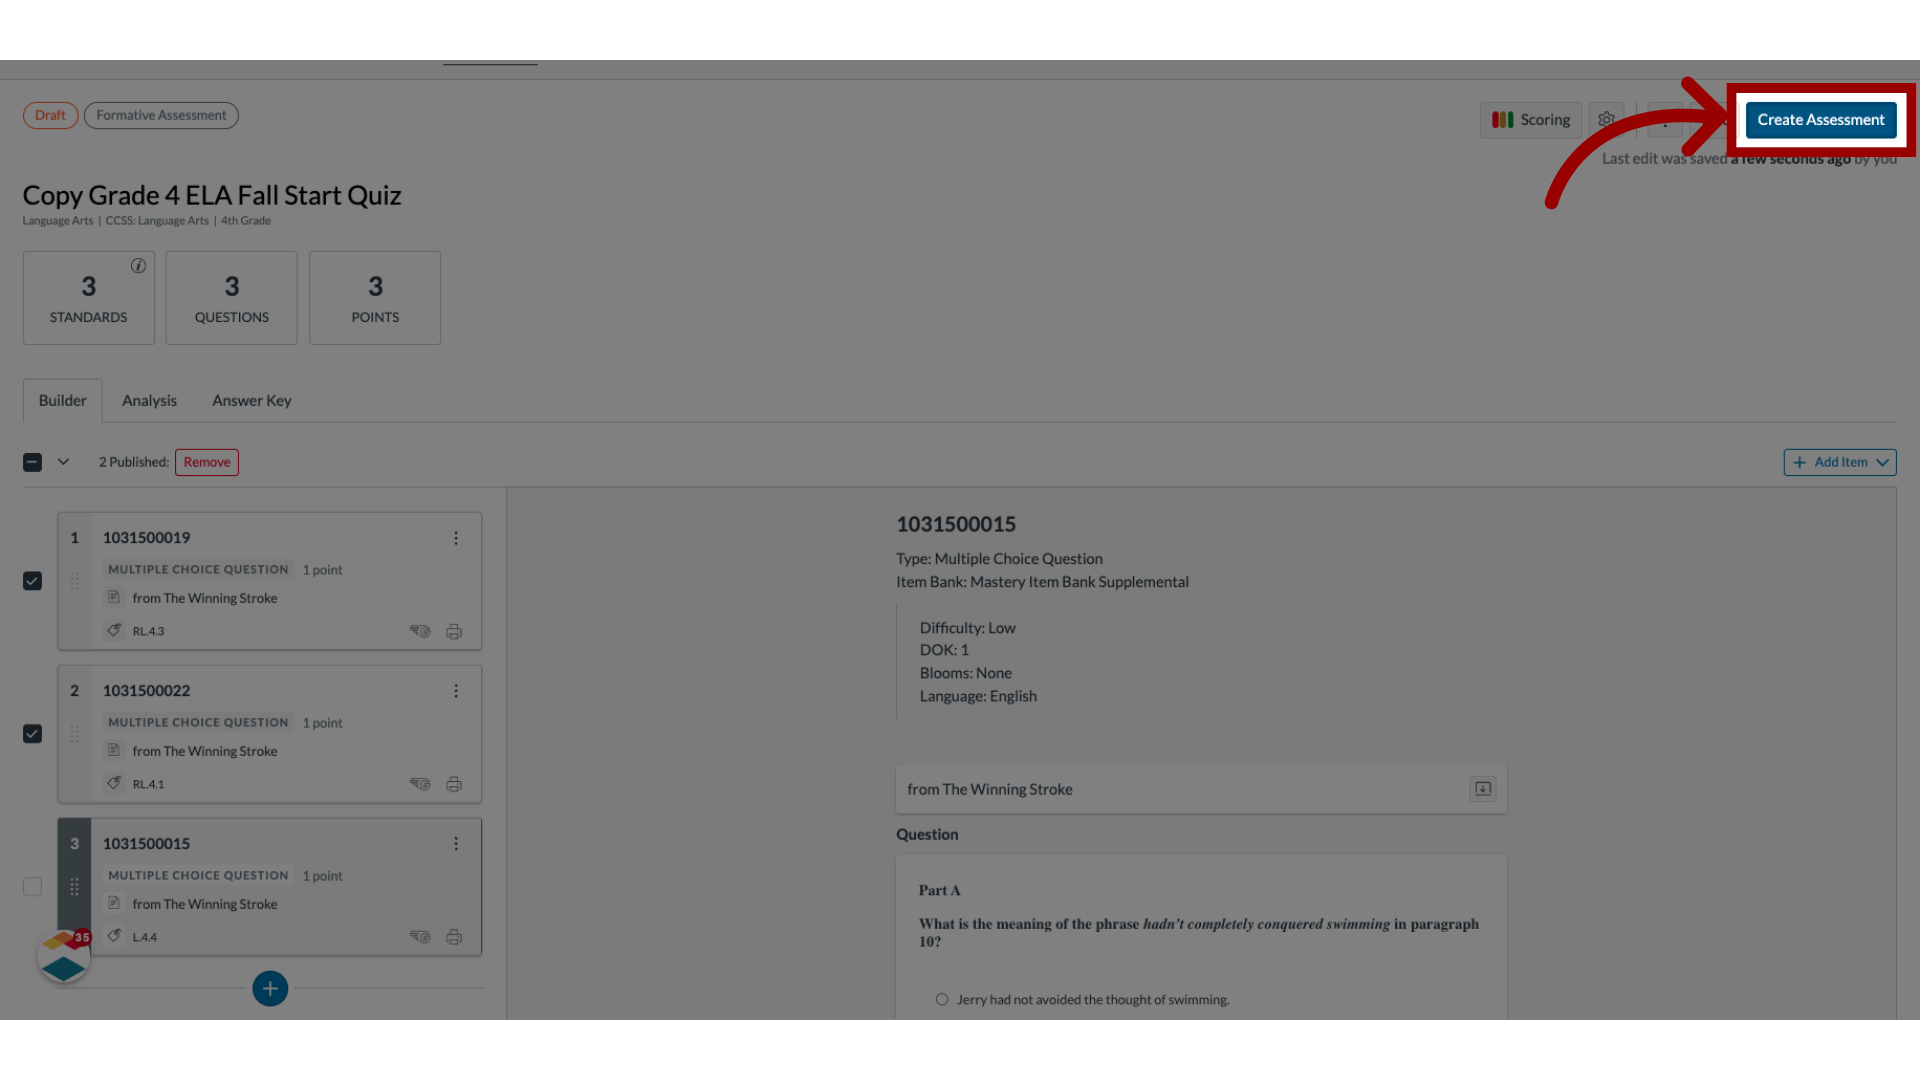
27. Create Assessment
To create the assessment, click the Create Assessment button.
The guide covered how to edit an item-based assessment as a teacher.

