What is the Assessment Editor?
The Assessment Editor in Mastery Connect allows you to create or edit item-based or document-based assessments.
In the Assessment Editor, you can view assessment details, manage assessment content, manage settings, edit cut scores, and move assessments from draft state to created.
What is the Assessment Editor?
What is the Assessment Editor?
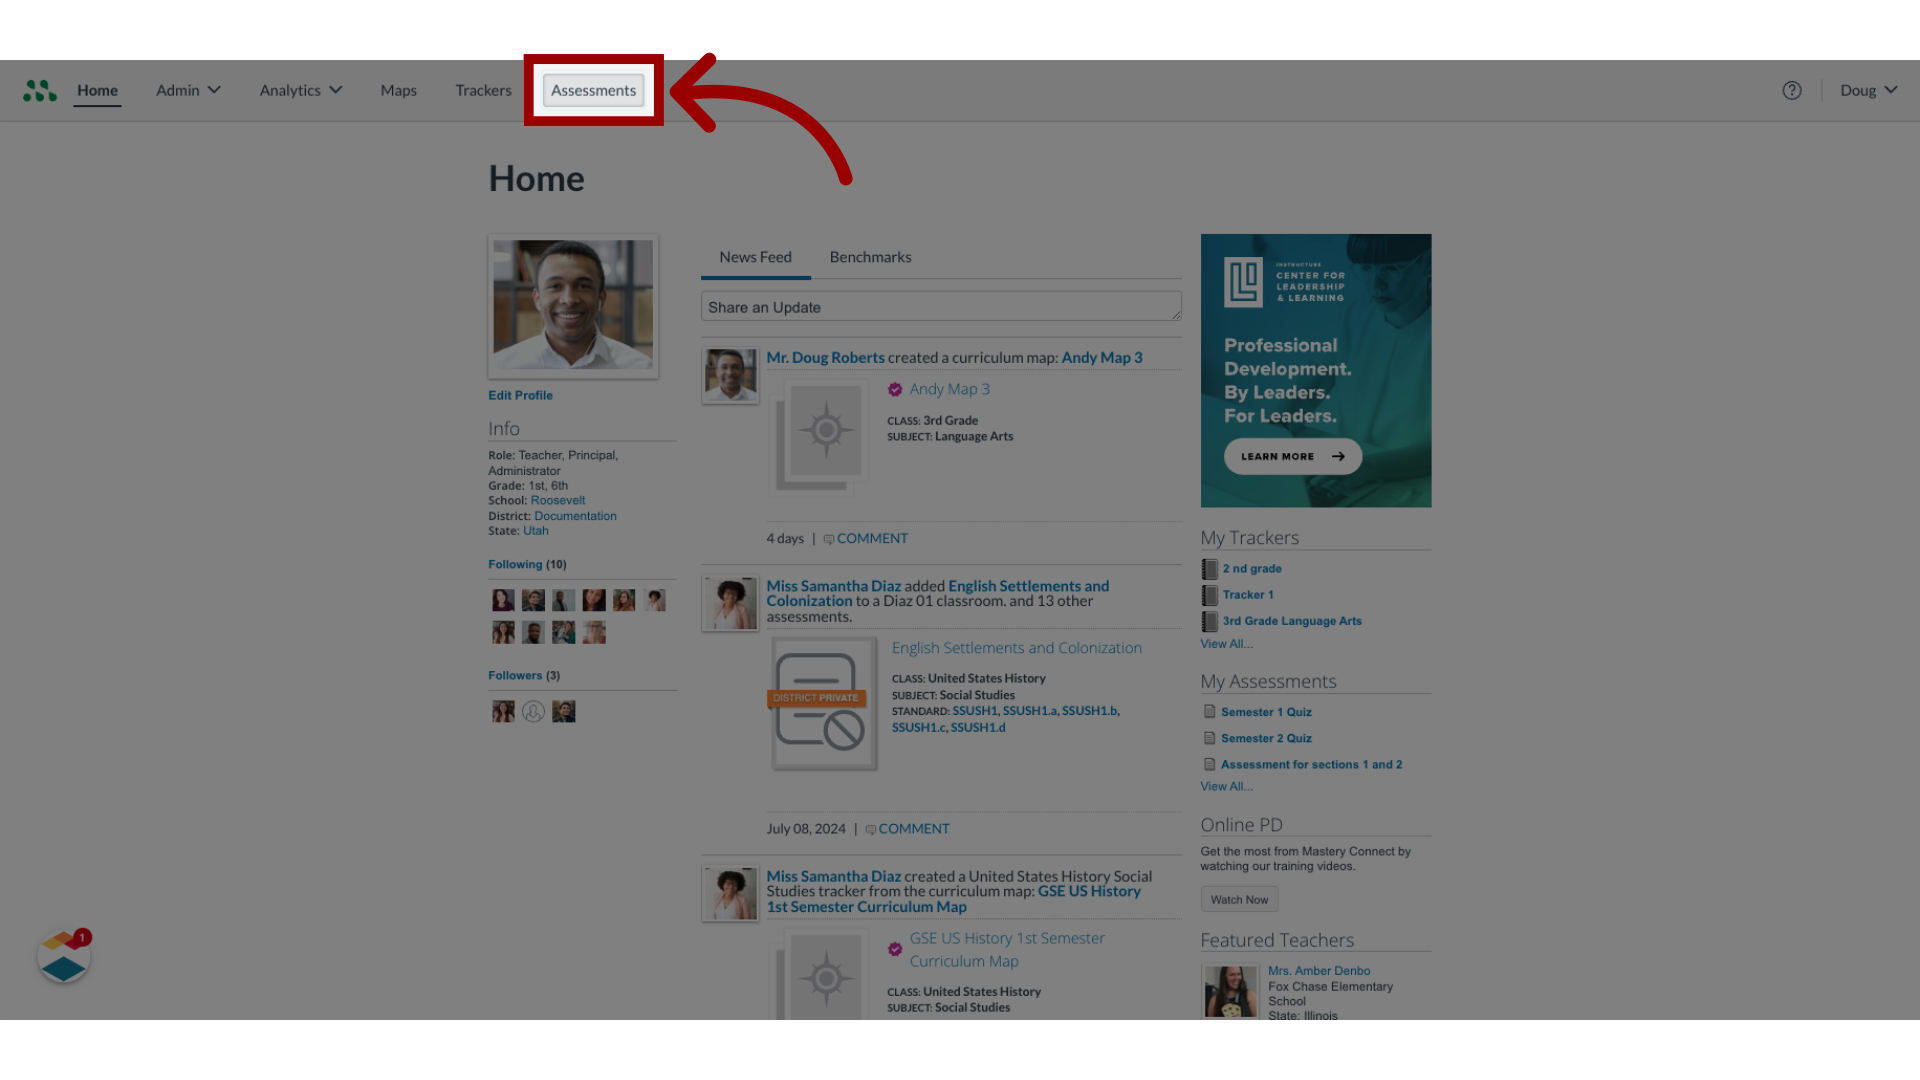
1. Open Assessments
In the global navigation, open the assessments link.
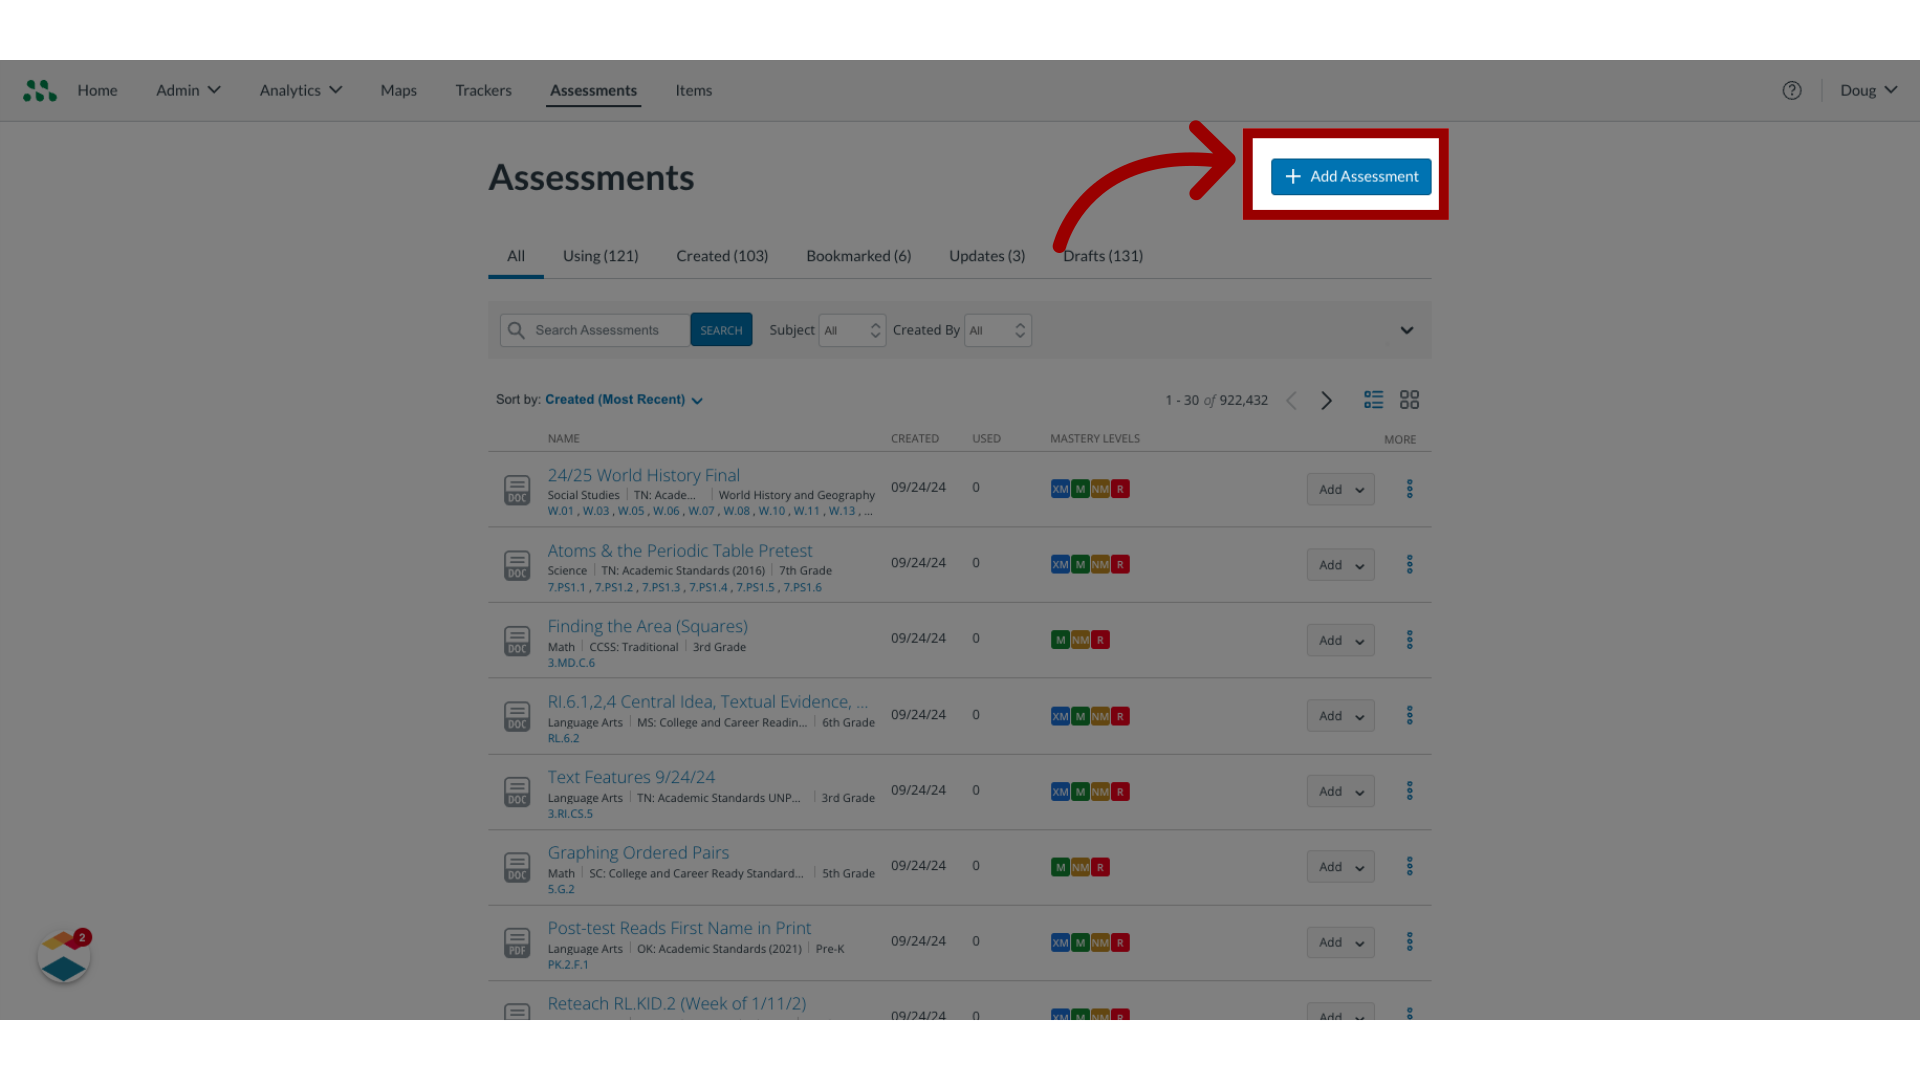
2. Add Assessment
To open the Assessment Editor, you must add a new assessment, or edit an existing assessment in the draft state.
To create a new assessment, click the Add Assessment button.
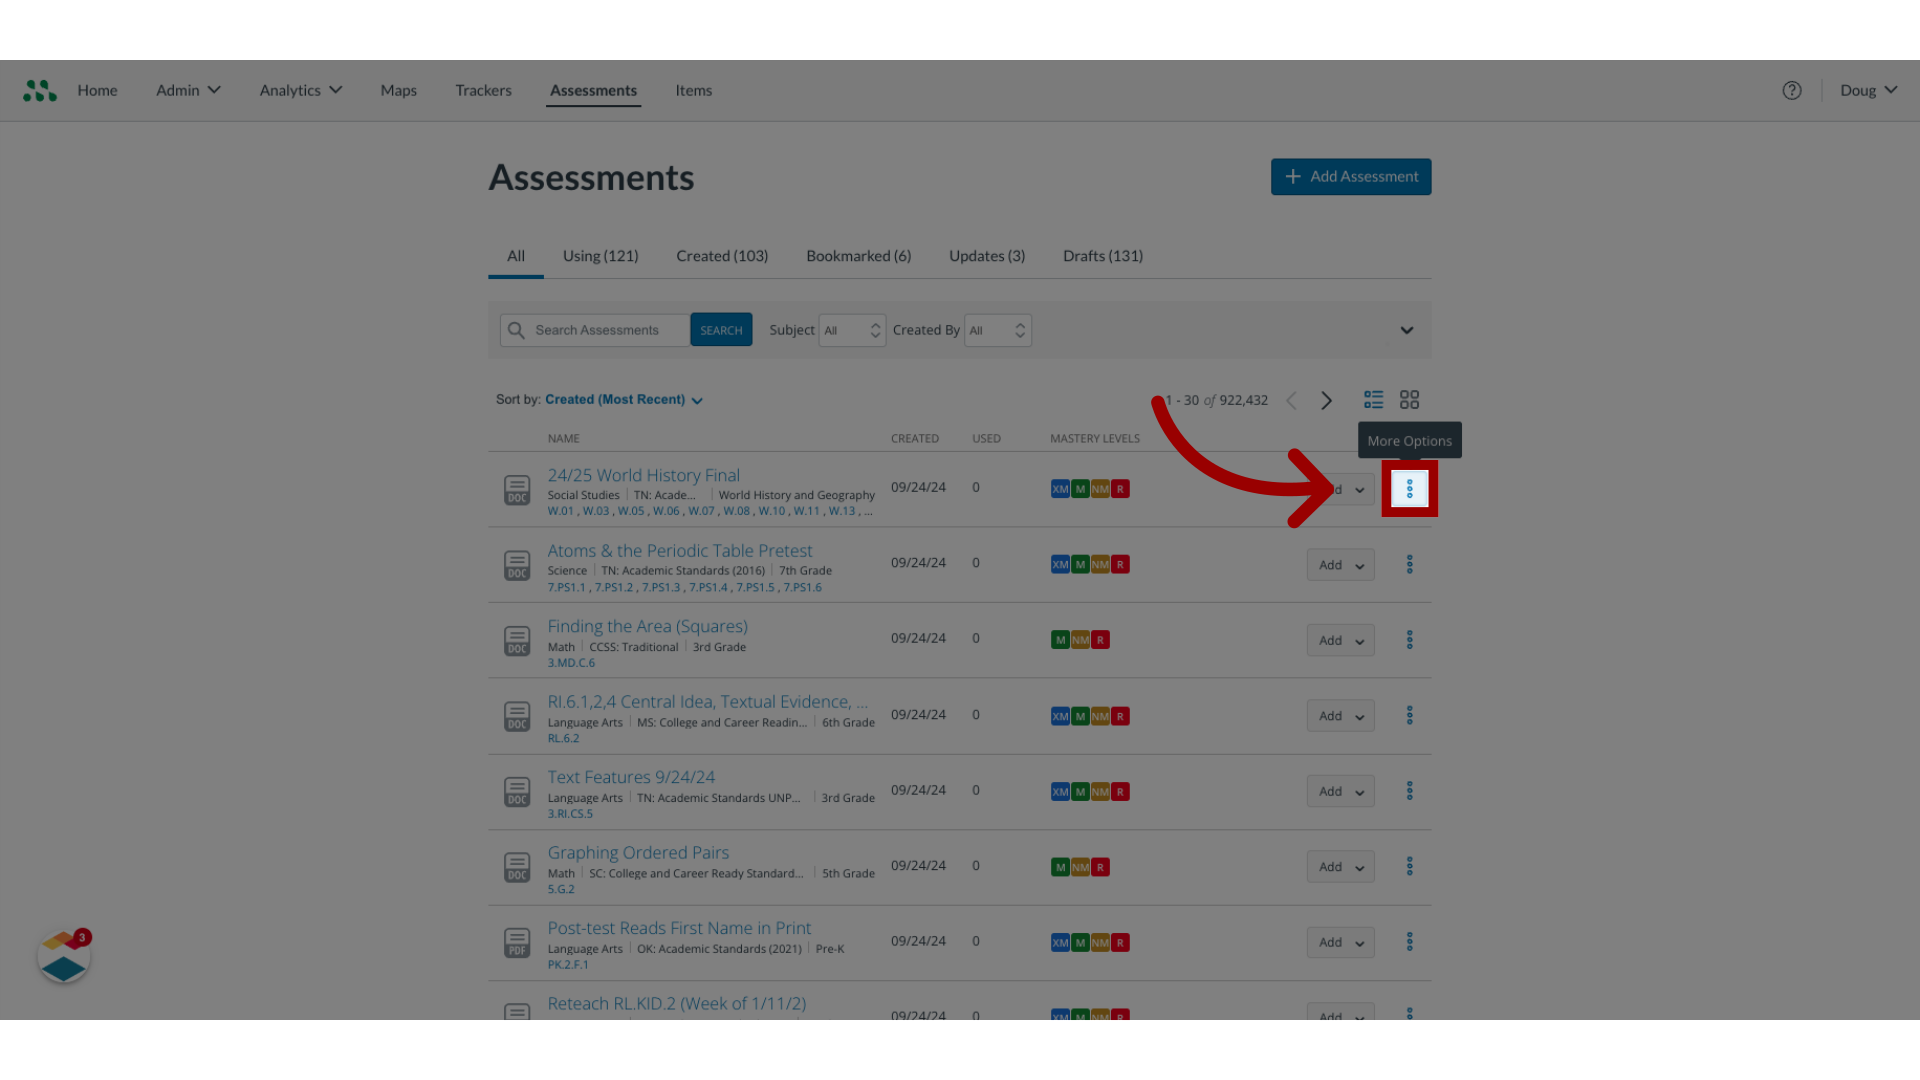
3. Edit existing assessment
To edit an existing assessment, click the More icon.
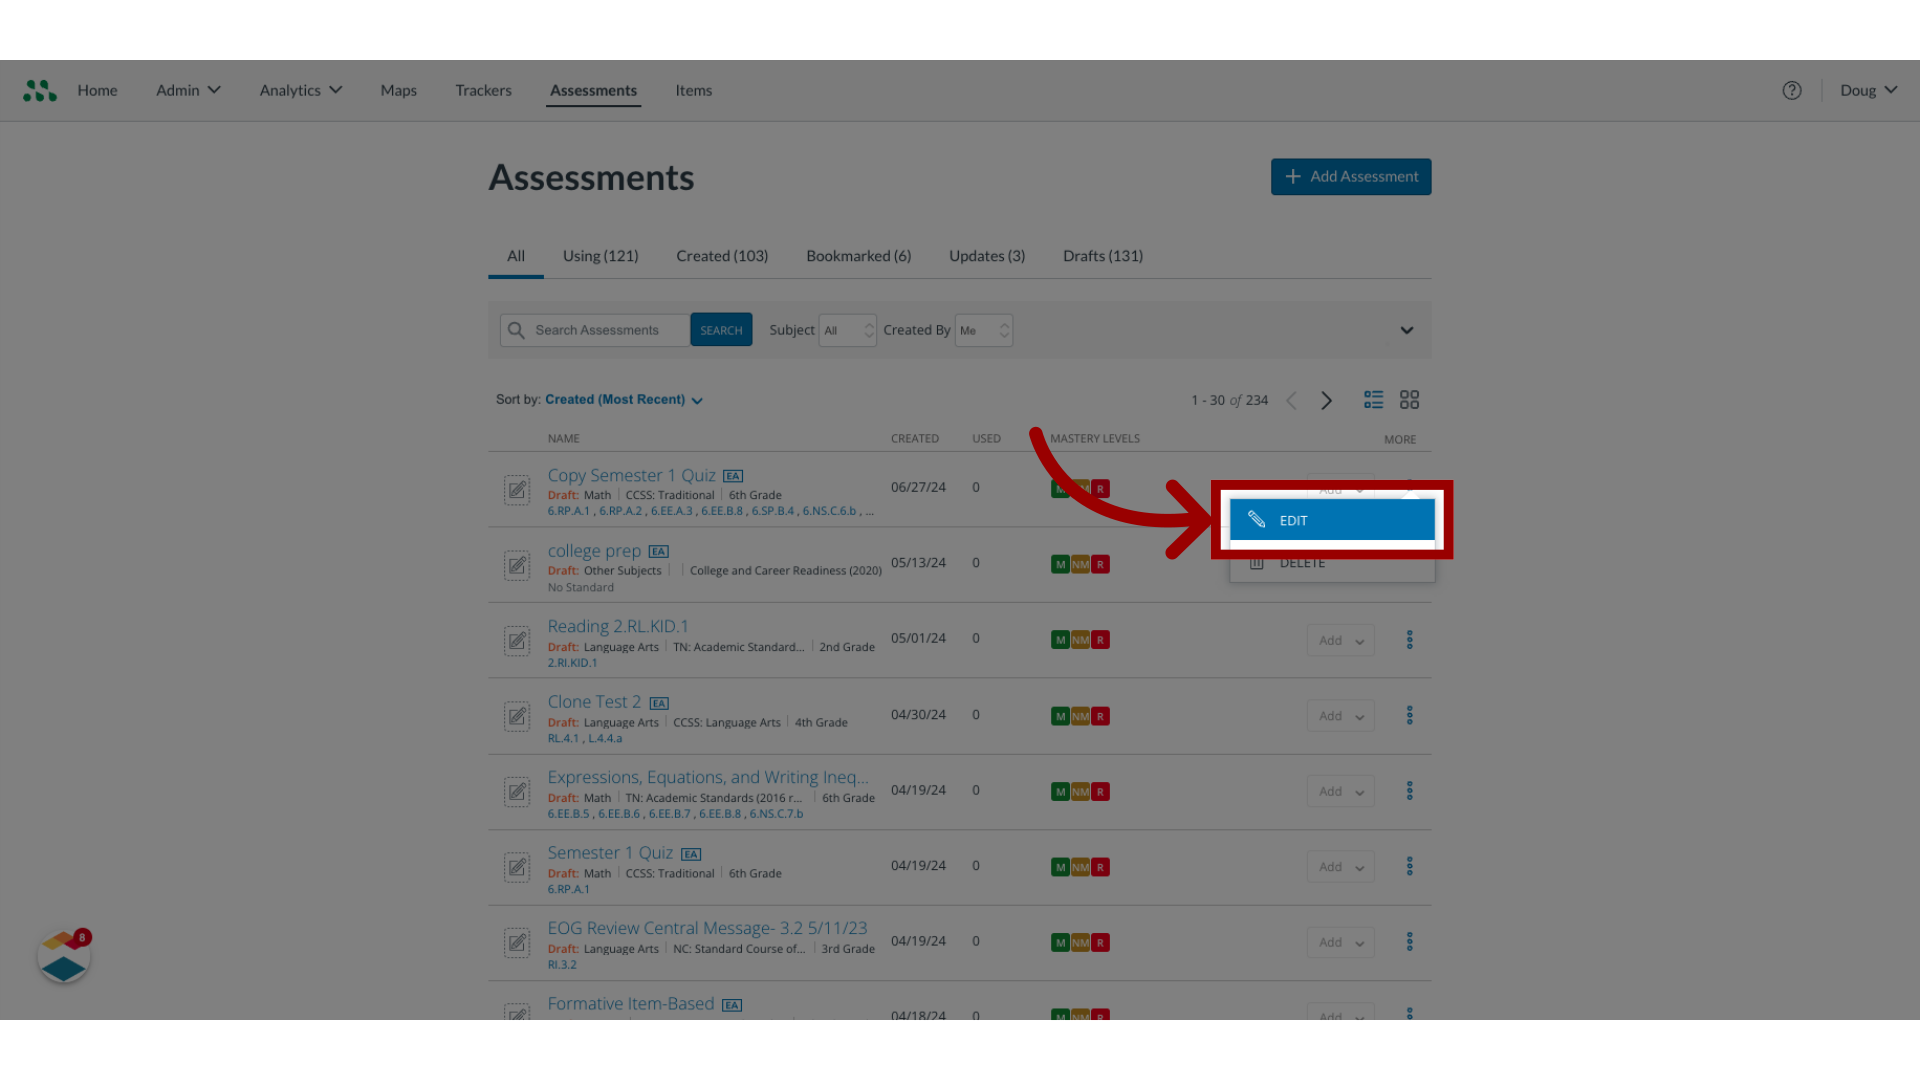
4. Edit assessment
Then, select the Edit option.
5. View Assessment Details
The Assessment Editor displays assessment information, including a draft label if the assessment is in draft state,
a label indicating the type of assessment, the assessment title and standards alignment.
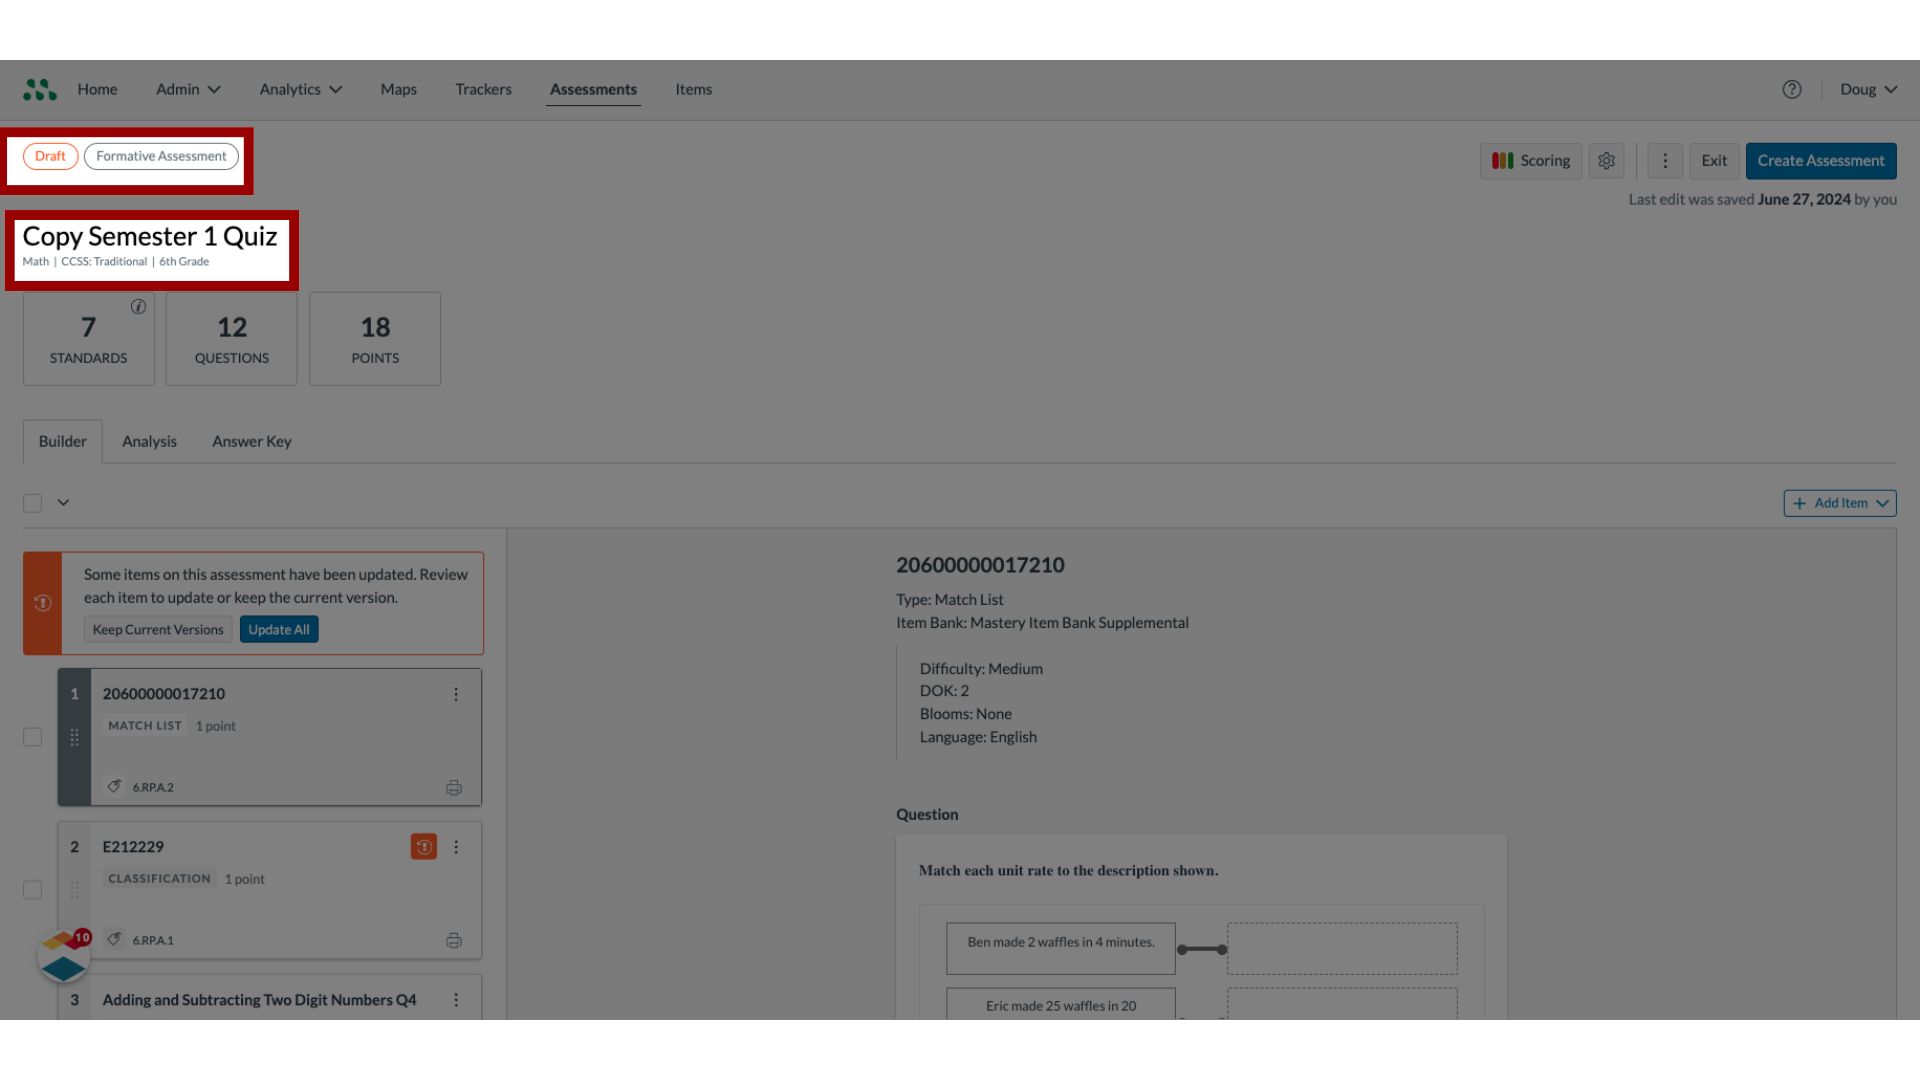
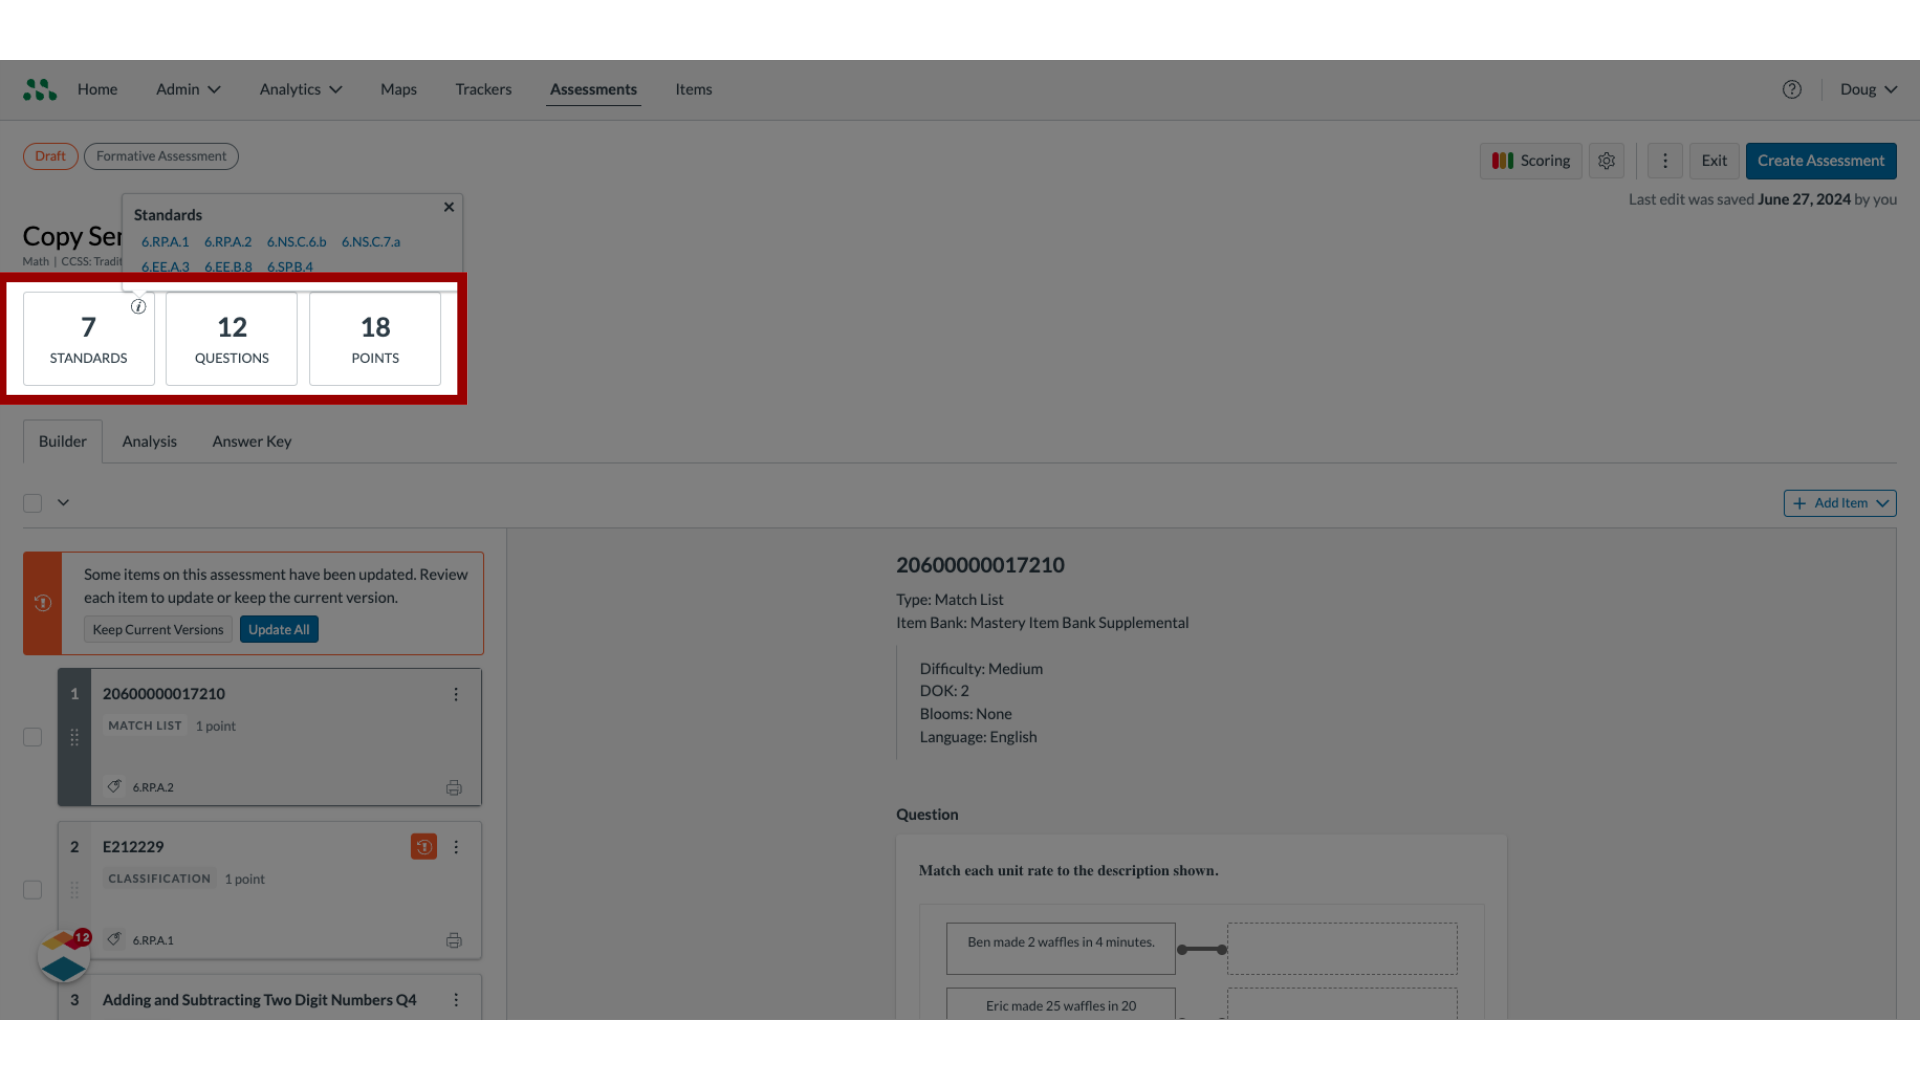
6. View Information Tiles
Information tiles display the number of standards covered in the assessment, the number of items in the assessment, and the total number of points for the assessment. To view additional details about a standard, click the Information icon on the Standards tile.
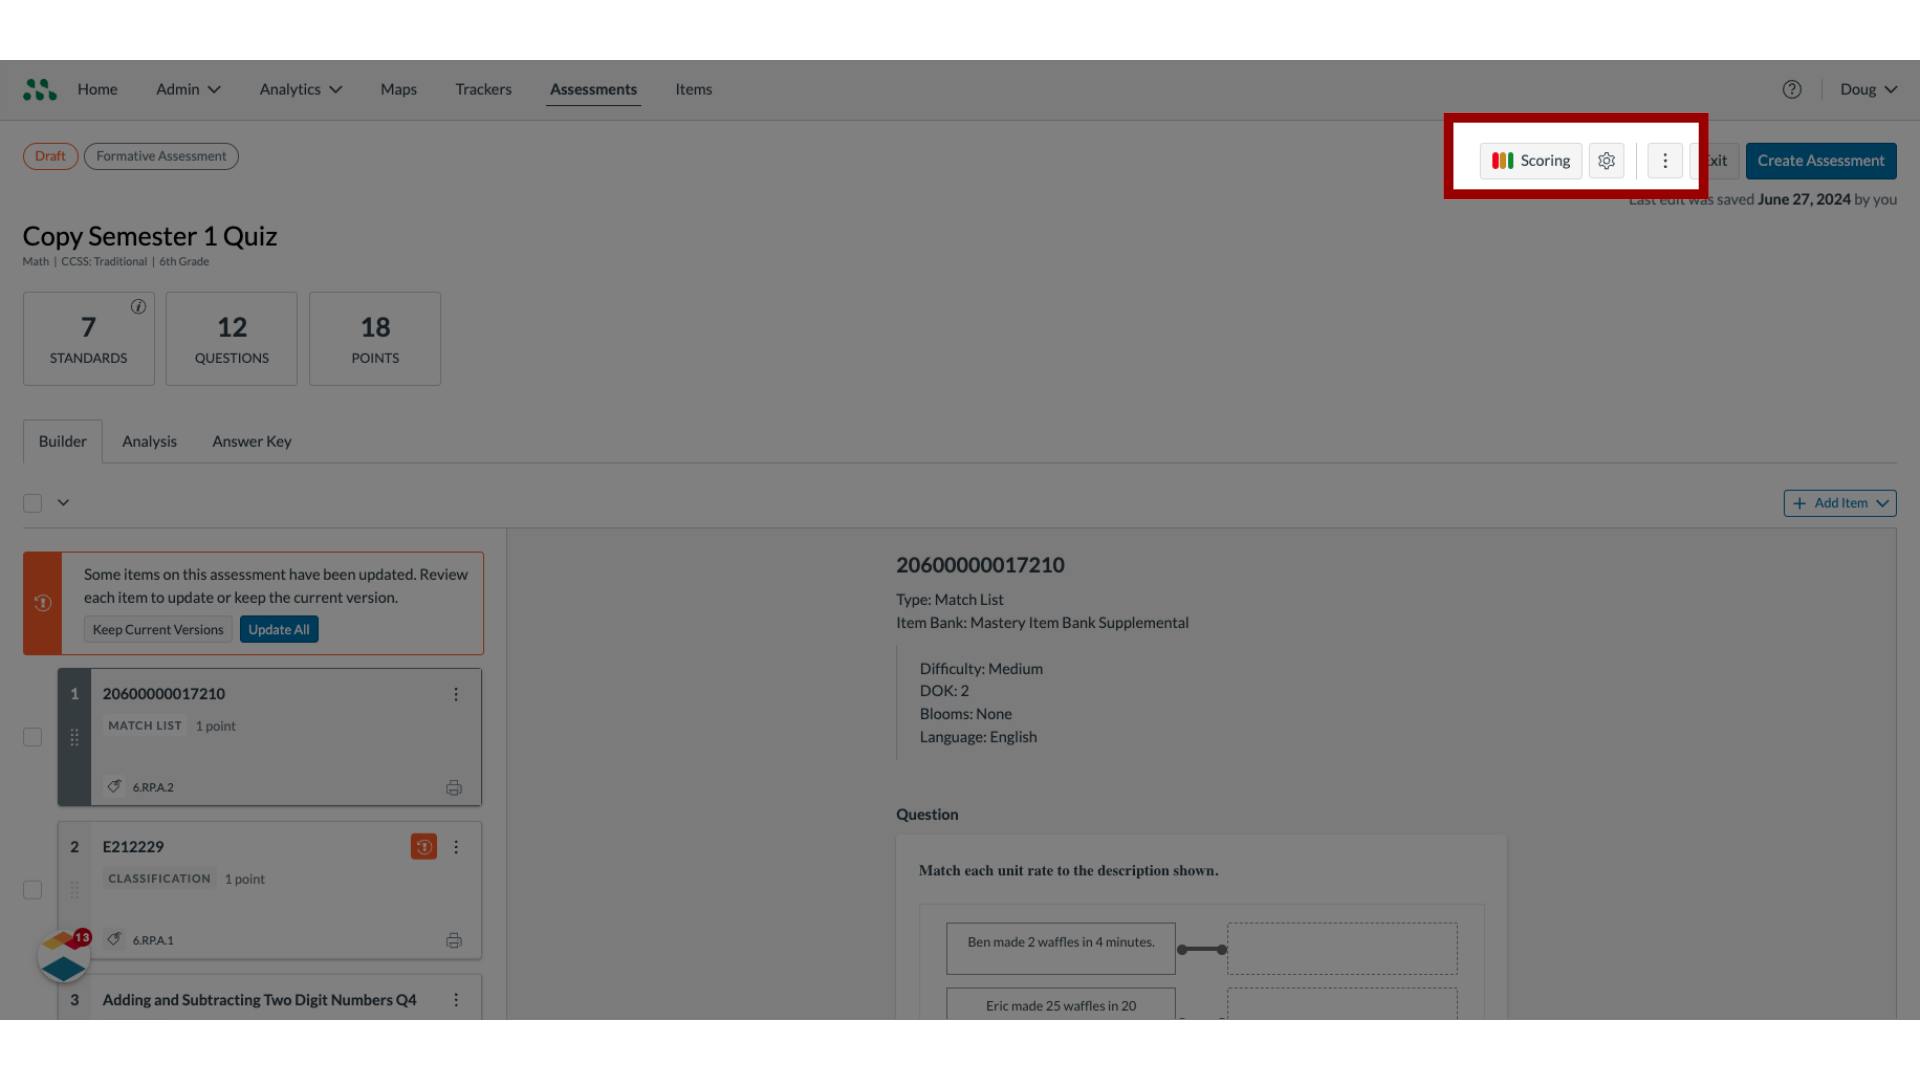
7. View Assessment Editor Buttons
Assessment Editor buttons allow you to control scoring and assessment settings, or to delete the assessment.
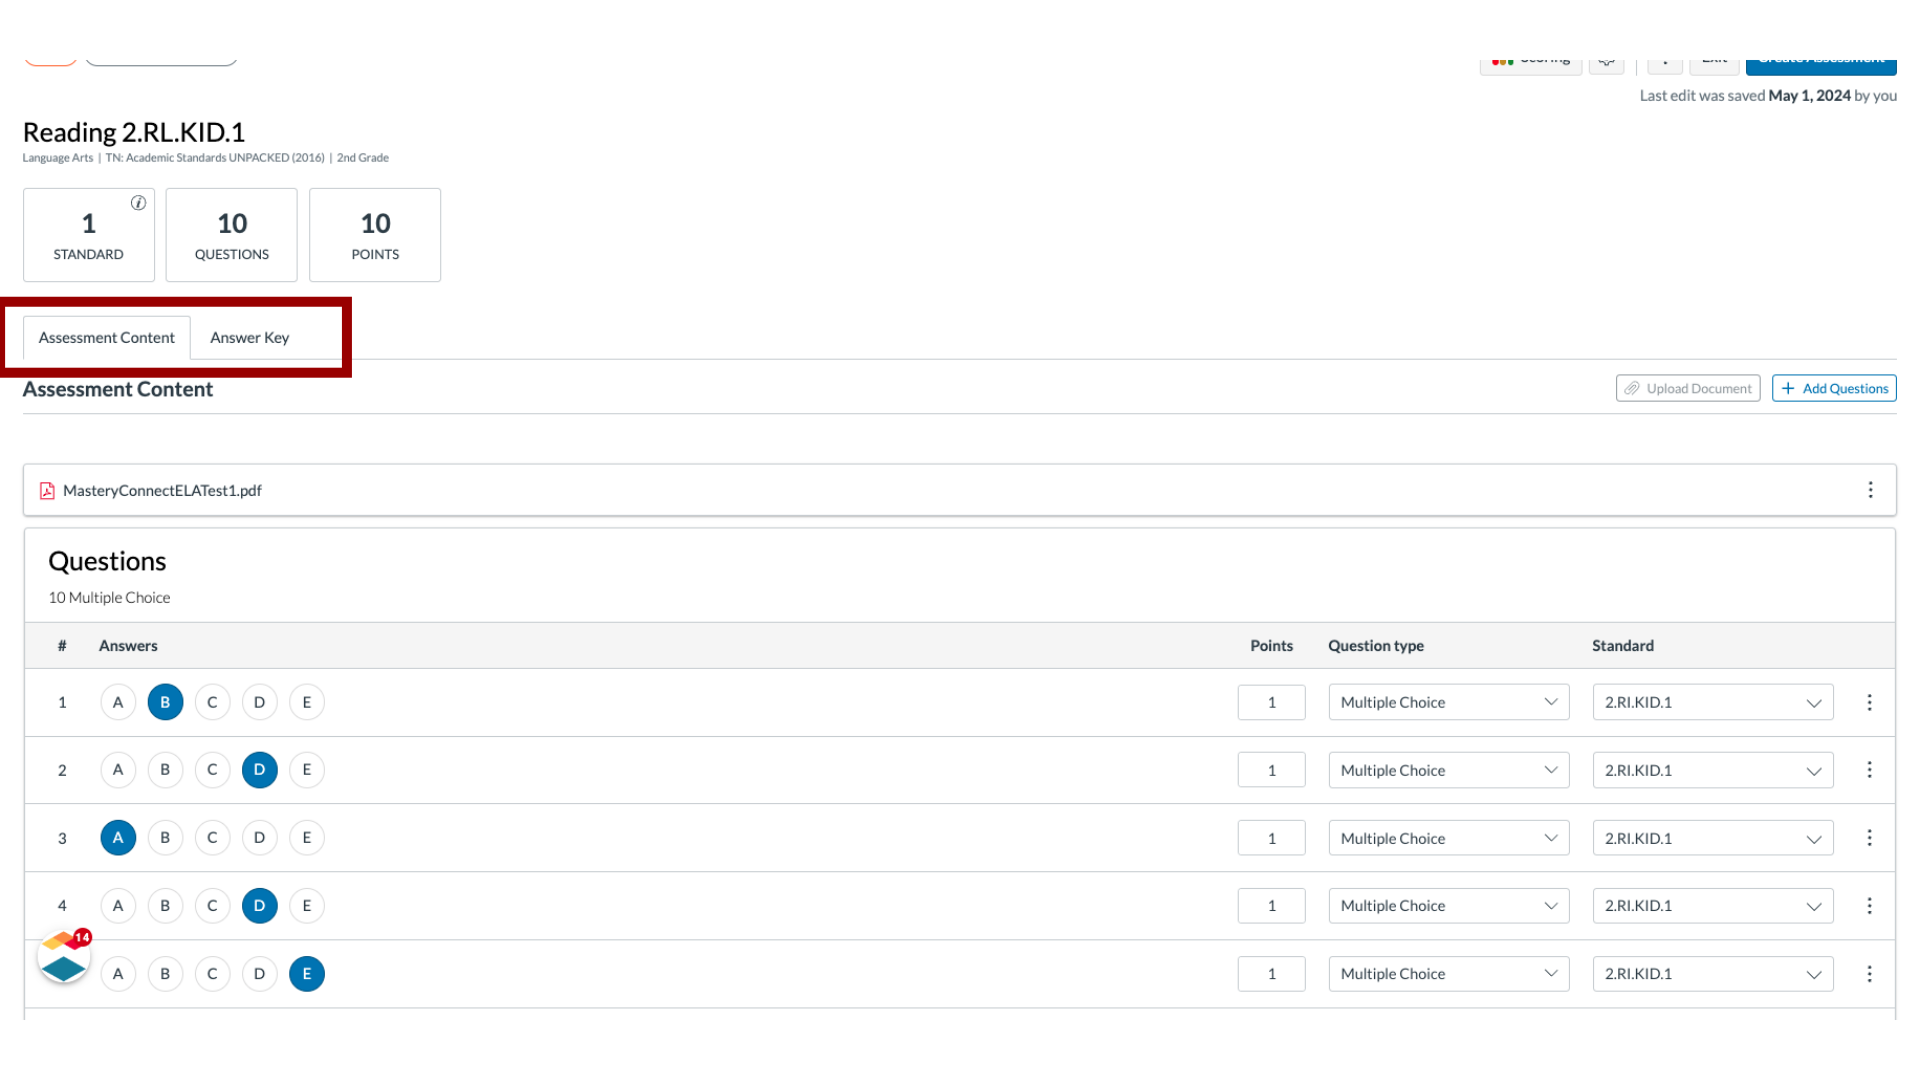
8. View Document-Based Assessment Editor
A document-based assessment contains questions that relate to a document that you upload or to a bubble sheet.
The Assessment Editor displays the Assessment Content tab by default.
To view the answer key for the assessment, click the Answer Key tab.
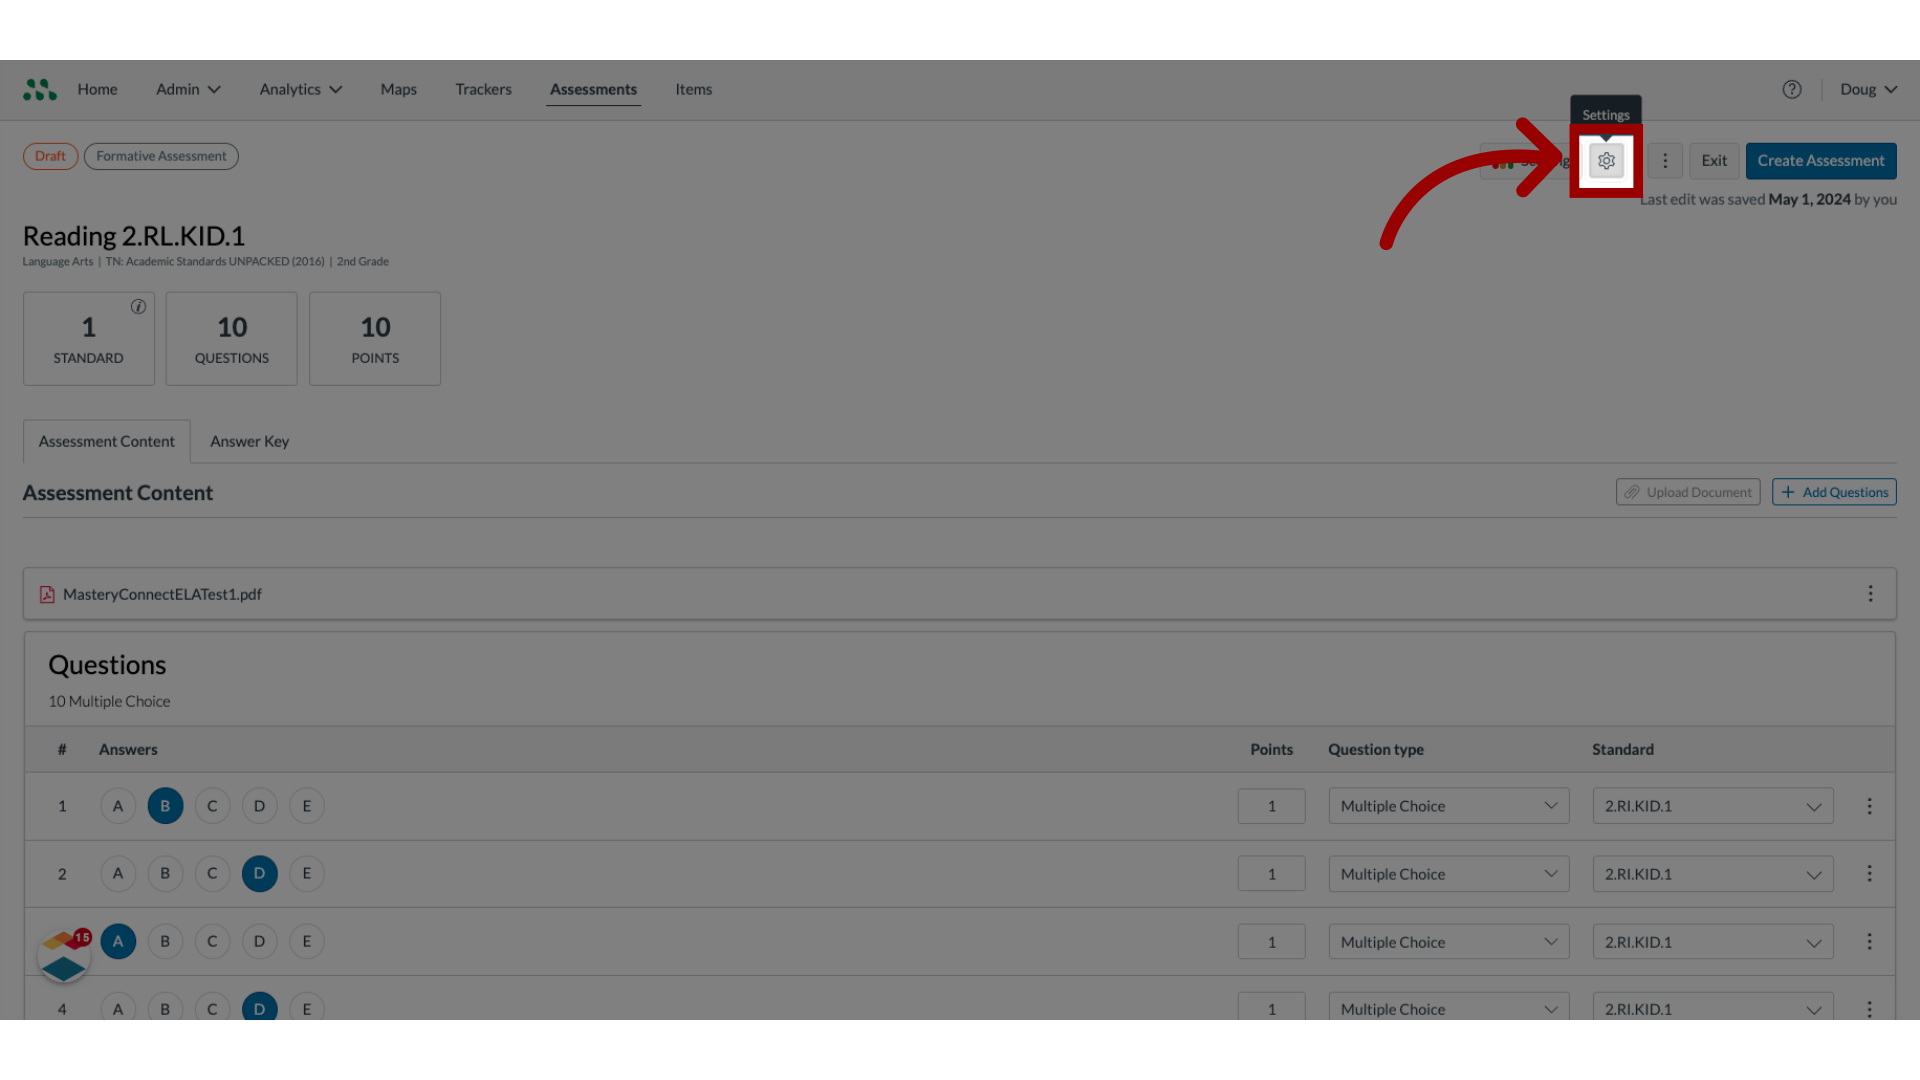
9. Manage Assessment Settings
To manage assessment settings, click the Settings button
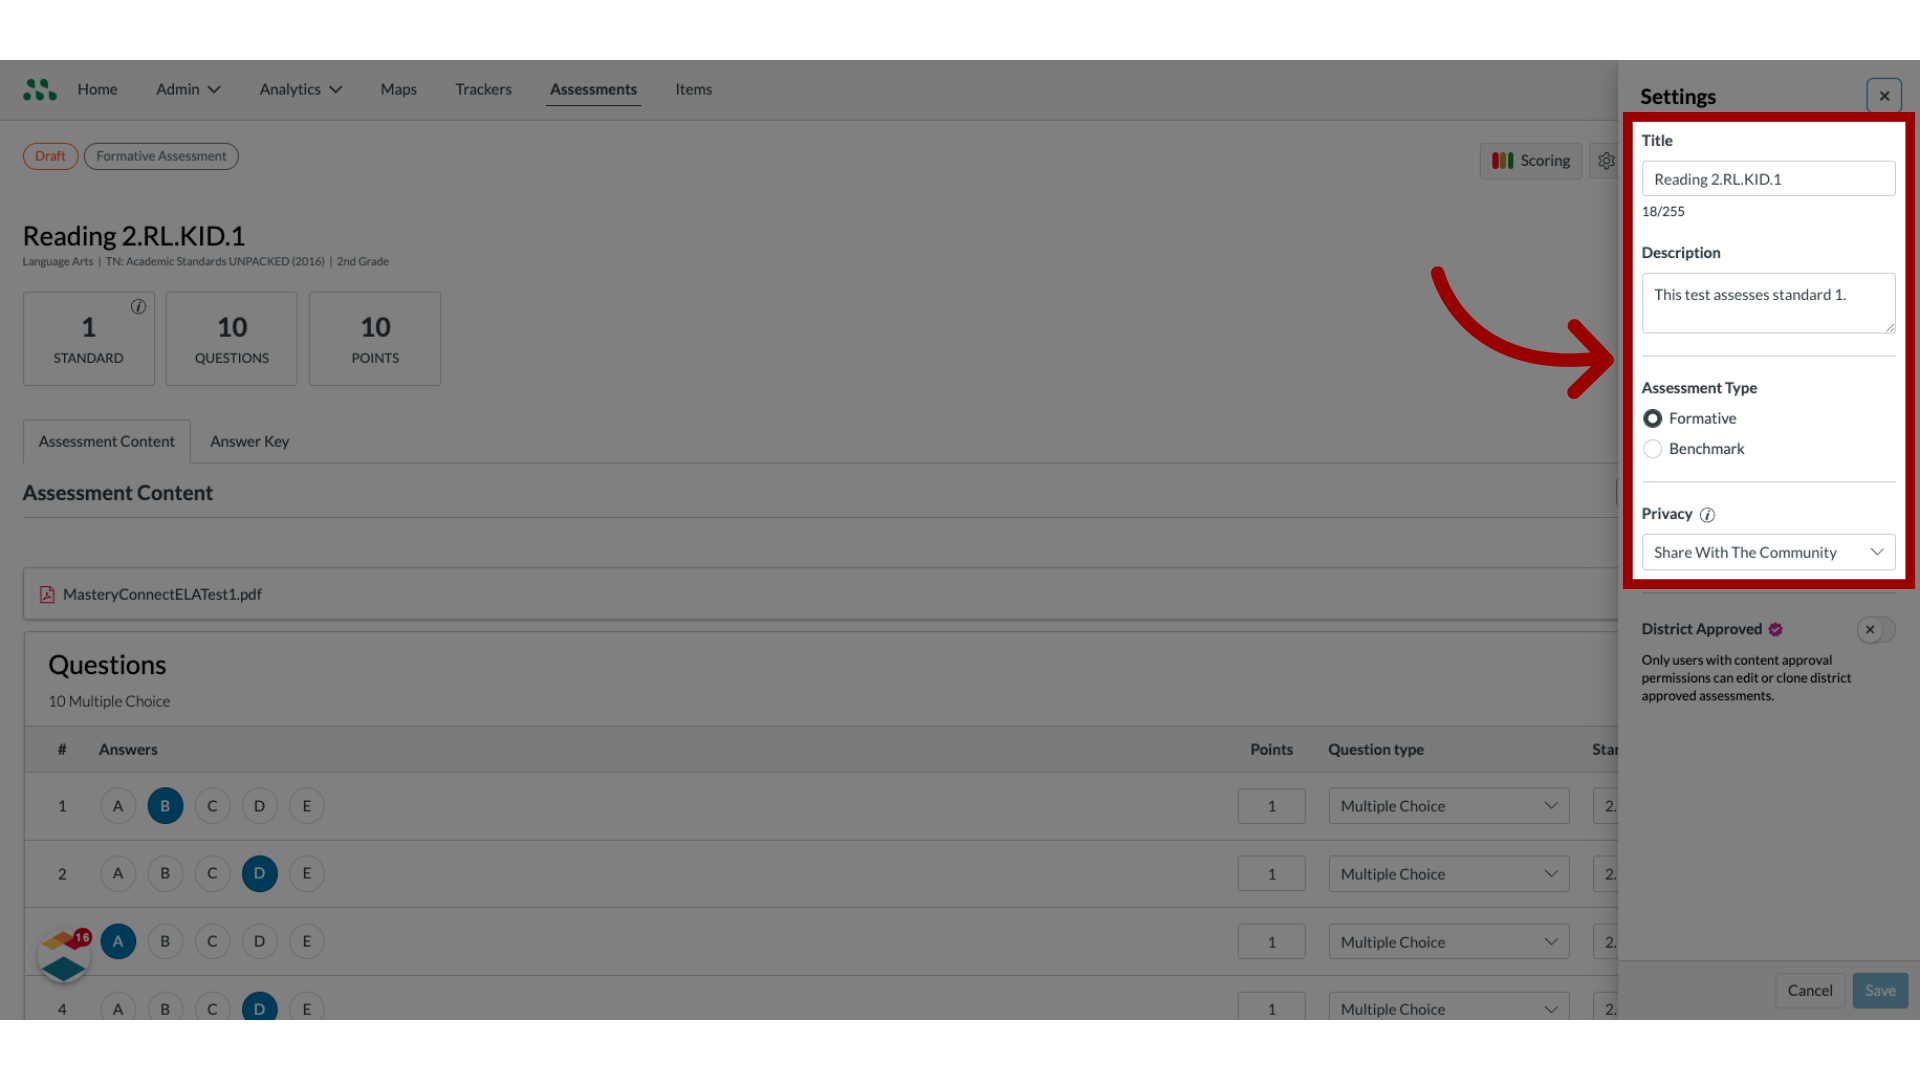
10. Manage Assessment Details
In the Settings tray, select assessment details.
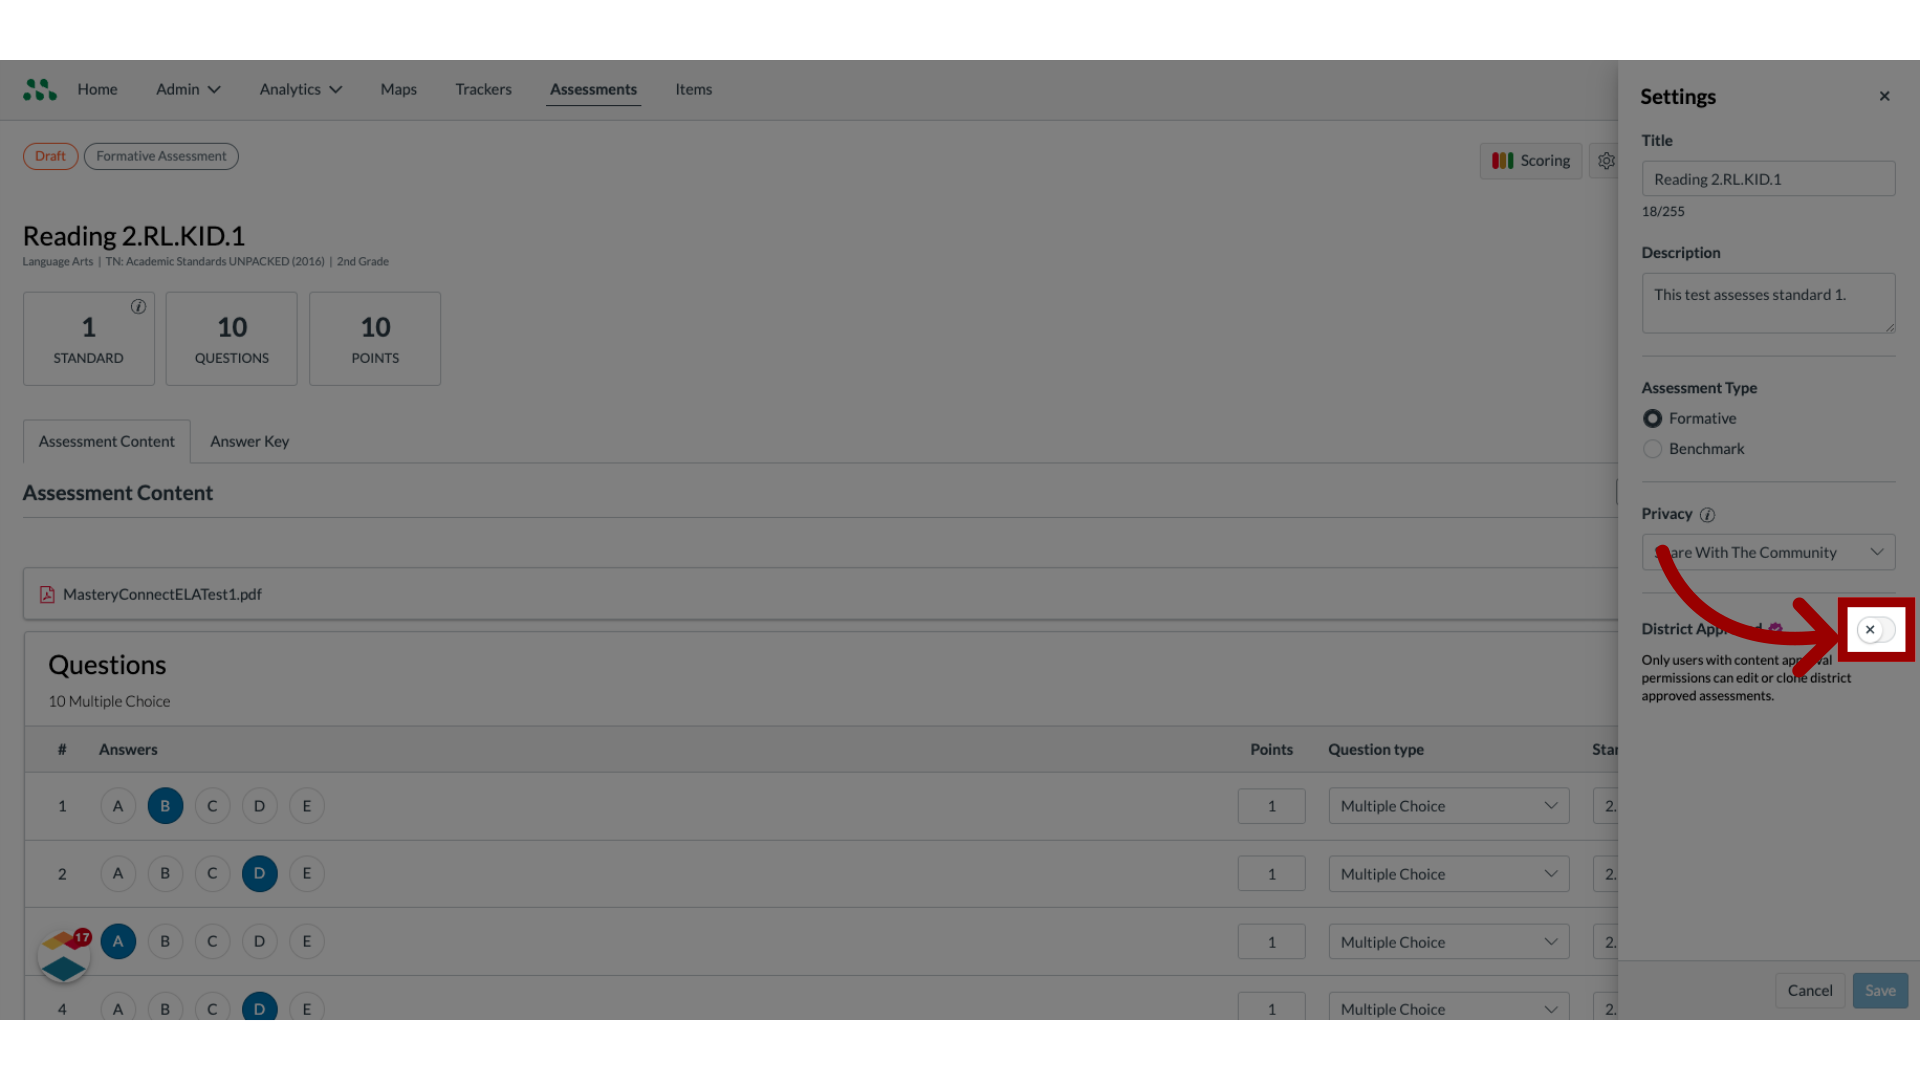
11. Toggle On District Approved
By default, the District Approved toggle is turned off. To designate an assessment as District Approved, click the toggle on.
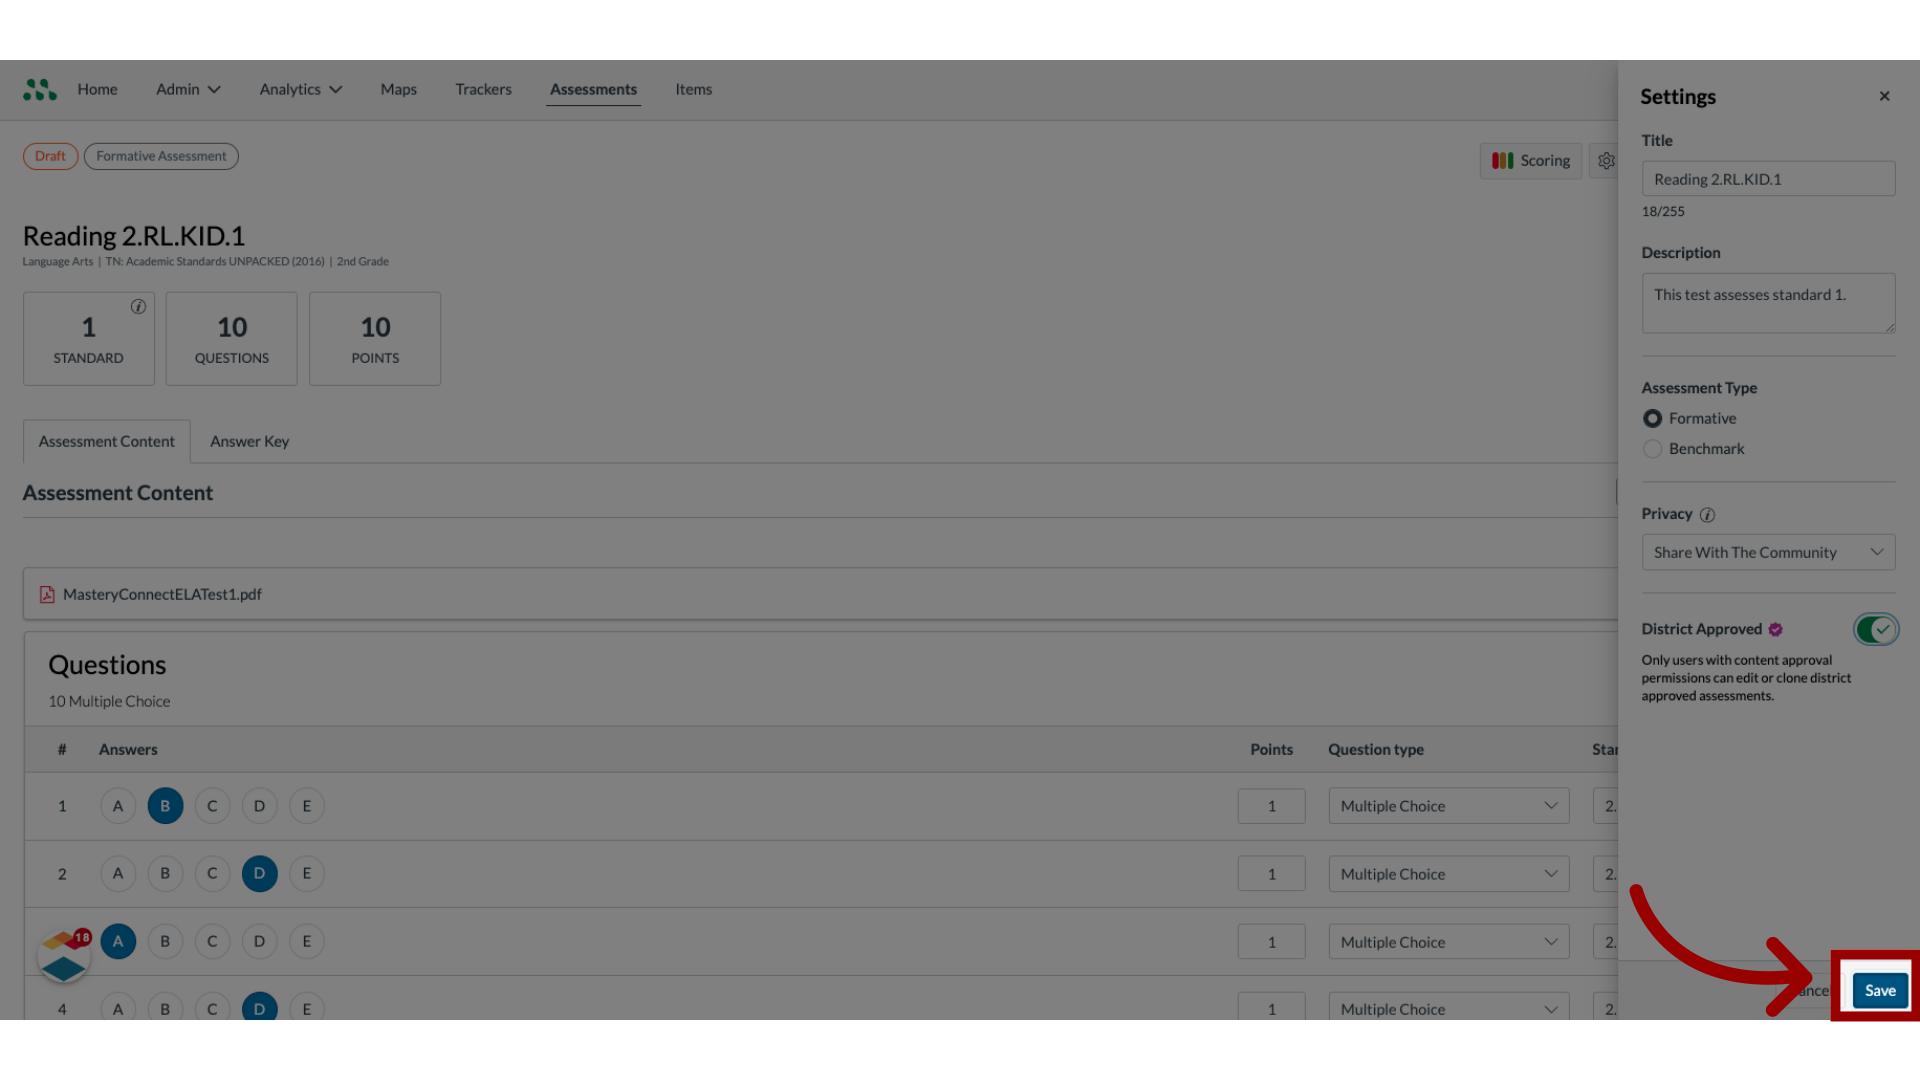
12. Save Changes
To save changes, click the Save button.
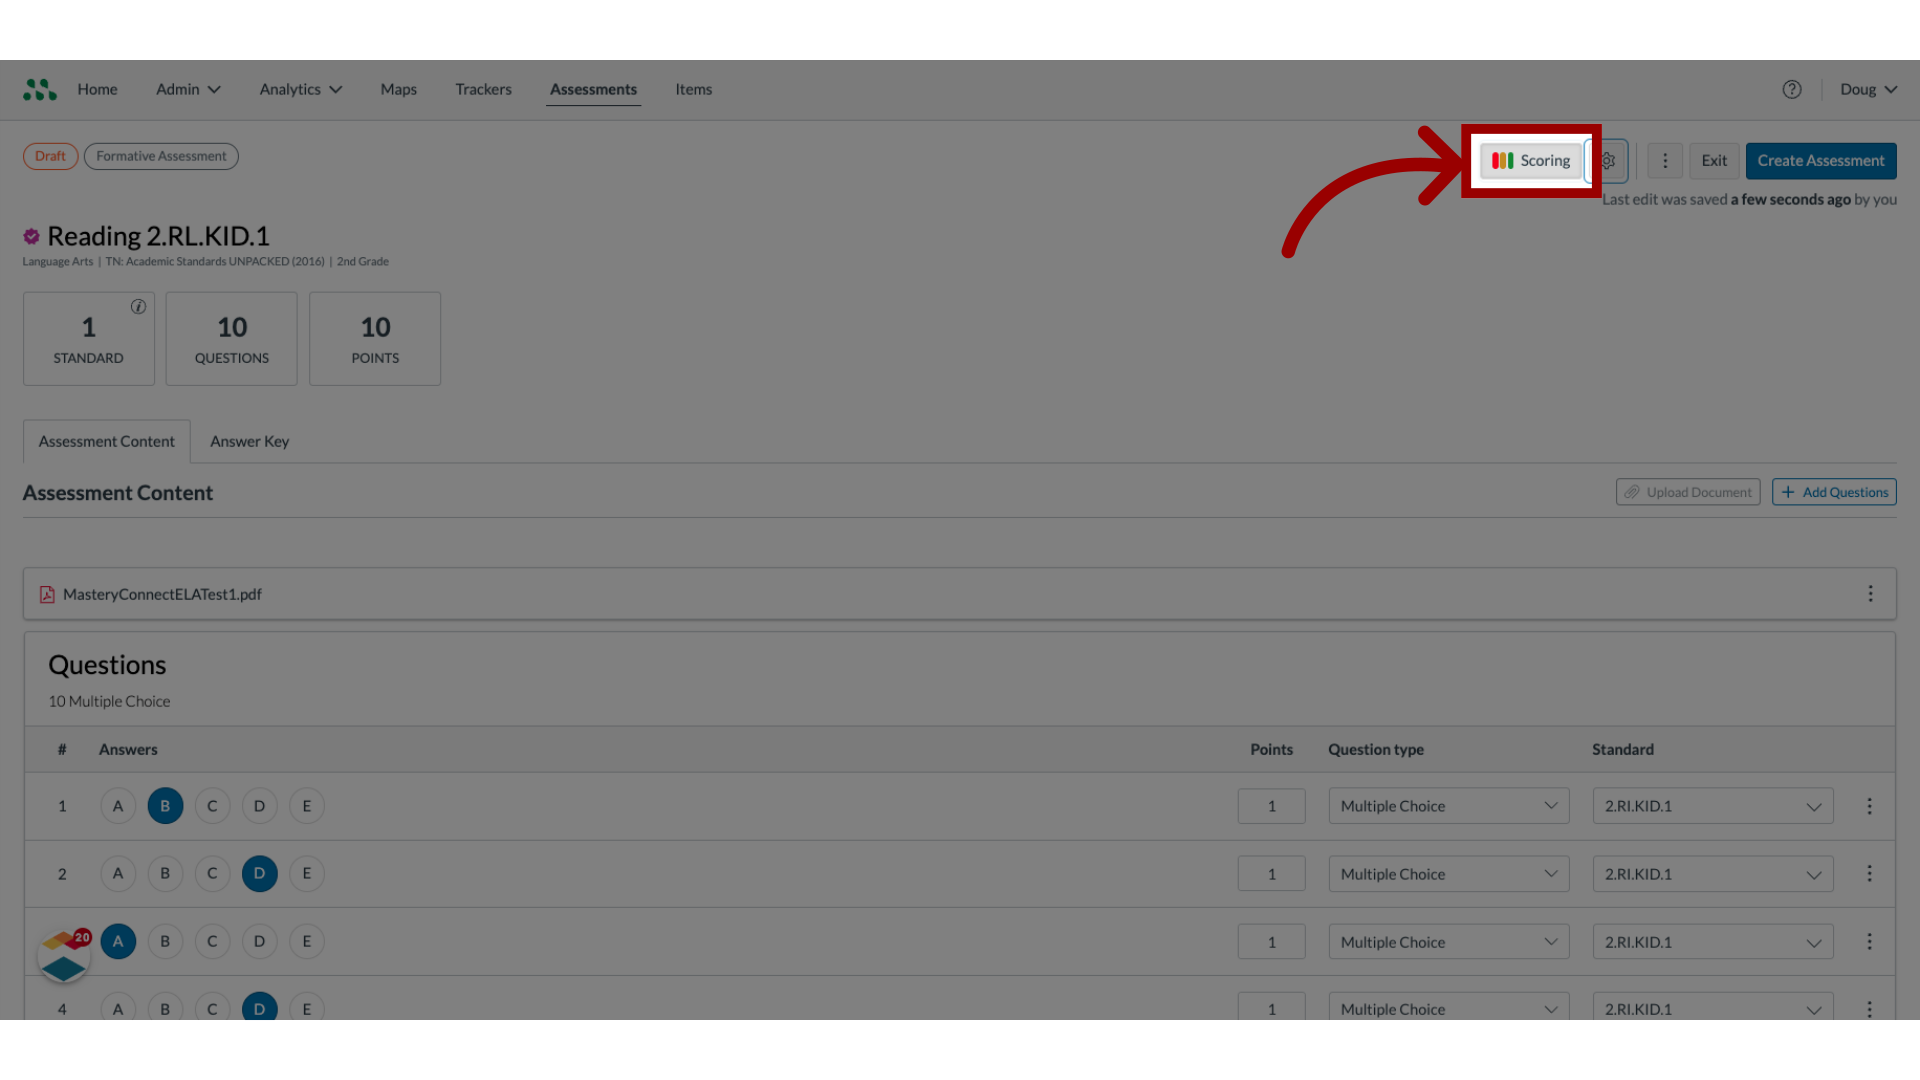
13. Edit Scoring
To edit mastery cut scores, click the Scoring button.
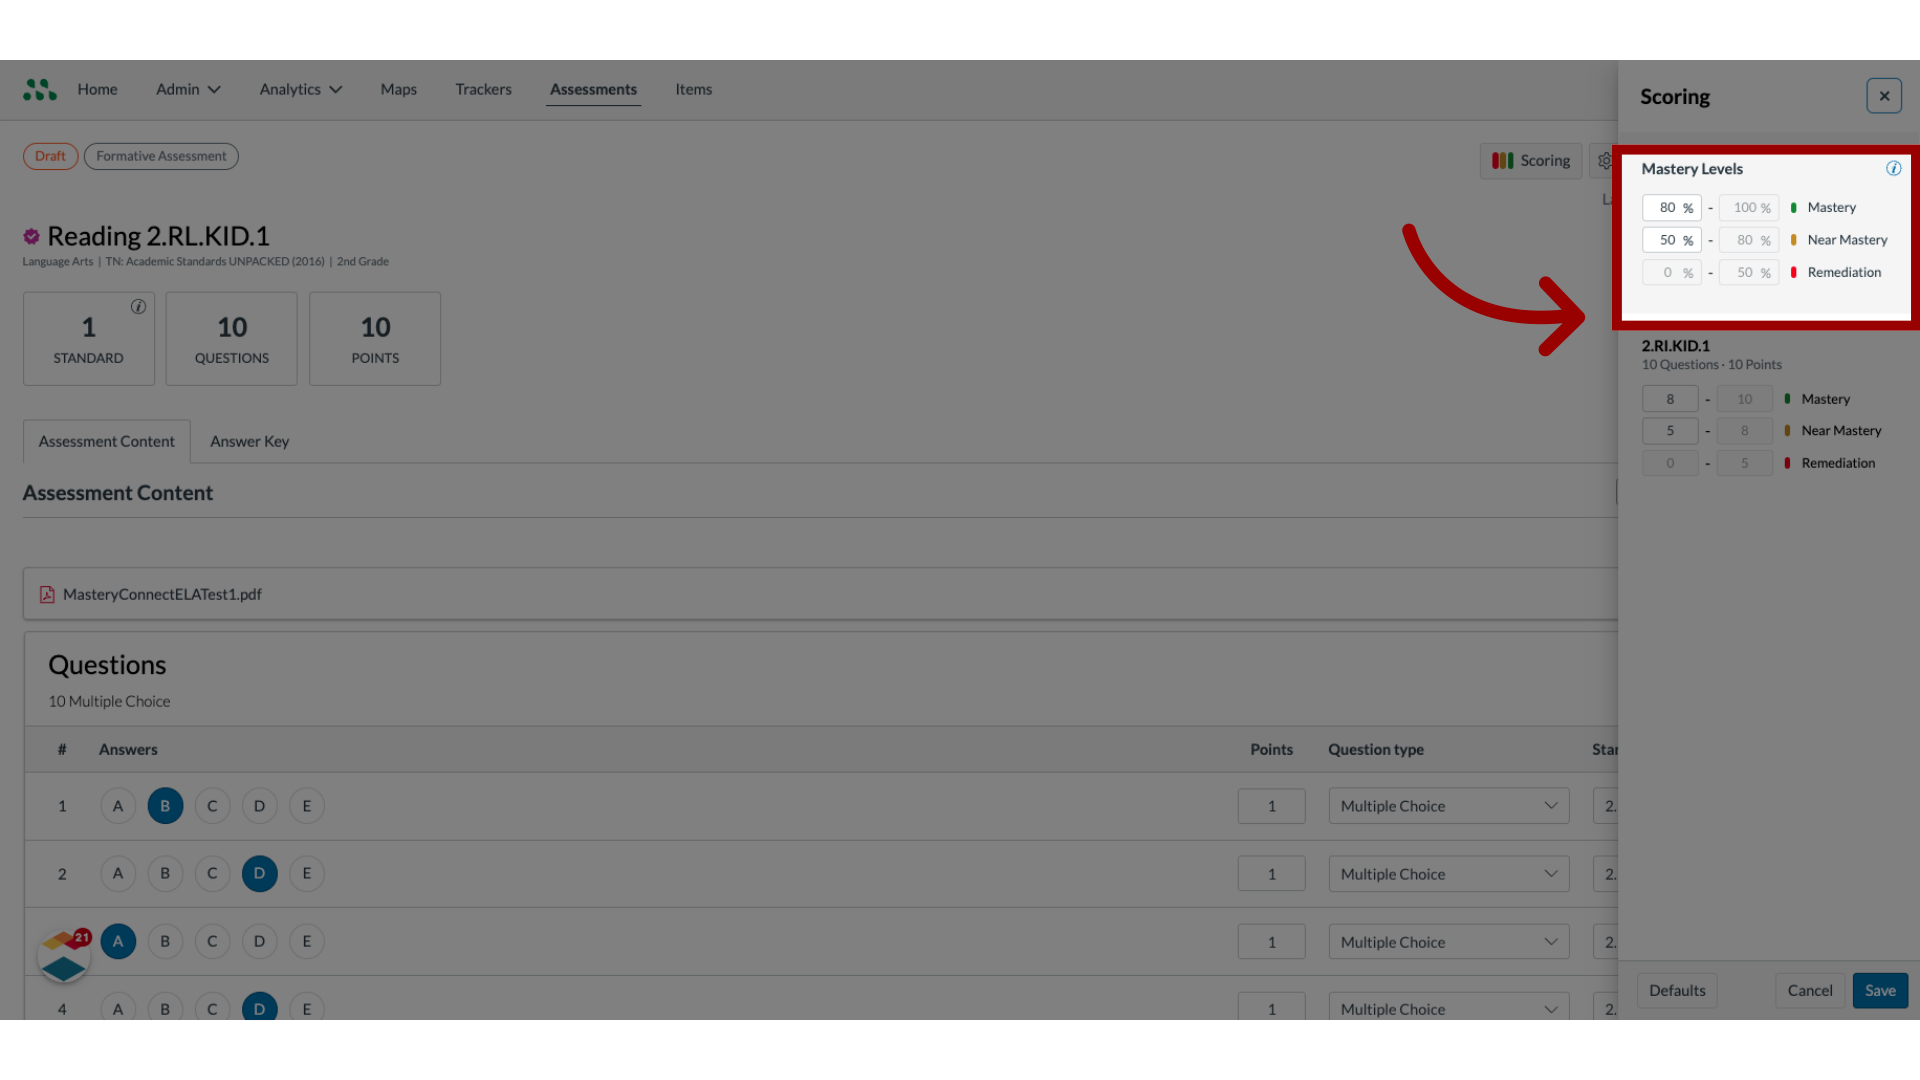
14. Edit Mastery Levels
To change mastery cut scores for the assessment, enter the new minimum scores for mastery or near mastery in the Mastery Level fields.
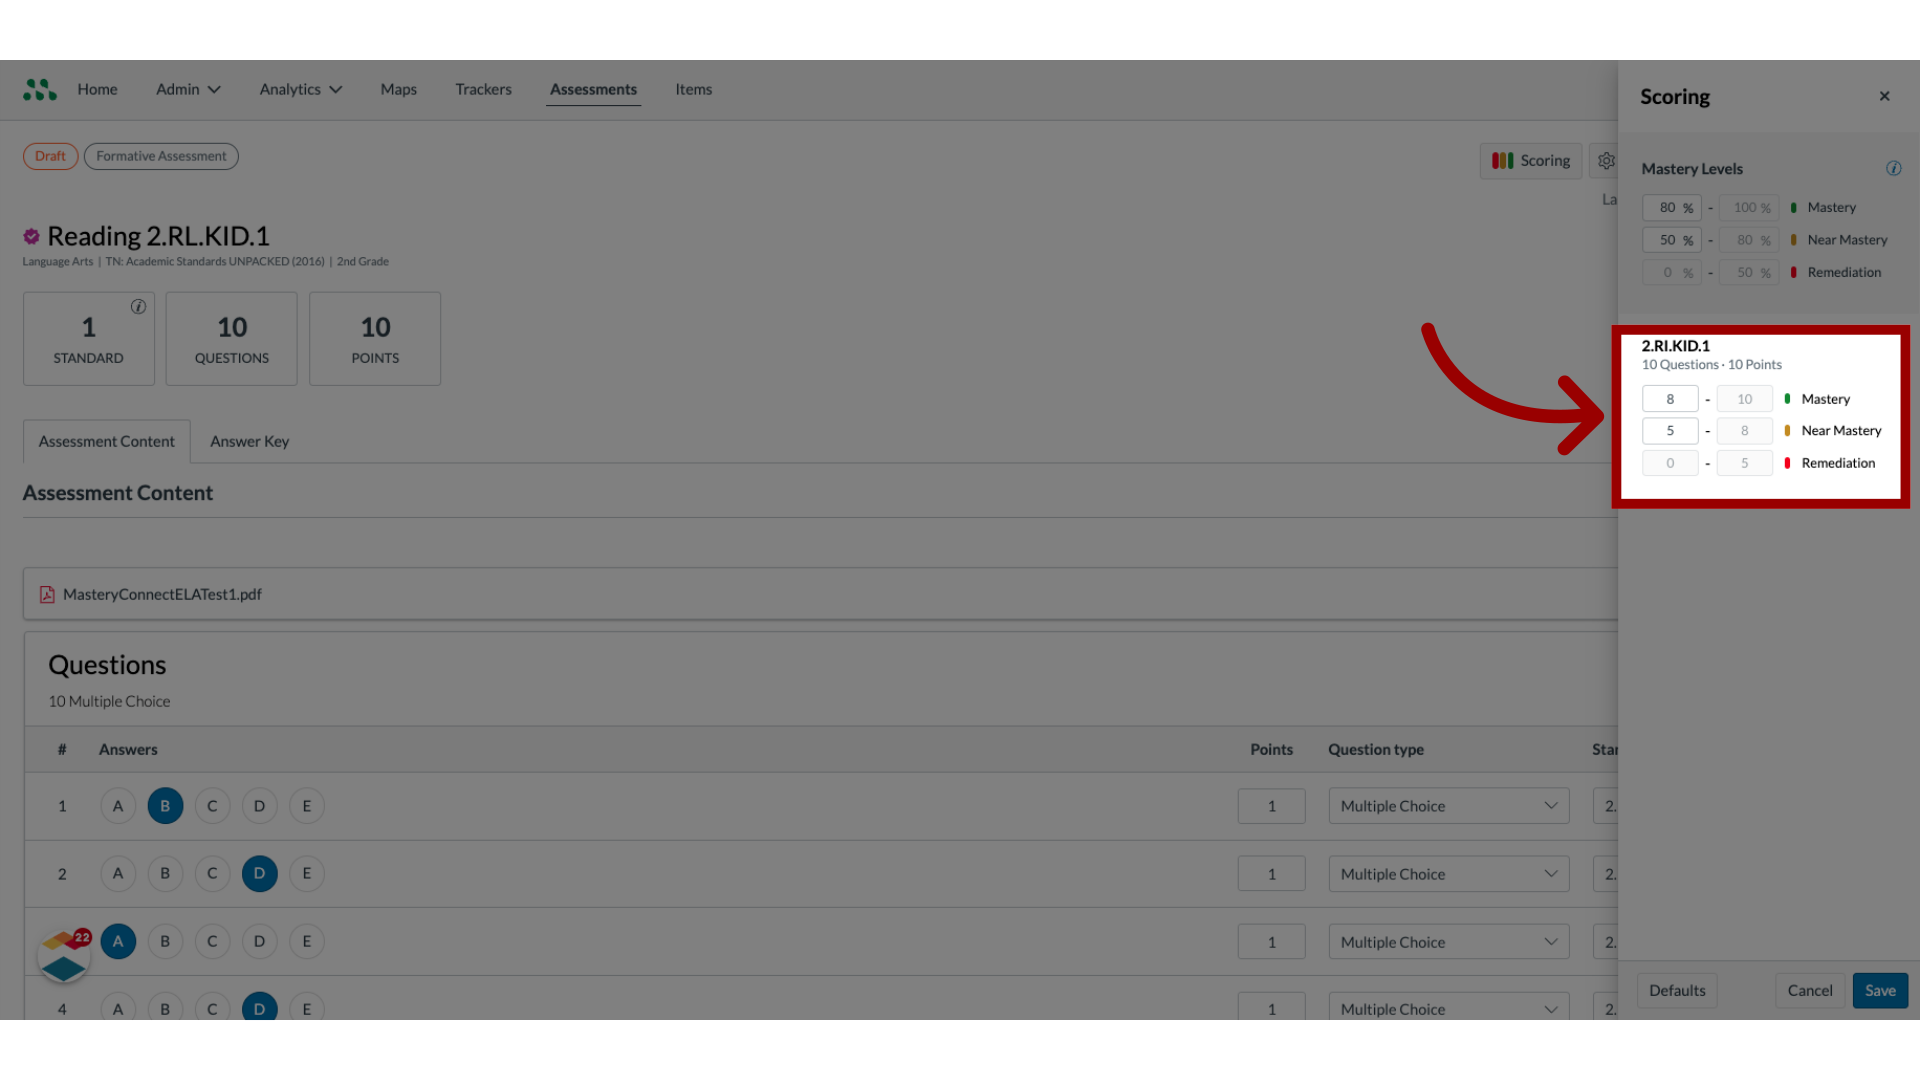
15. Edit Question Minimum Scores
If a question is worth more than one point, to adjust mastery levels for the question, enter new minimum scores for mastery and near mastery in the item's Mastery or Near Mastery fields.
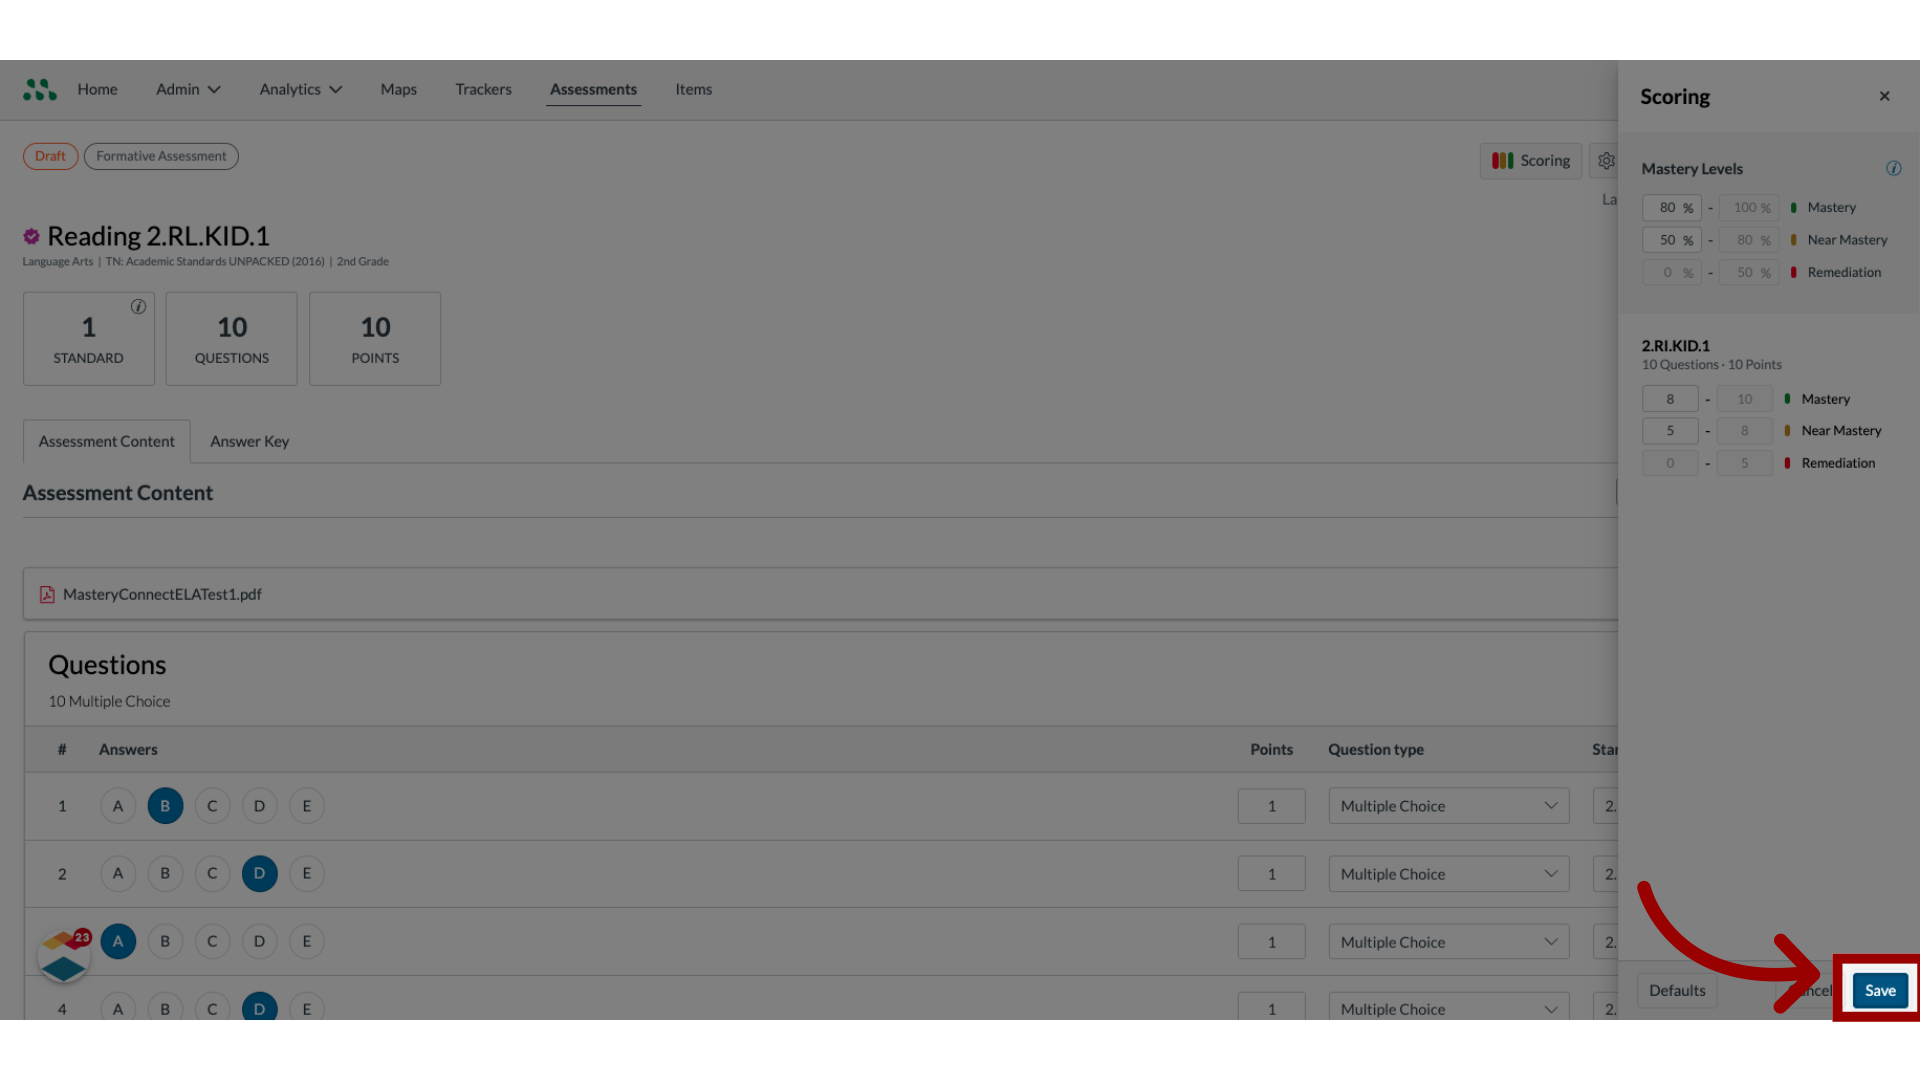
16. Save Changes
To save changes, click the Save button.
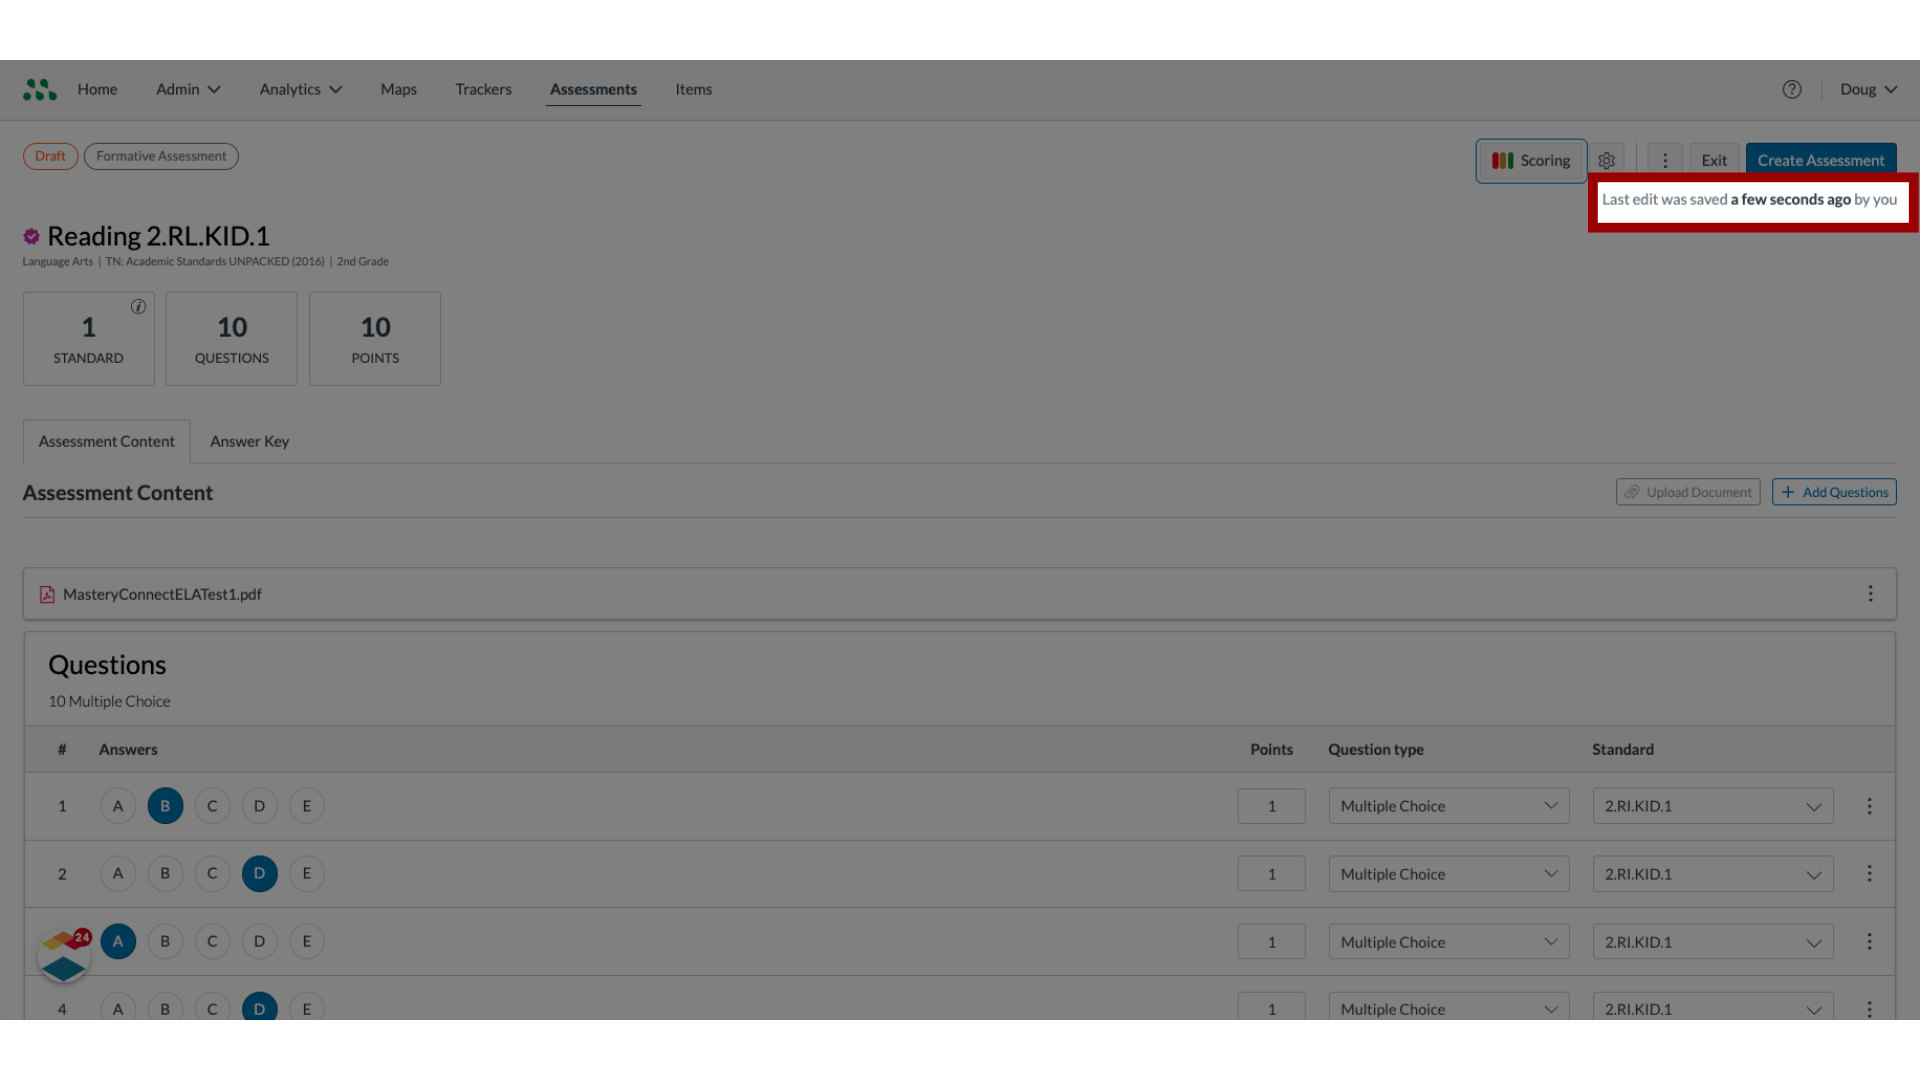
17. View Save Time
Edits are saved automatically, and the most recent save date or time is indicated.
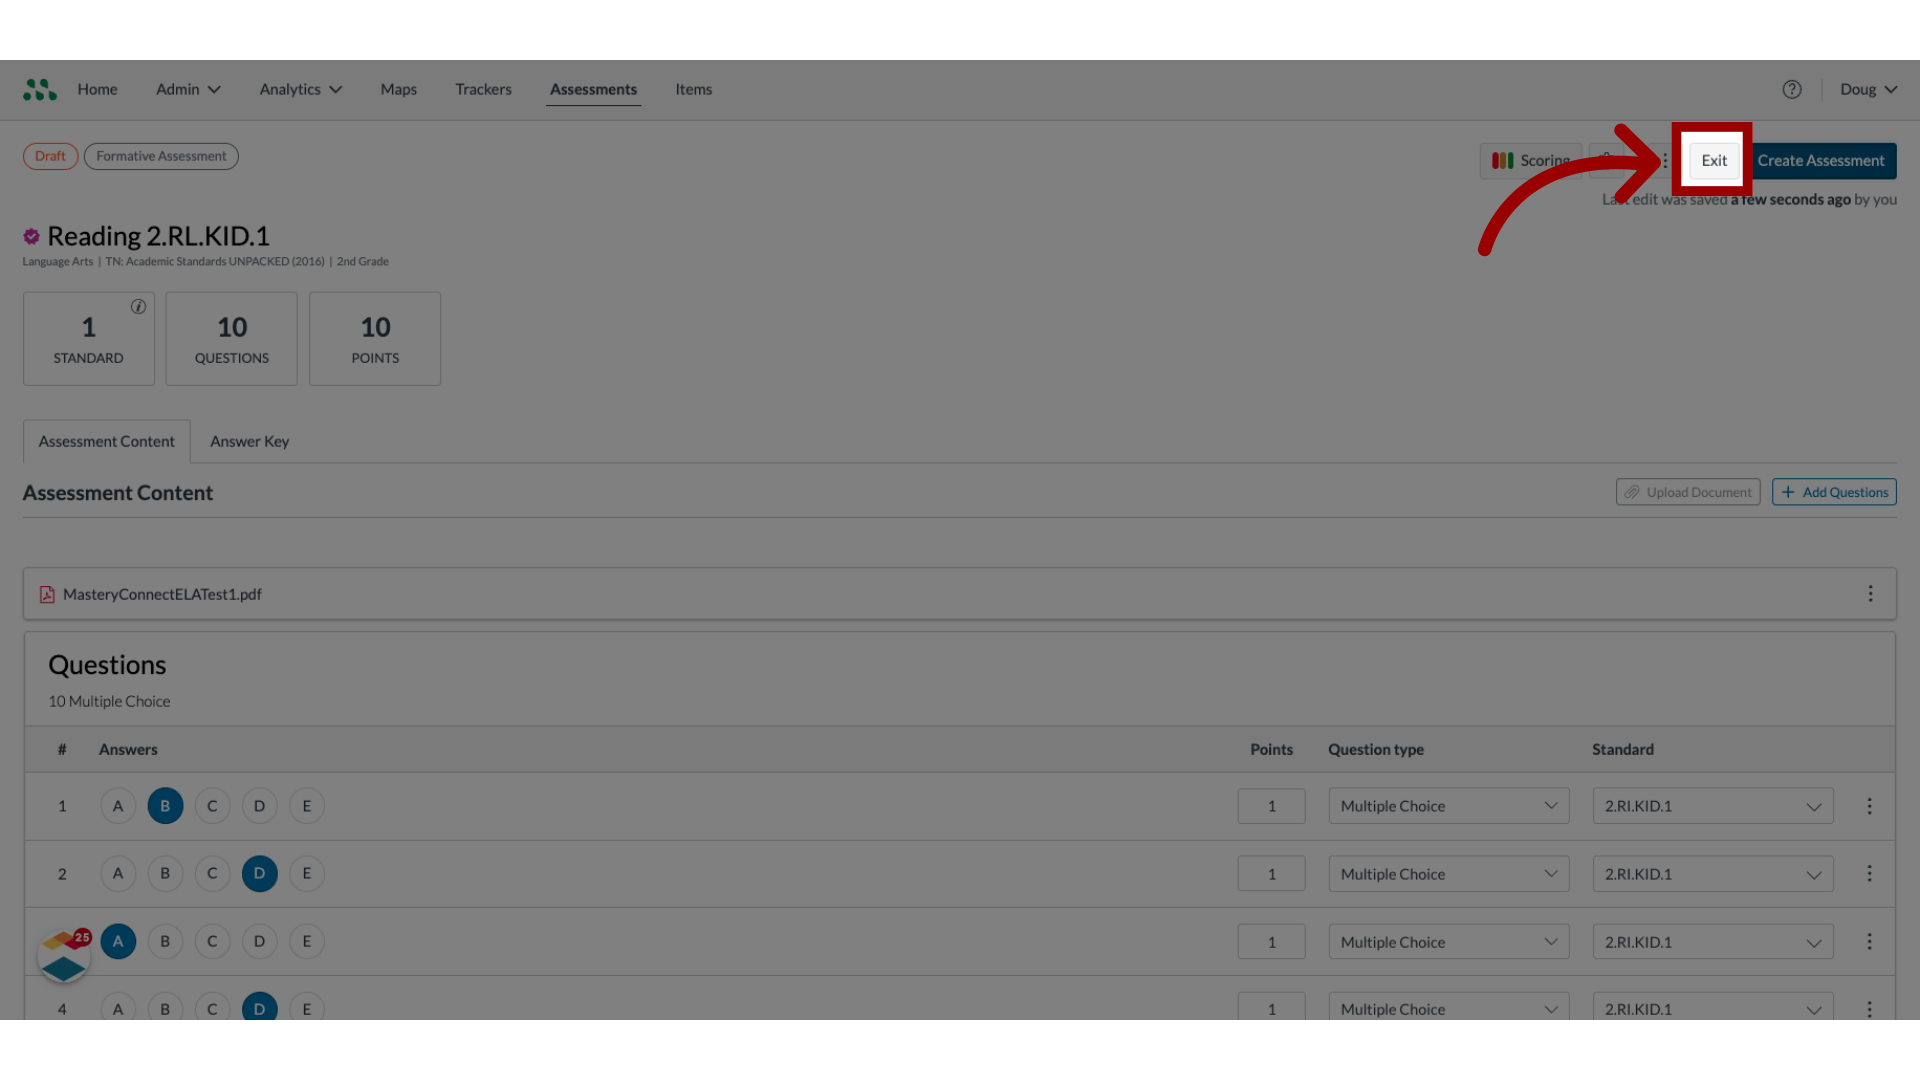
18. Exit Editor
To exit the Assessment Editor and keep the assessment in draft state, click the Exit button.
19. Create Assessment
To create the assessment, click the Create Assessment button.

The guide covered how to use the Assessment Editor in Mastery Connect.

