How do I create a document-based assessment?
In Mastery Connect you can create assessments from document-based sources and add a variety of question types. Teachers can create document-based formative assessments, and admins can create document-based formative and benchmark assessments.
Assessments can align to single or multiple standards and can be kept private, shared with your school, or across your district.
How do I create a document-based assessment?
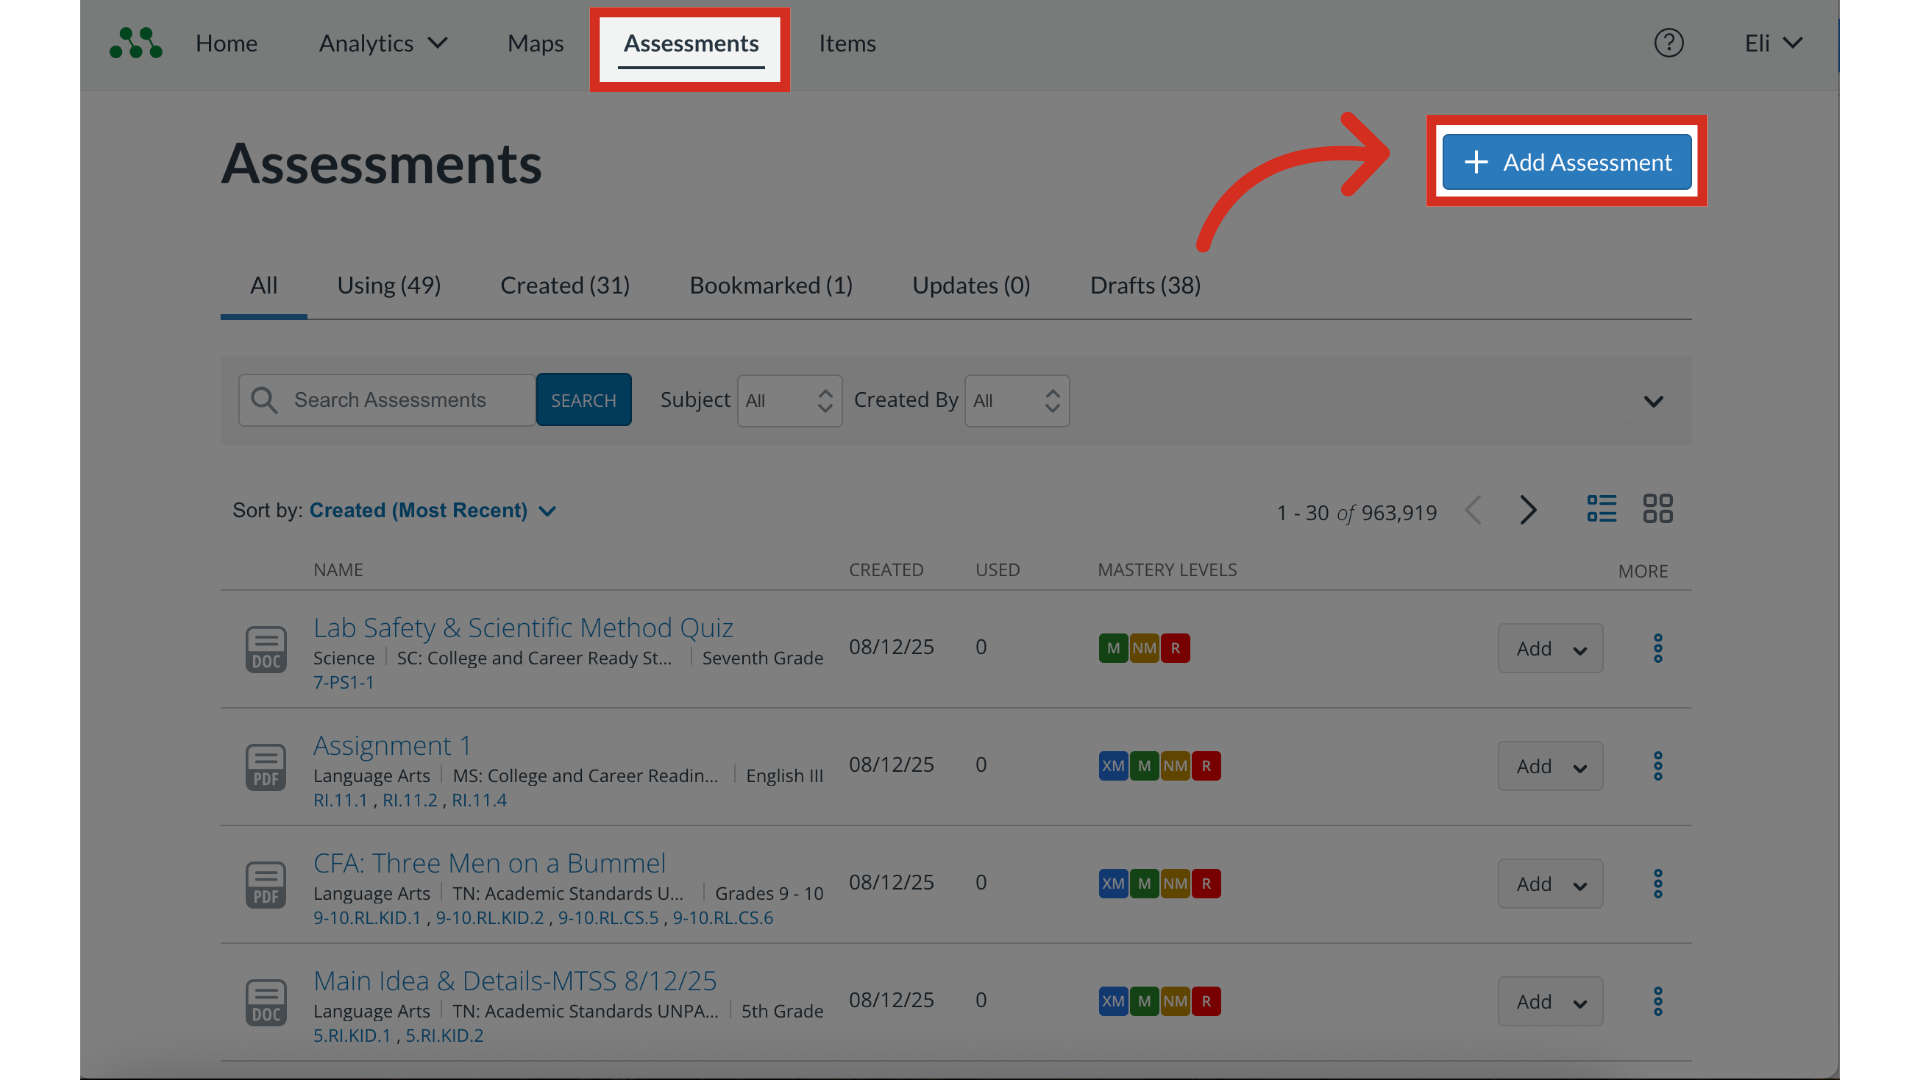
1. Add Assessment
In the Assessments page, click the Add Assessment button.
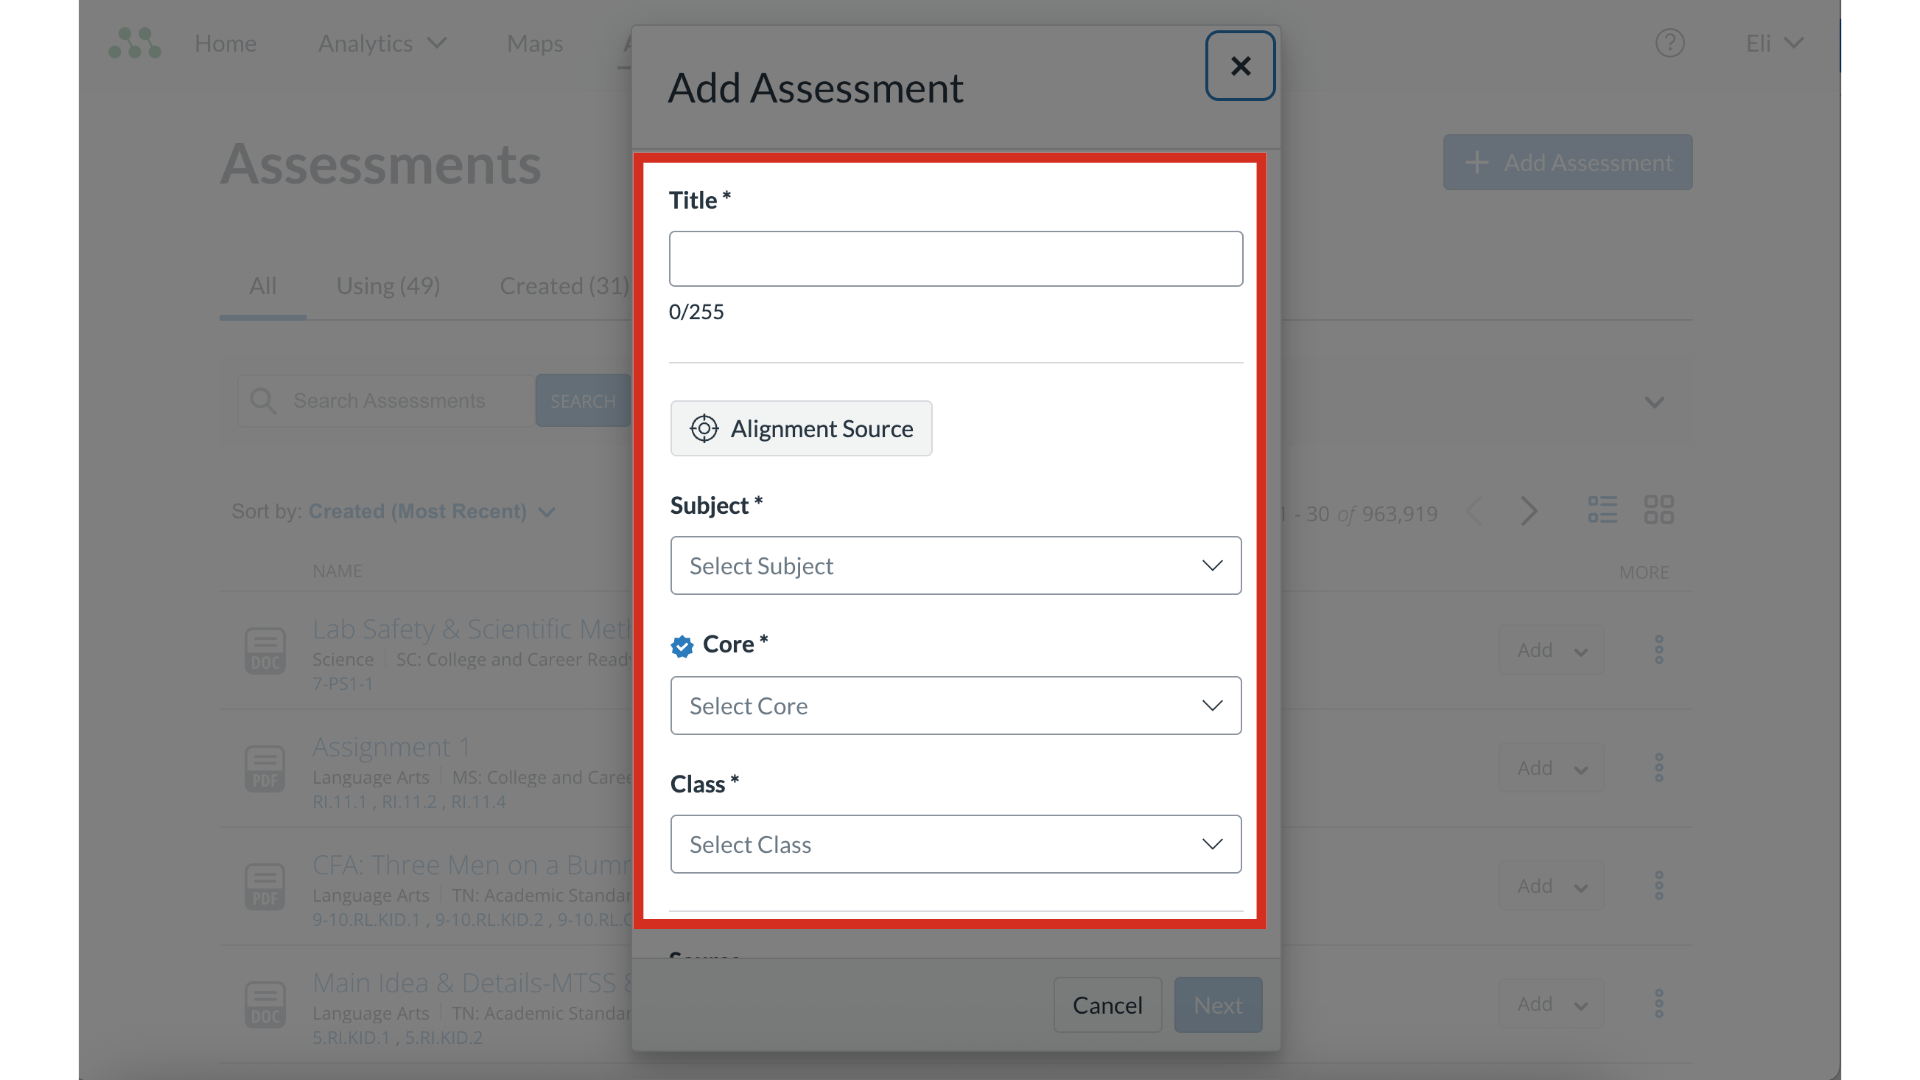
2. Enter Assessment Details
Add the Assessment Title, Alignment Score, Subject, Core and Class.
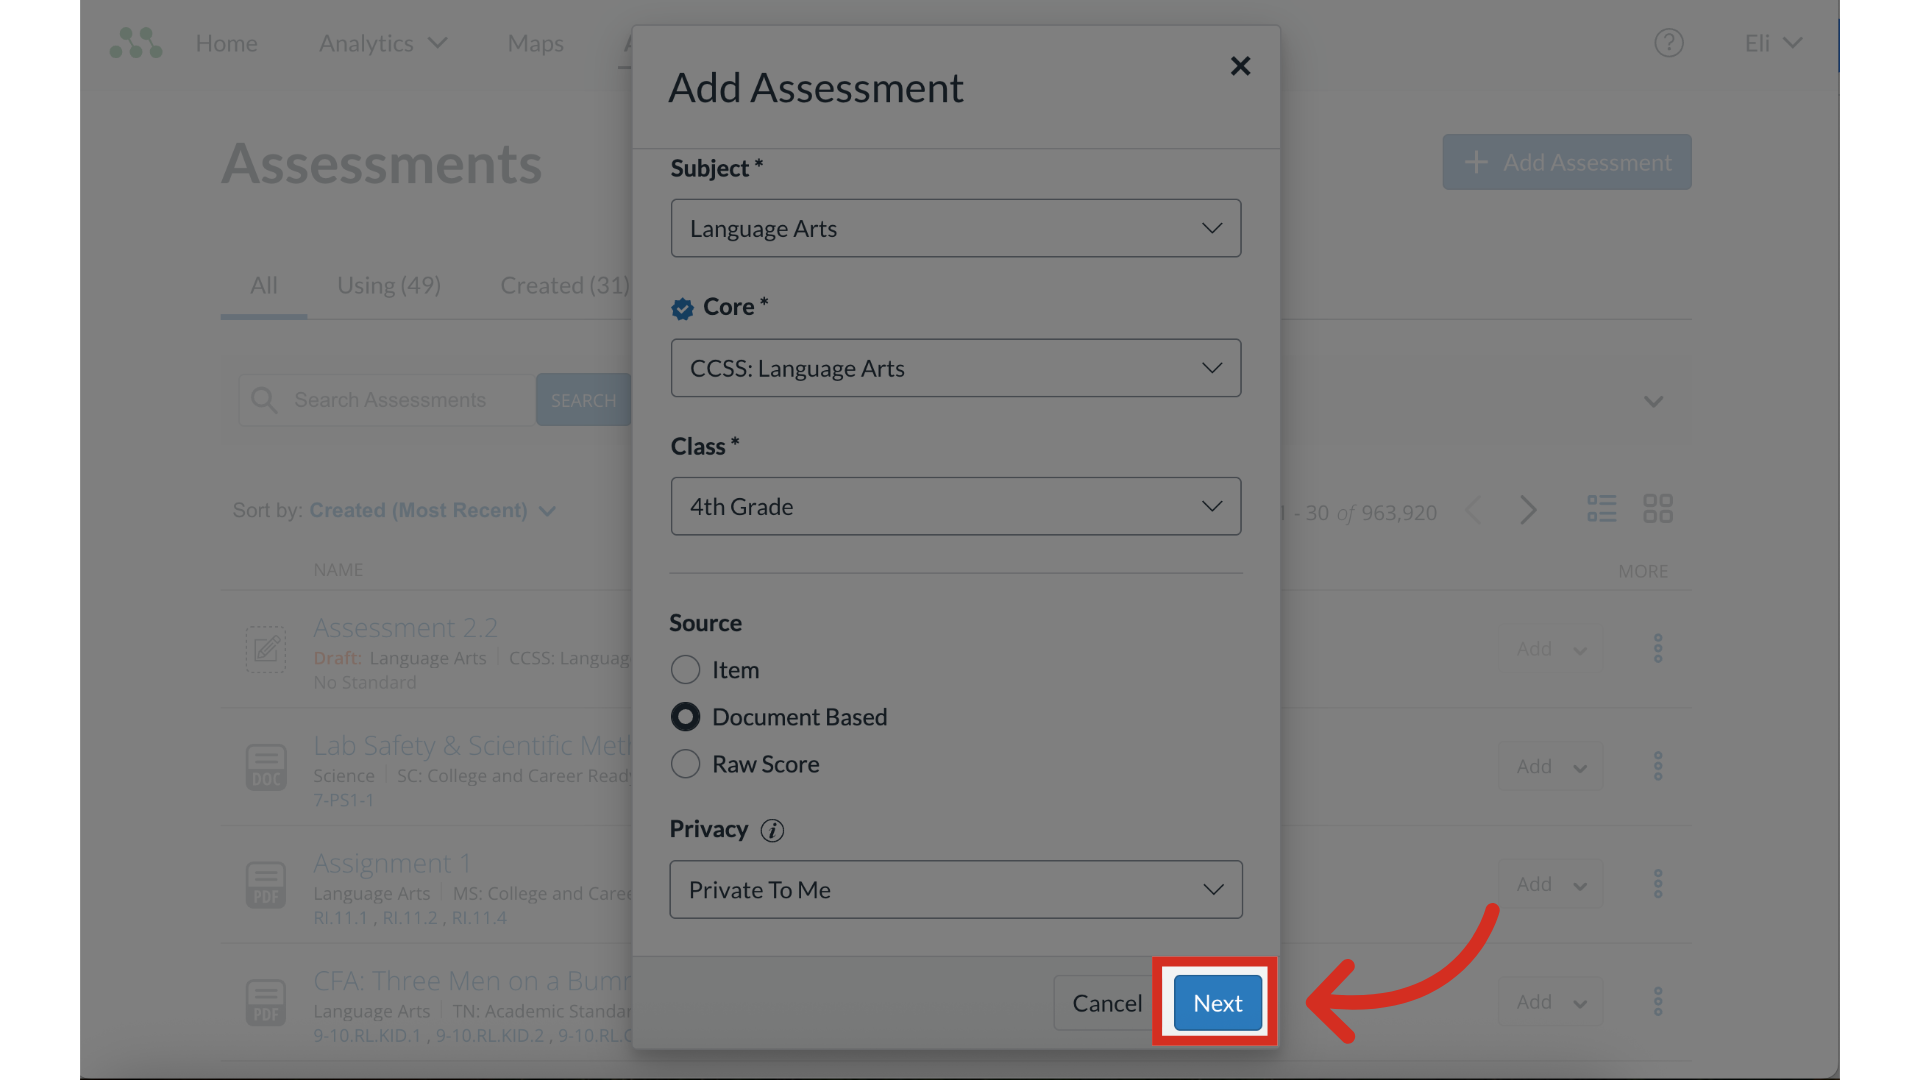
3. Add Source
To create a Document Based Assessment, click the Document Based radio button.

4. Create Assessment
Then click the Next button.
5. View Assessment Editor
When you click the next button for the assessment details, the Assessment Editor displays.
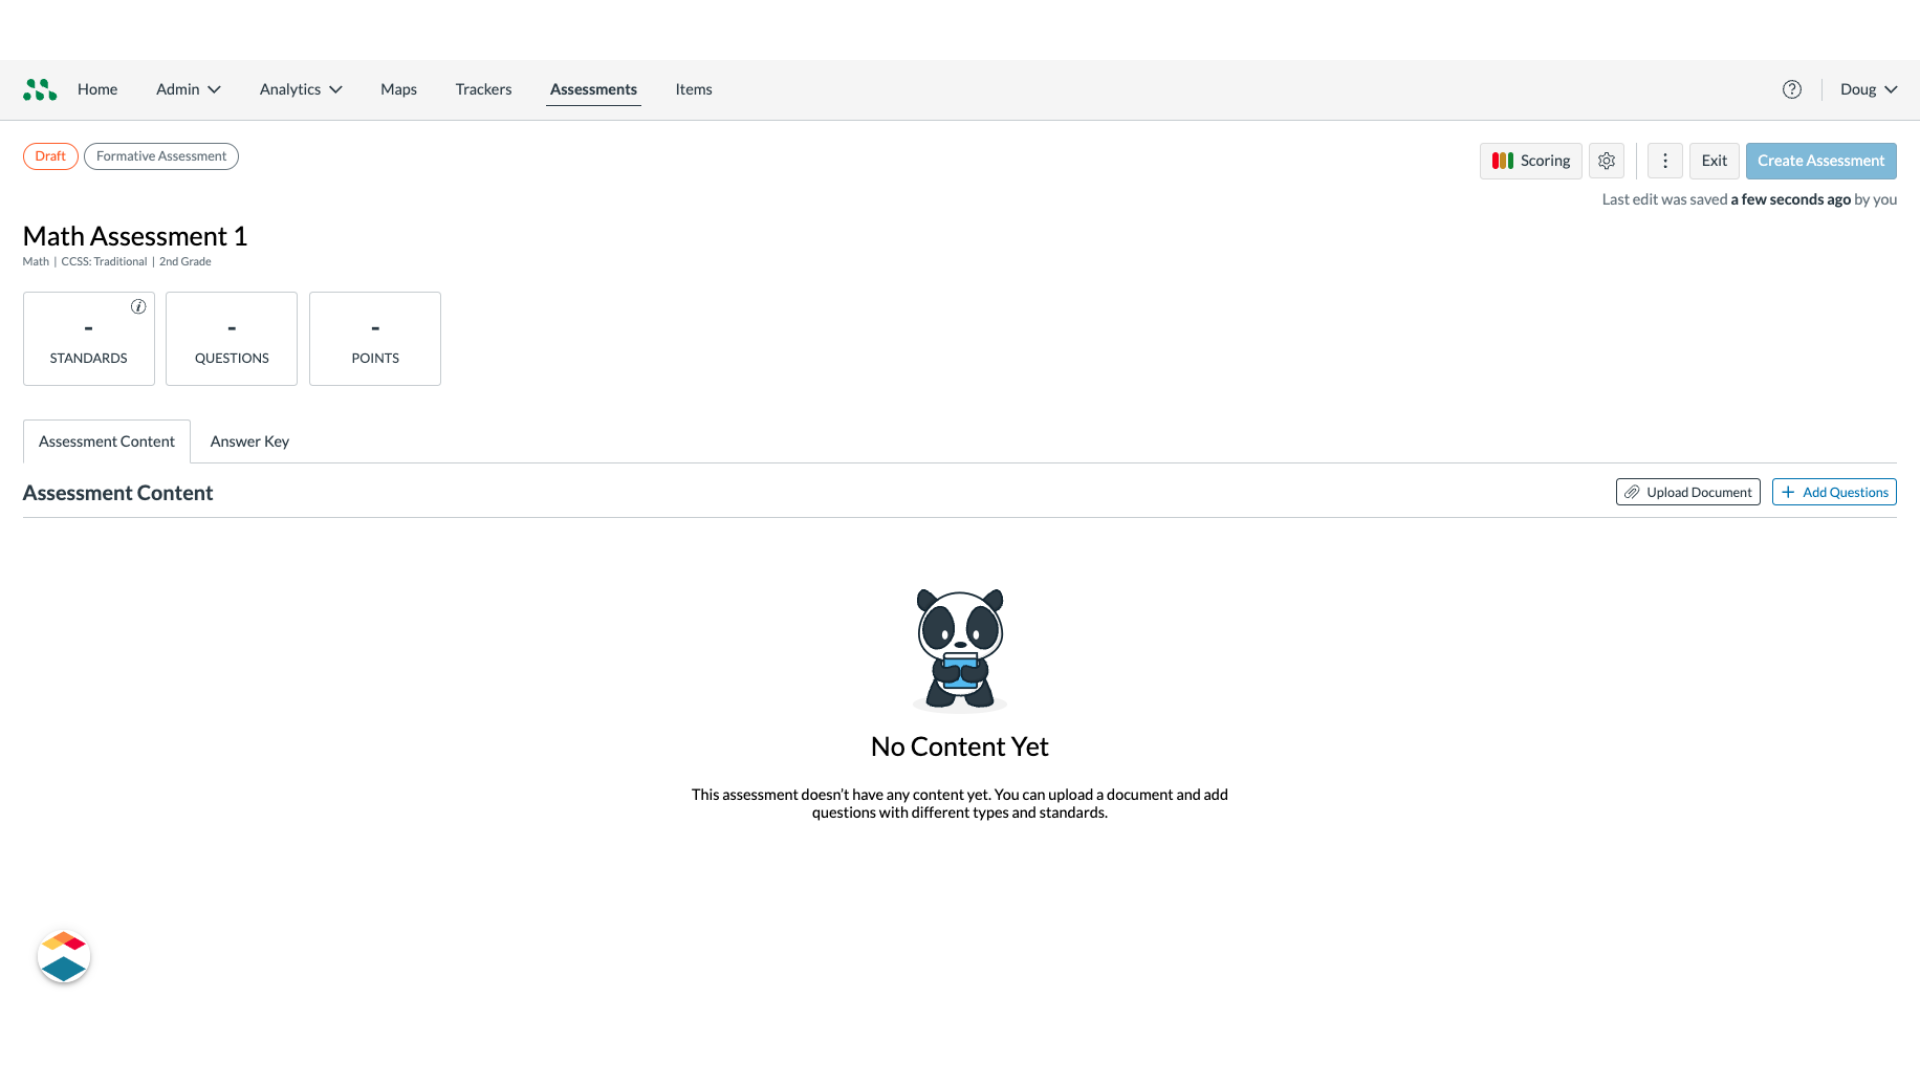
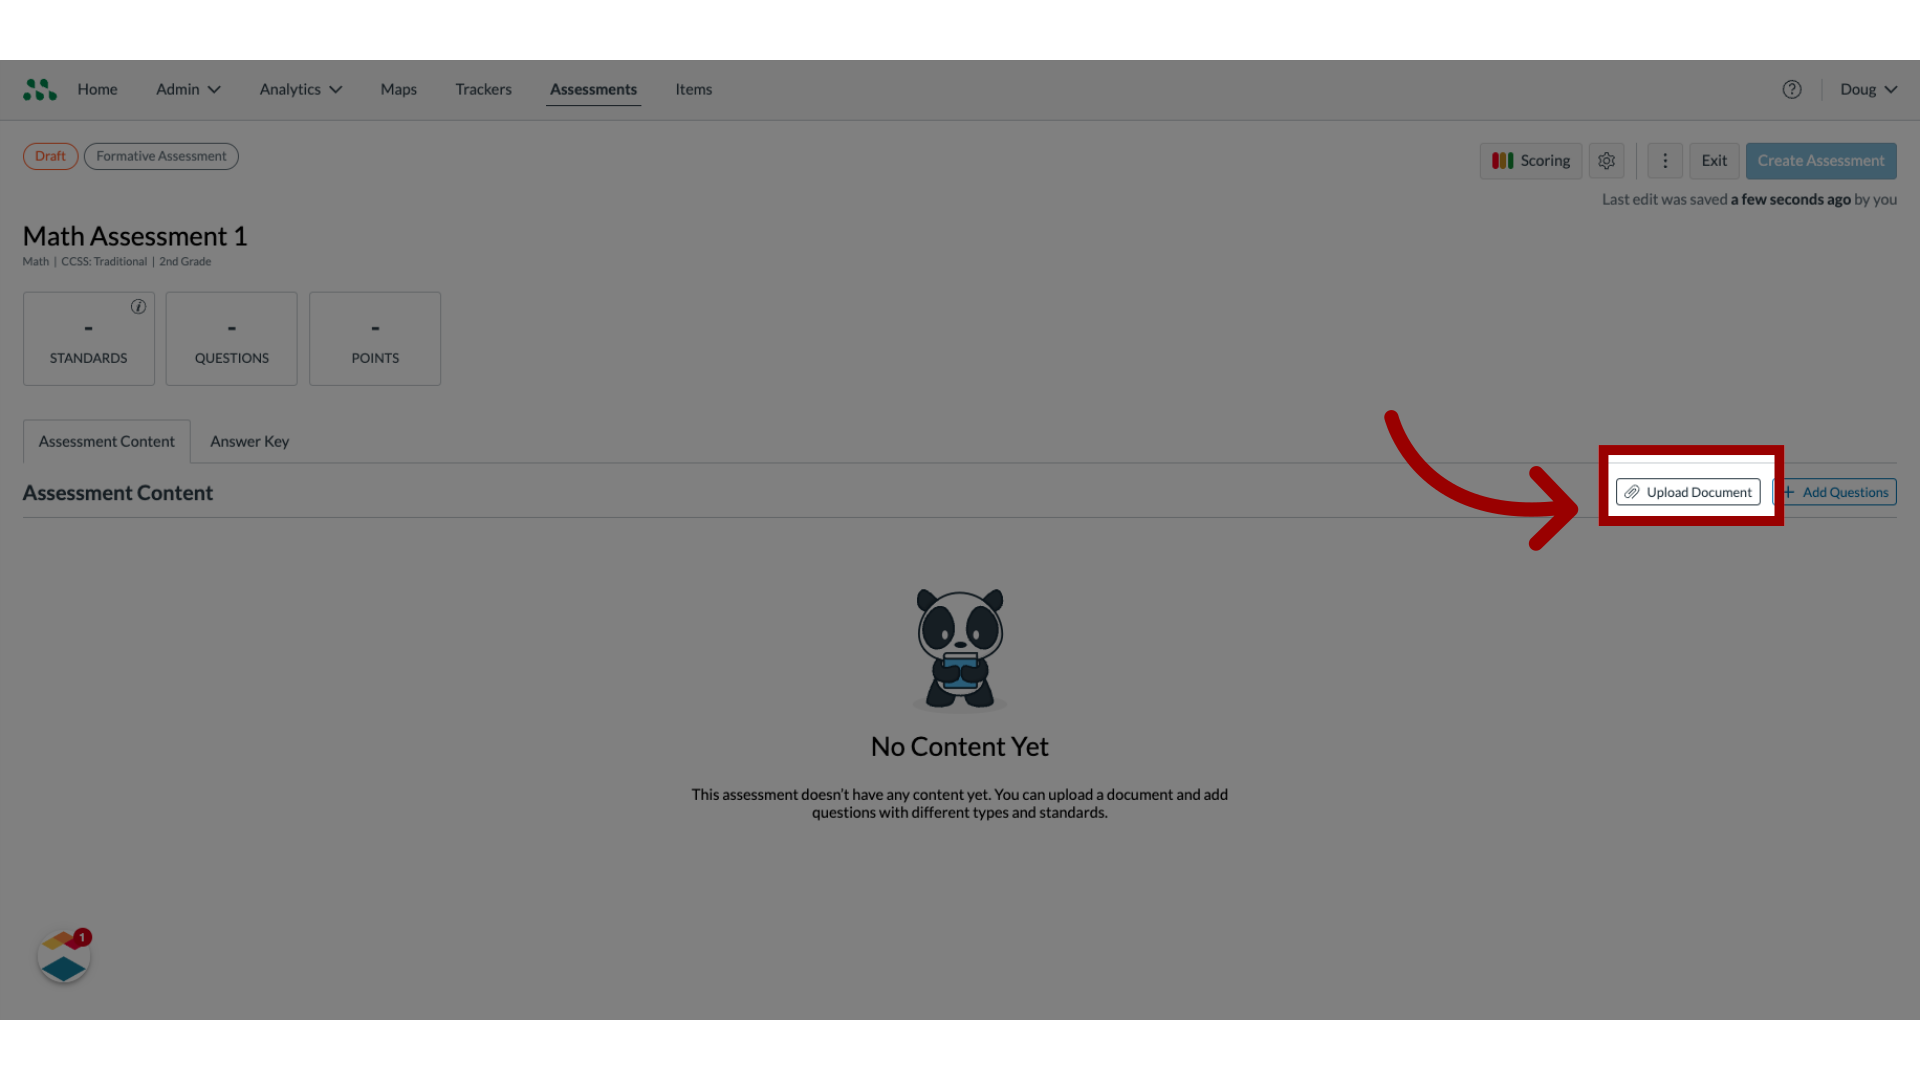
6. Upload Document
To upload a document to the assessment, click the Upload Document button.
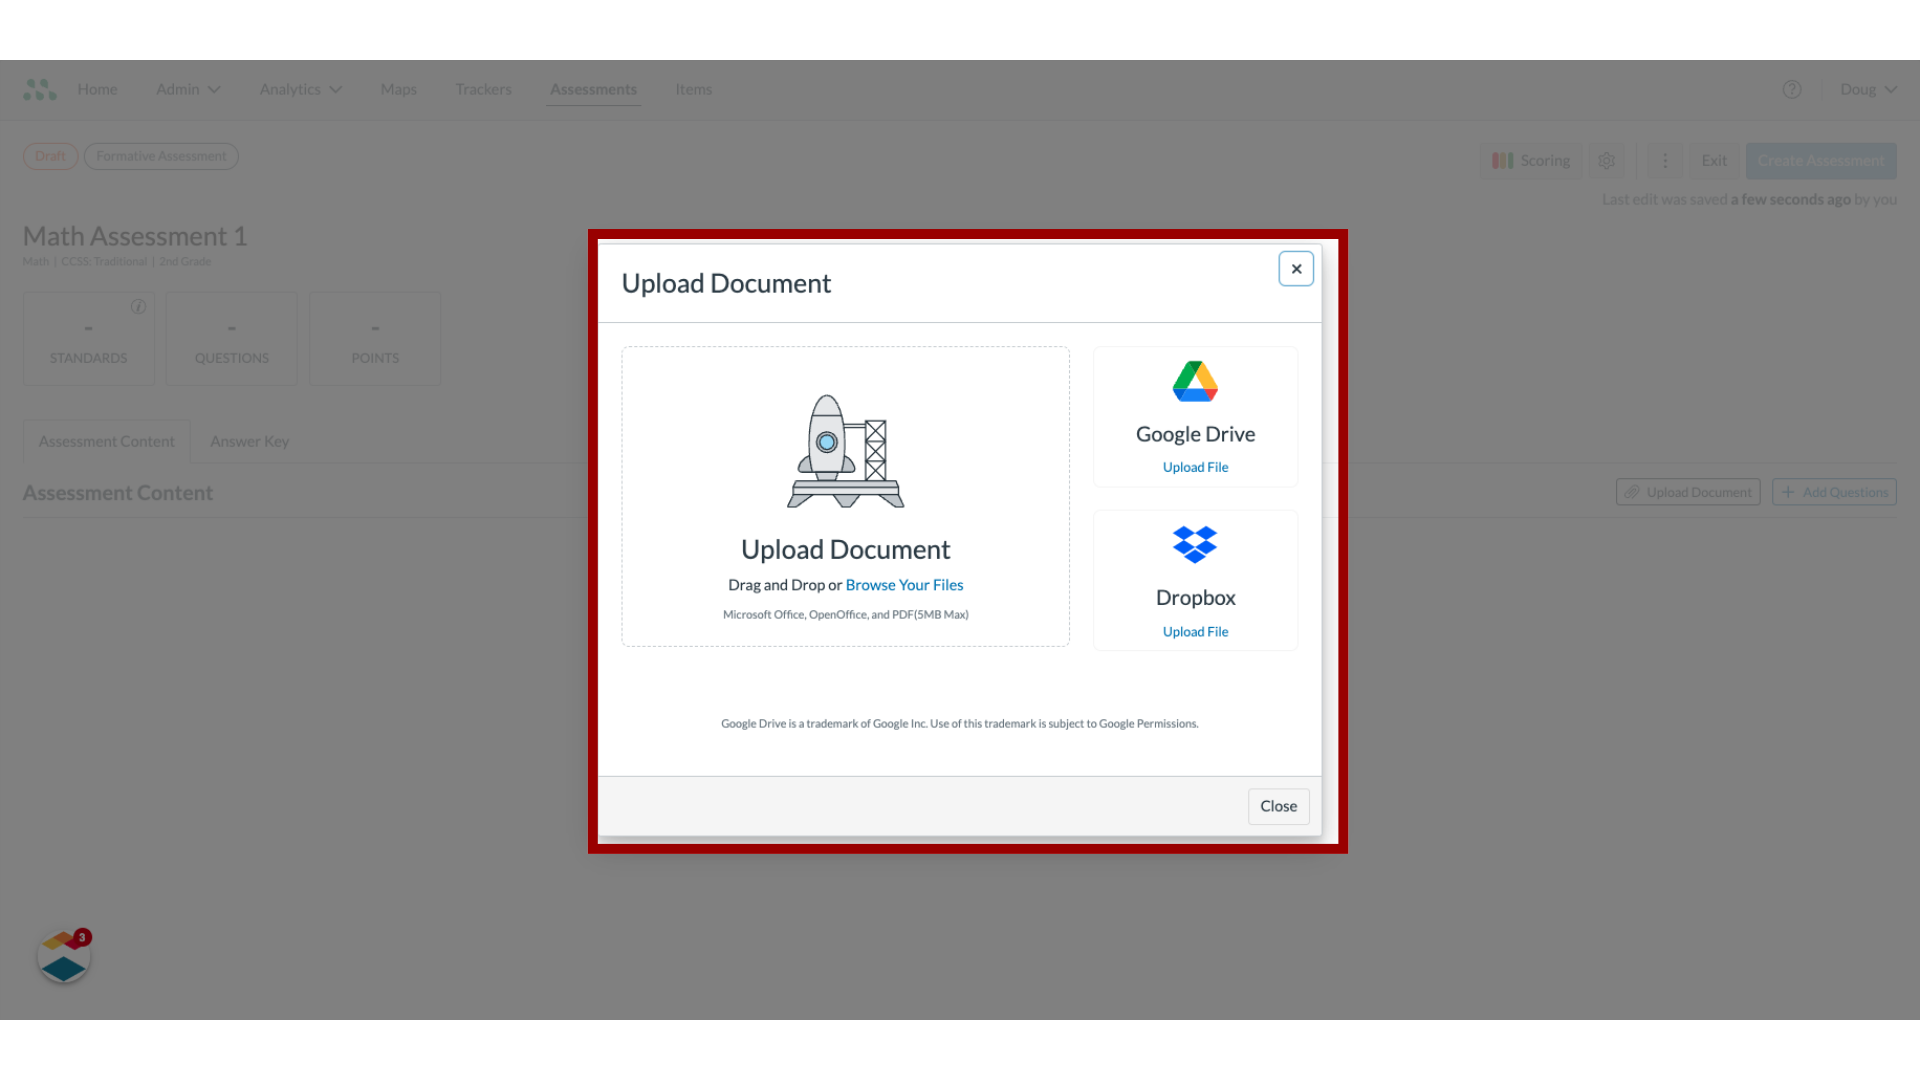
7. Select Upload Source
To upload a document from your computer, click the Upload Document button. To upload a file from Google Drive, click the Google Drive button. To upload a file from Dropbox, click the Dropbox button.
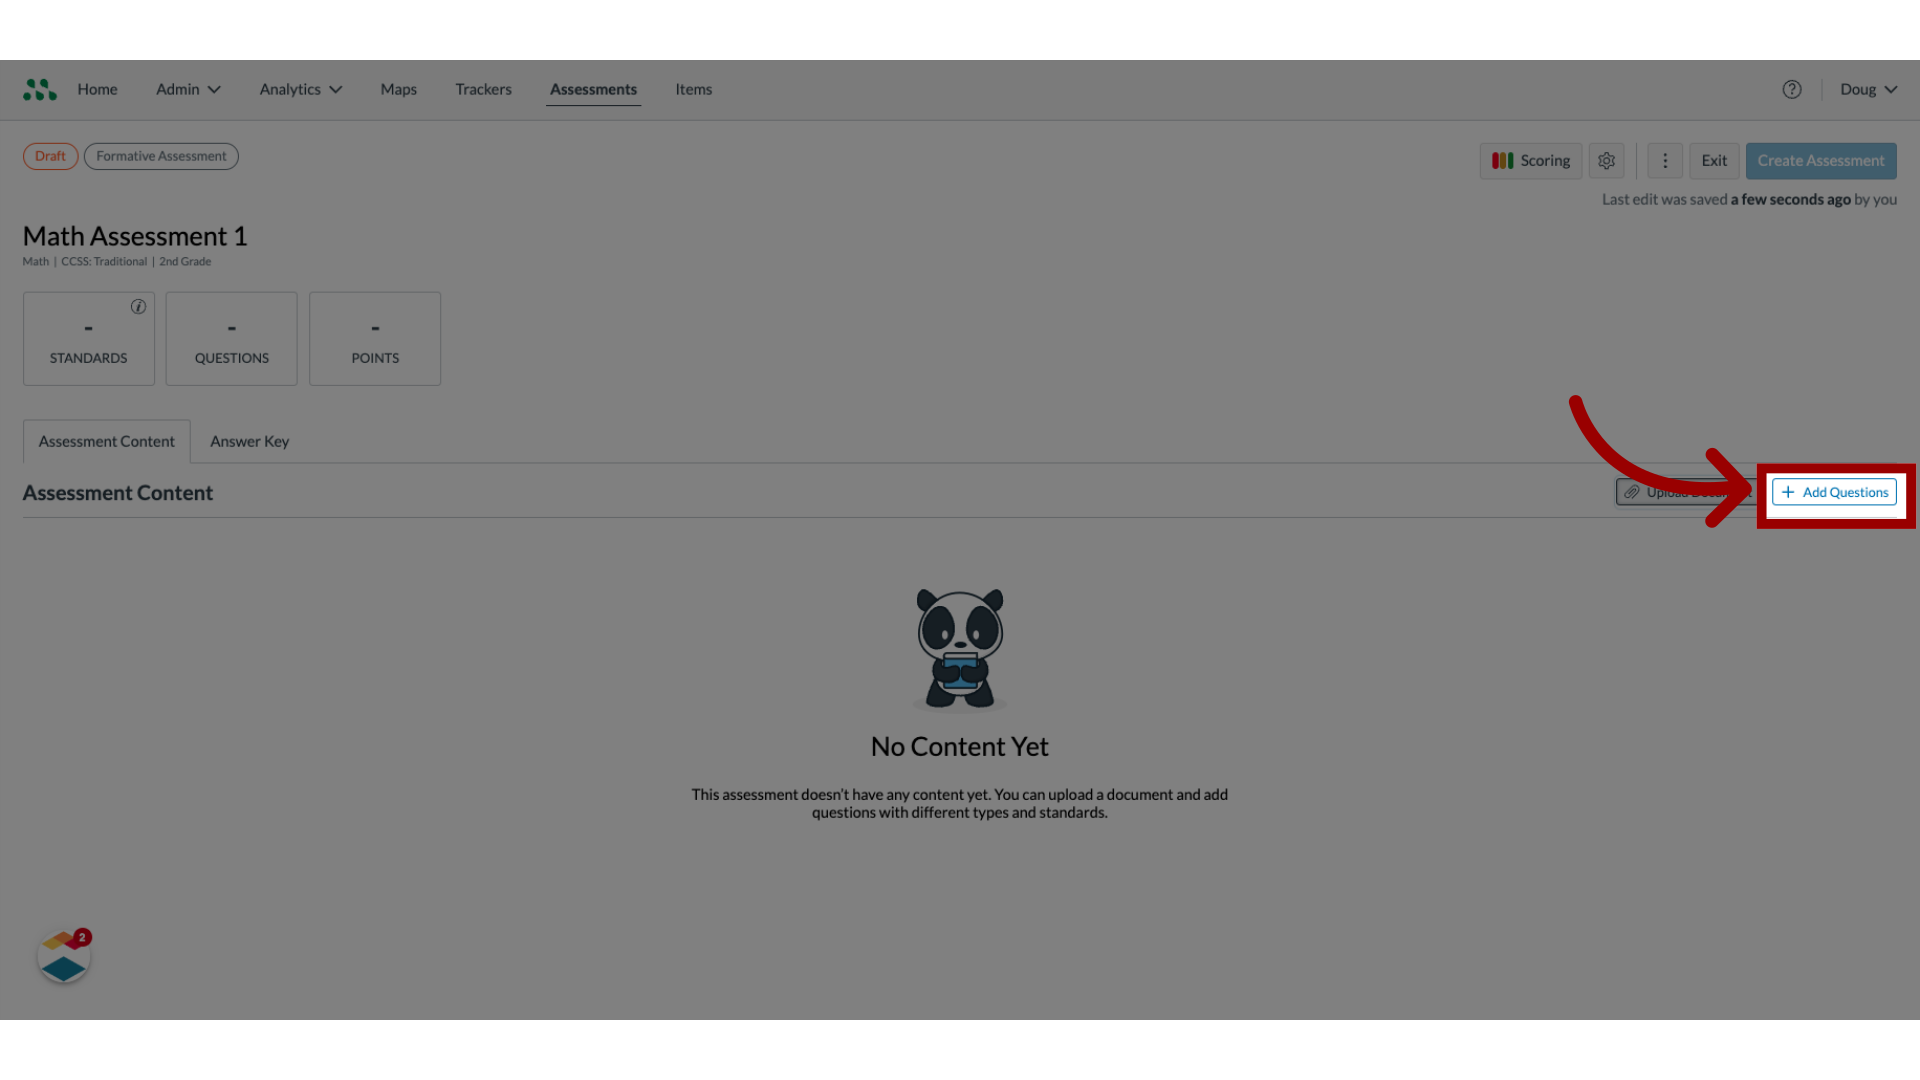
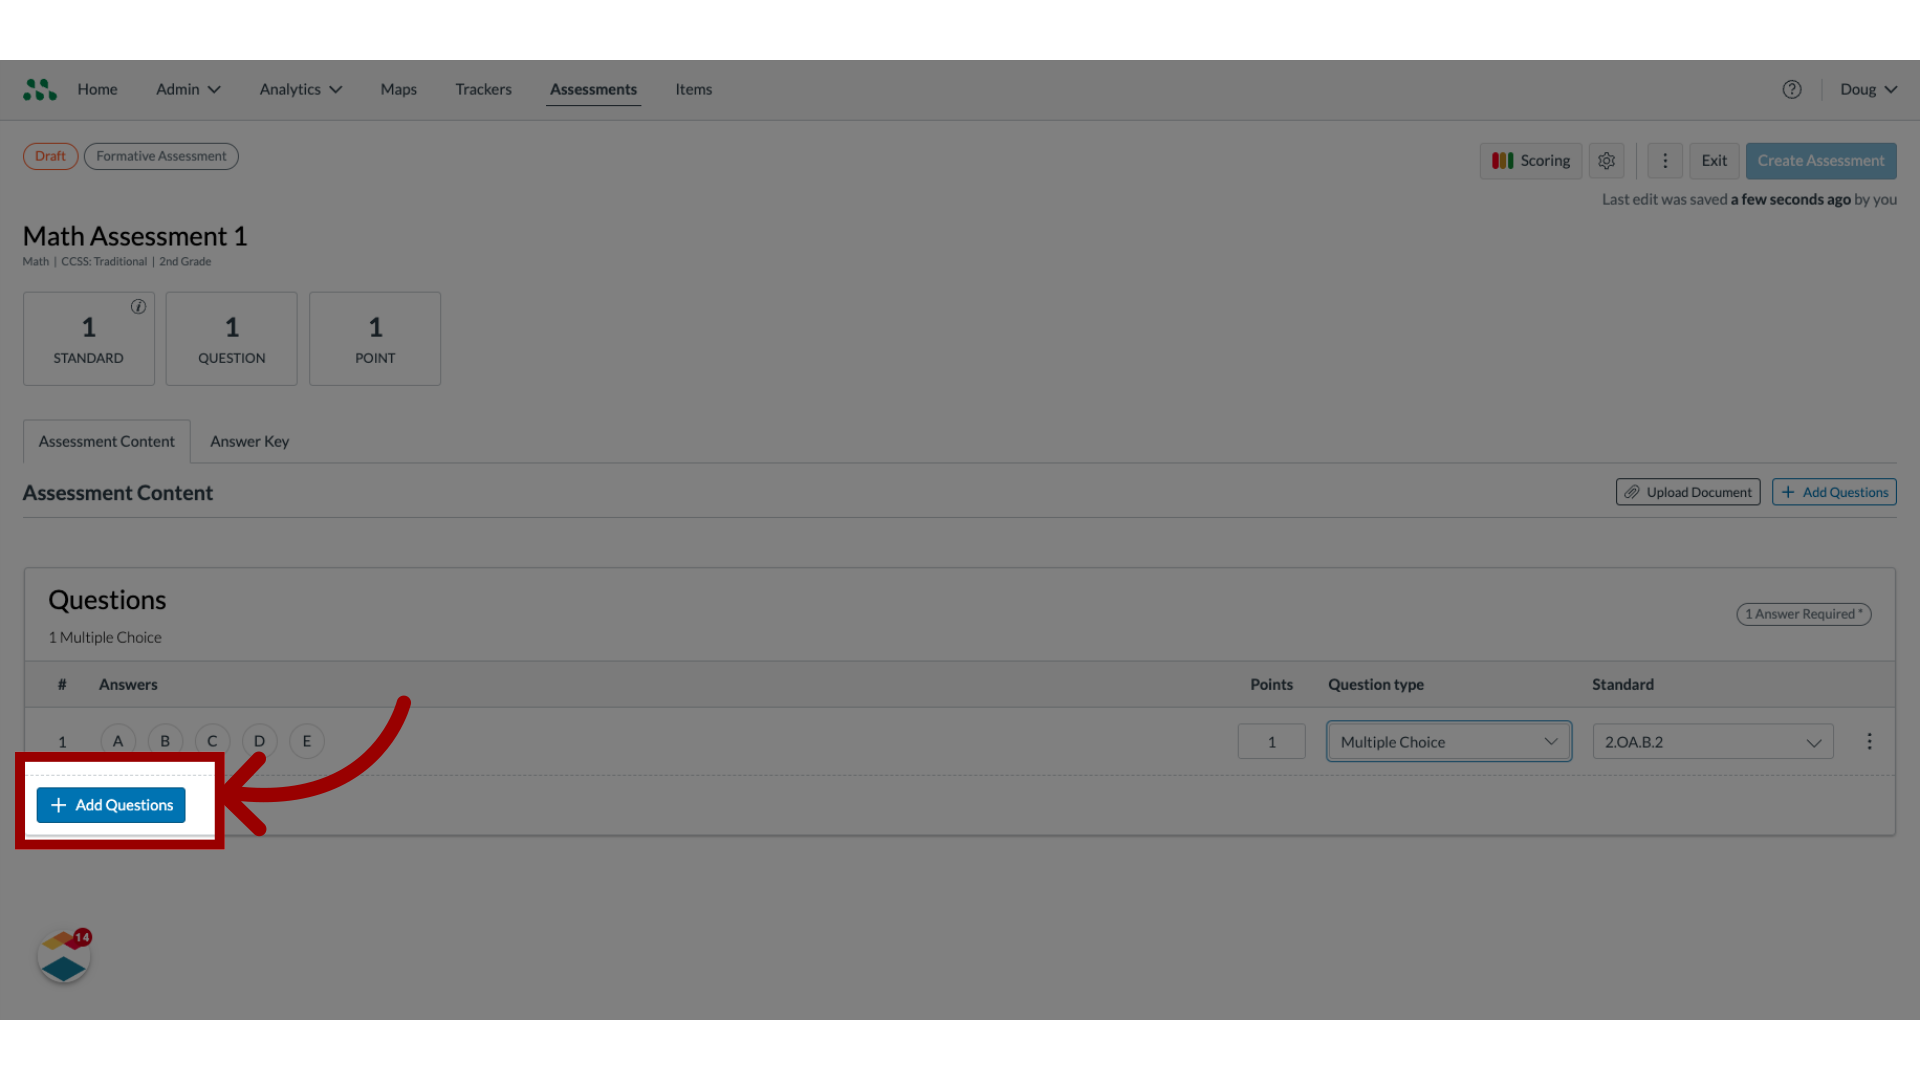
8. Open Add Questions
To add questions to the assessment, click the Add Questions button.
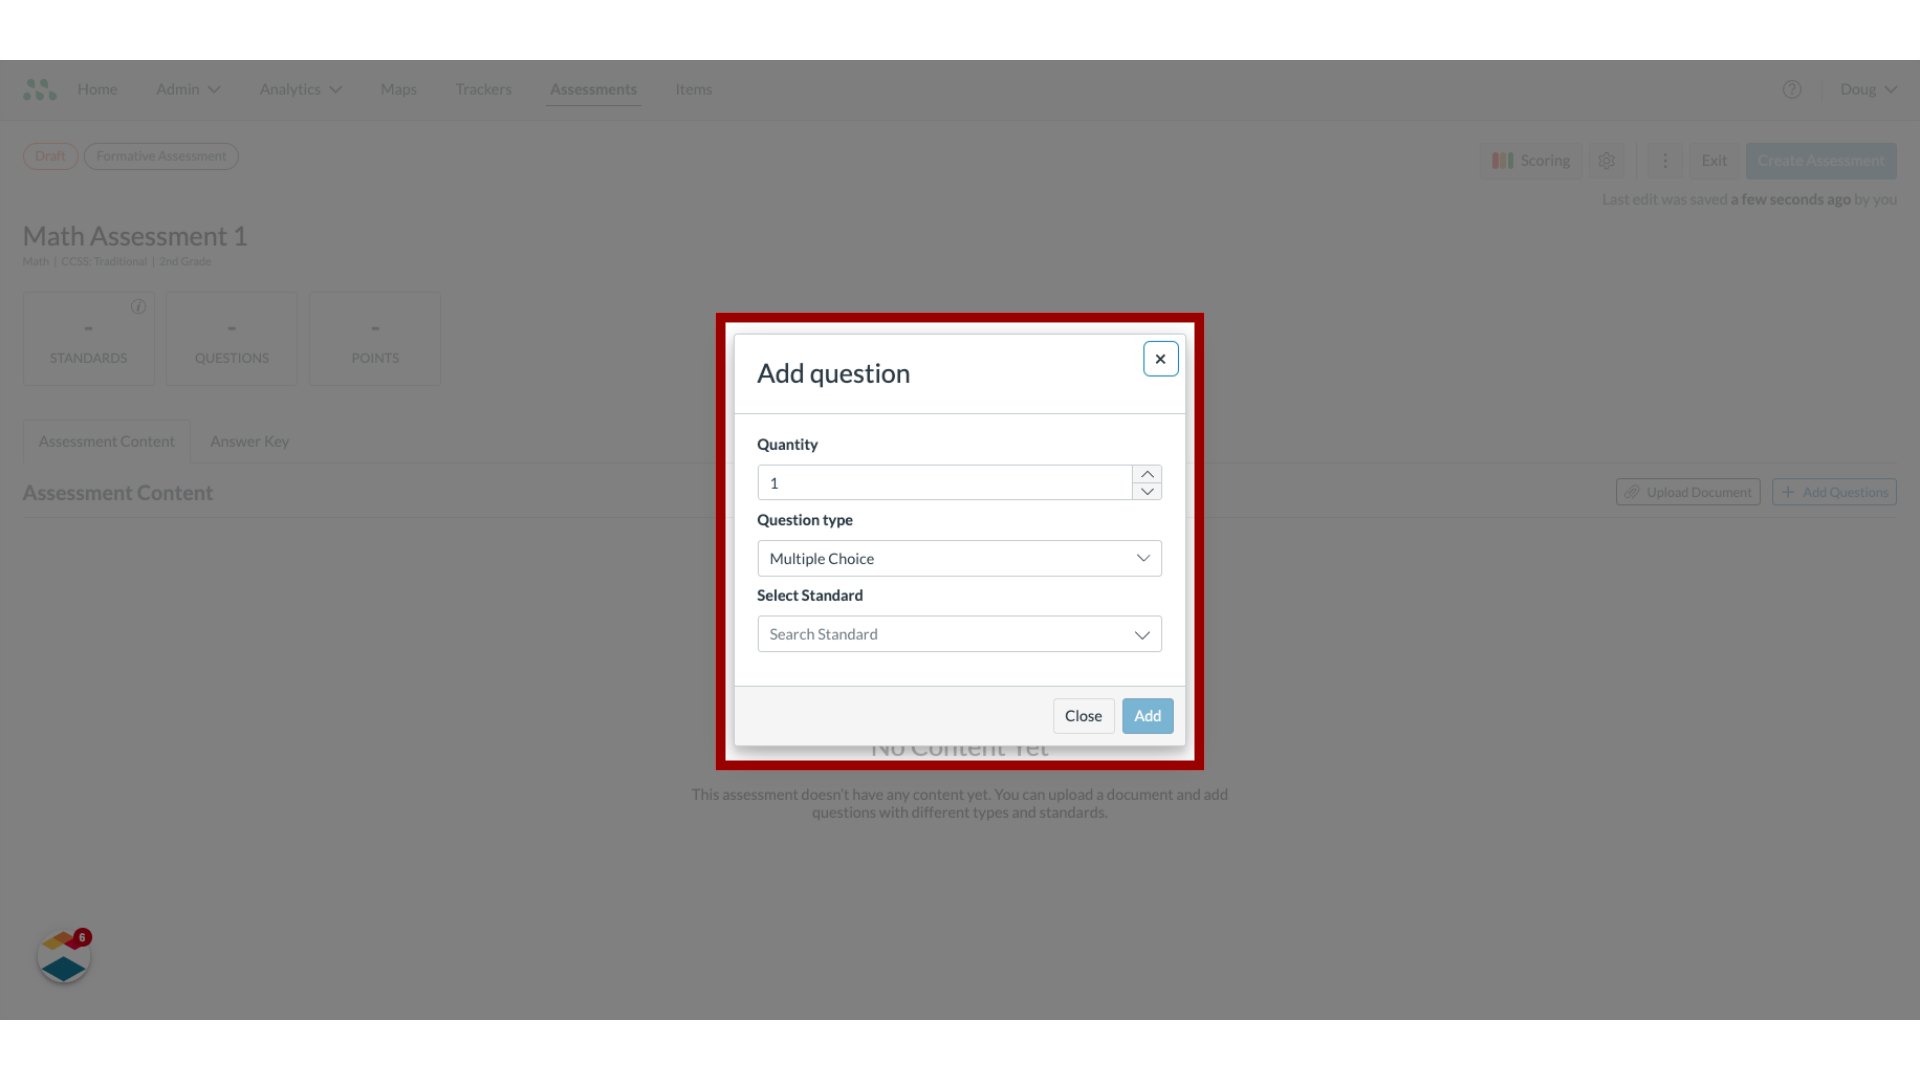
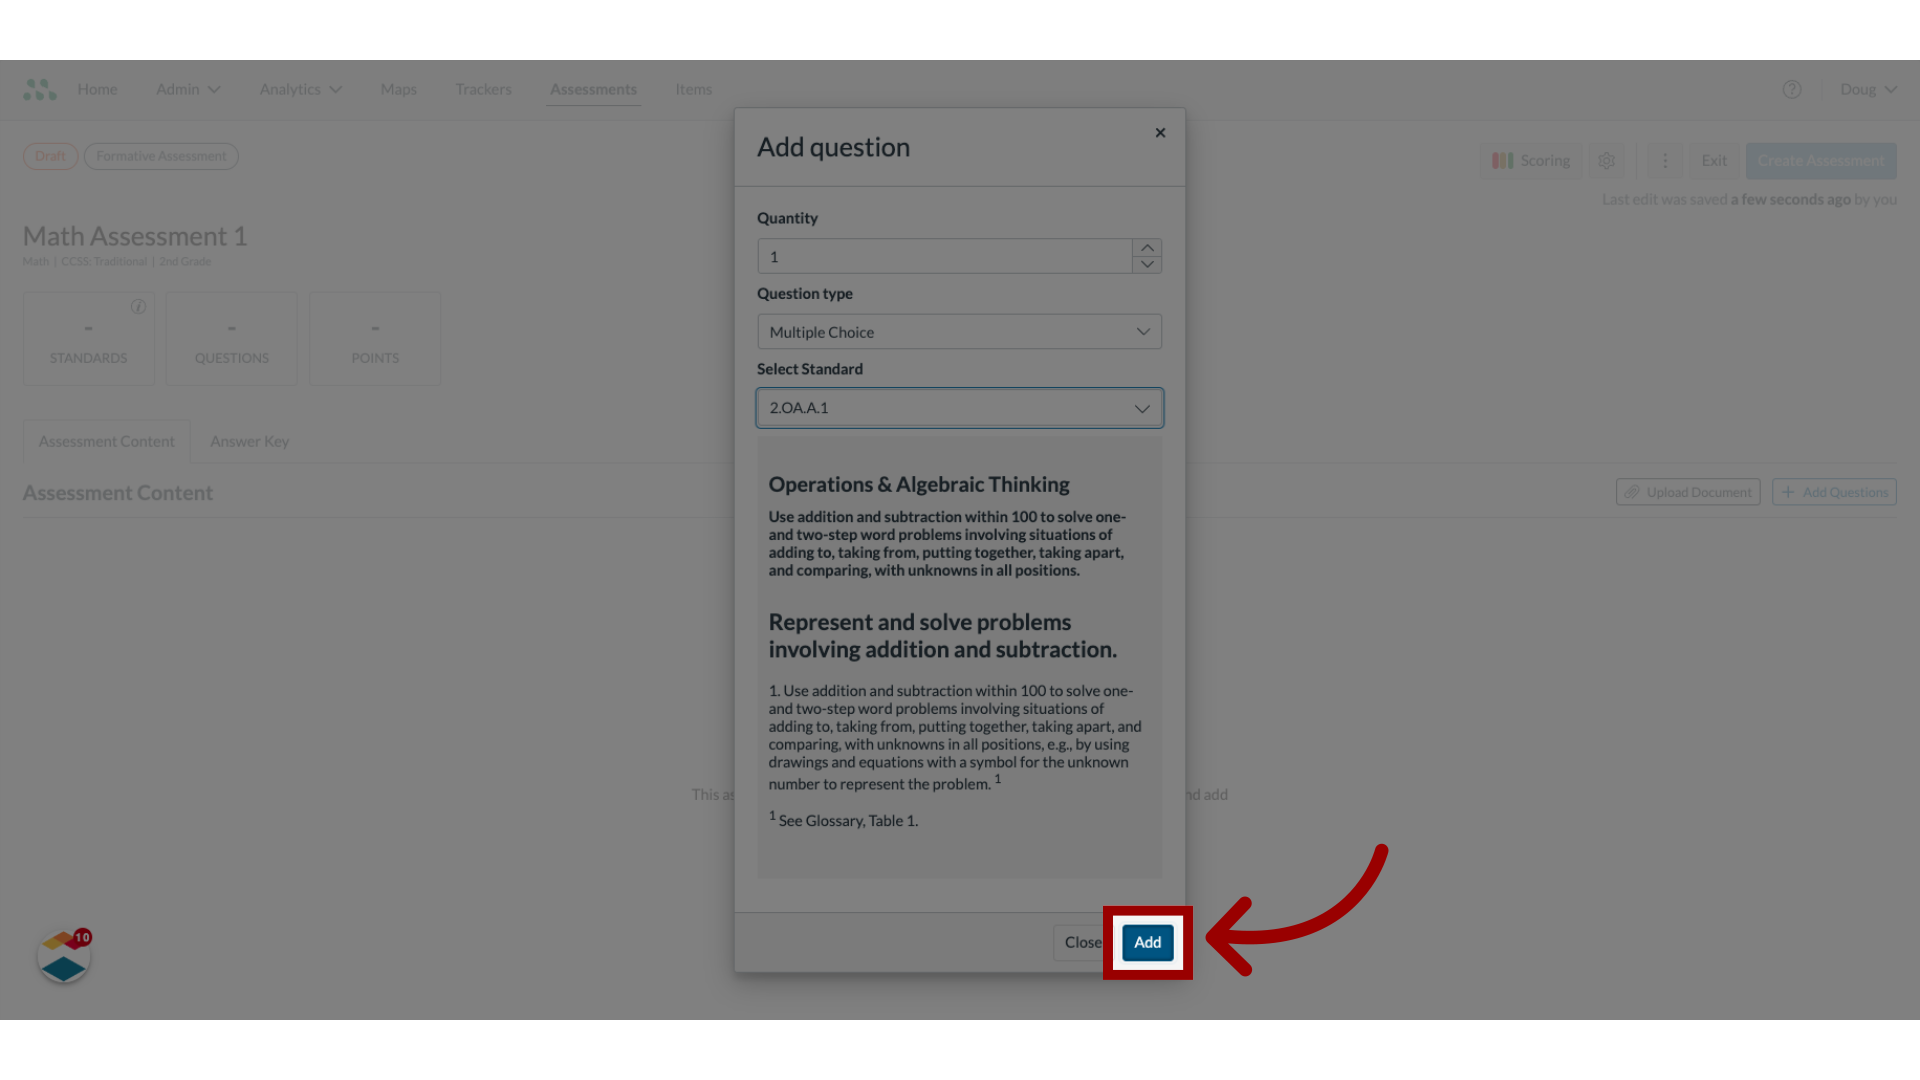
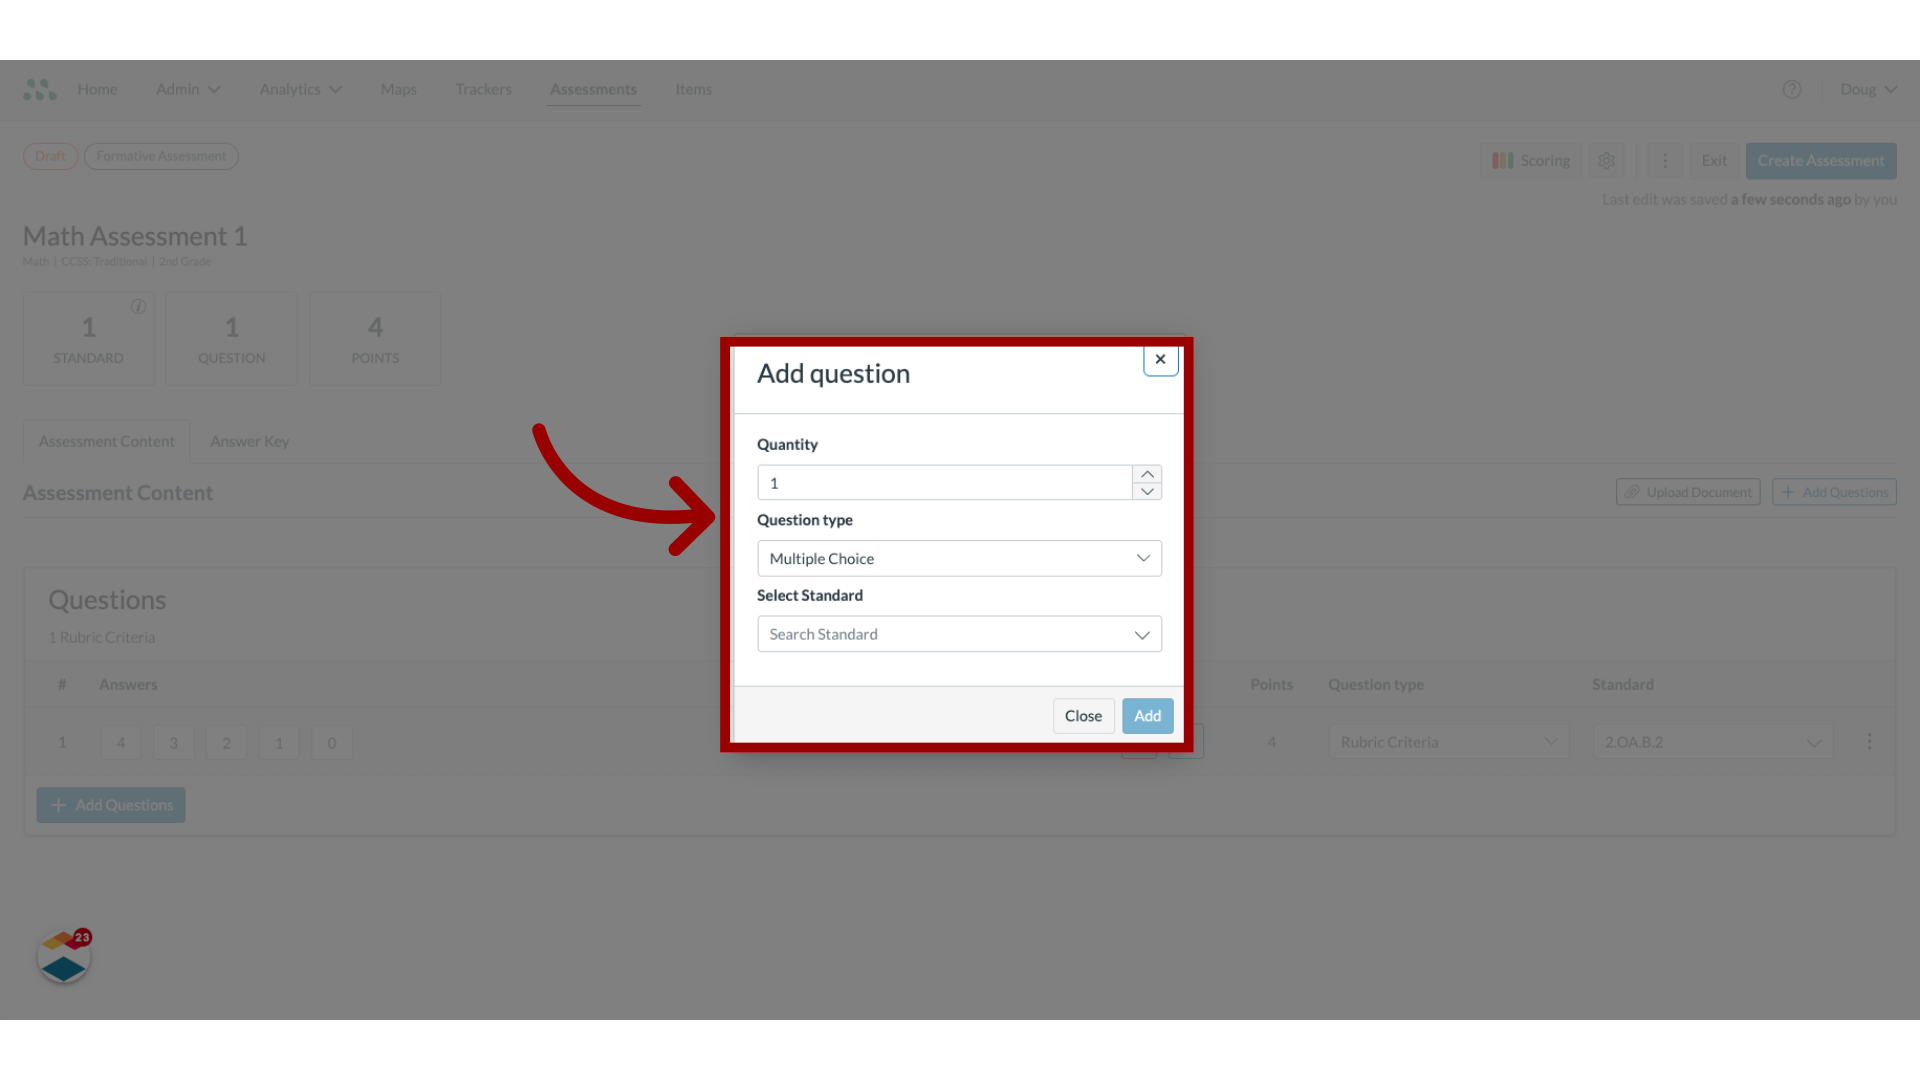
9. Add Questions
In the Add question window, select the question quantity and type, and associate a standard.
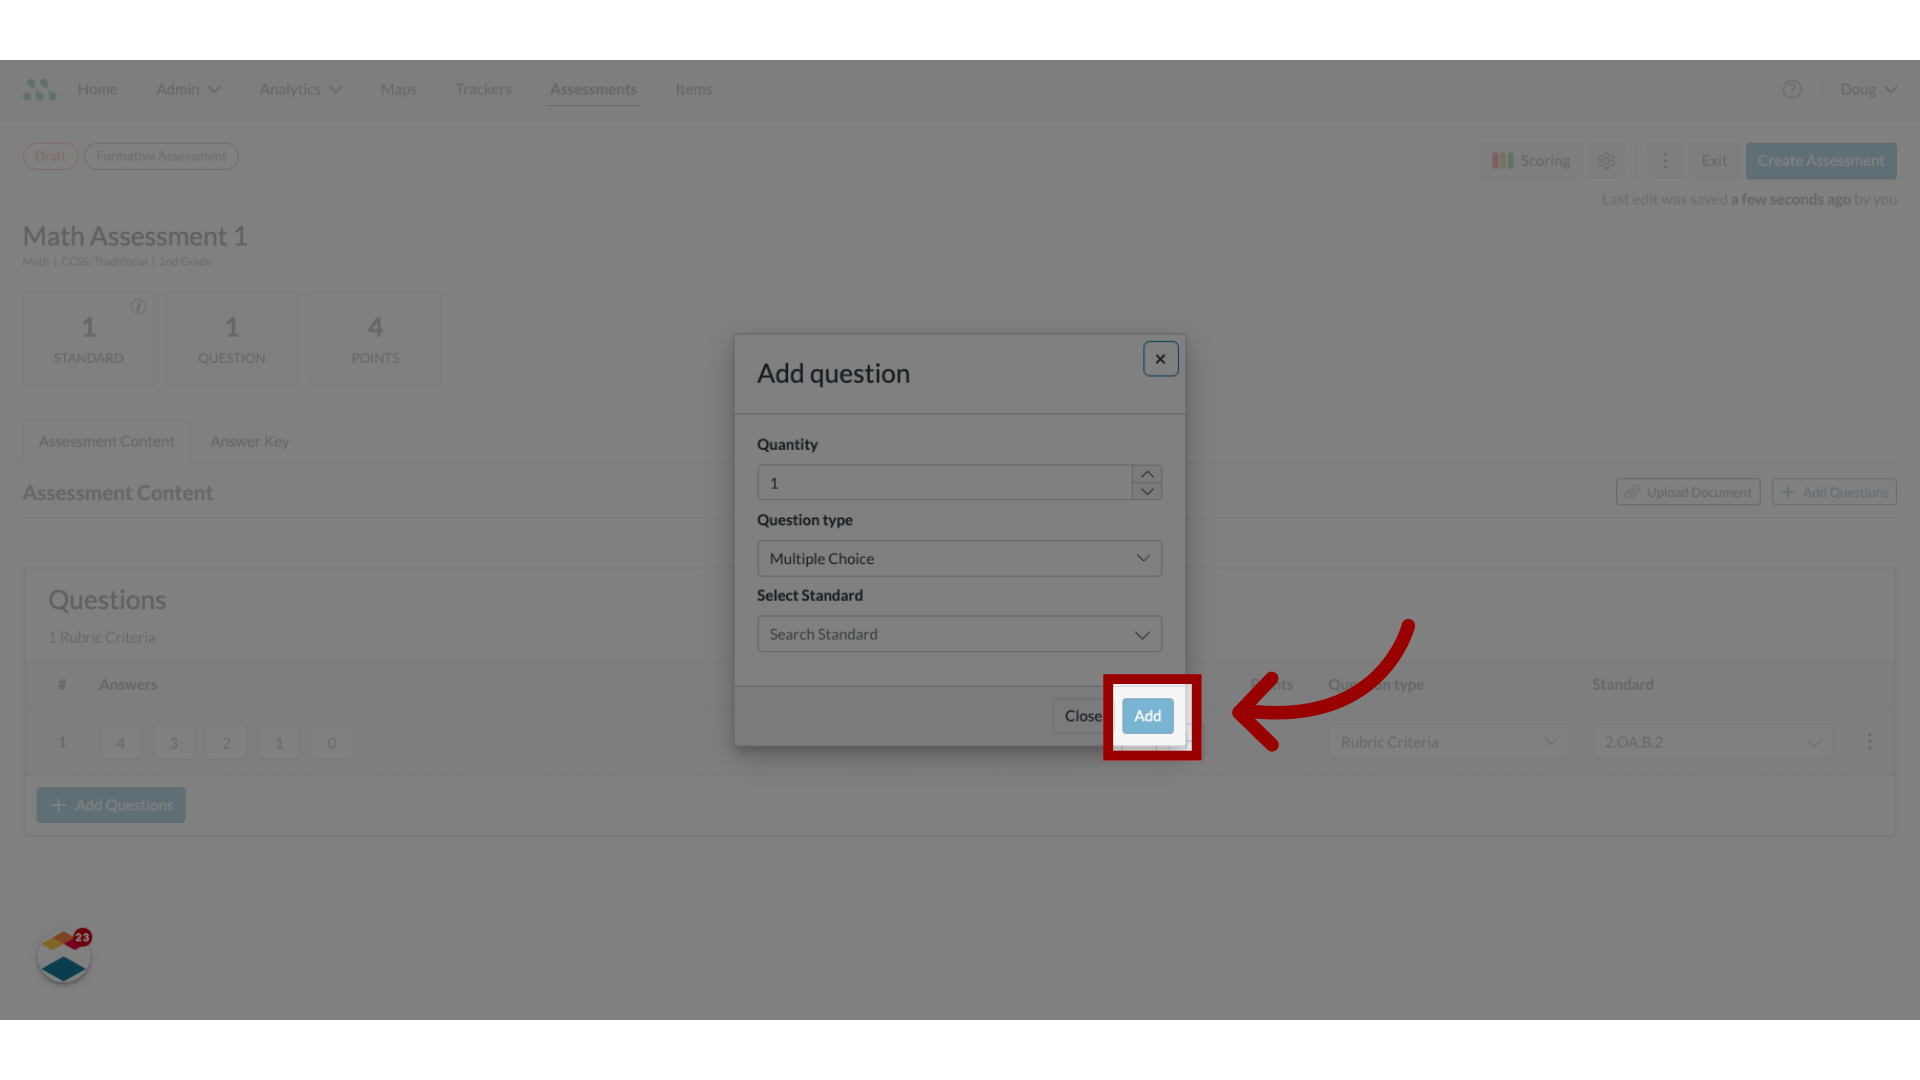
10. Save Questions
To add the selected question type to the assessment, click the Add button. Repeat with additional question types and standards
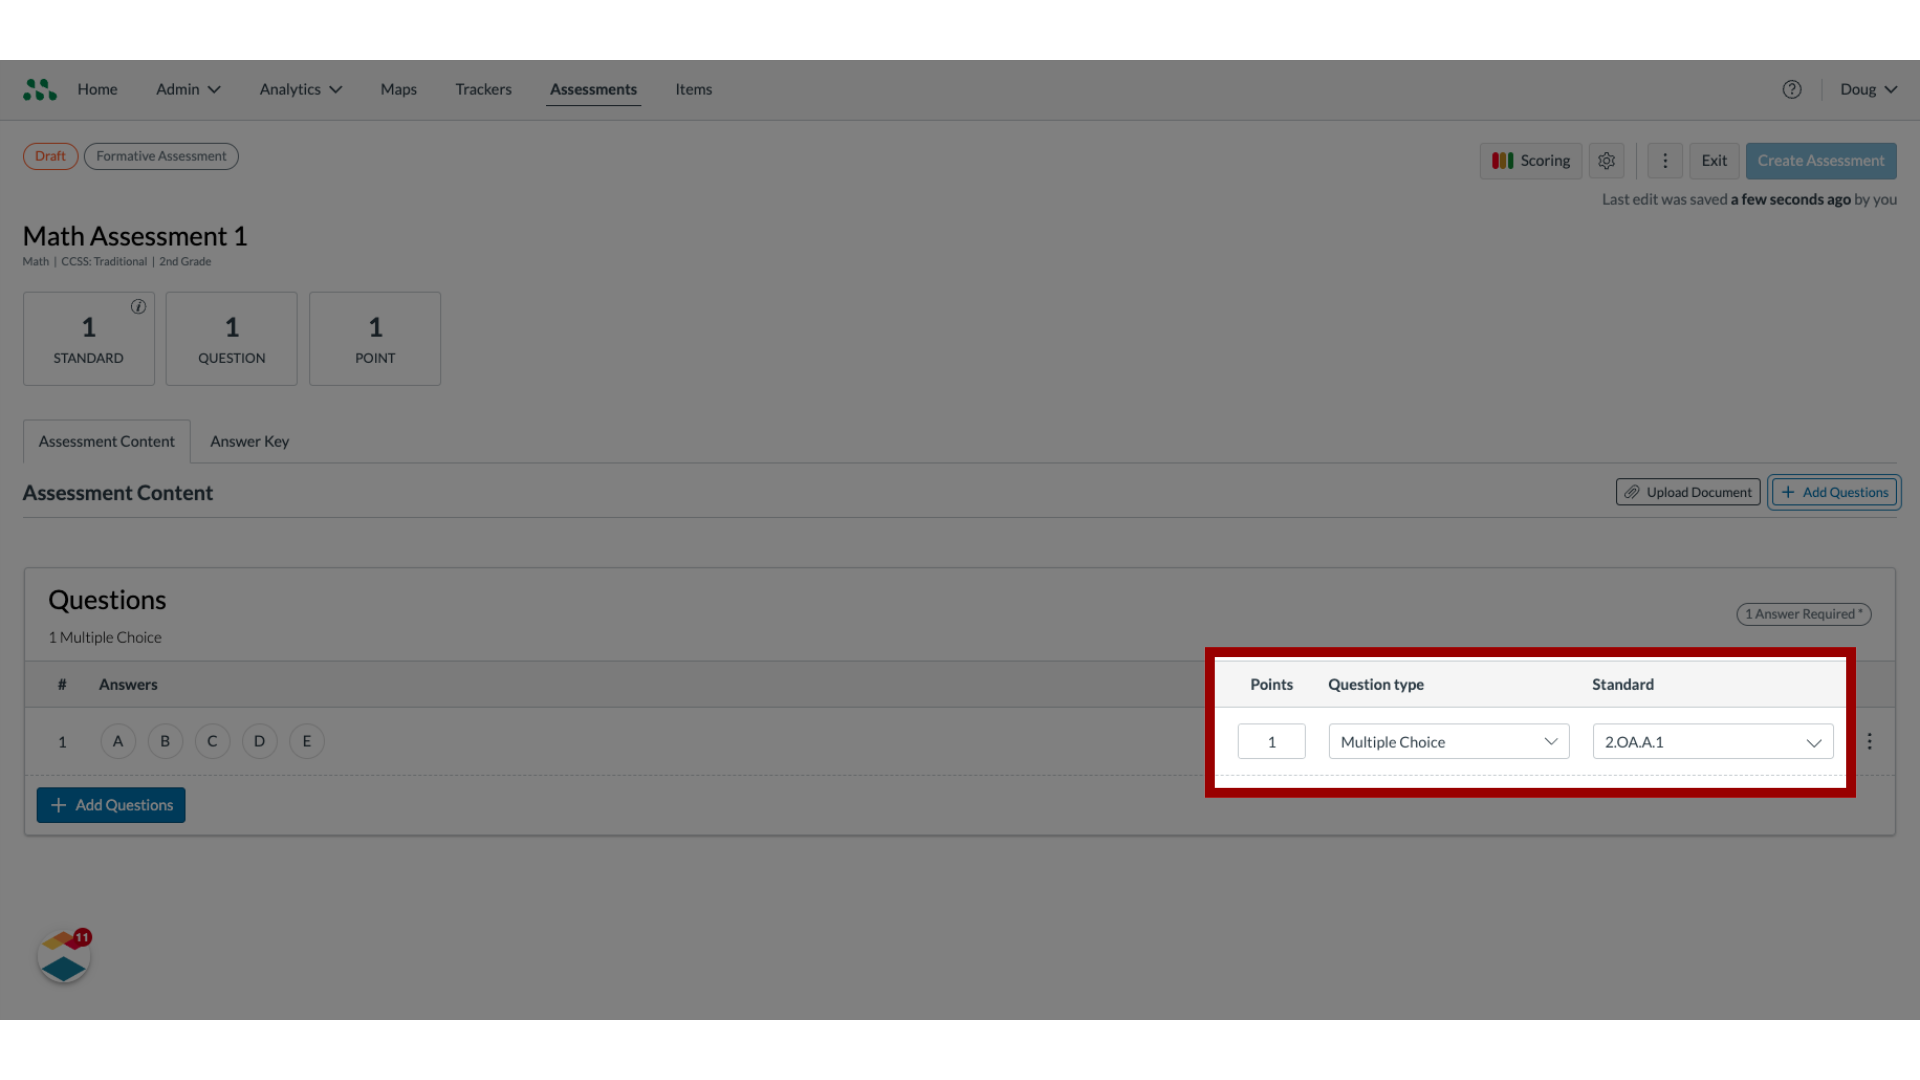
11. Edit Question
You can edit individual questions in the Assessment Editor. To edit the Points, Question type, or Standard, enter new details in the fields.
12. Edit Rubric Item
In rubric scoring, a point value must be assigned to each achievement level. For Bubble Sheet Rubric Scoring question types, enter a point value for each achievement level in the text-boxes. For Rubric Criteria question types, to edit the number of achievement levels, click the Delete or Add icons.
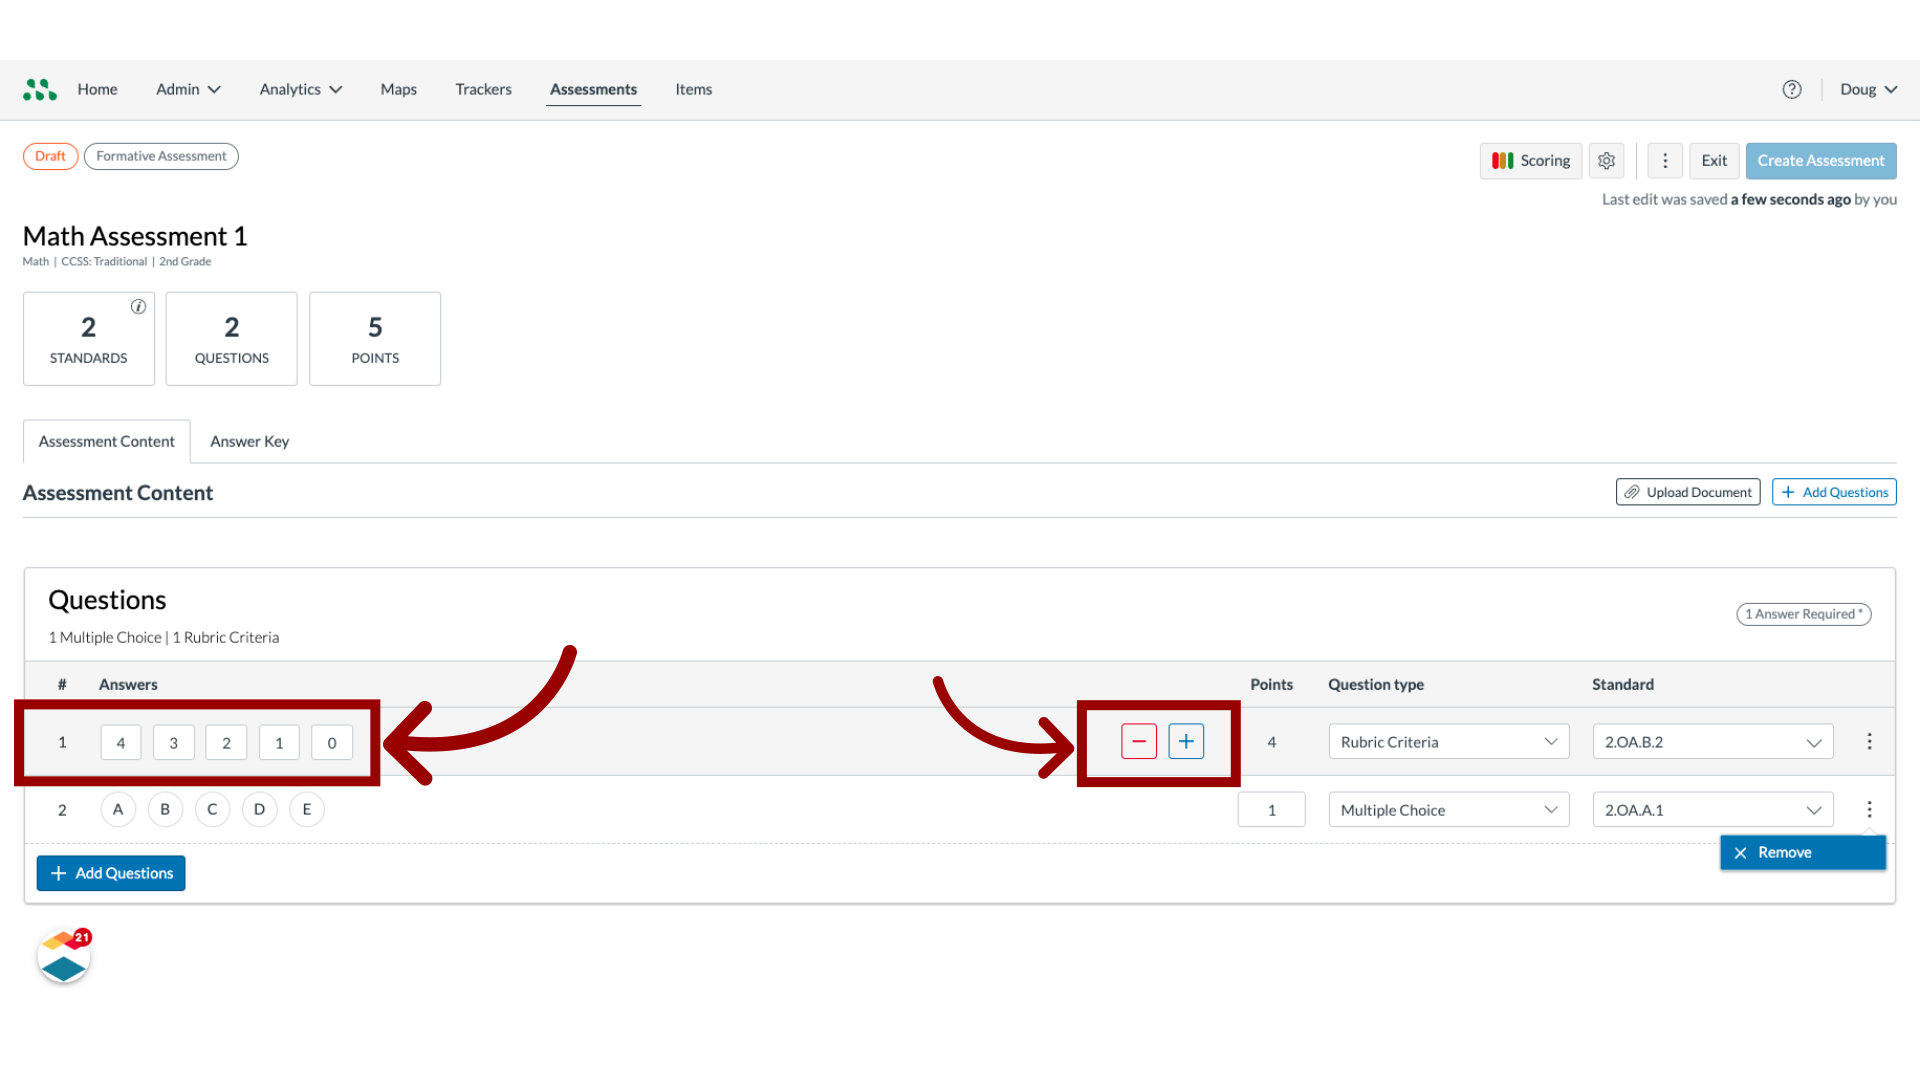
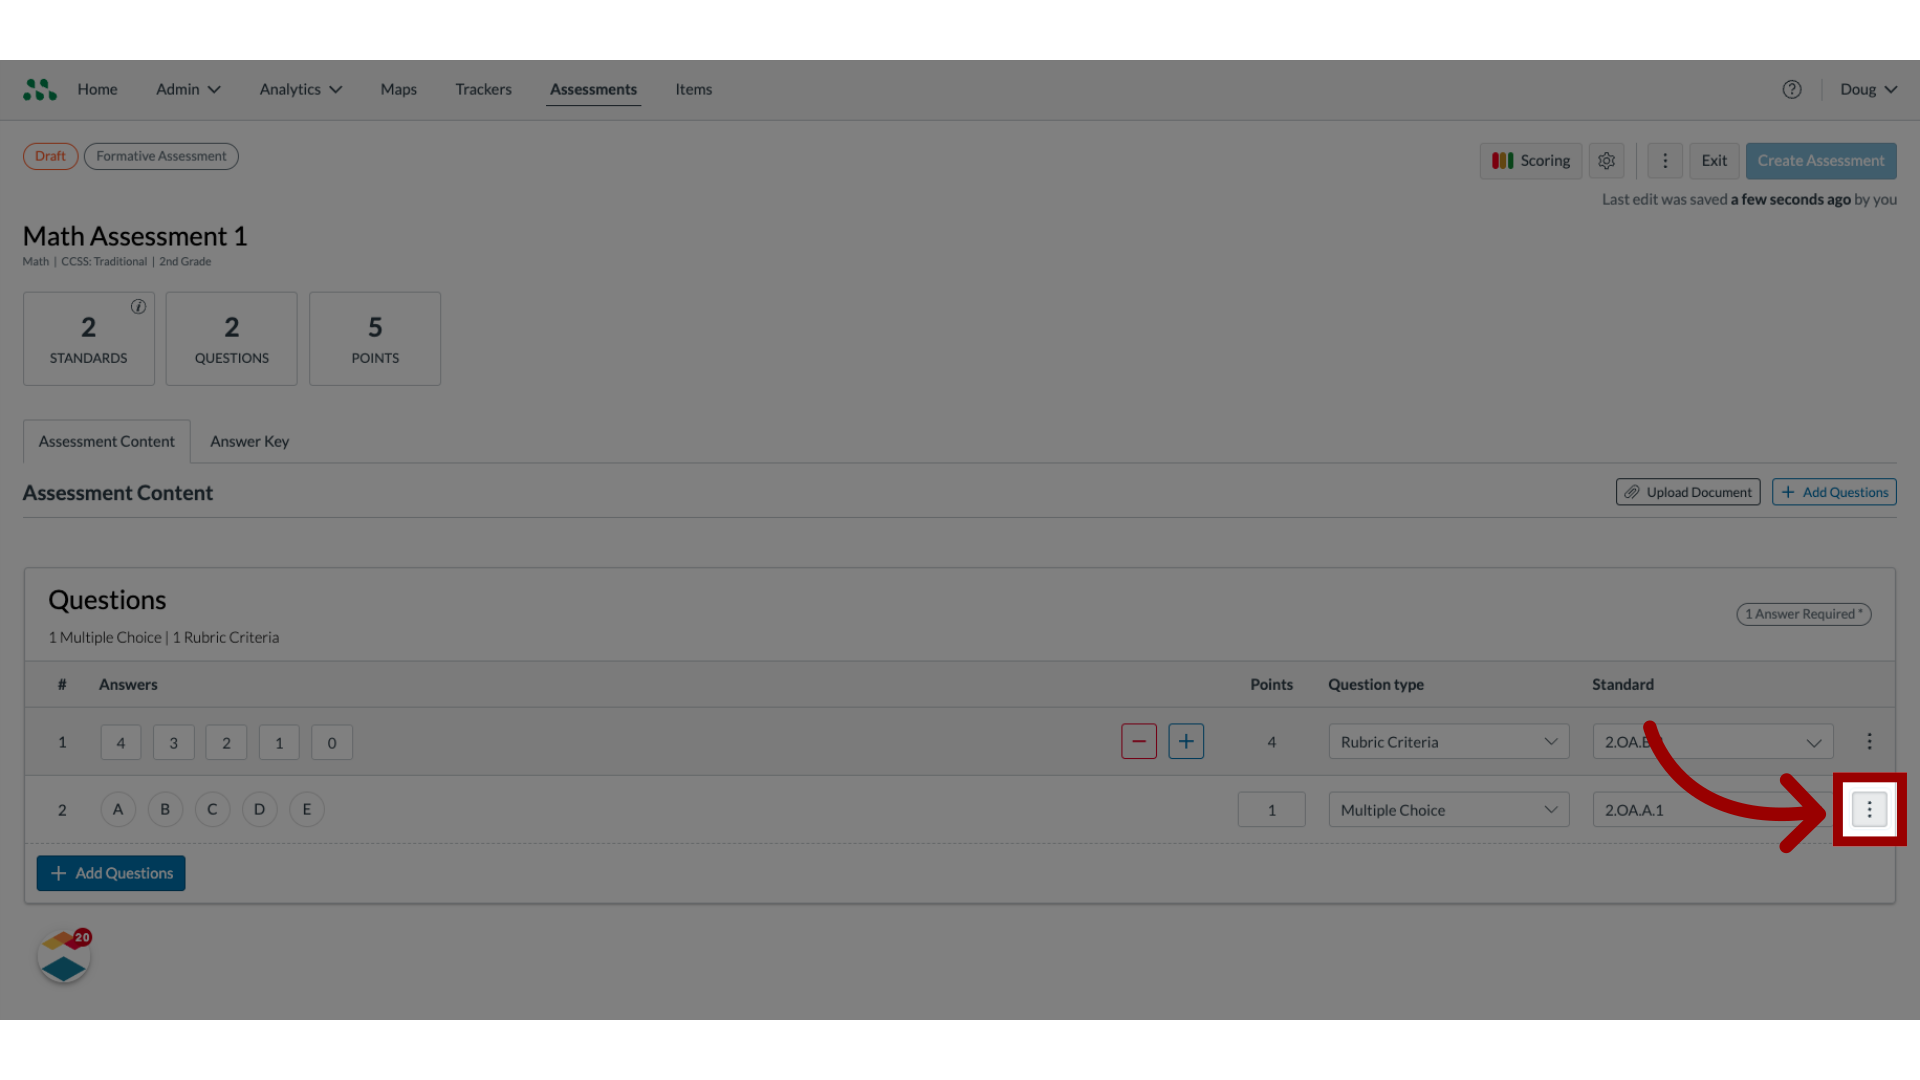
13. Remove Question
To delete a question, click the Question Options icon and select the Remove option.
14. Add Additional Questions
To add additional questions to the assessment, click the Add Questions button
15. Enter Question Details
In the Add Question window, enter the type, quantity and standard for the additional question or questions.
16. Save Additional Questions
Click the Add button.
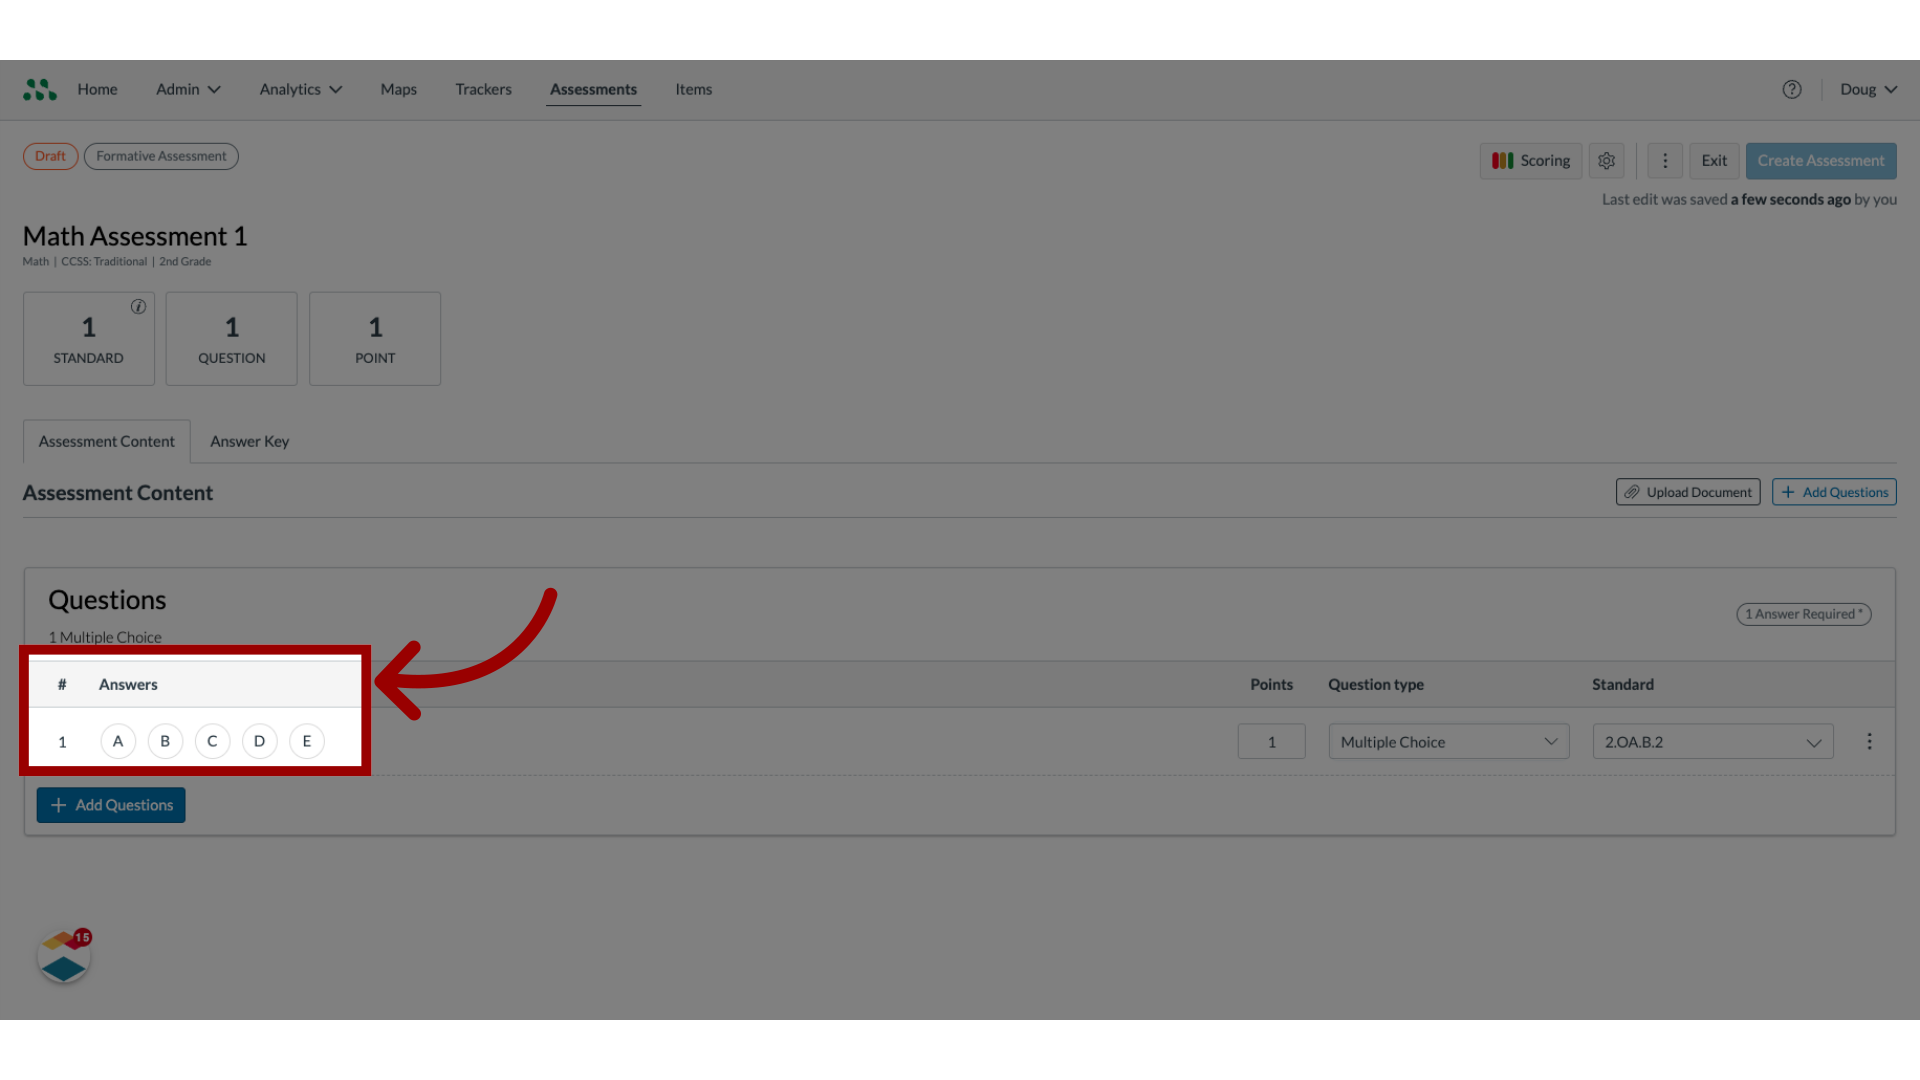
17. Add Correct Answer
To enter correct answers for multiple choice, multi select and true false questions, click the appropriate answer bubbles.
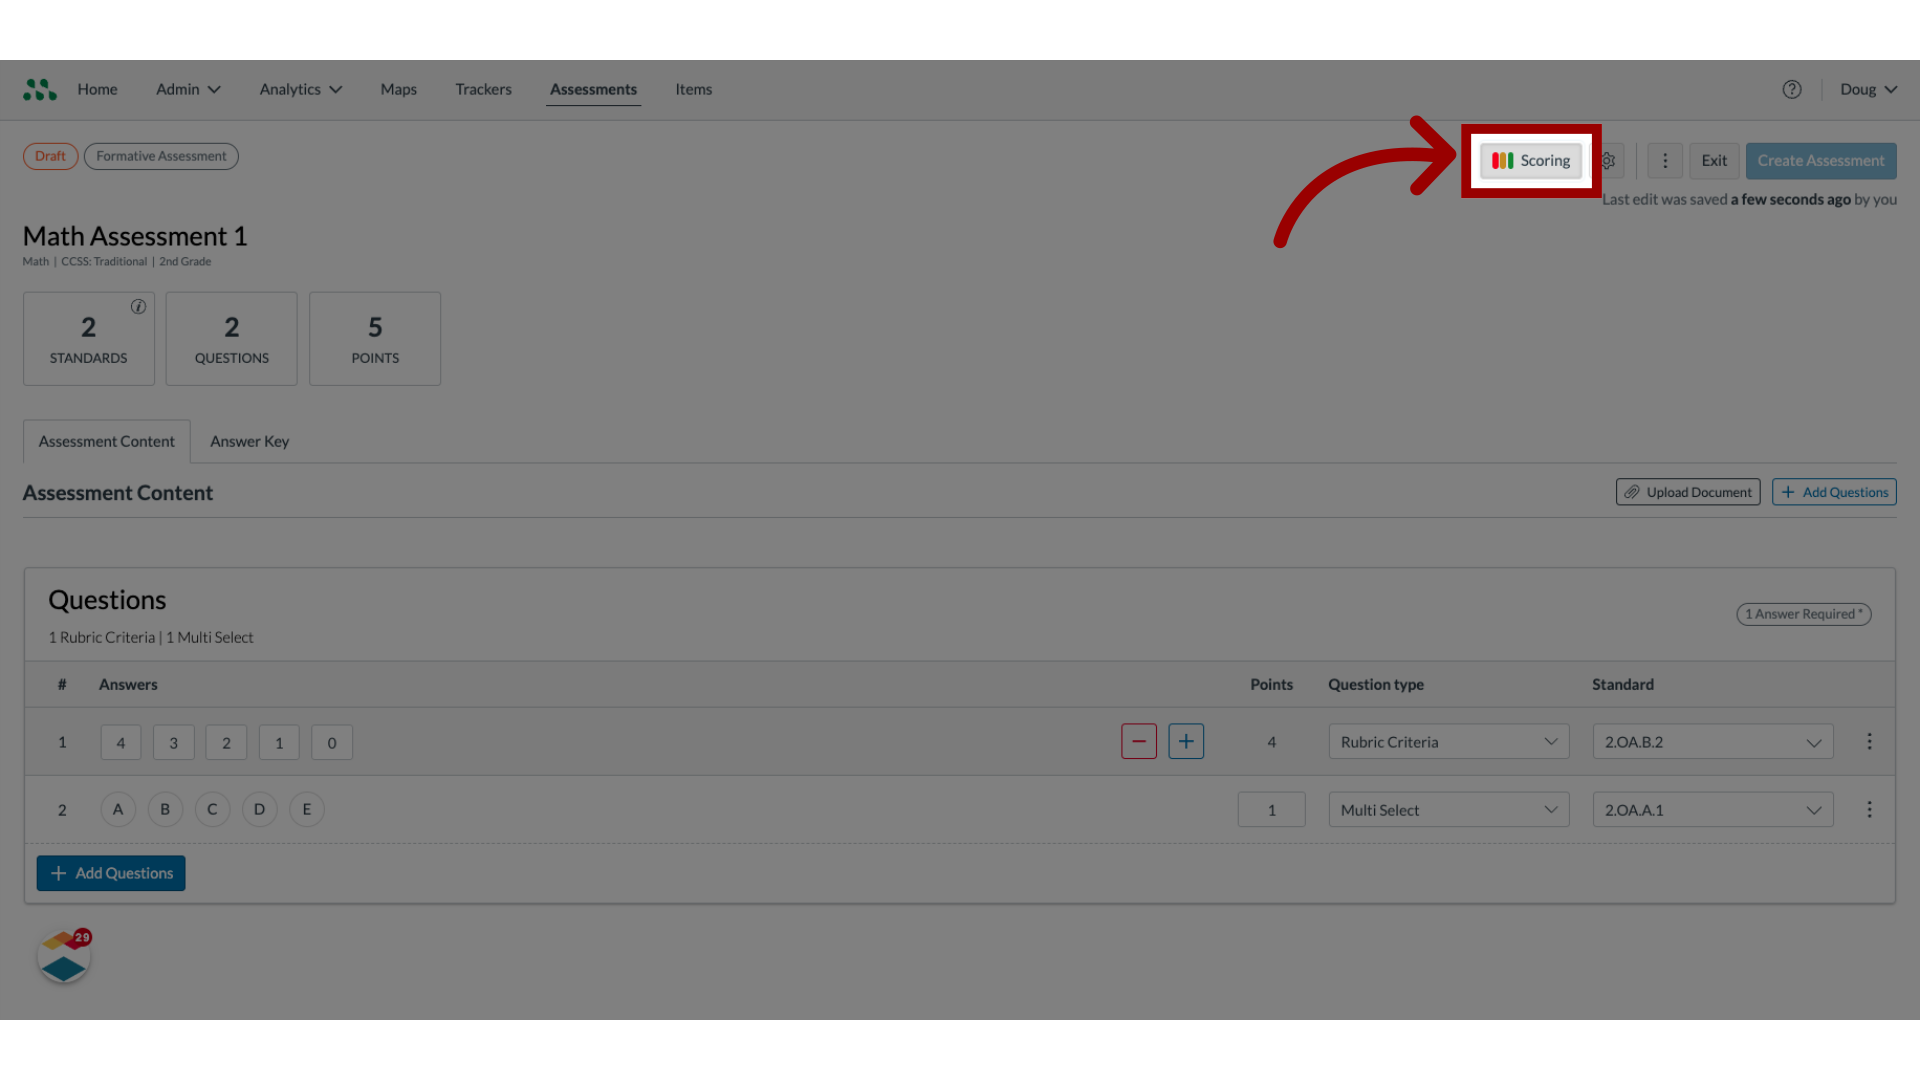
18. Open Mastery Levels Scoring
To edit mastery levels for the assessment click the Scoring button.
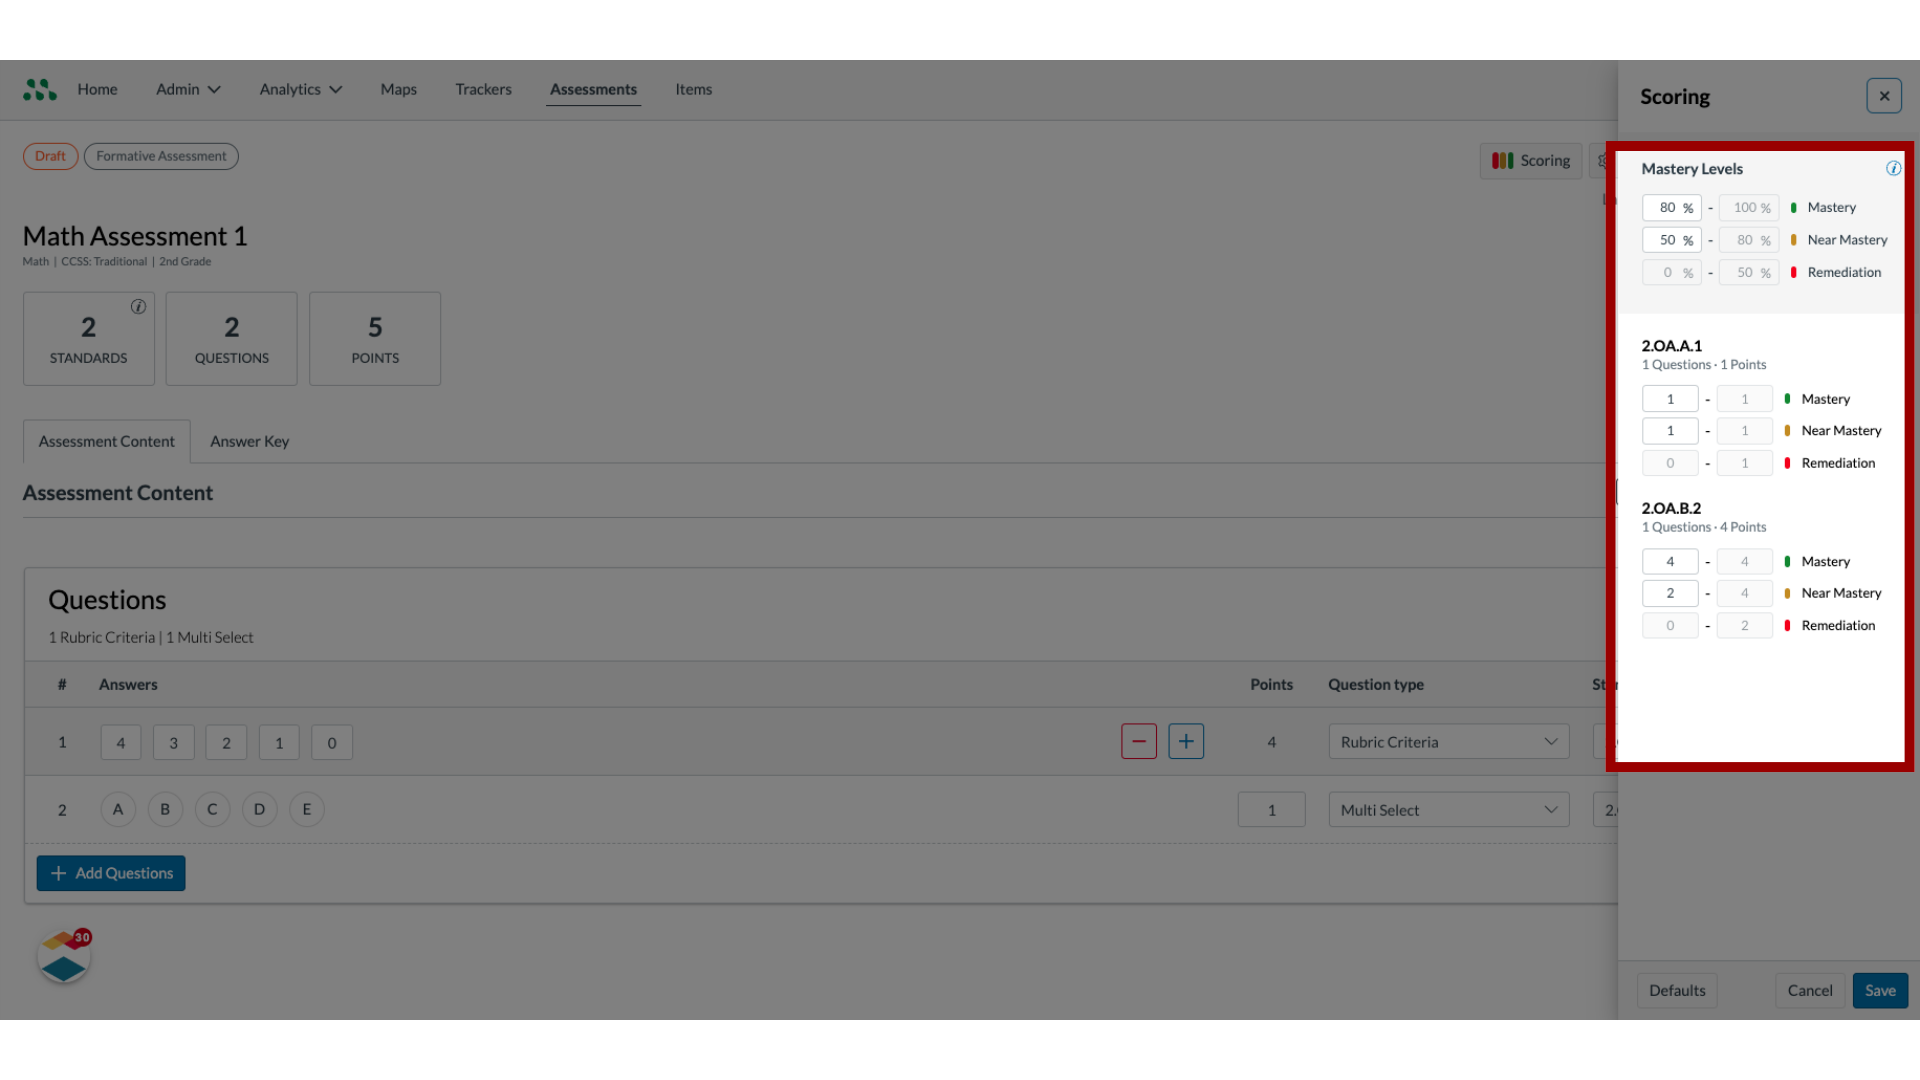
19. Edit Mastery Levels
Enter lower boundary percentages for the Mastery and Near Mastery levels in the fields. To edit mastery levels for each standard in a multi-standard assessment enter the lower point boundary for mastery and near mastery in the field for each standard.
20. Save Scoring
Click the Save button.

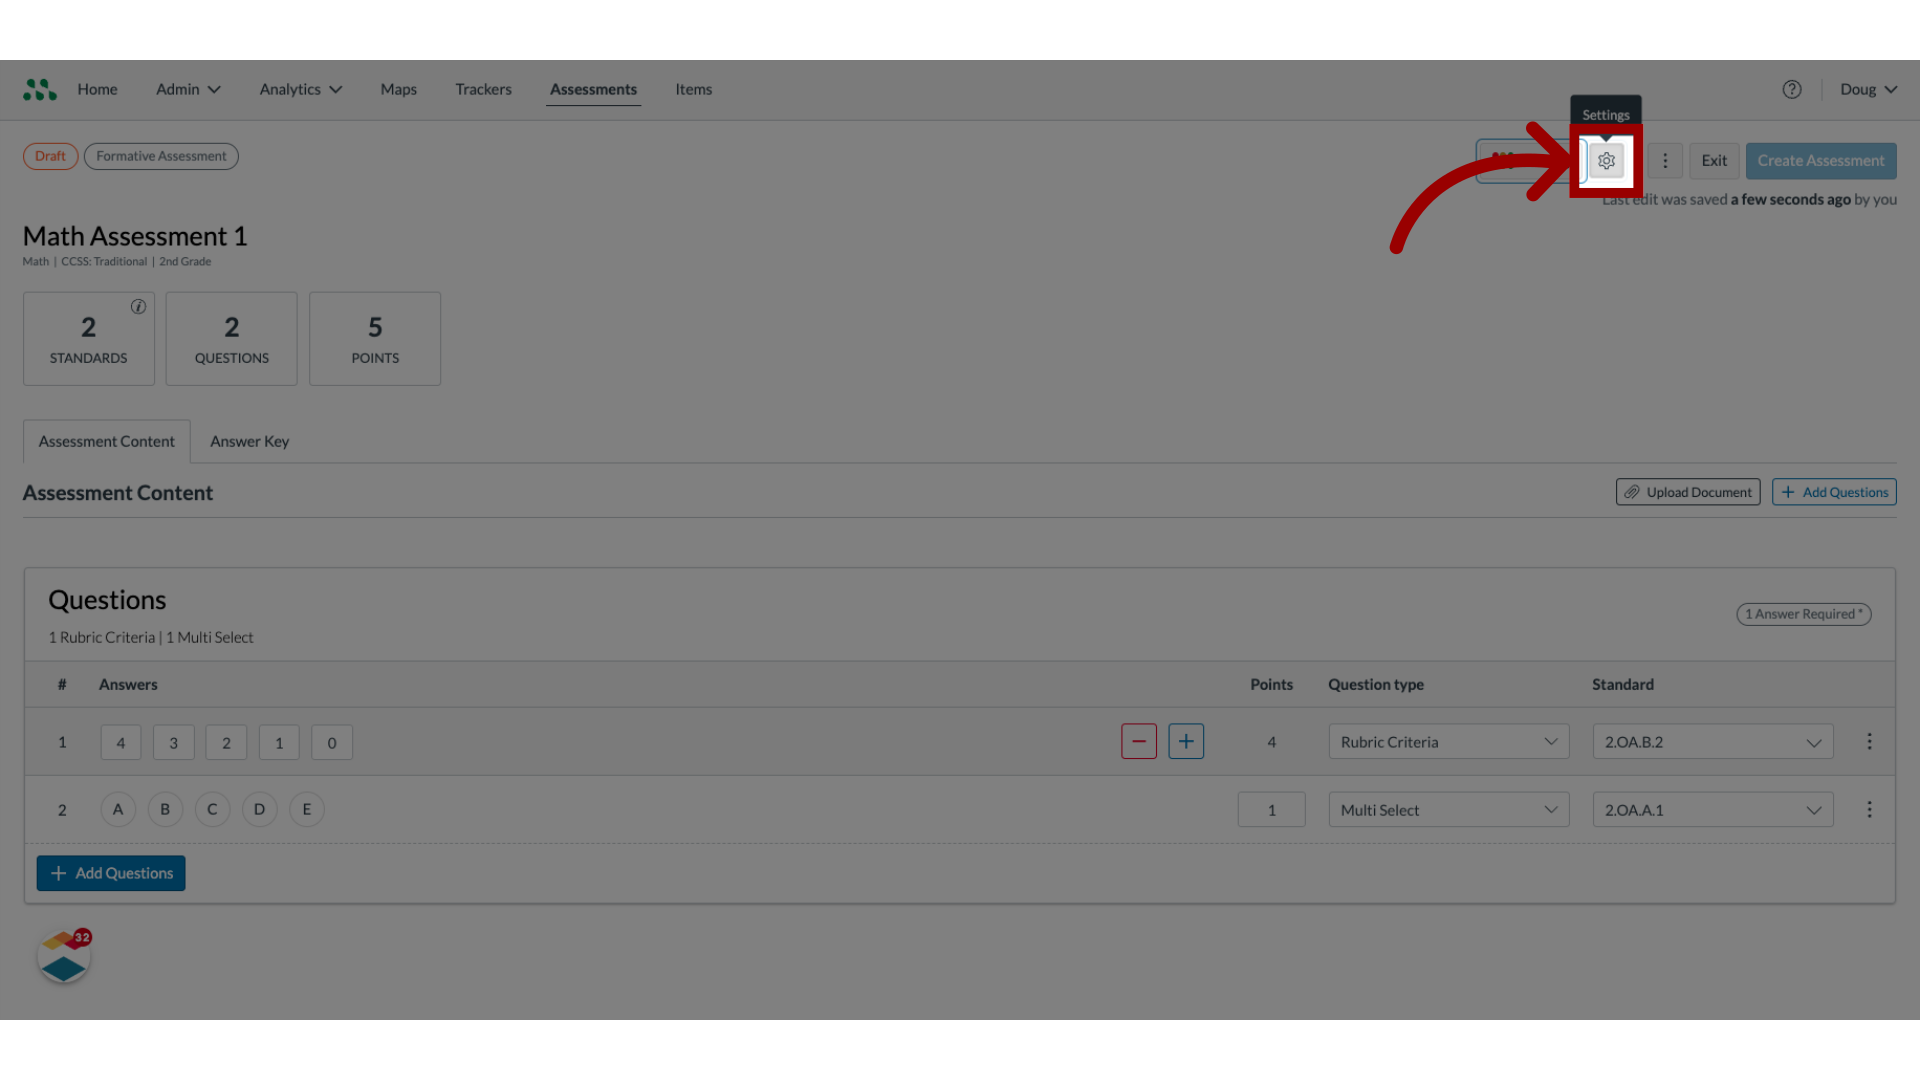
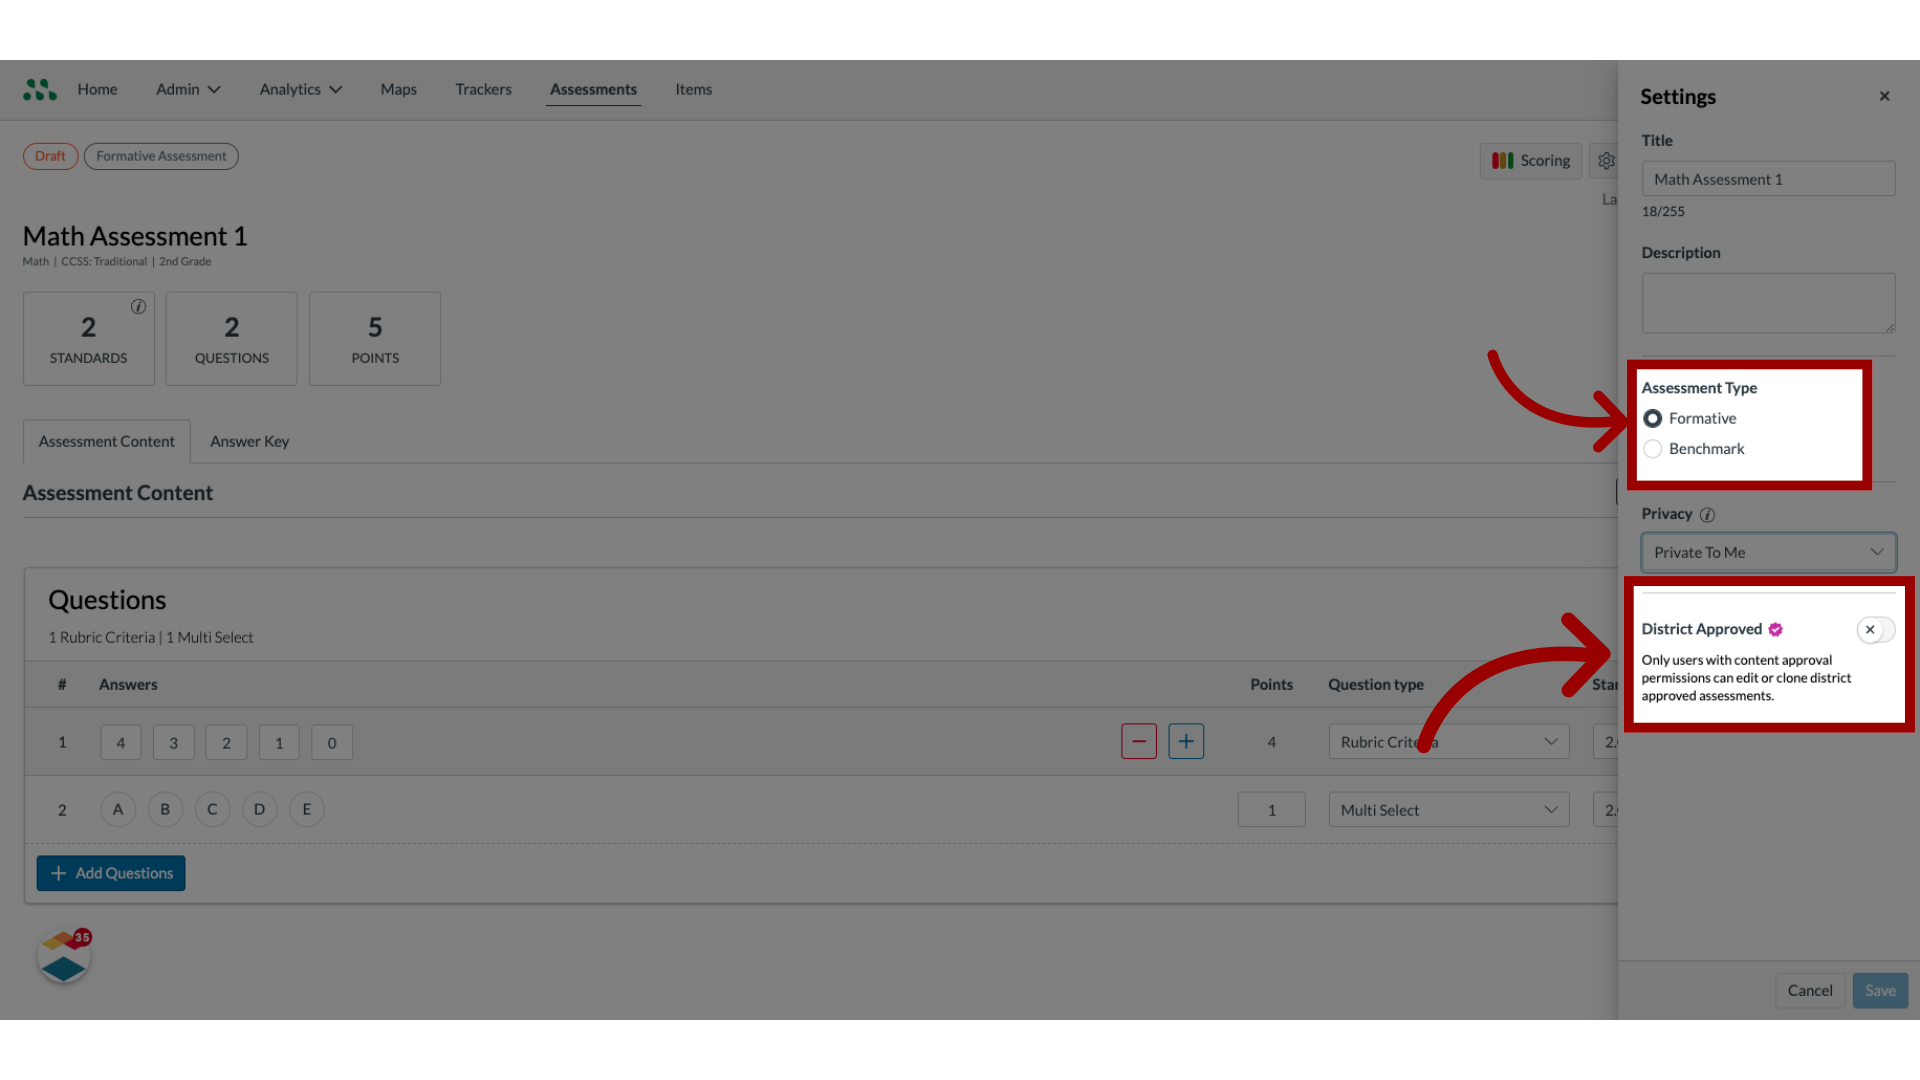
21. Open Assessment Settings
To edit assessment settings, click the Settings button.
22. Edit Assessment Title and Description
To edit the assessment title or description, enter new text in the appropriate fields.
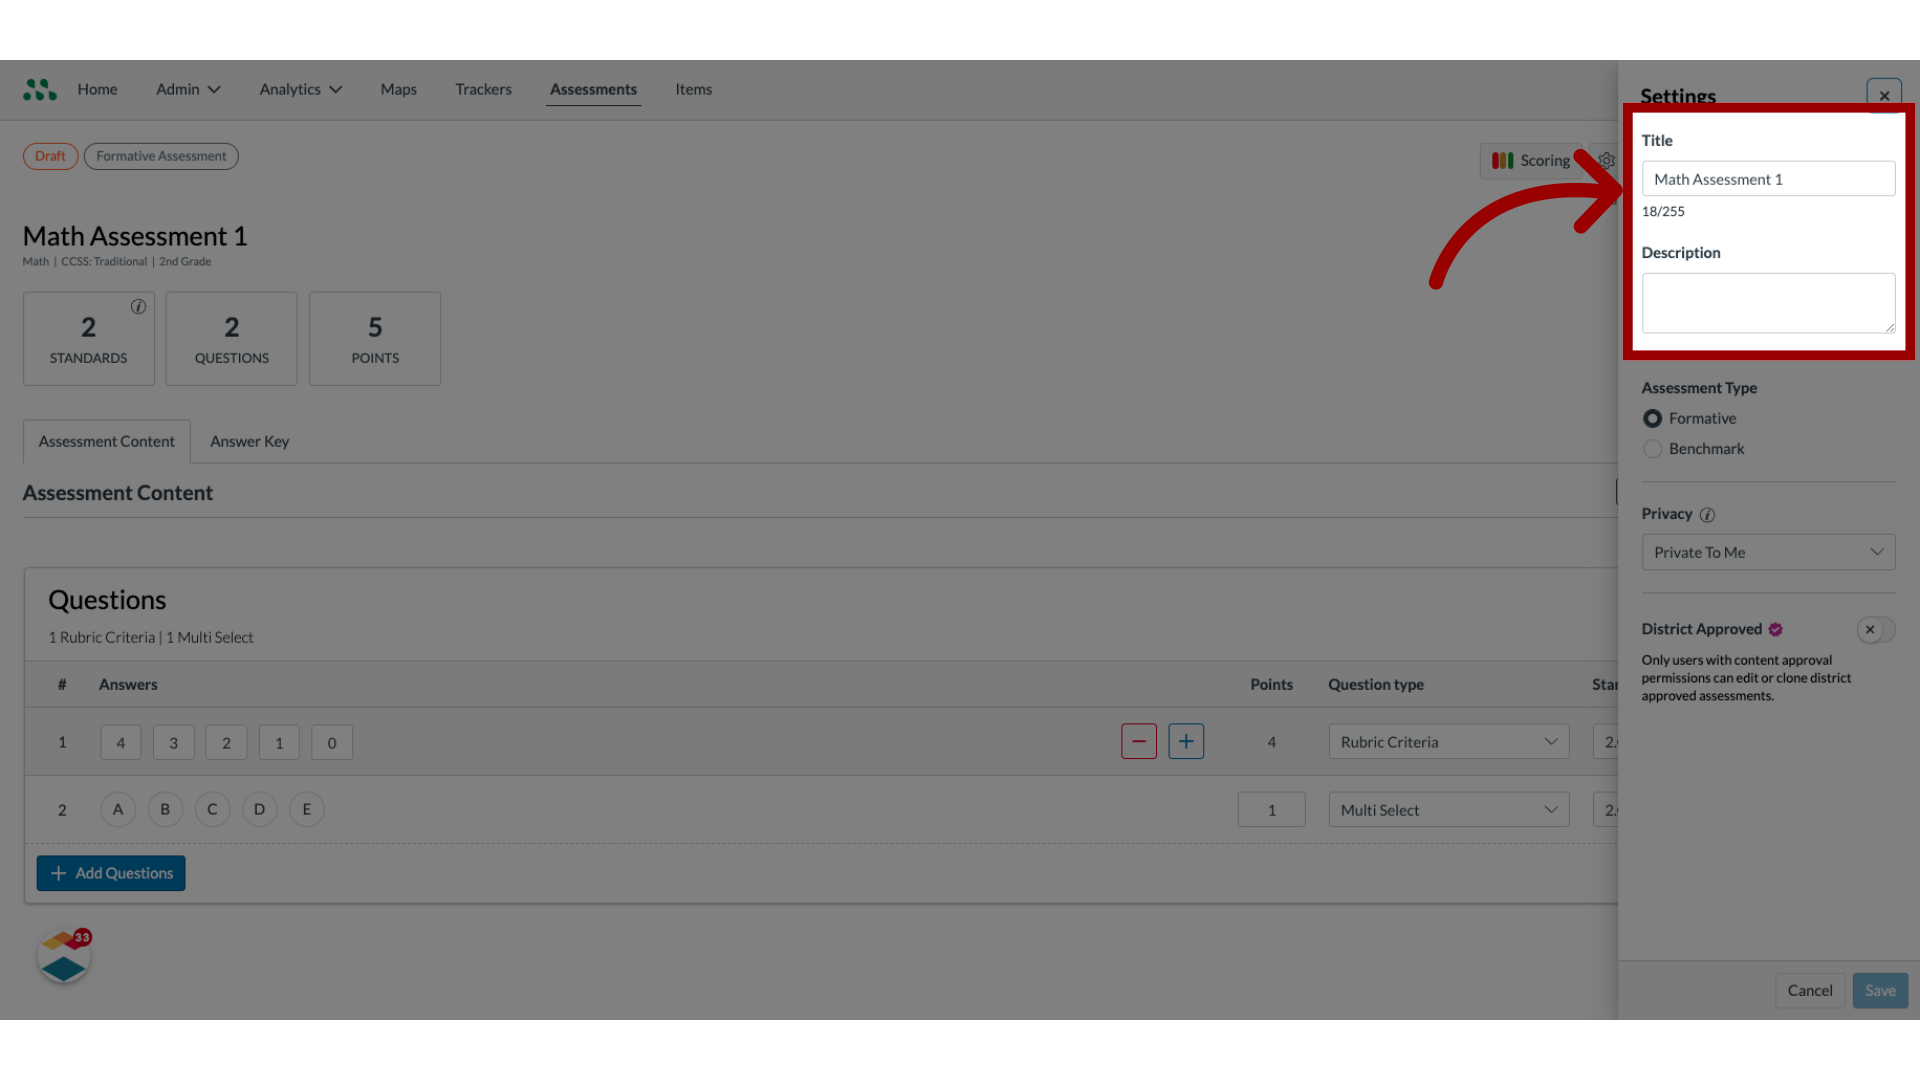
23. Select Privacy Setting
To change privacy settings for the assessment, click the Privacy drop-down menu.

24. Select Administrator Settings
District Administrators and users with Benchmark Author and Benchmark facilitator roles can create benchmark assessments and designate both benchmark and formative assessments as District Approved assessments. To change the assessment type, click the appropriate radio button. To designate an assessment as a District Approved assessment, click the District Approved toggle on.
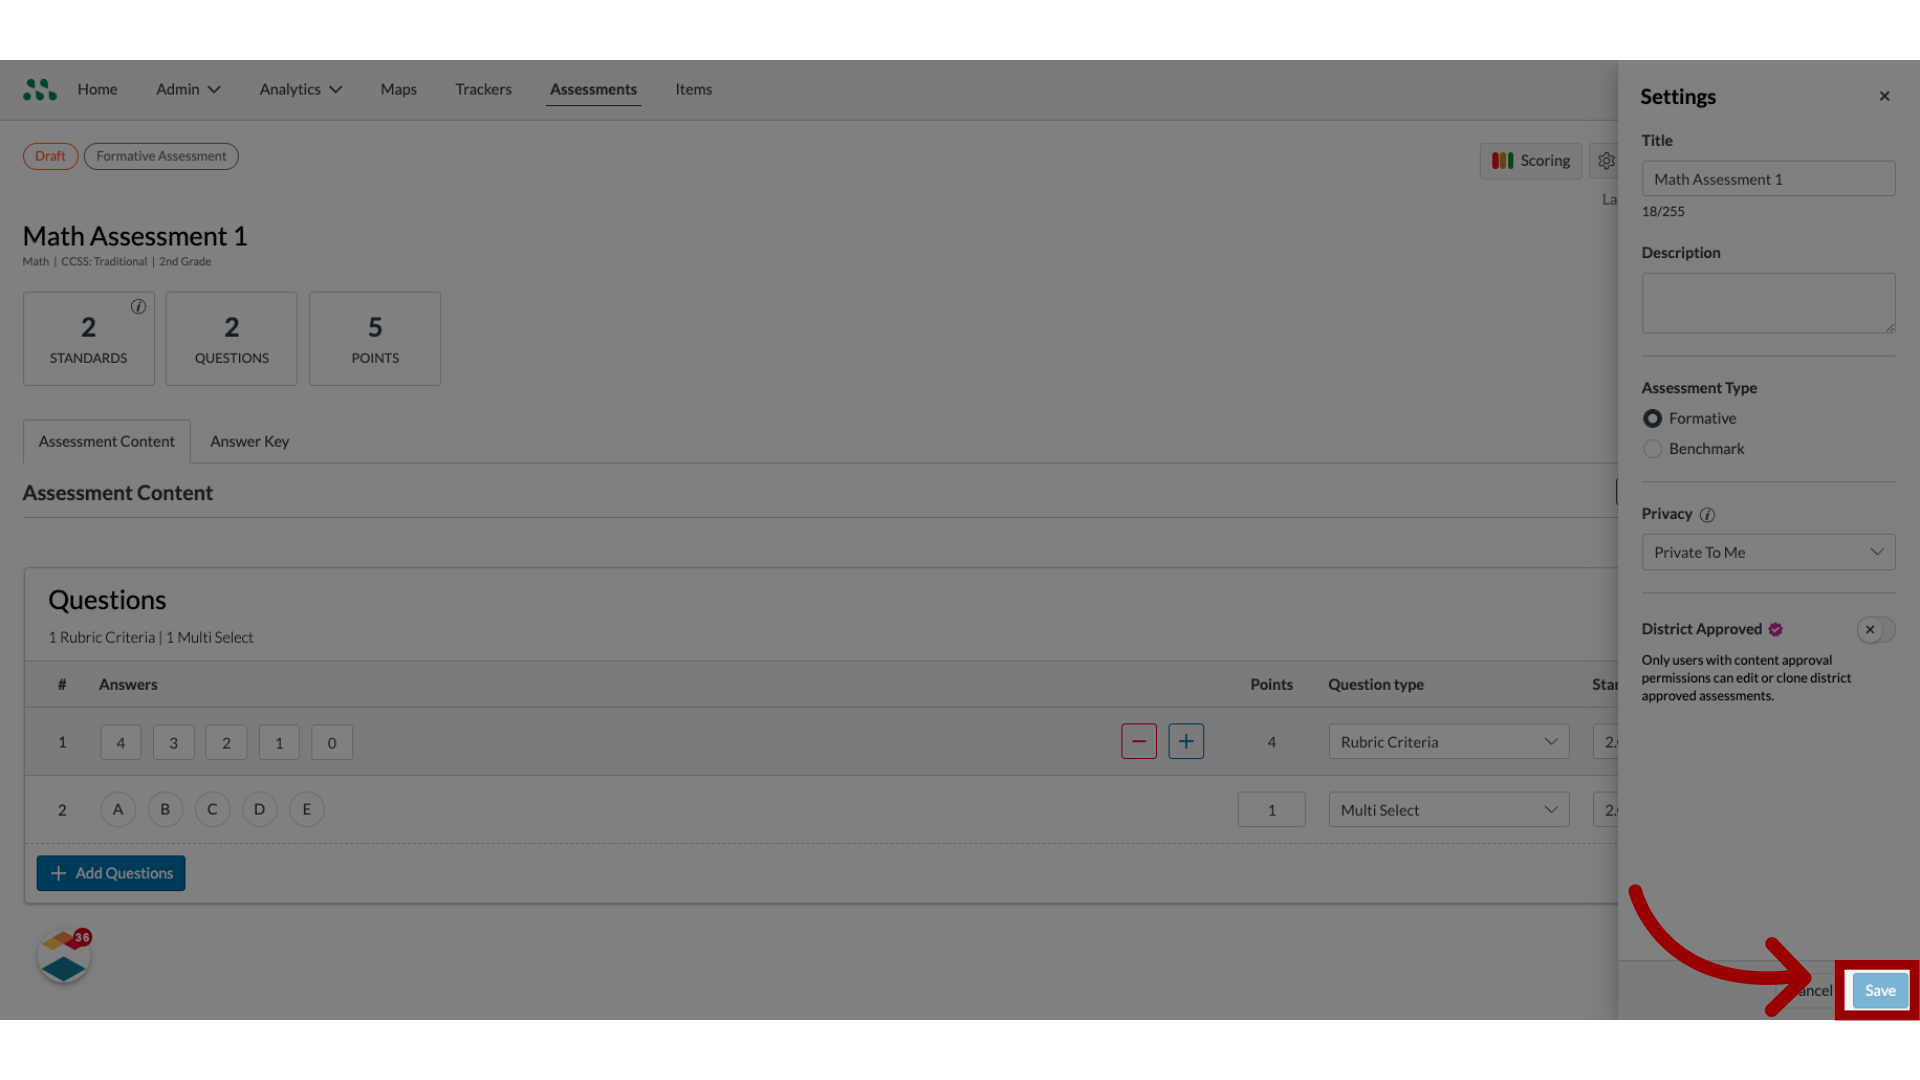
25. Save Assessment Settings
To save changes, click the Save button .
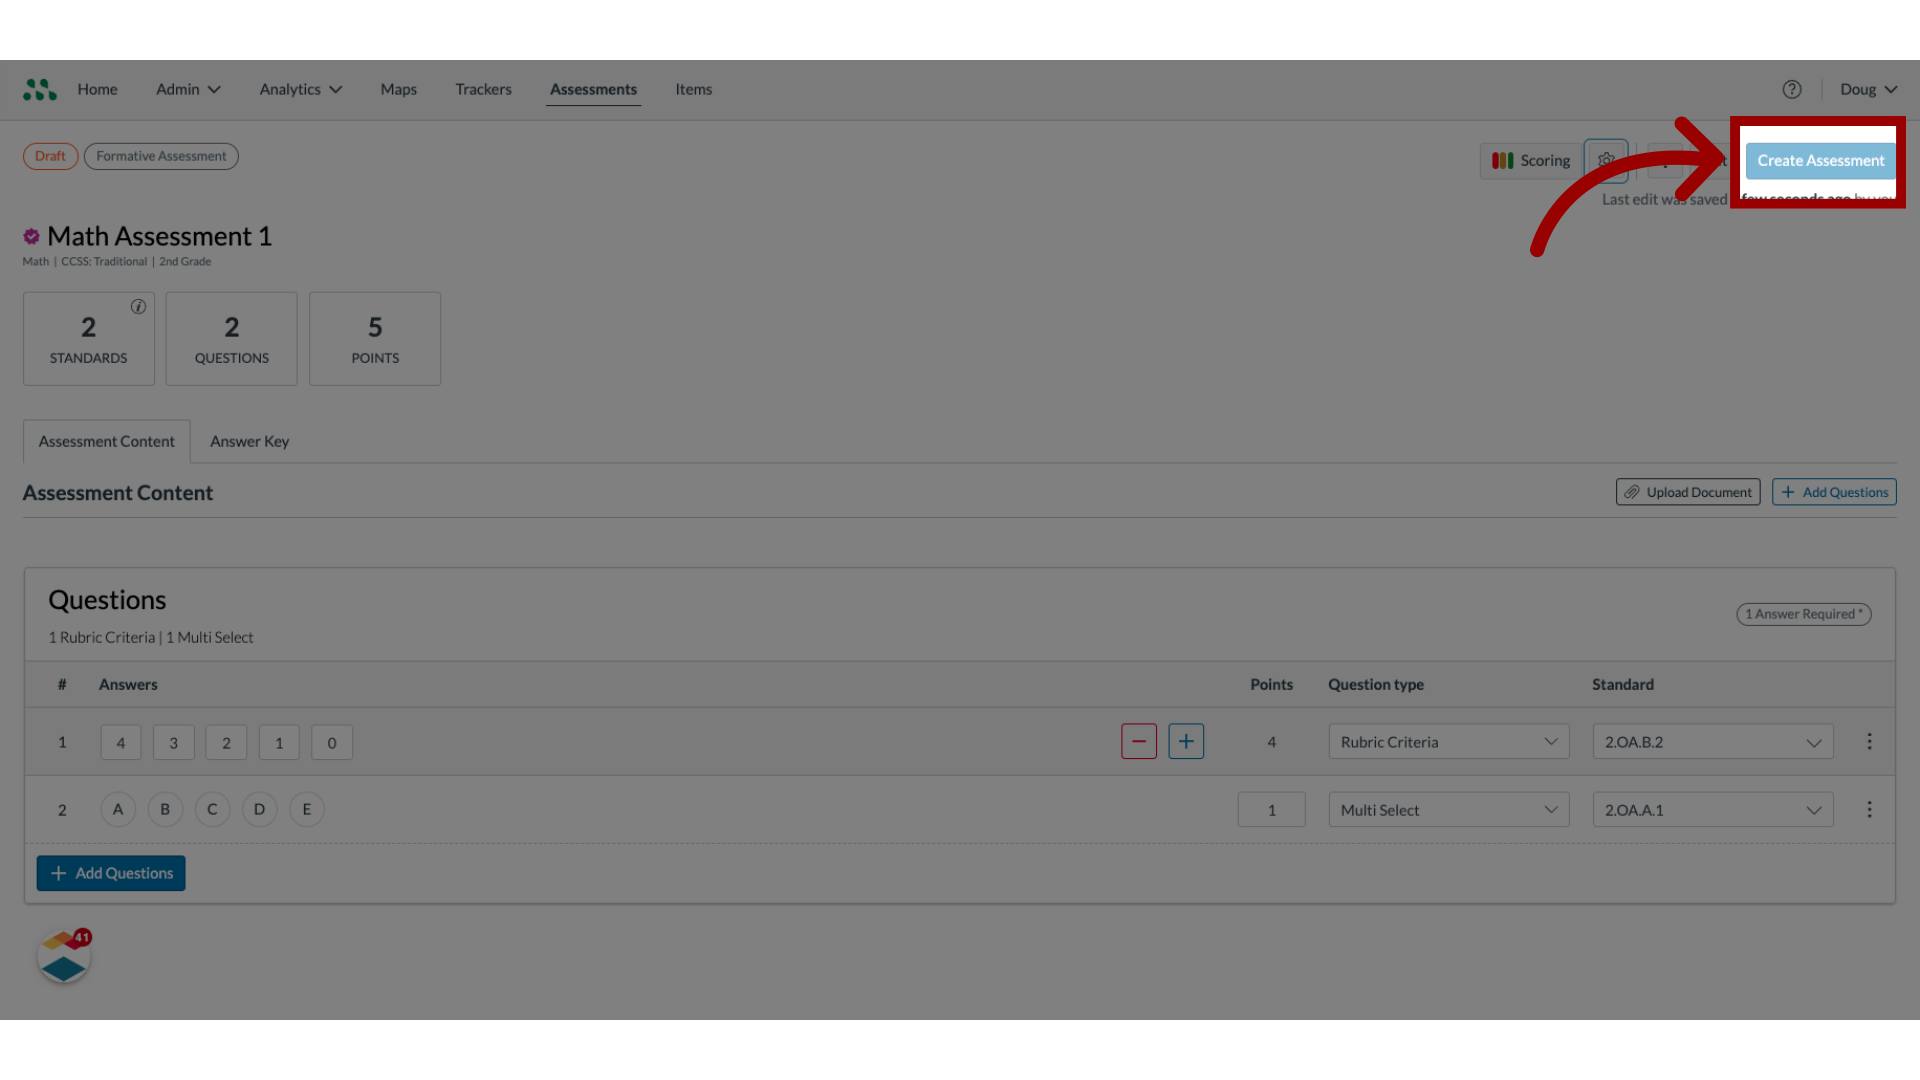
26. Create Assessment
To create the assessment, click the Create Assessment button.
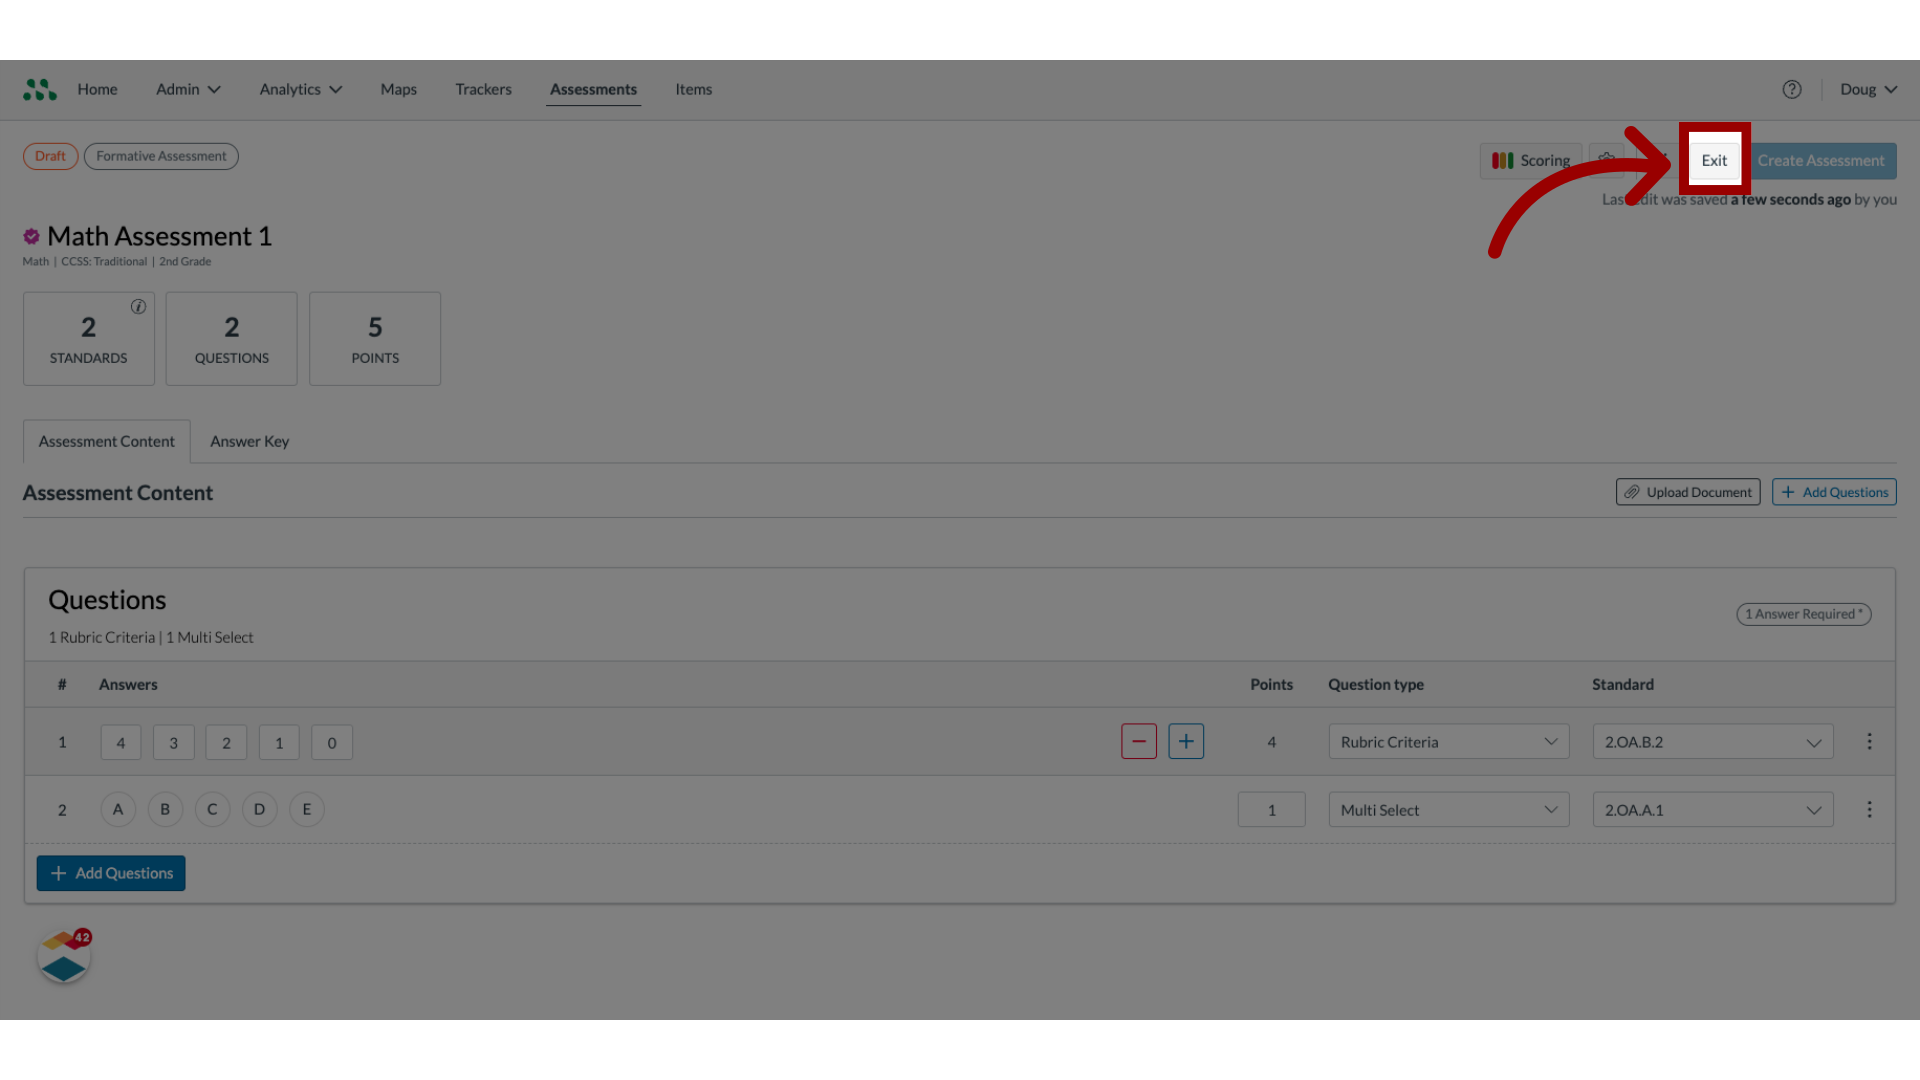
27. Close Assessment
To save the assessment as a draft, click the Exit button.
28. Open Assessment Options
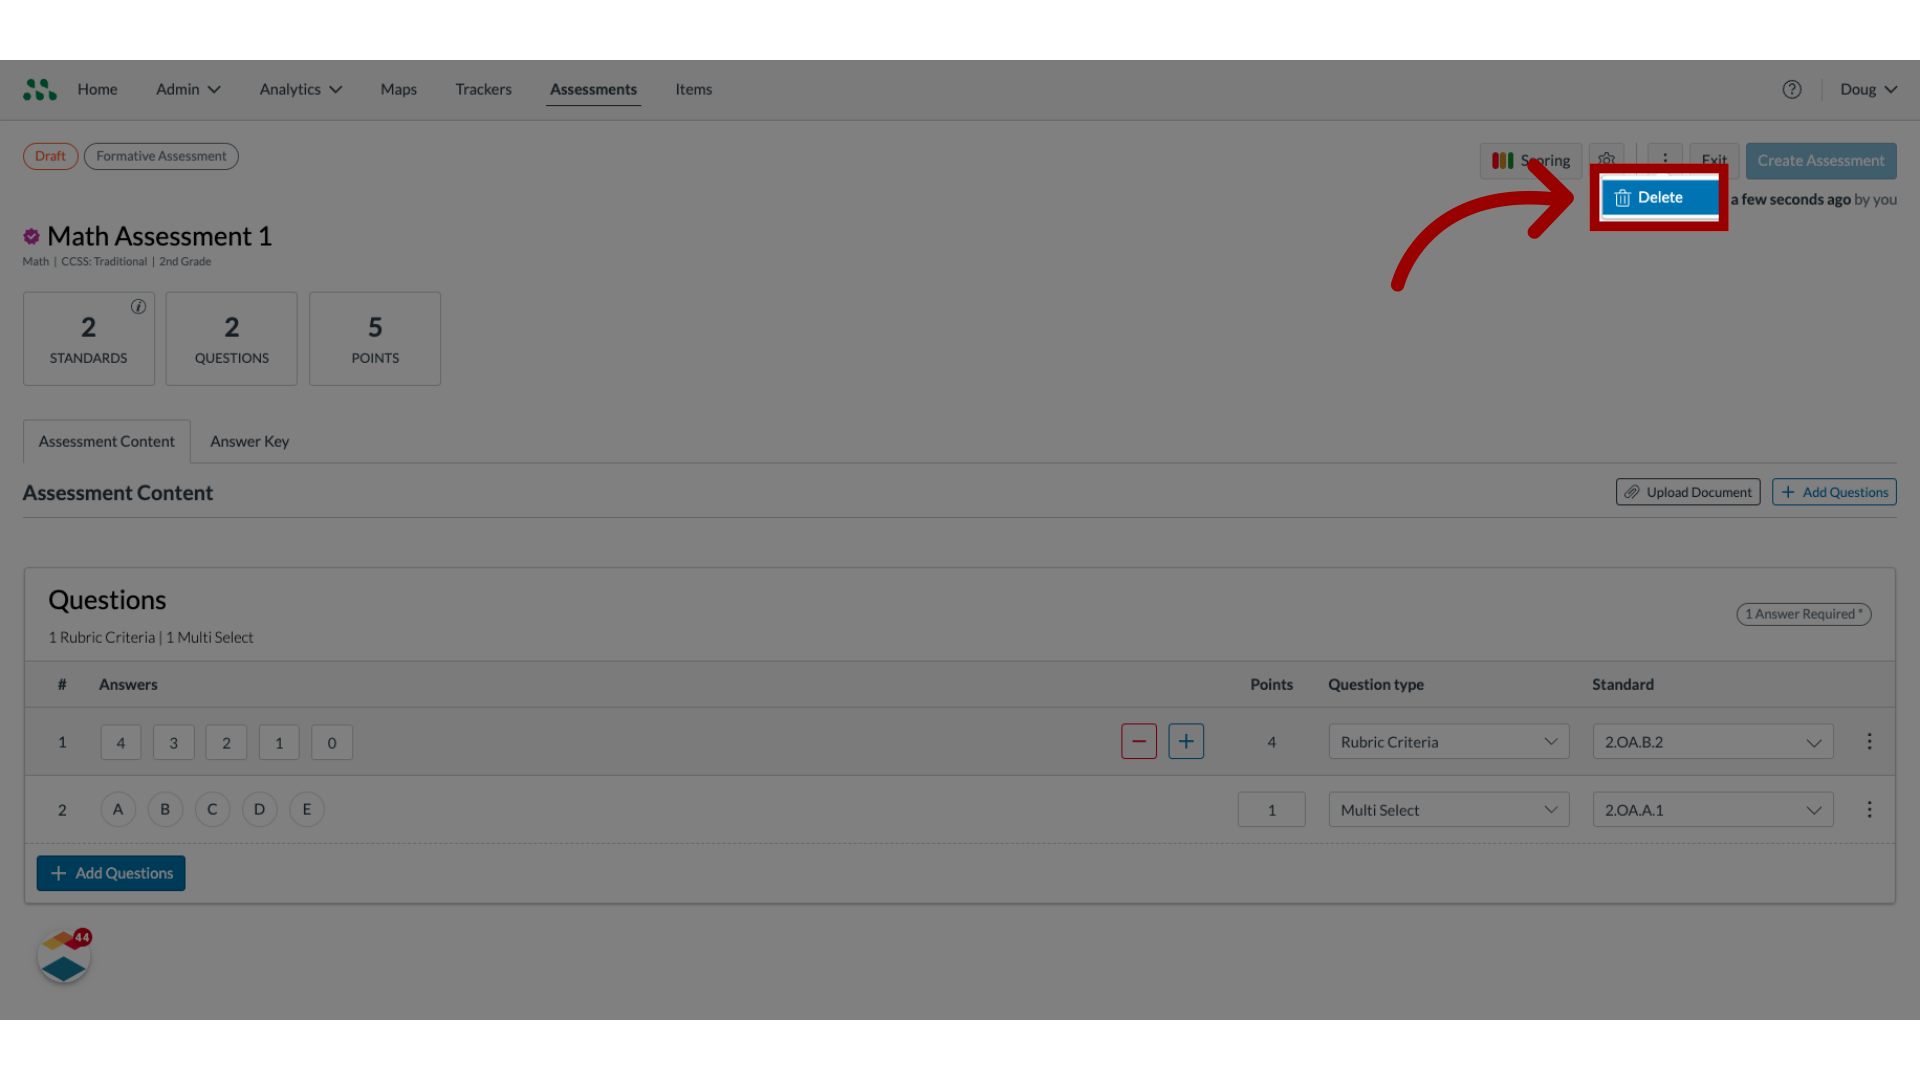
To delete the assessment, click the More icon.

29. Delete Assessment
Then, click the Delete button.
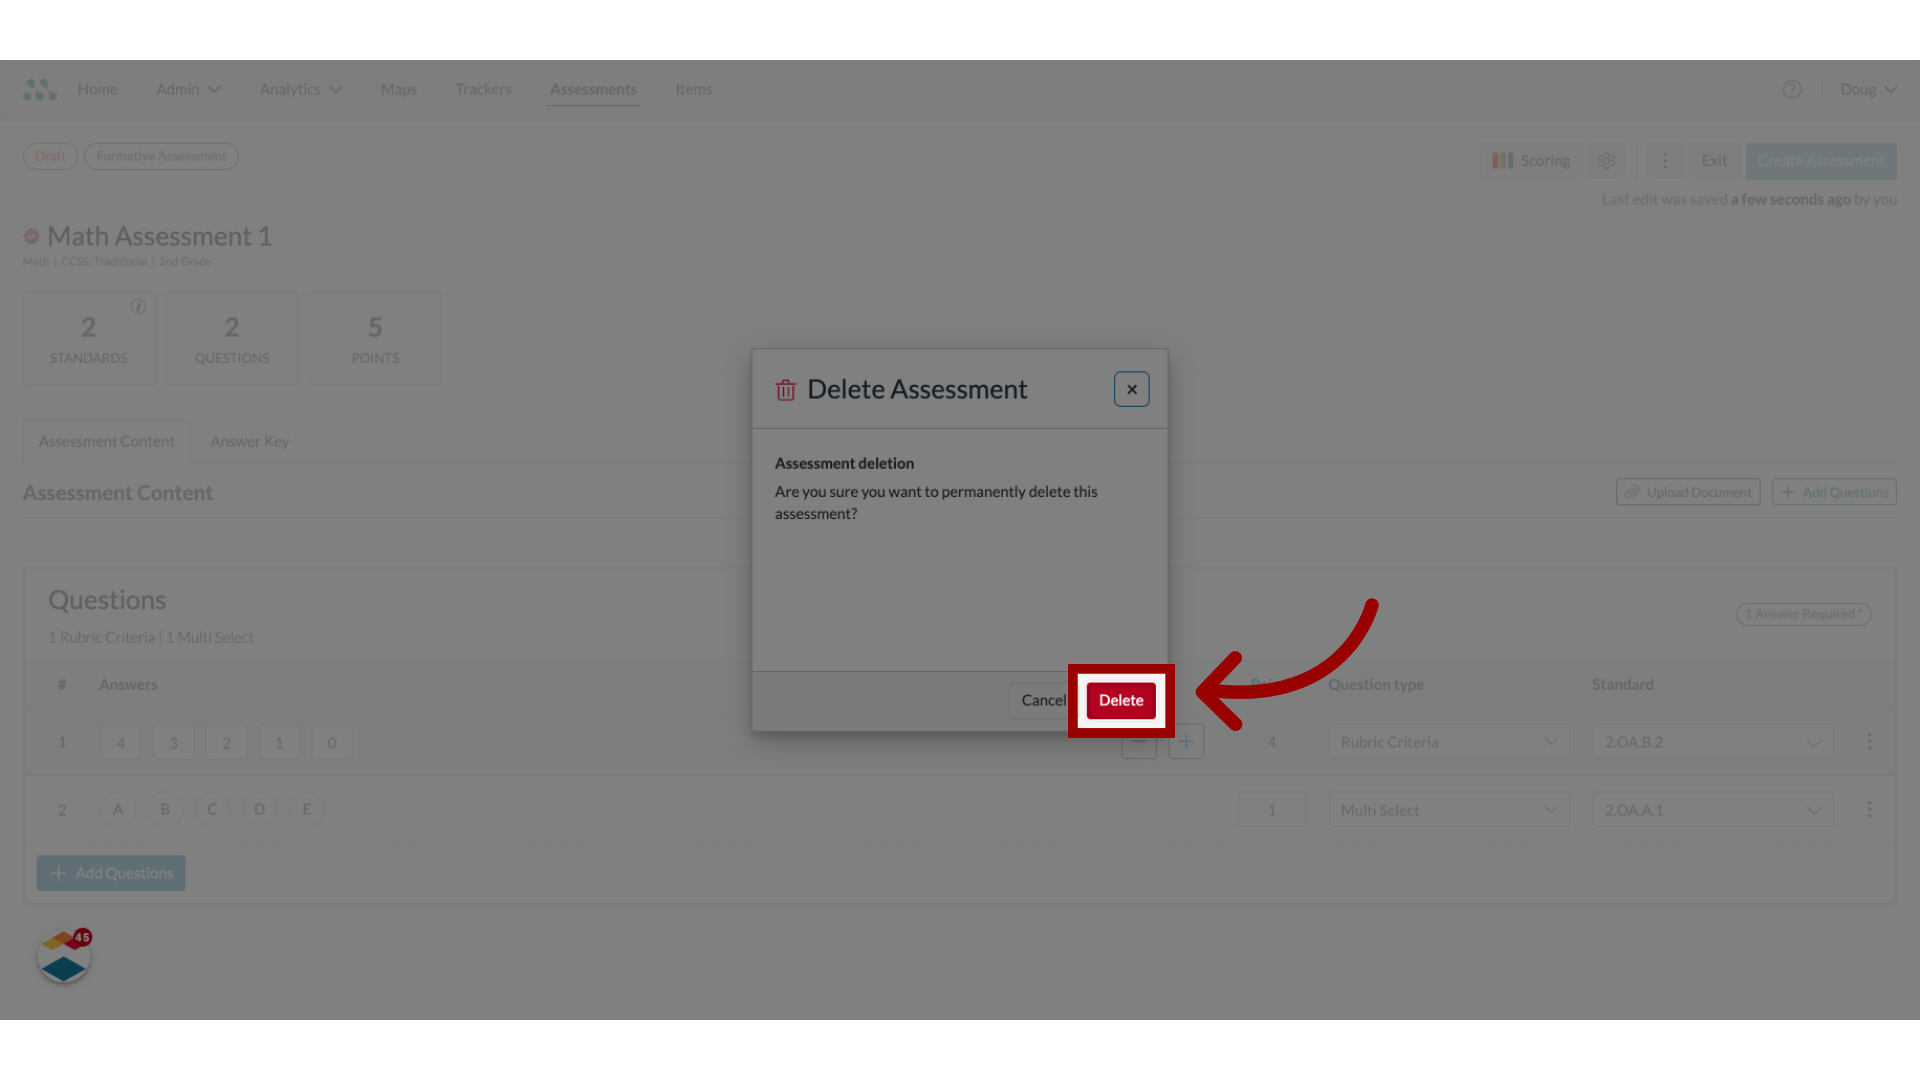
30. Confirm Deletion
The Delete Assessment confirmation window displays. To confirm the deletion, click the Delete button.
This guide covered how to create a document-based assessment.

