How do I enable Impact in Canvas as a Dashboard LTI?
Integrate Impact into Canvas as a Dashboard LTI for users.
Note: Impact Manage is a Canvas Account permission associated with the Dashboard LTI. The Impact Manage permission toggles the visibility of the Impact Dashboard in Canvas. Only Canvas Admin who are also Impact Admin have access.
How do I enable Impact in Canvas as a Dashboard LTI?
1. Open Canvas Admin Navigation Menu
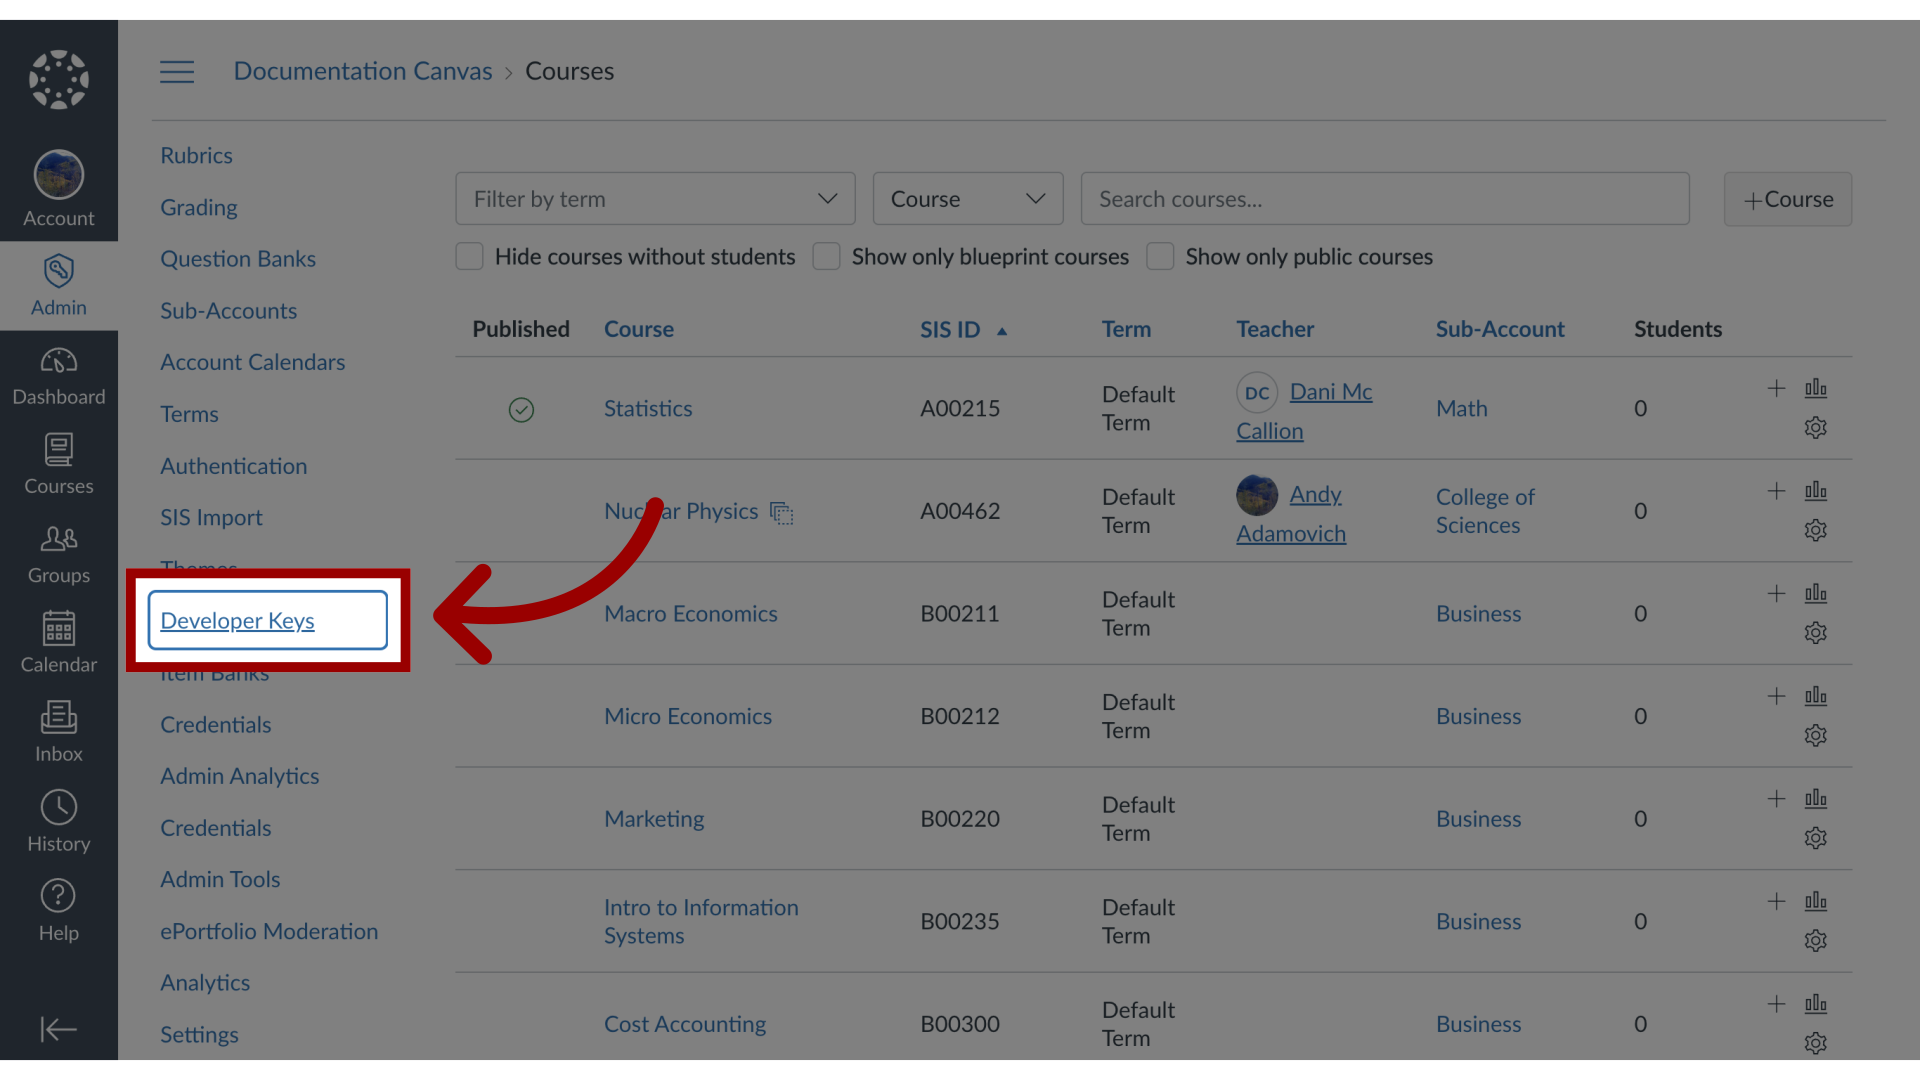
In the Canvas Global Navigation, click the Admin button.

2. Open Developer Keys
In the Admin Menu, open the Developer Keys page.
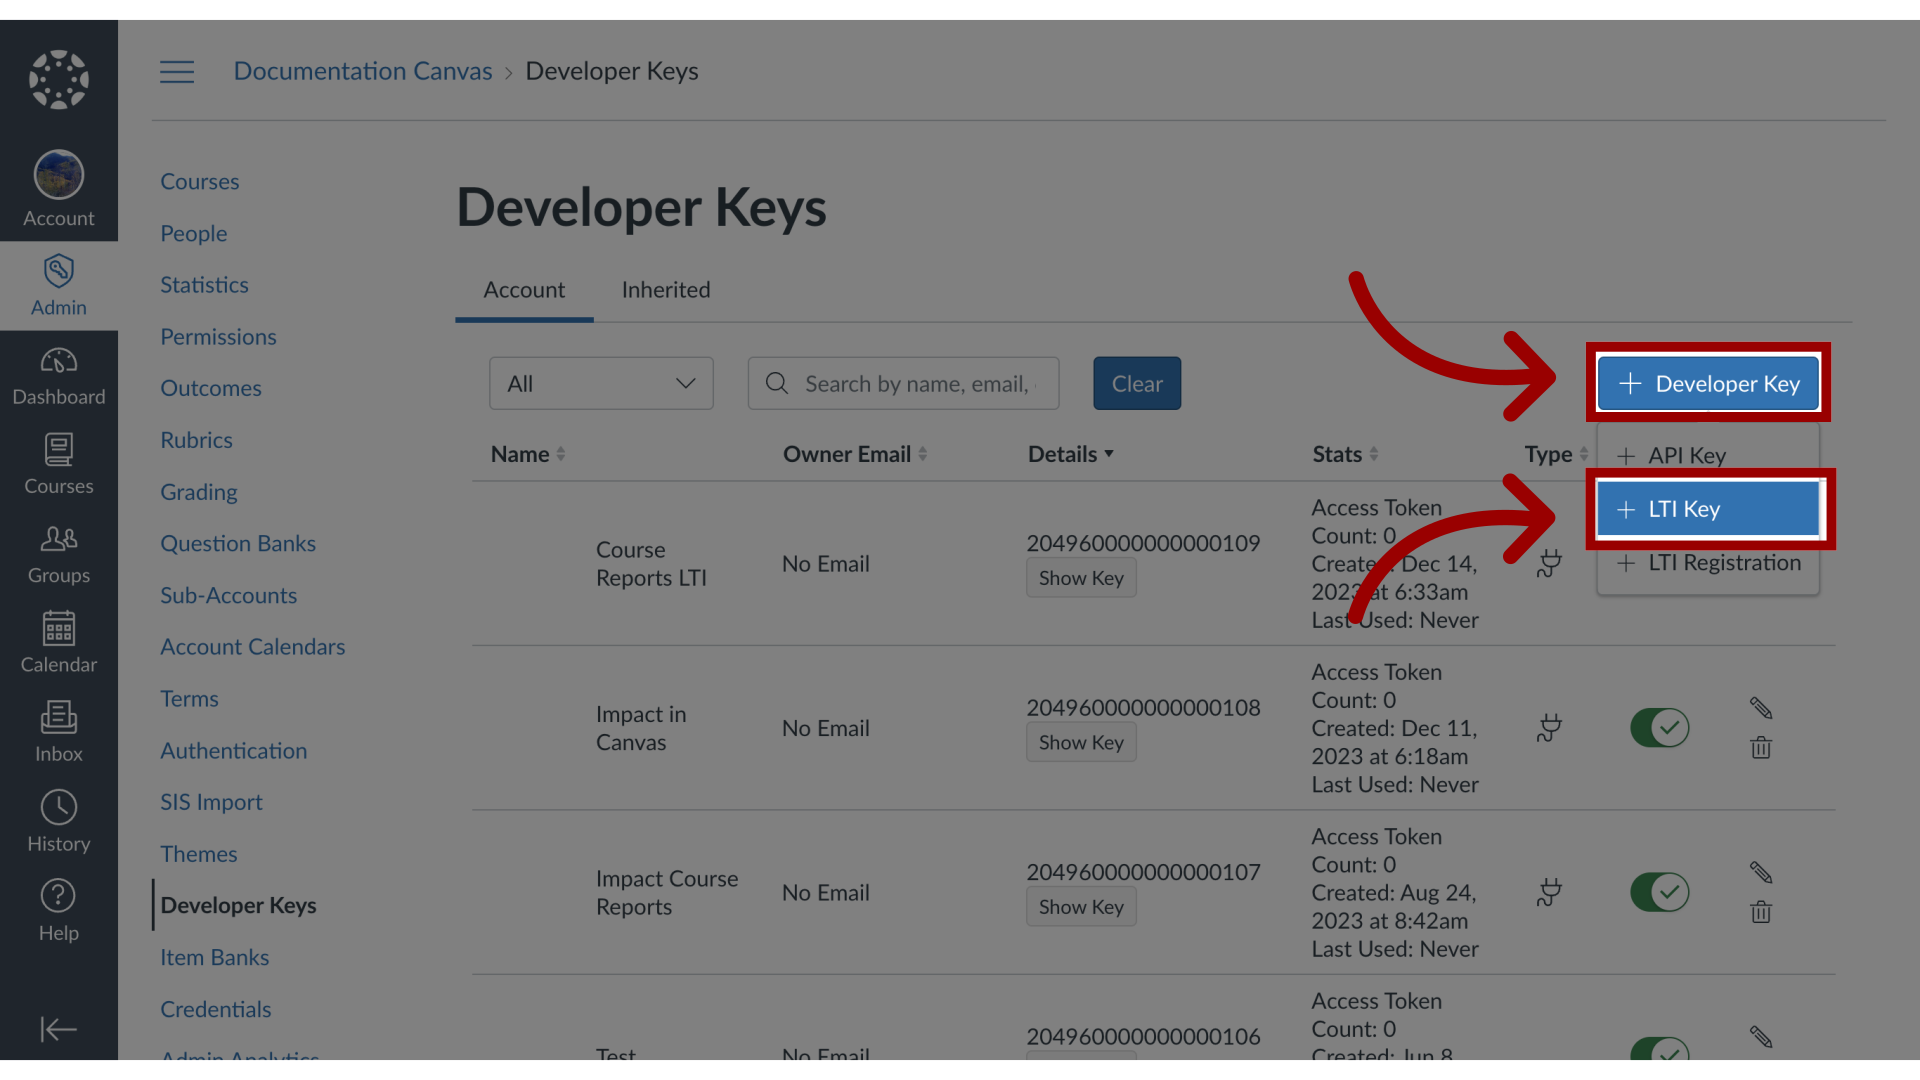
3. Add Developer Key
Click the + Developer Key button followed by + LTI Key button.
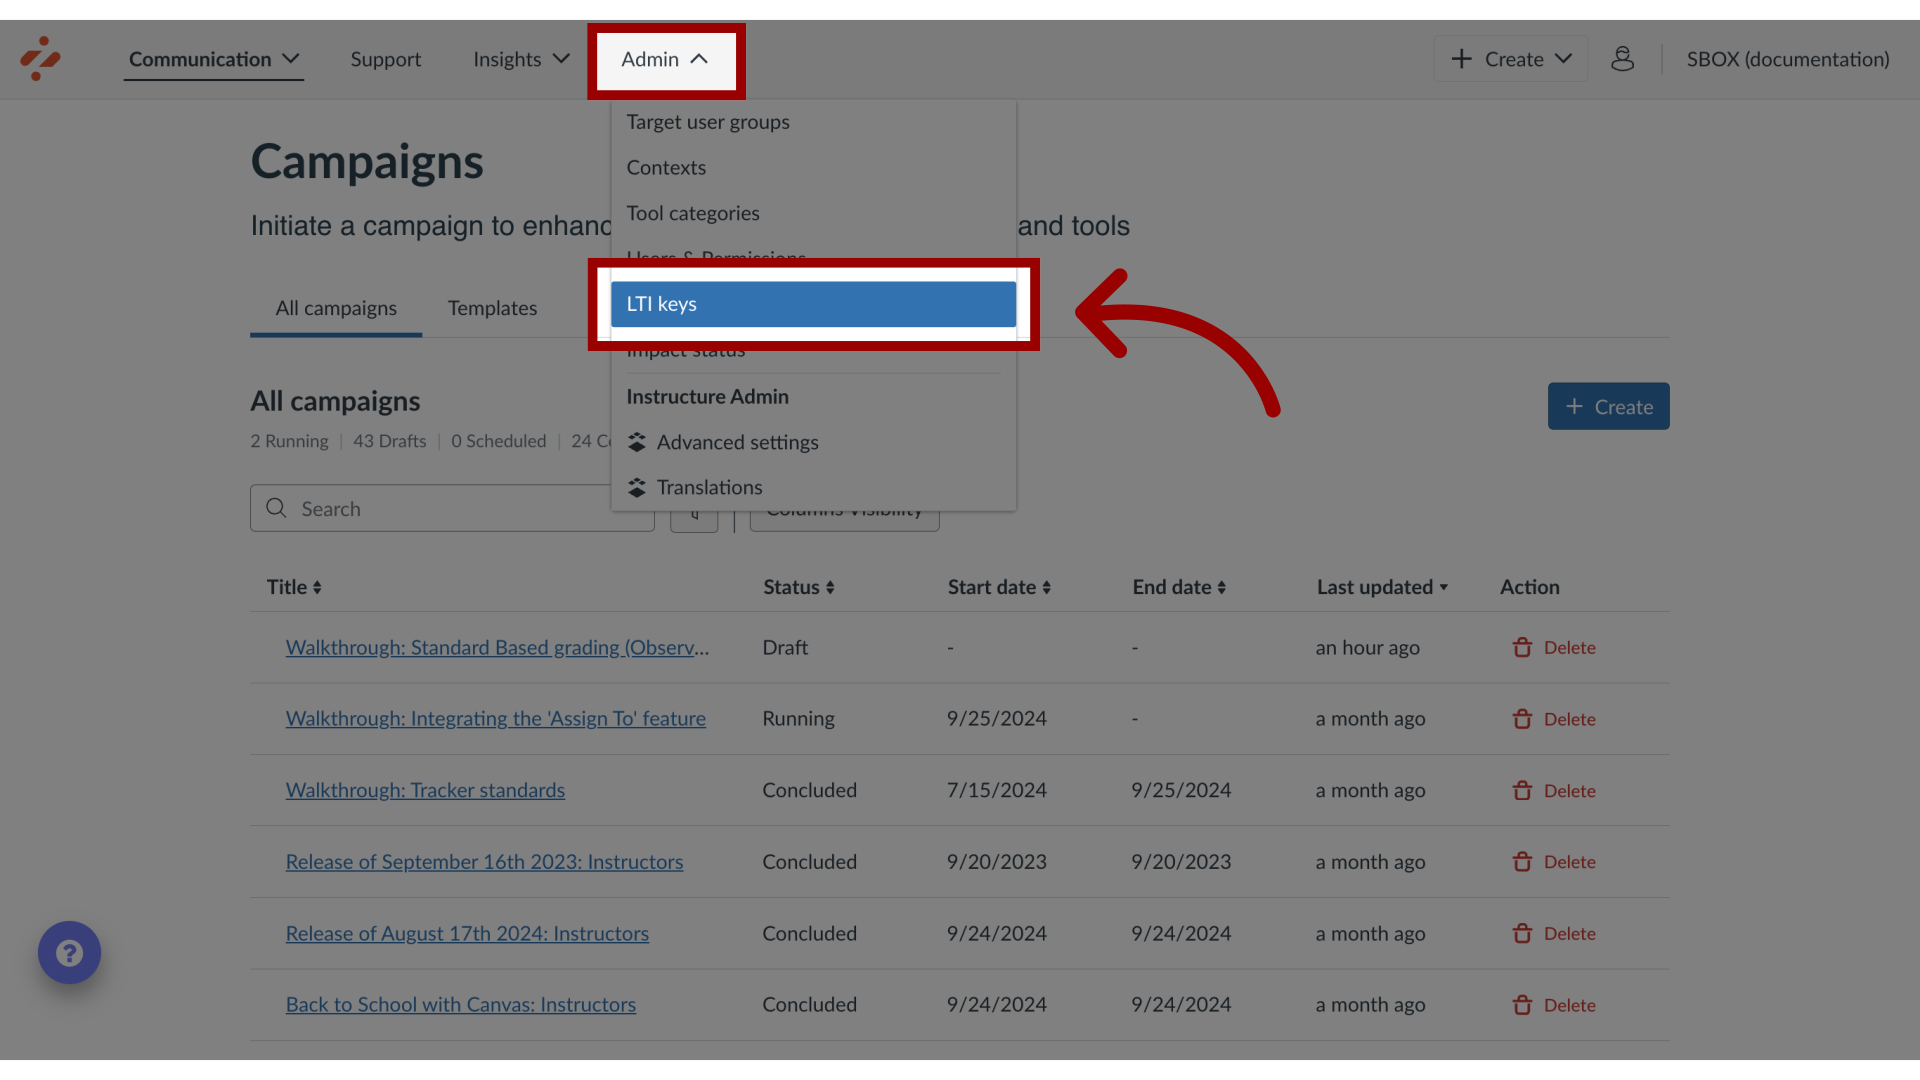
4. Open LTI Keys
In the Global Navigations in Impact, click the Admin link. Then click the LTI Keys link.
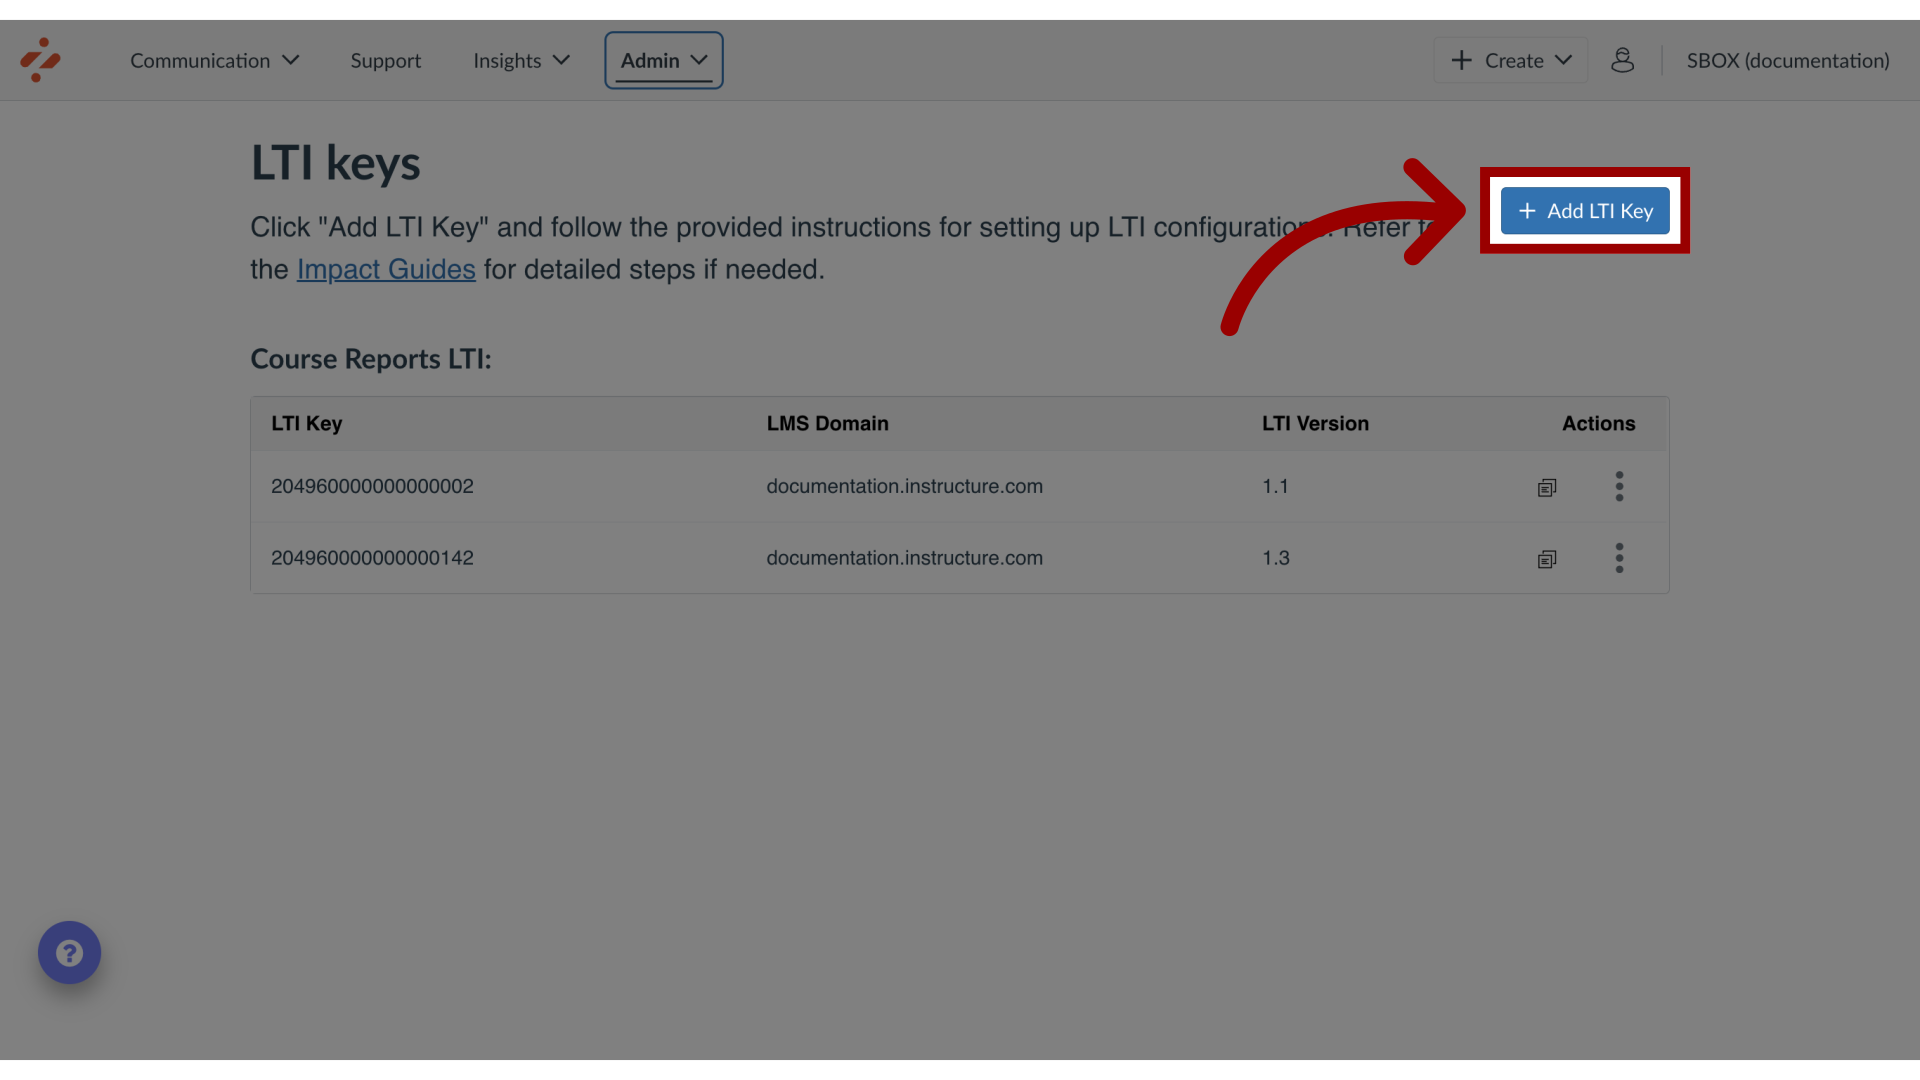
5. Add LTI Key
Click the Add LTI Key button.
6. Add Integration Type and LMS Domain
Select the Integration Type and LMS Domain. Then click the Next button.
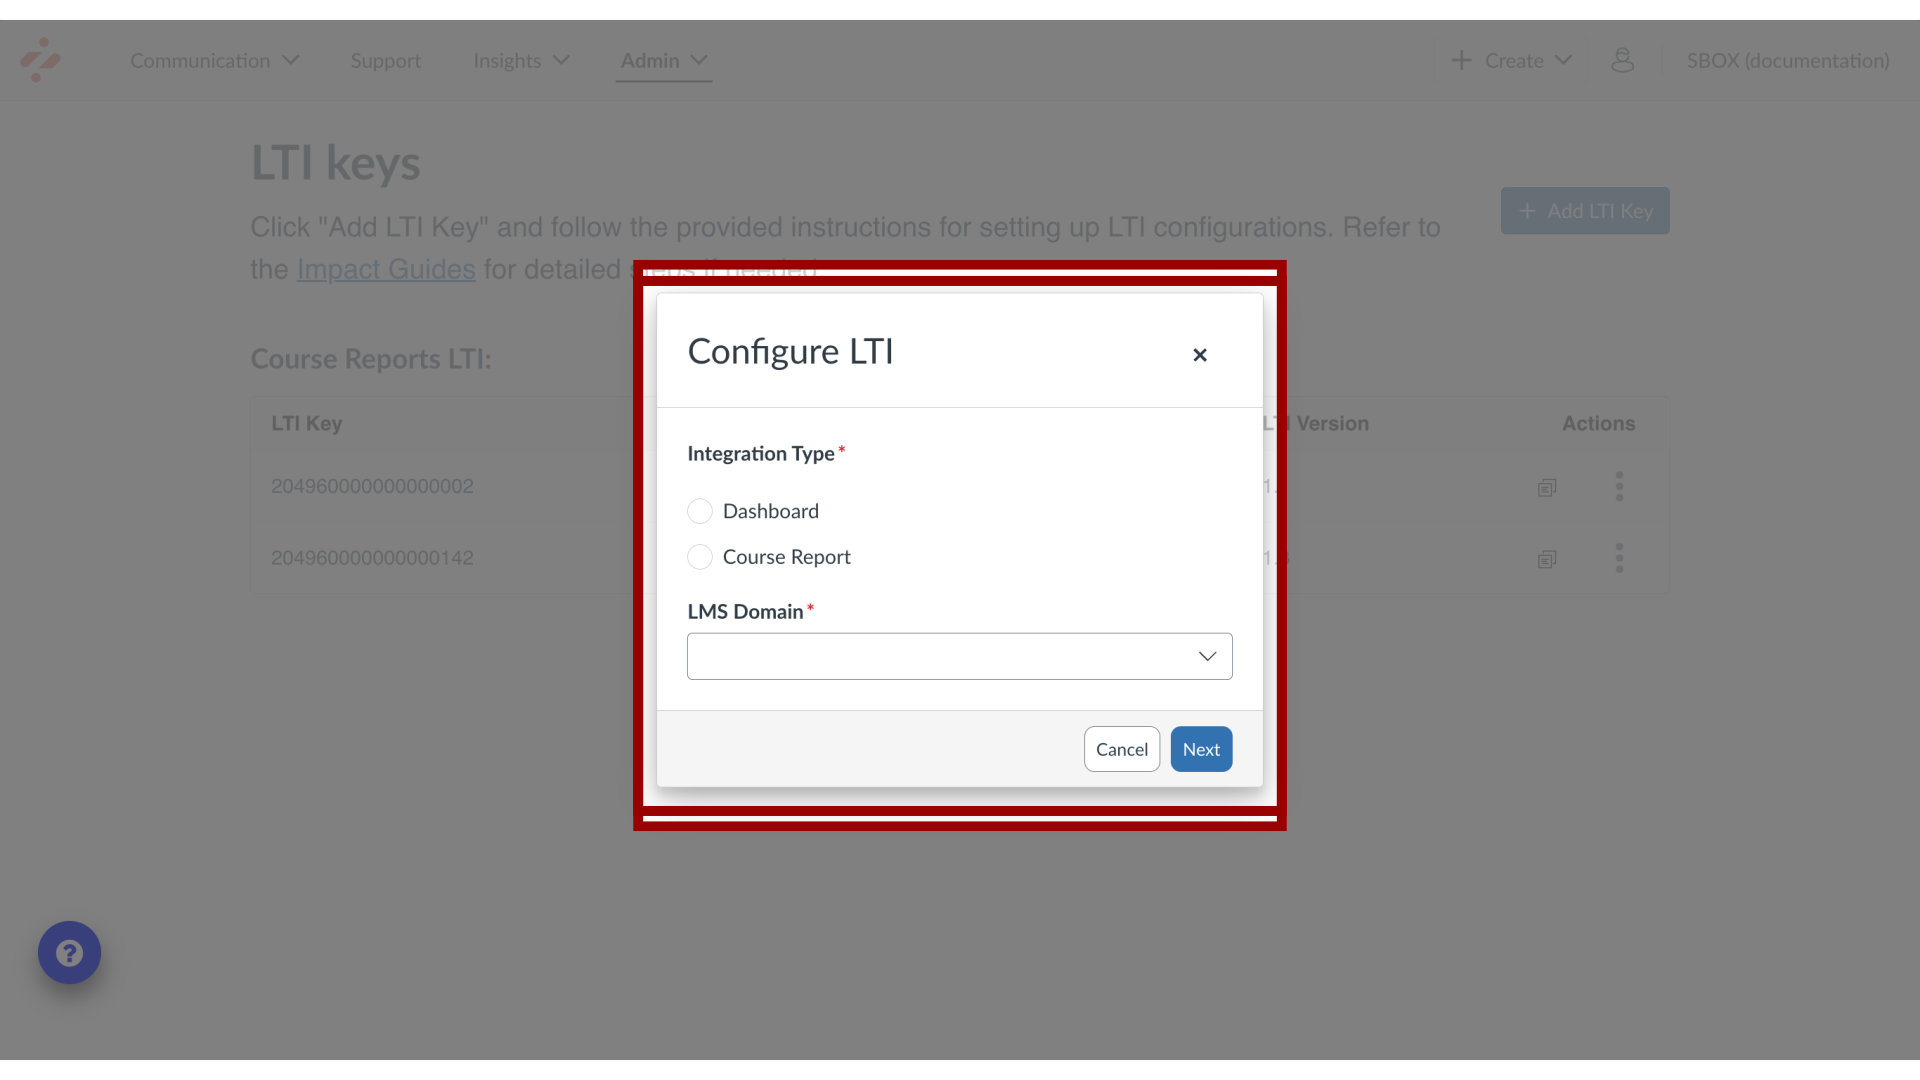
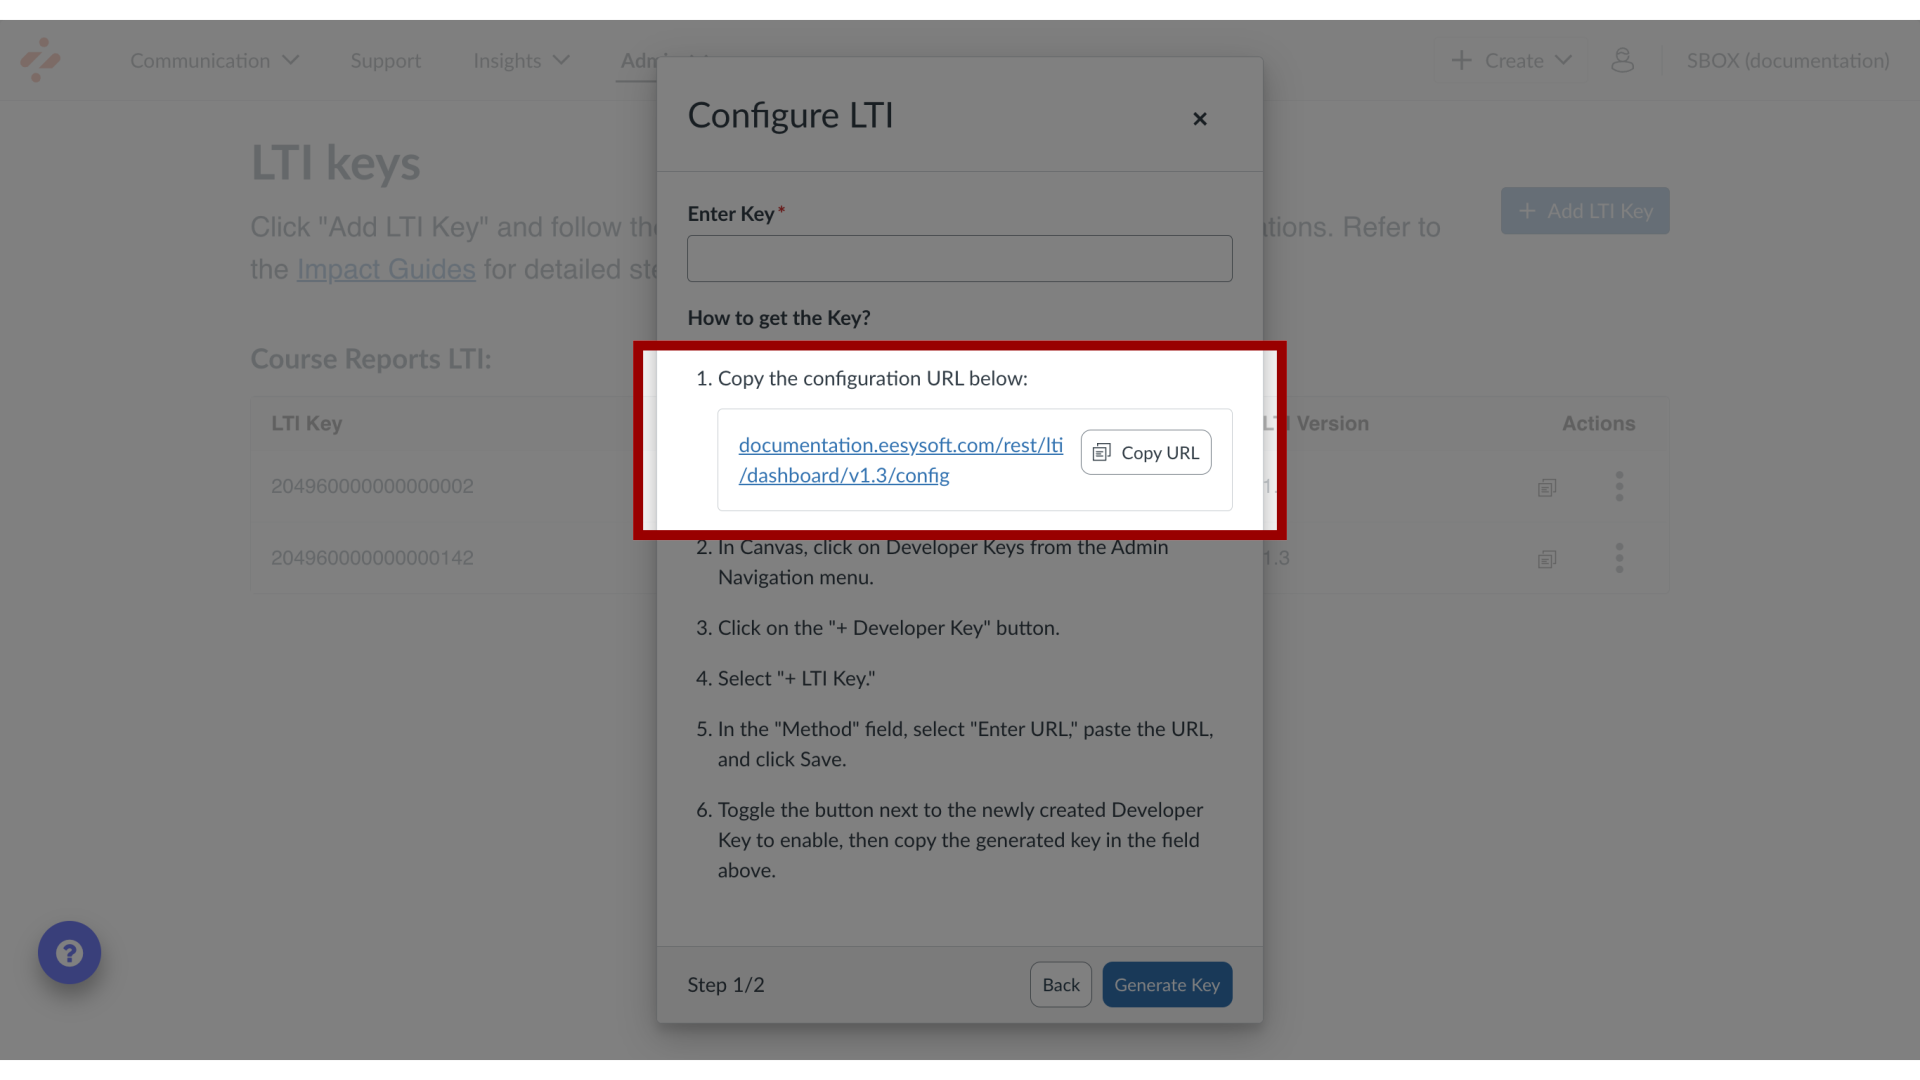
7. Copy Configuration URL
In the Configure LTI popup, copy the Configuration URL.
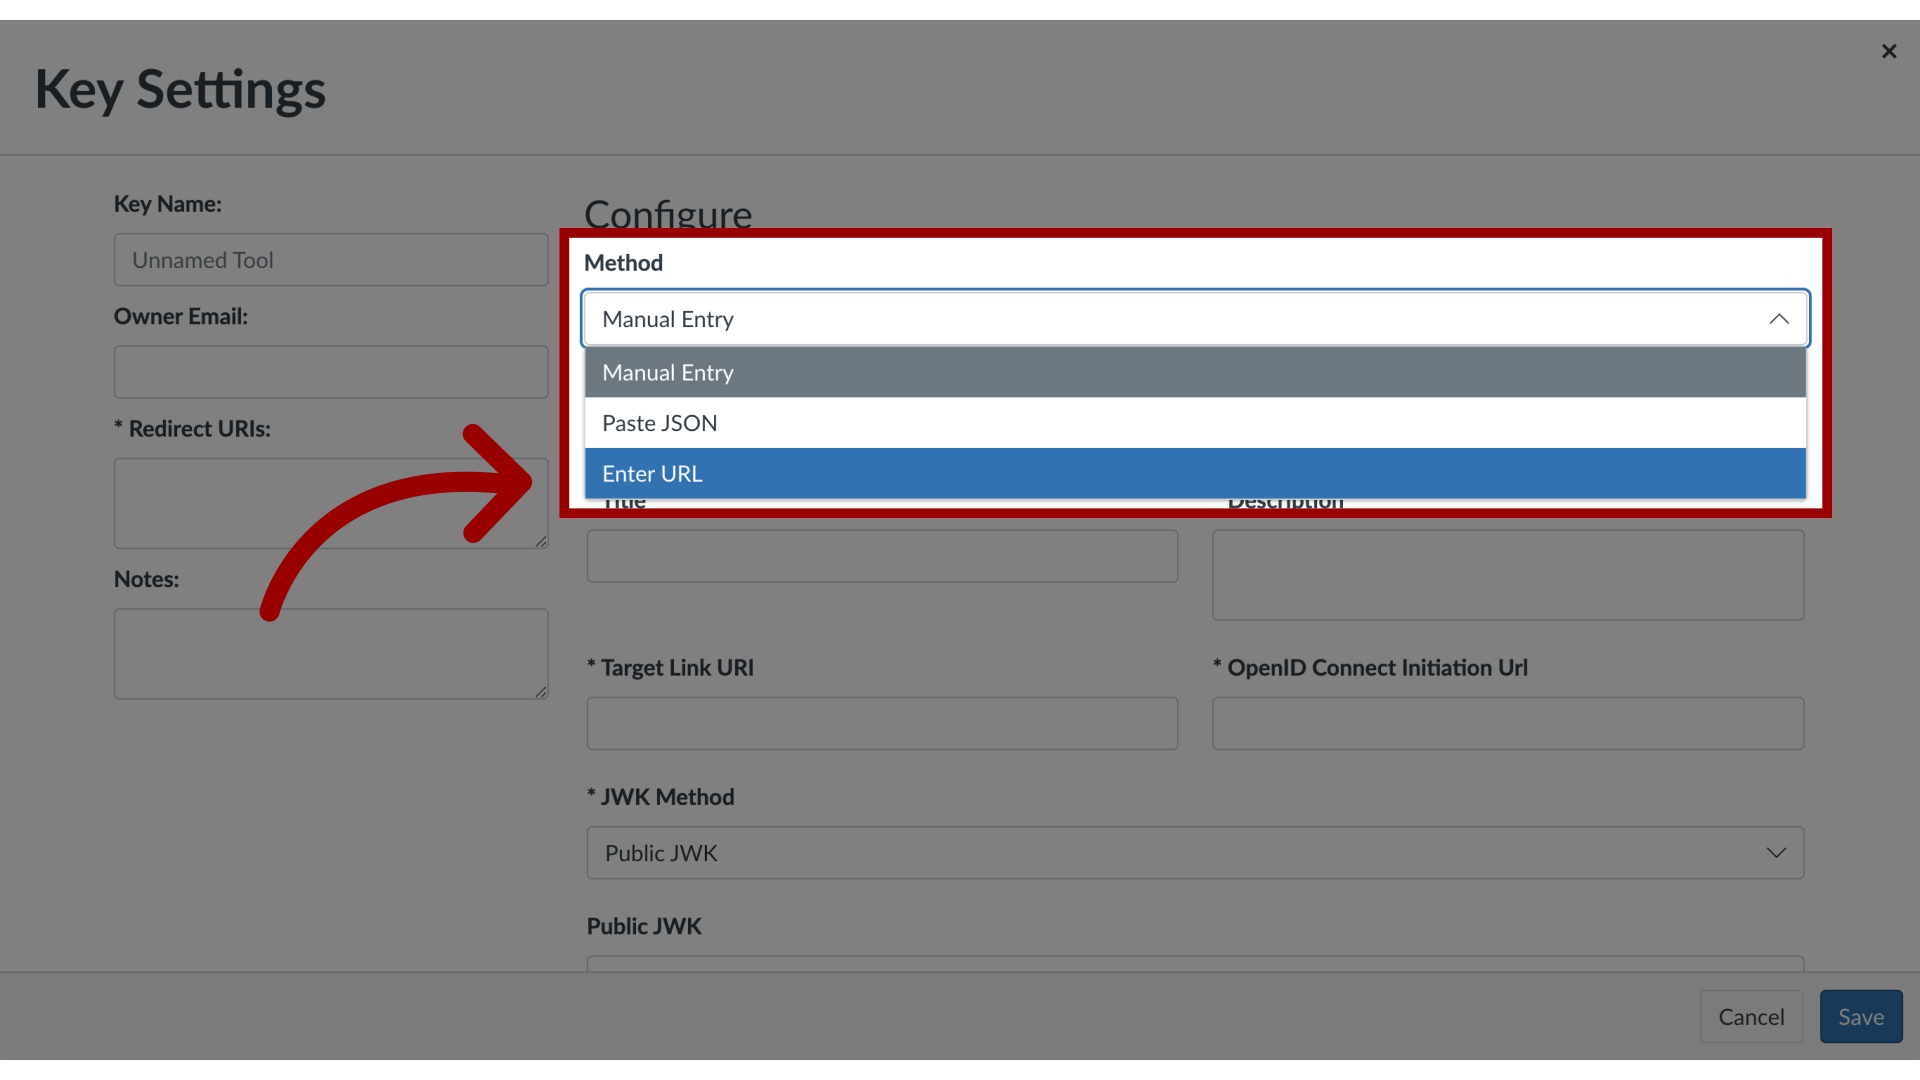
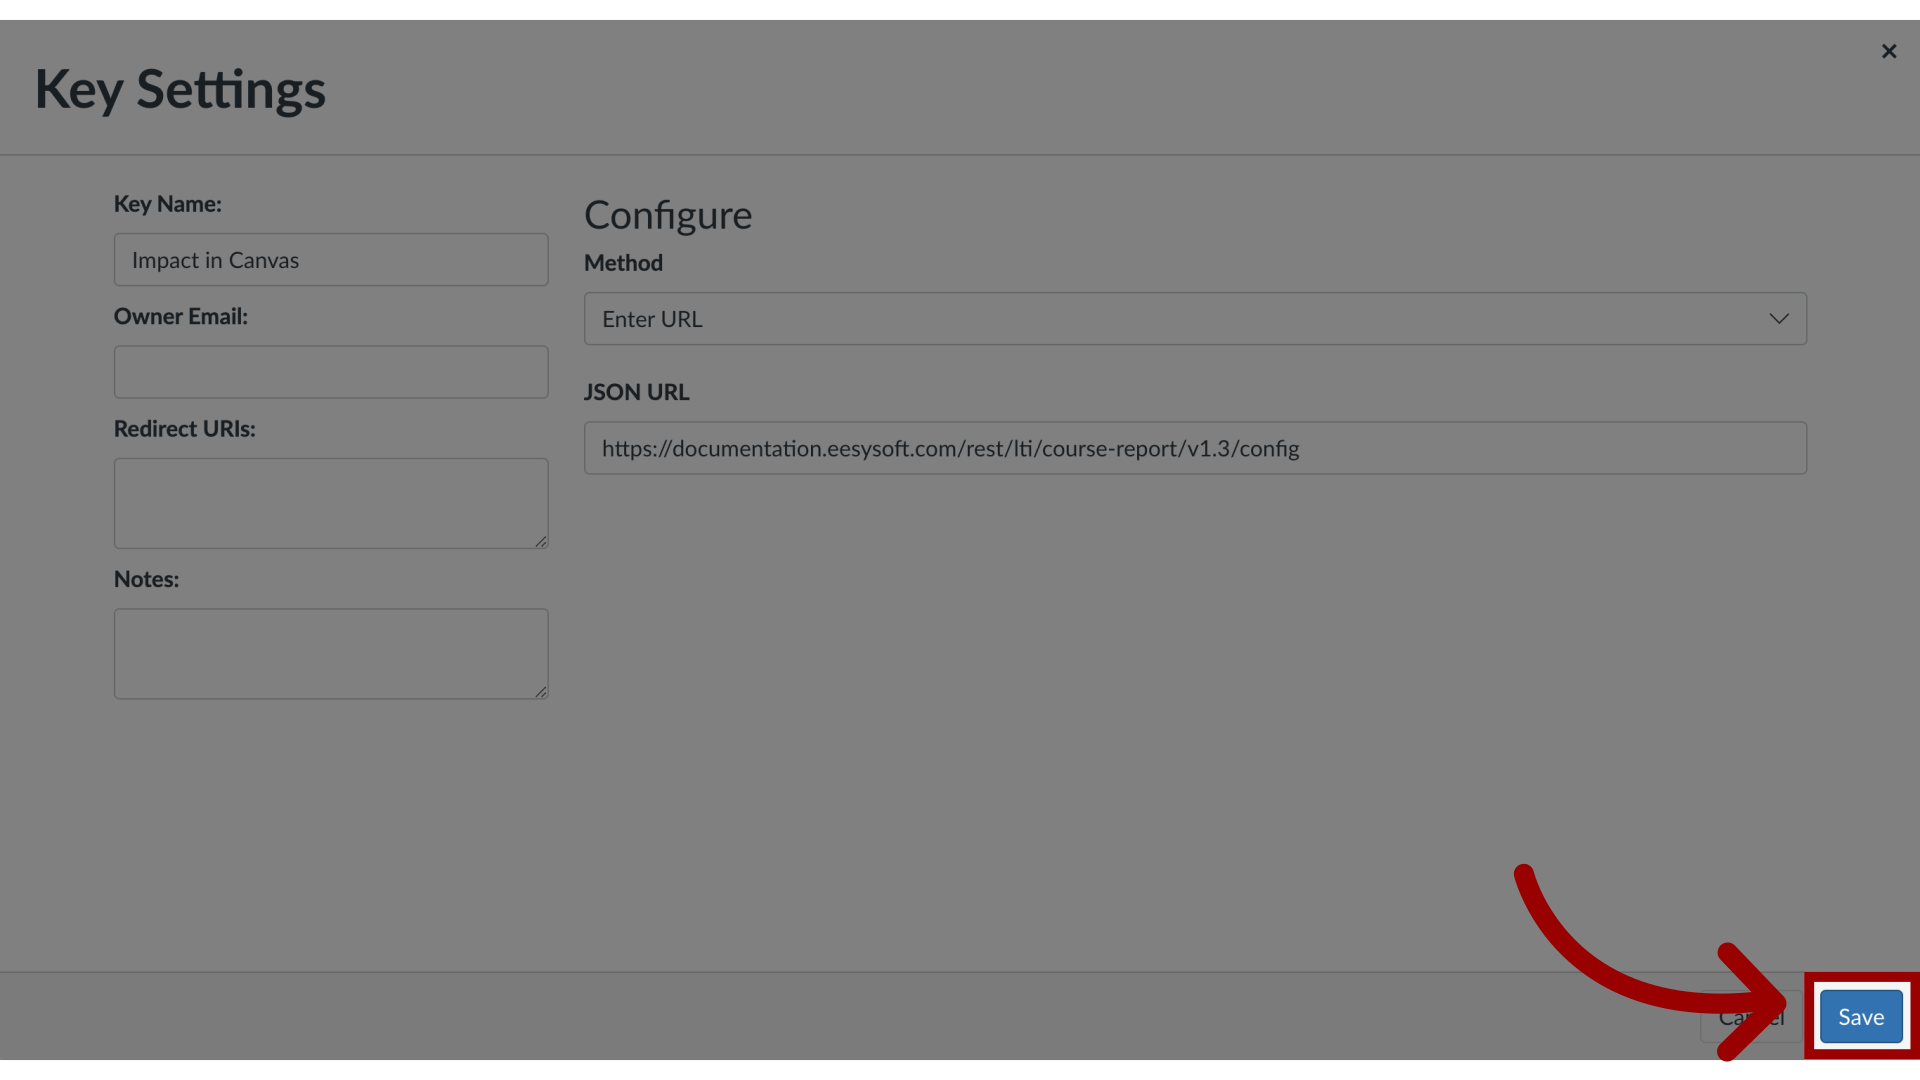
8. Add Canvas Key Settings
Click the Method drop-down and select Enter URL.
9. Add JSON URL and Key Name
Insert the JSON URL and Key Name.
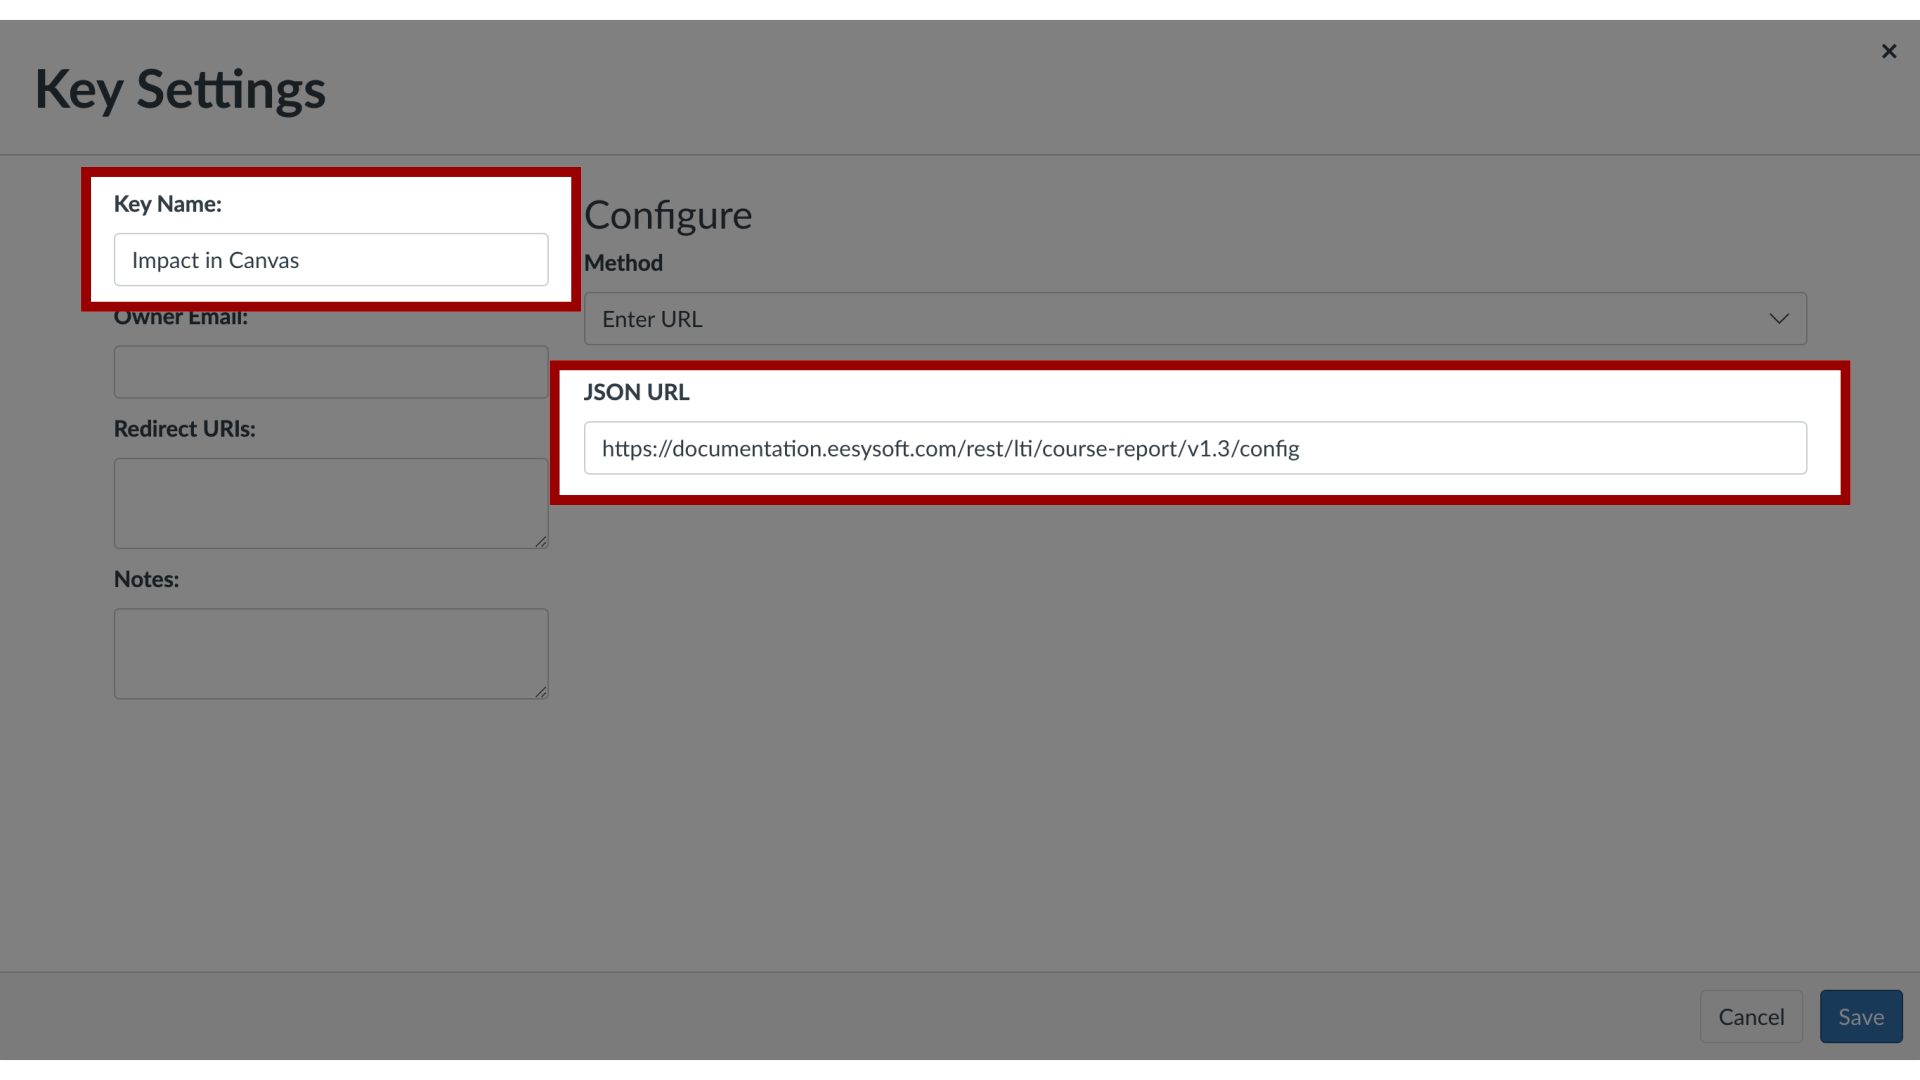
10. Save Key Settings
Then click the Save button.
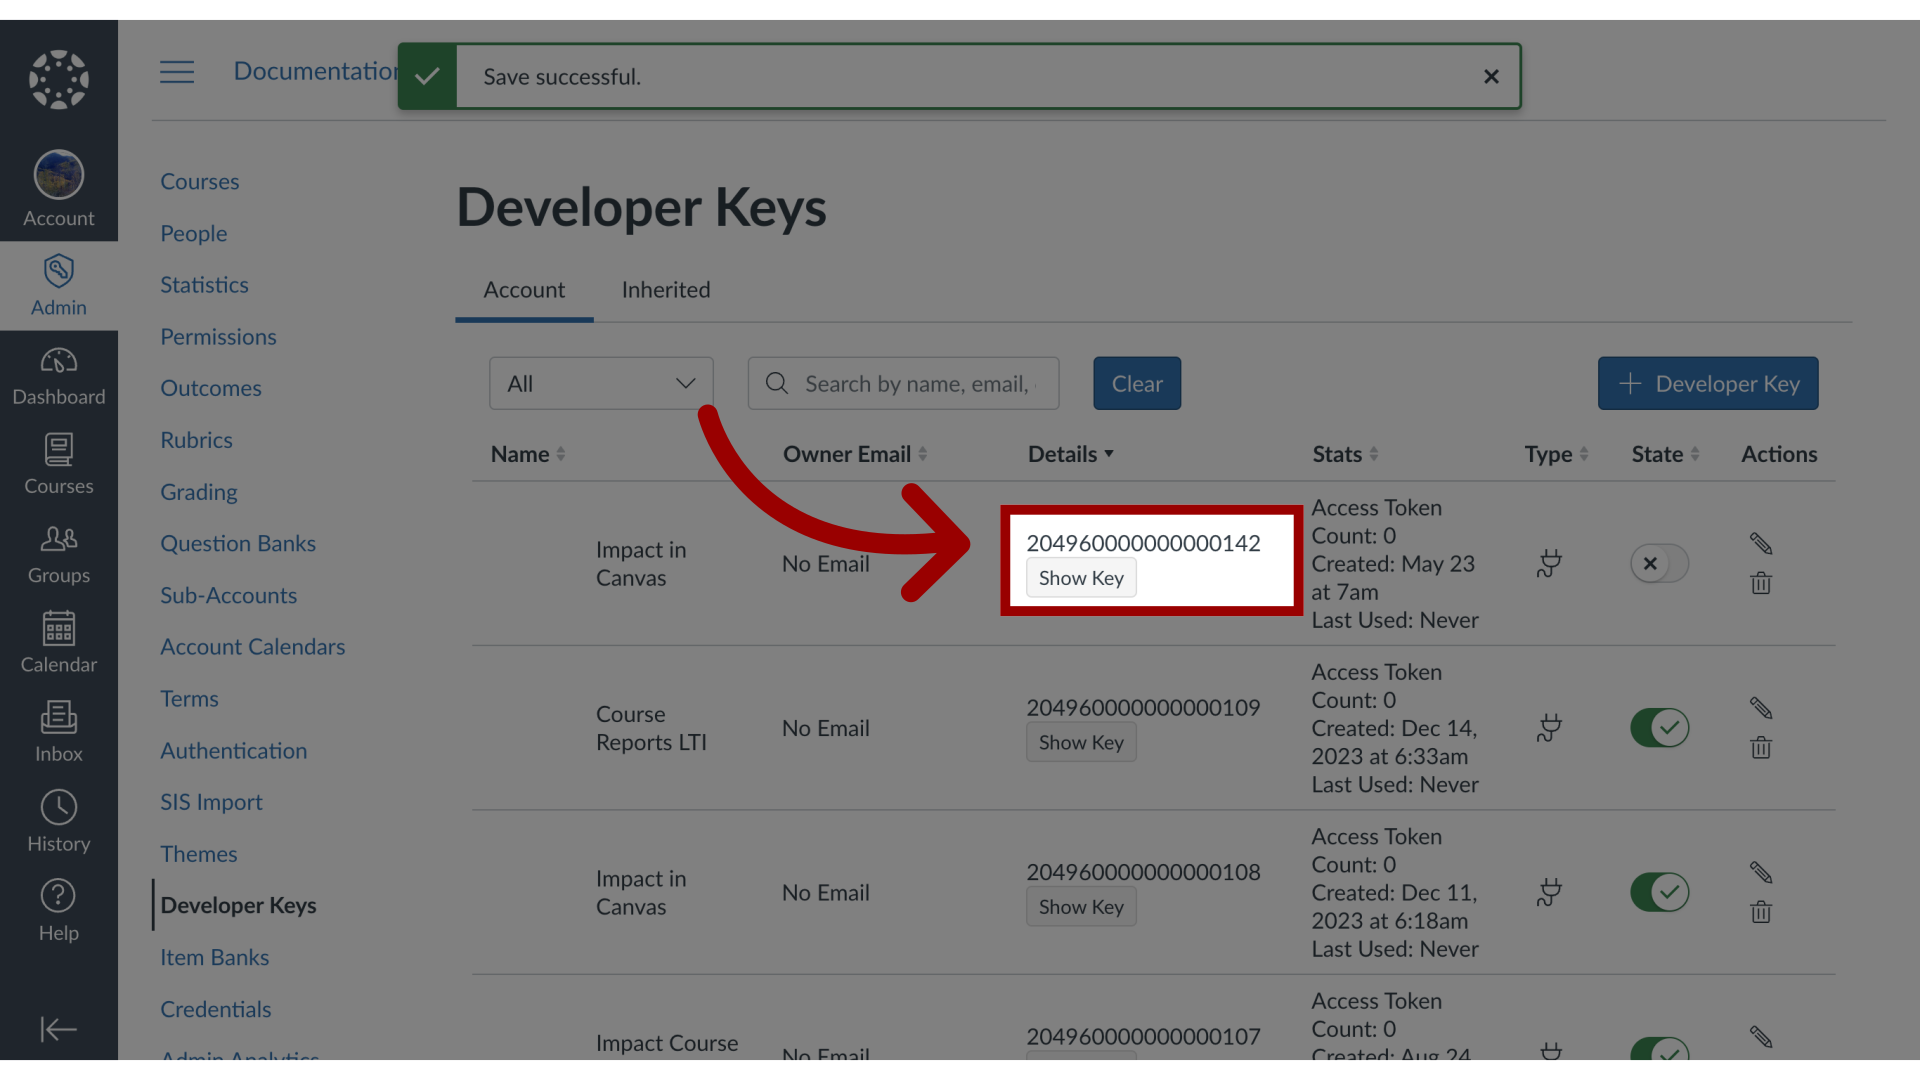
11. Copy Developer Key
In the Details column, copy the Developer Key for your new LTI.
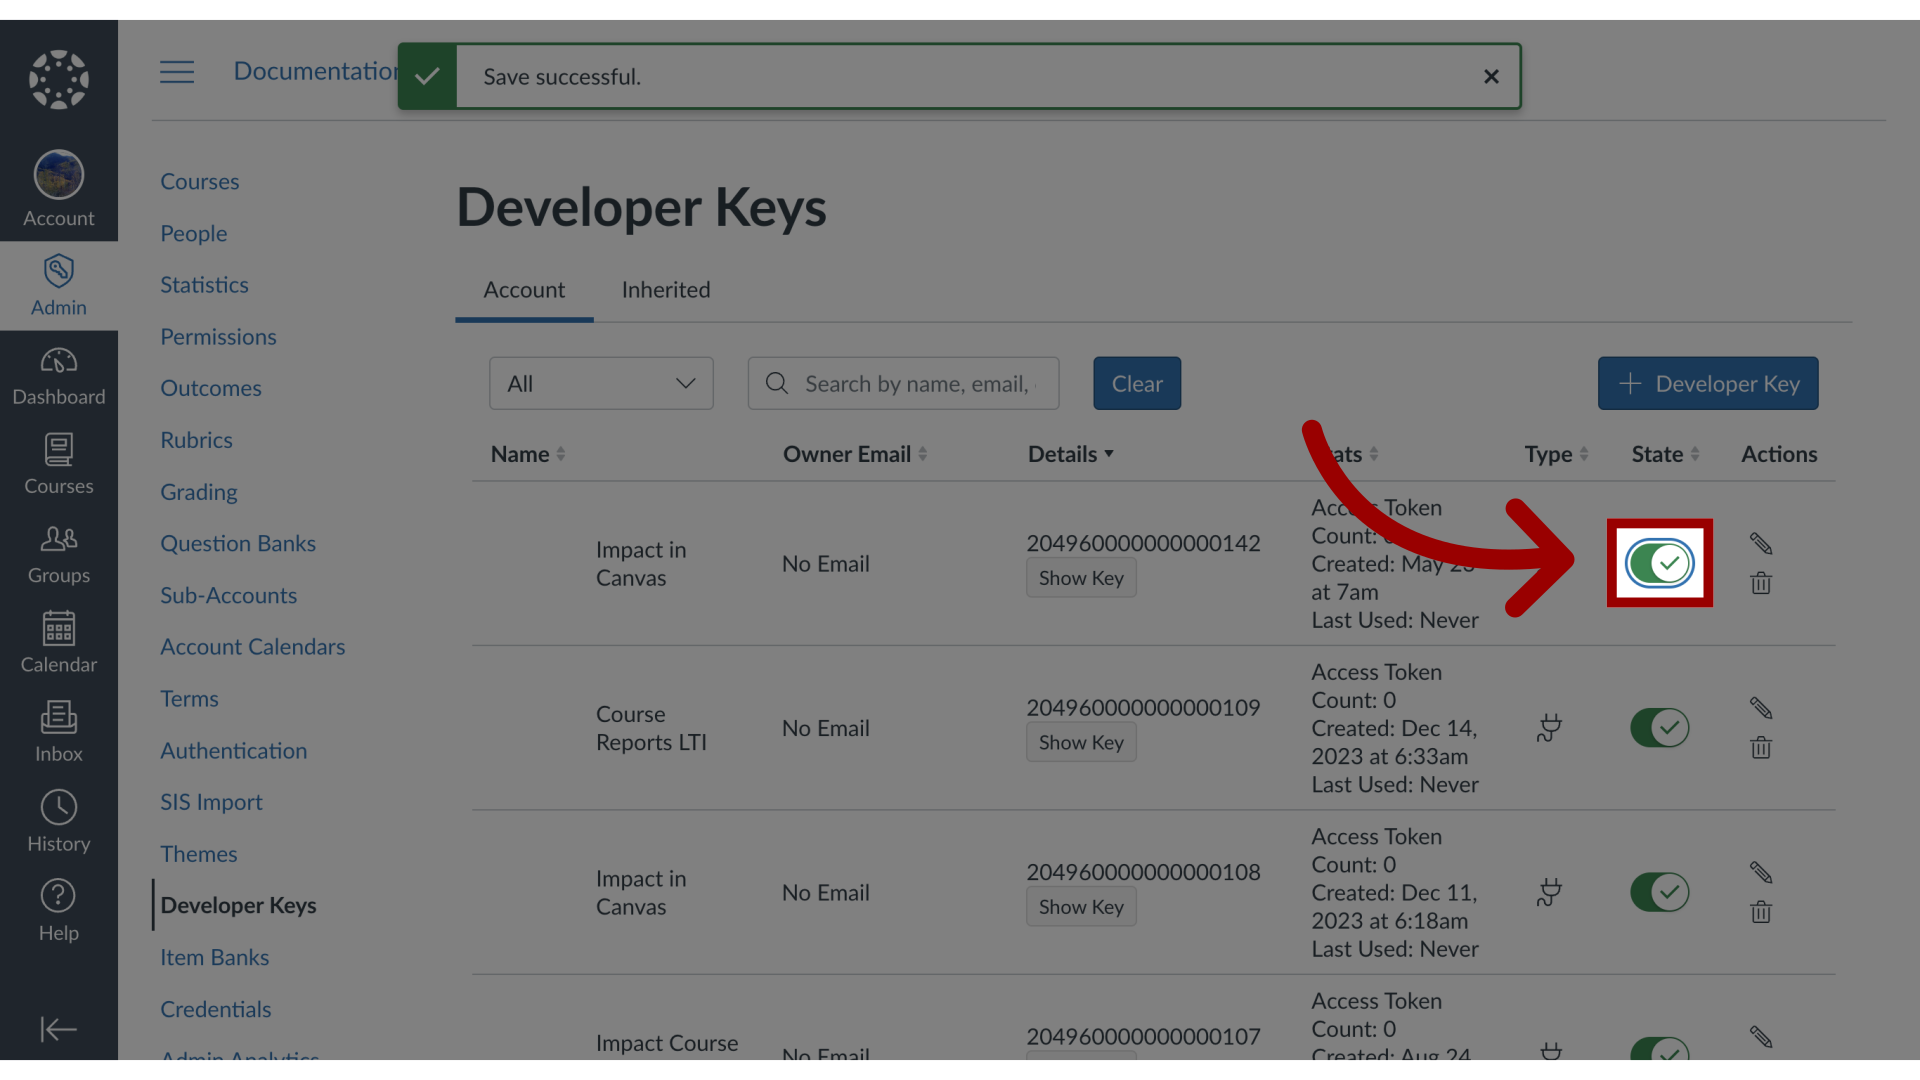
12. Enable Developer Key
Toggle the Developer Key to On.
13. Multiple Impact Instances
If an Impact instance is connected to multiple Canvas instances, there are multiple options. Click the correct LTI Version 1.3 and add the developer key from the Canvas account.

14. Add LTI Key in Impact
Enter the Developer Key from Canvas.
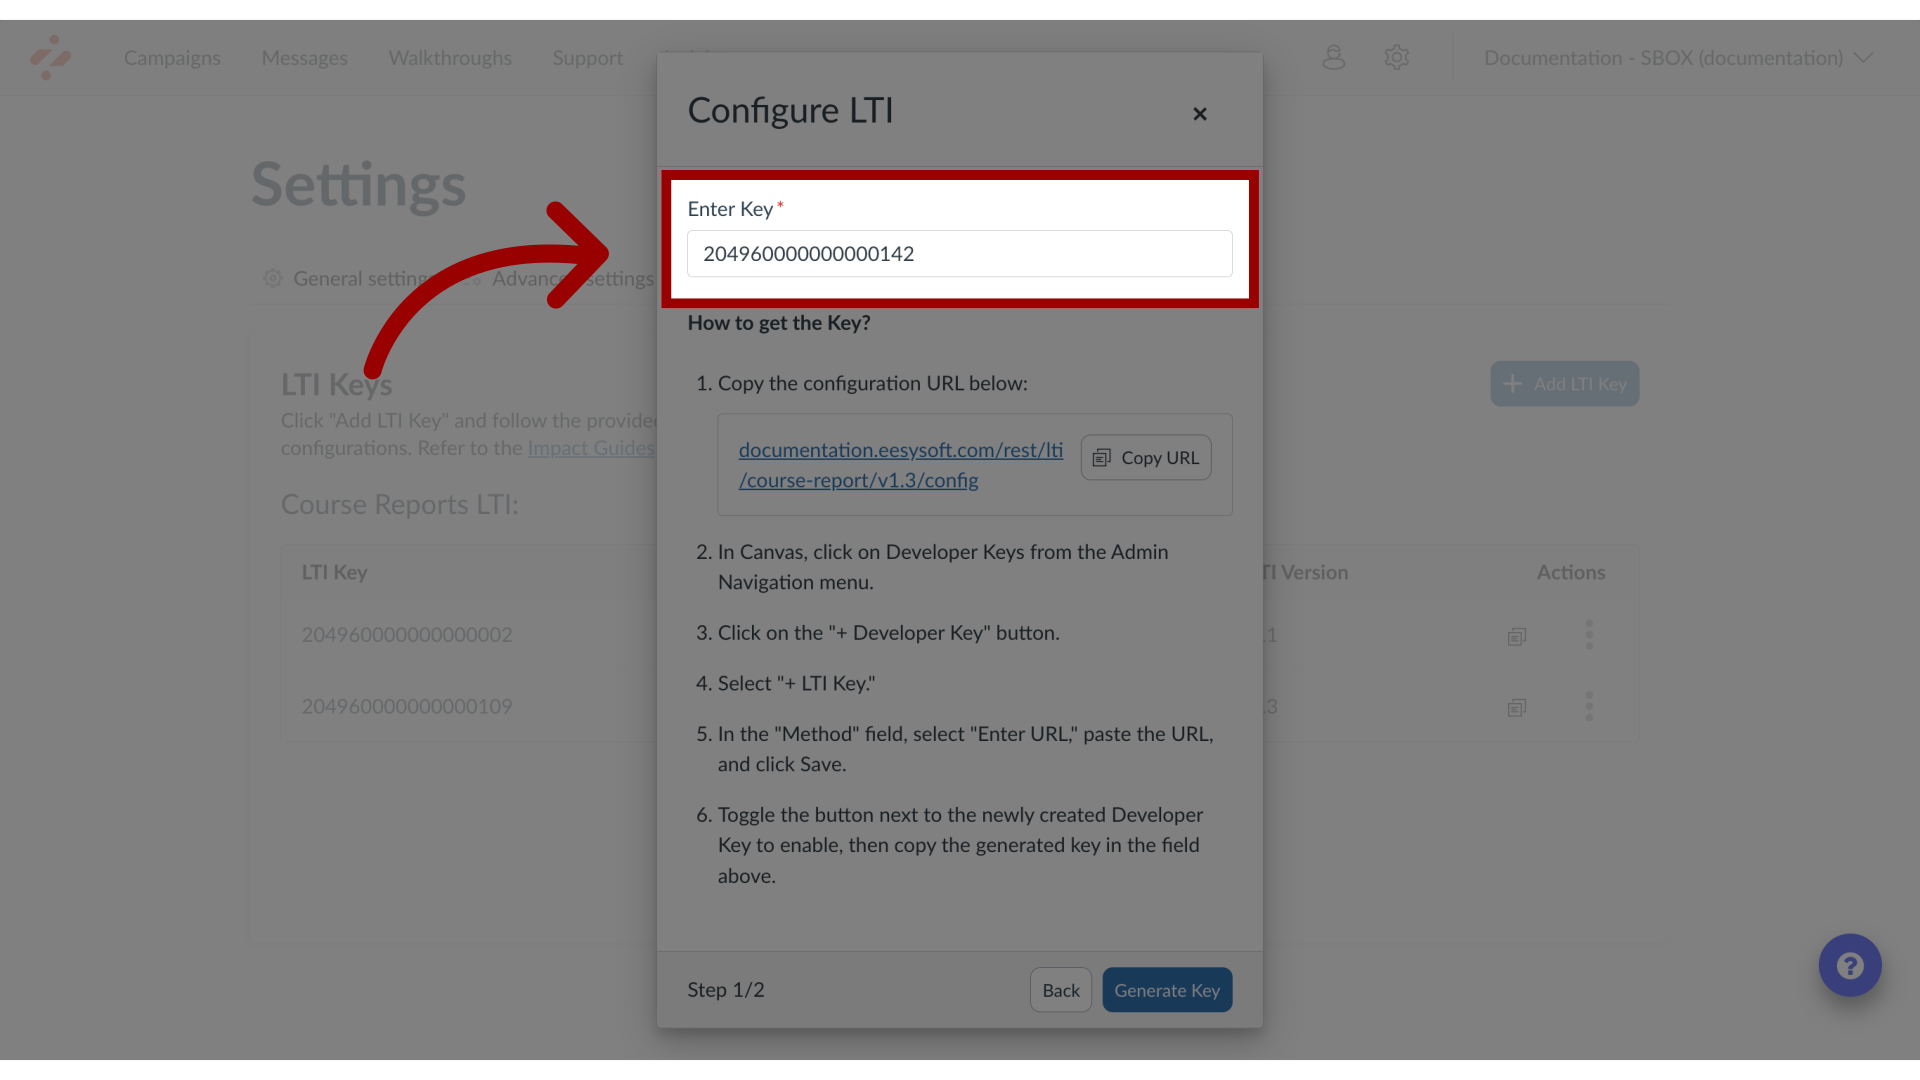
15. Generate Key
Click the Generate Key button.
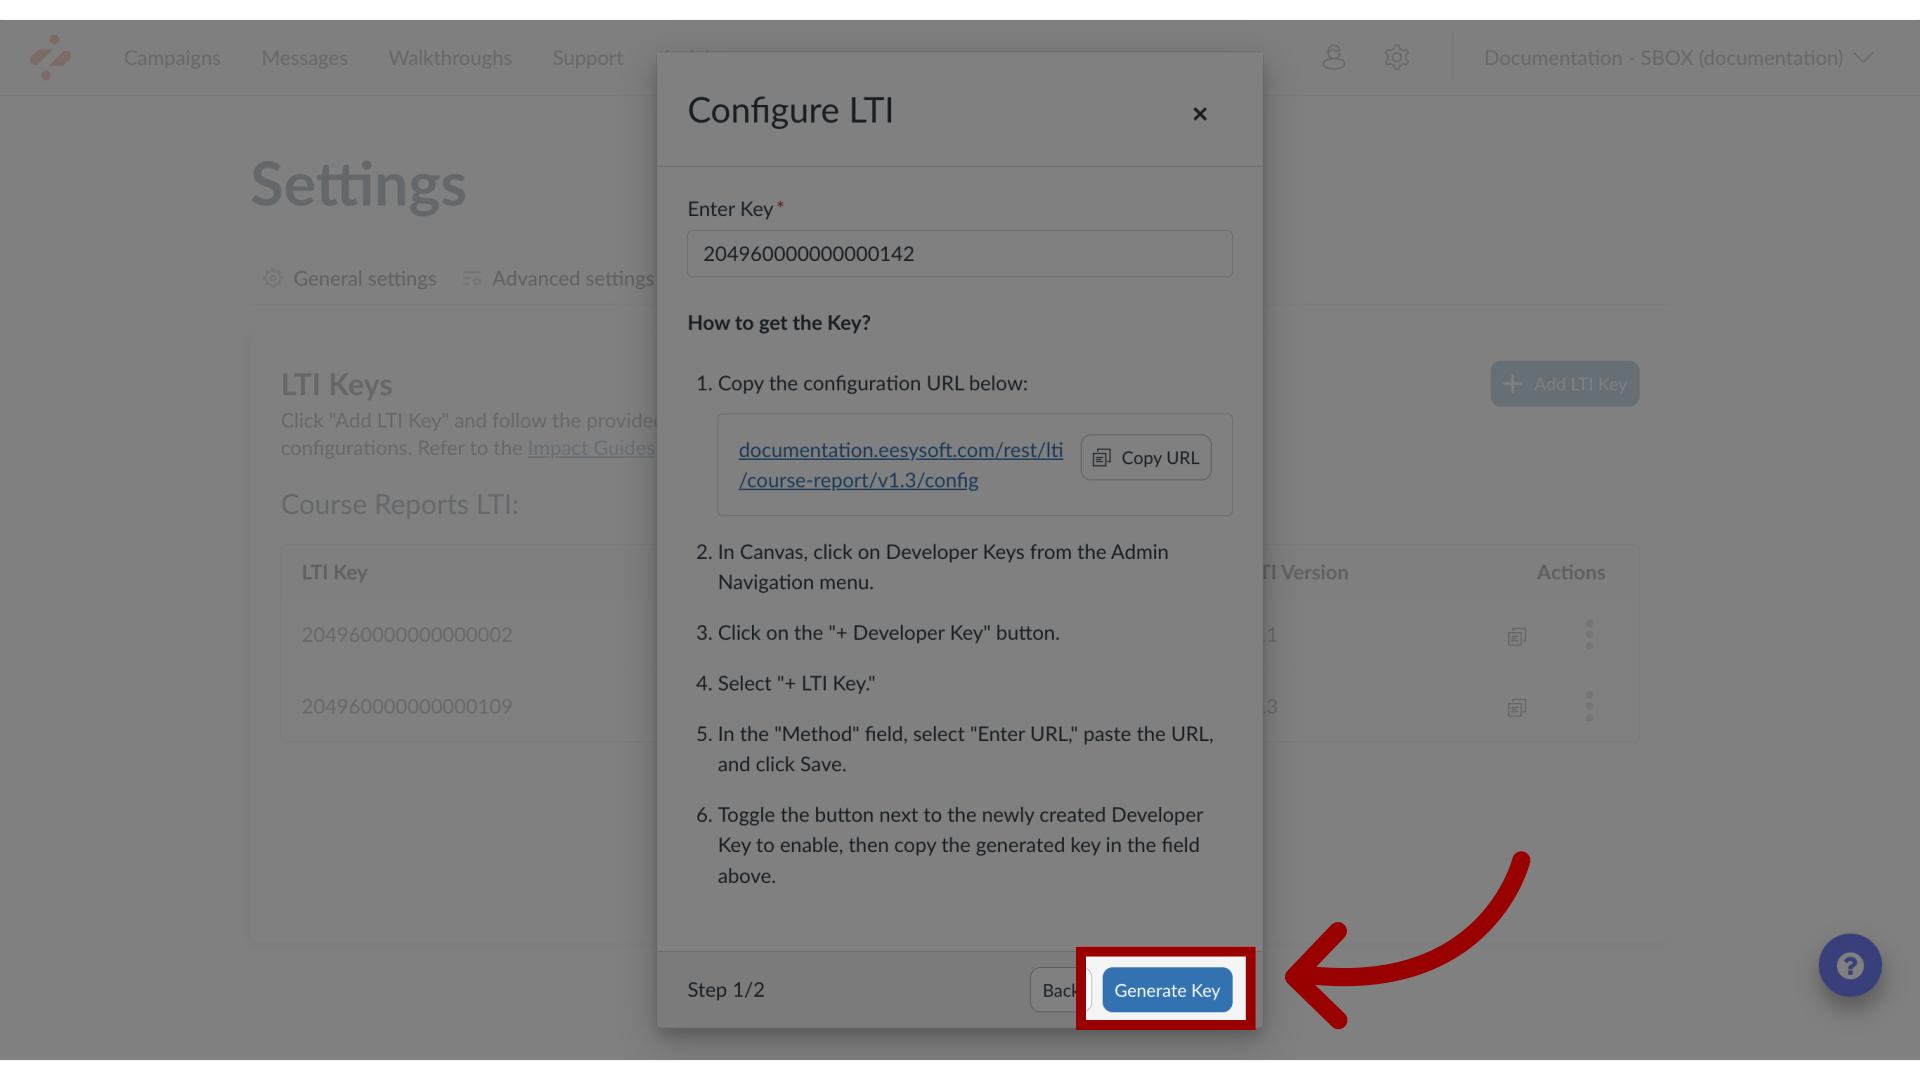
16. Configure LTI Confirmation
The Configure LTI confirmation screen will appear.
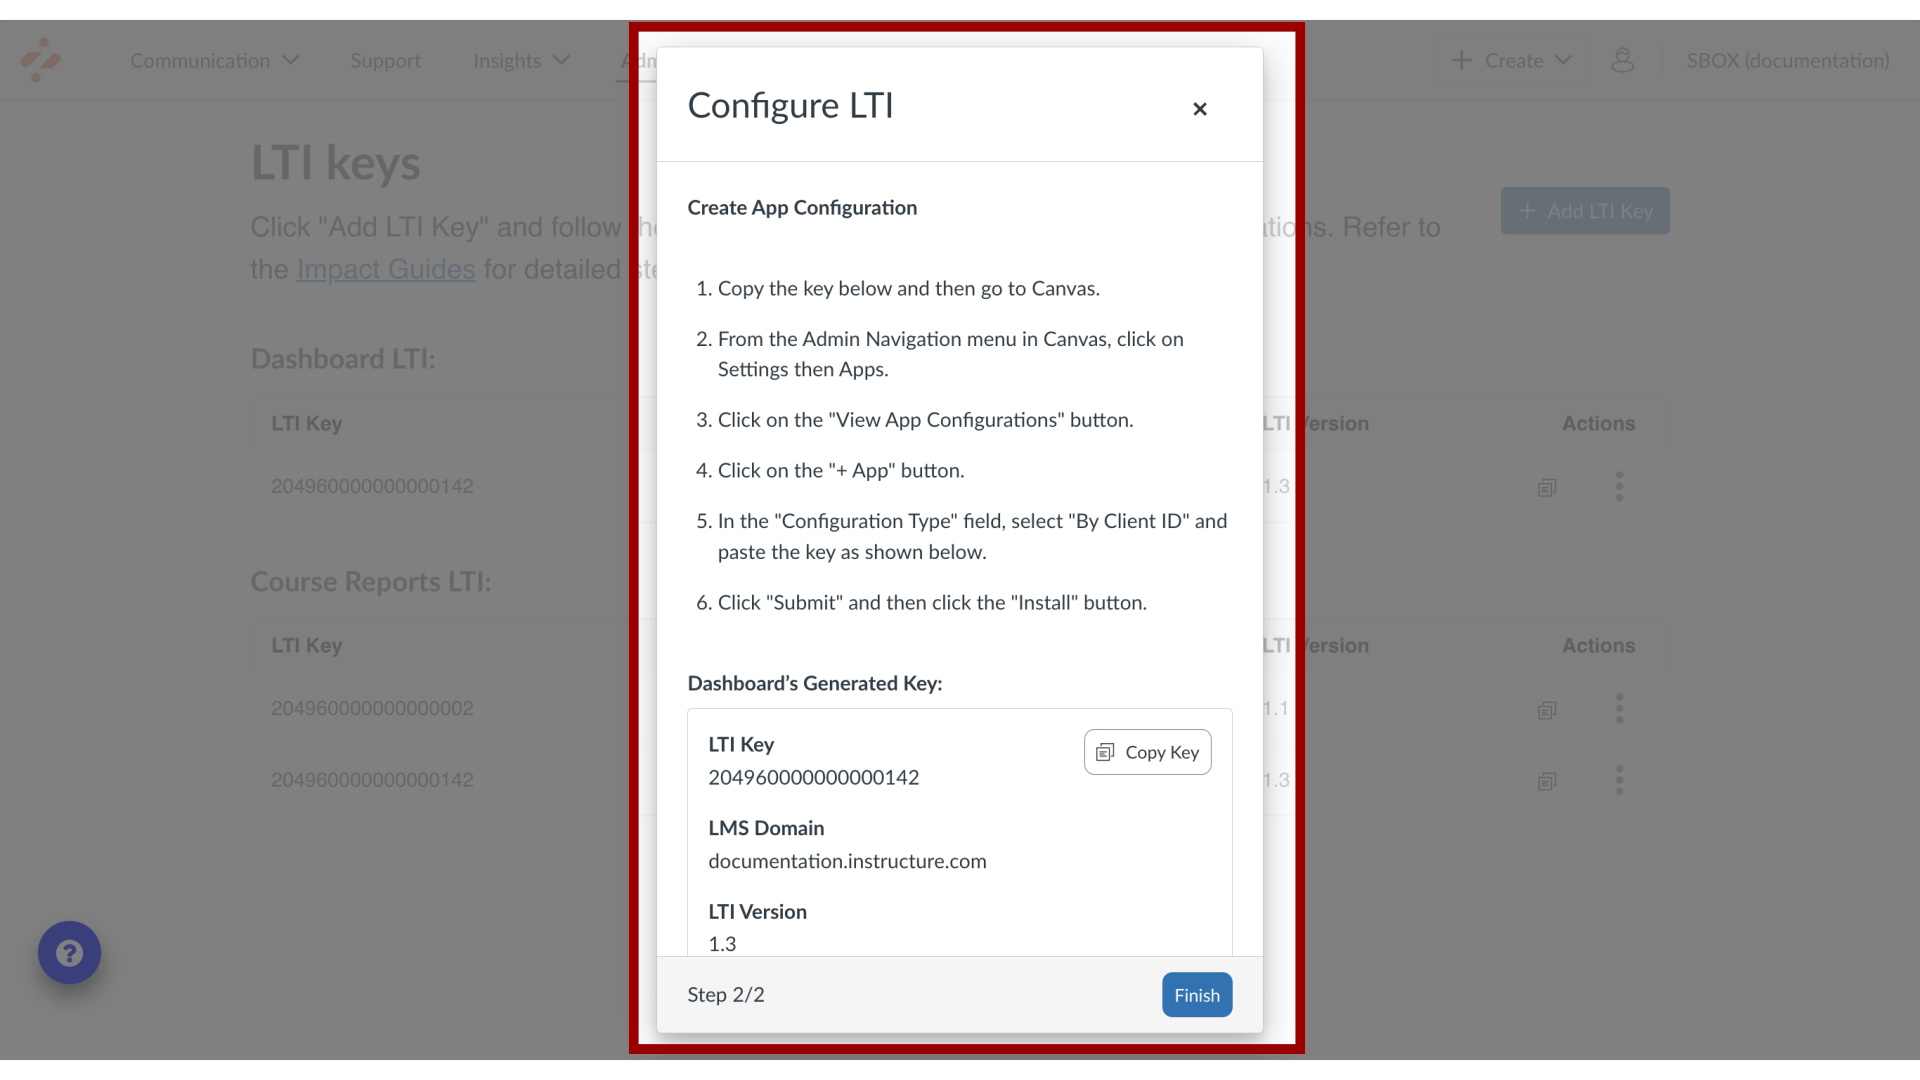
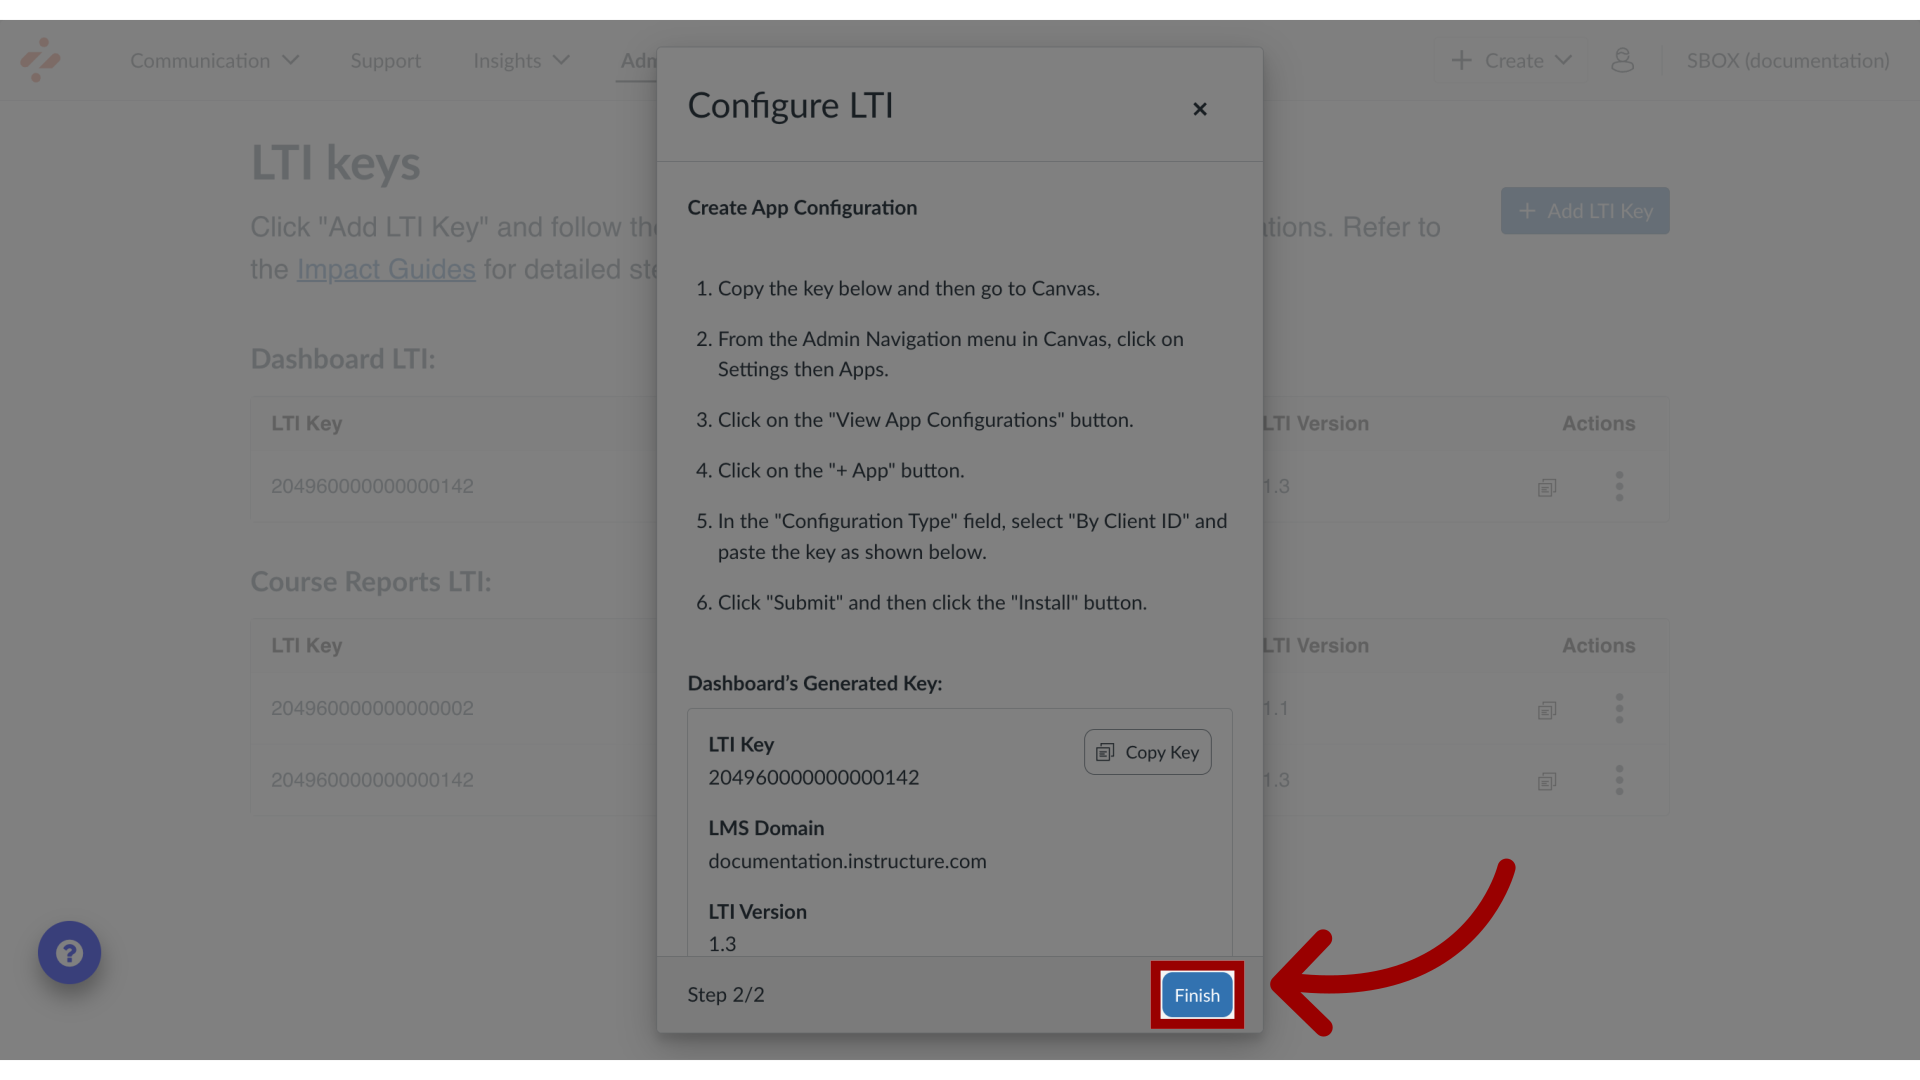
17. Finish Configuration
Then, click the Finish button.
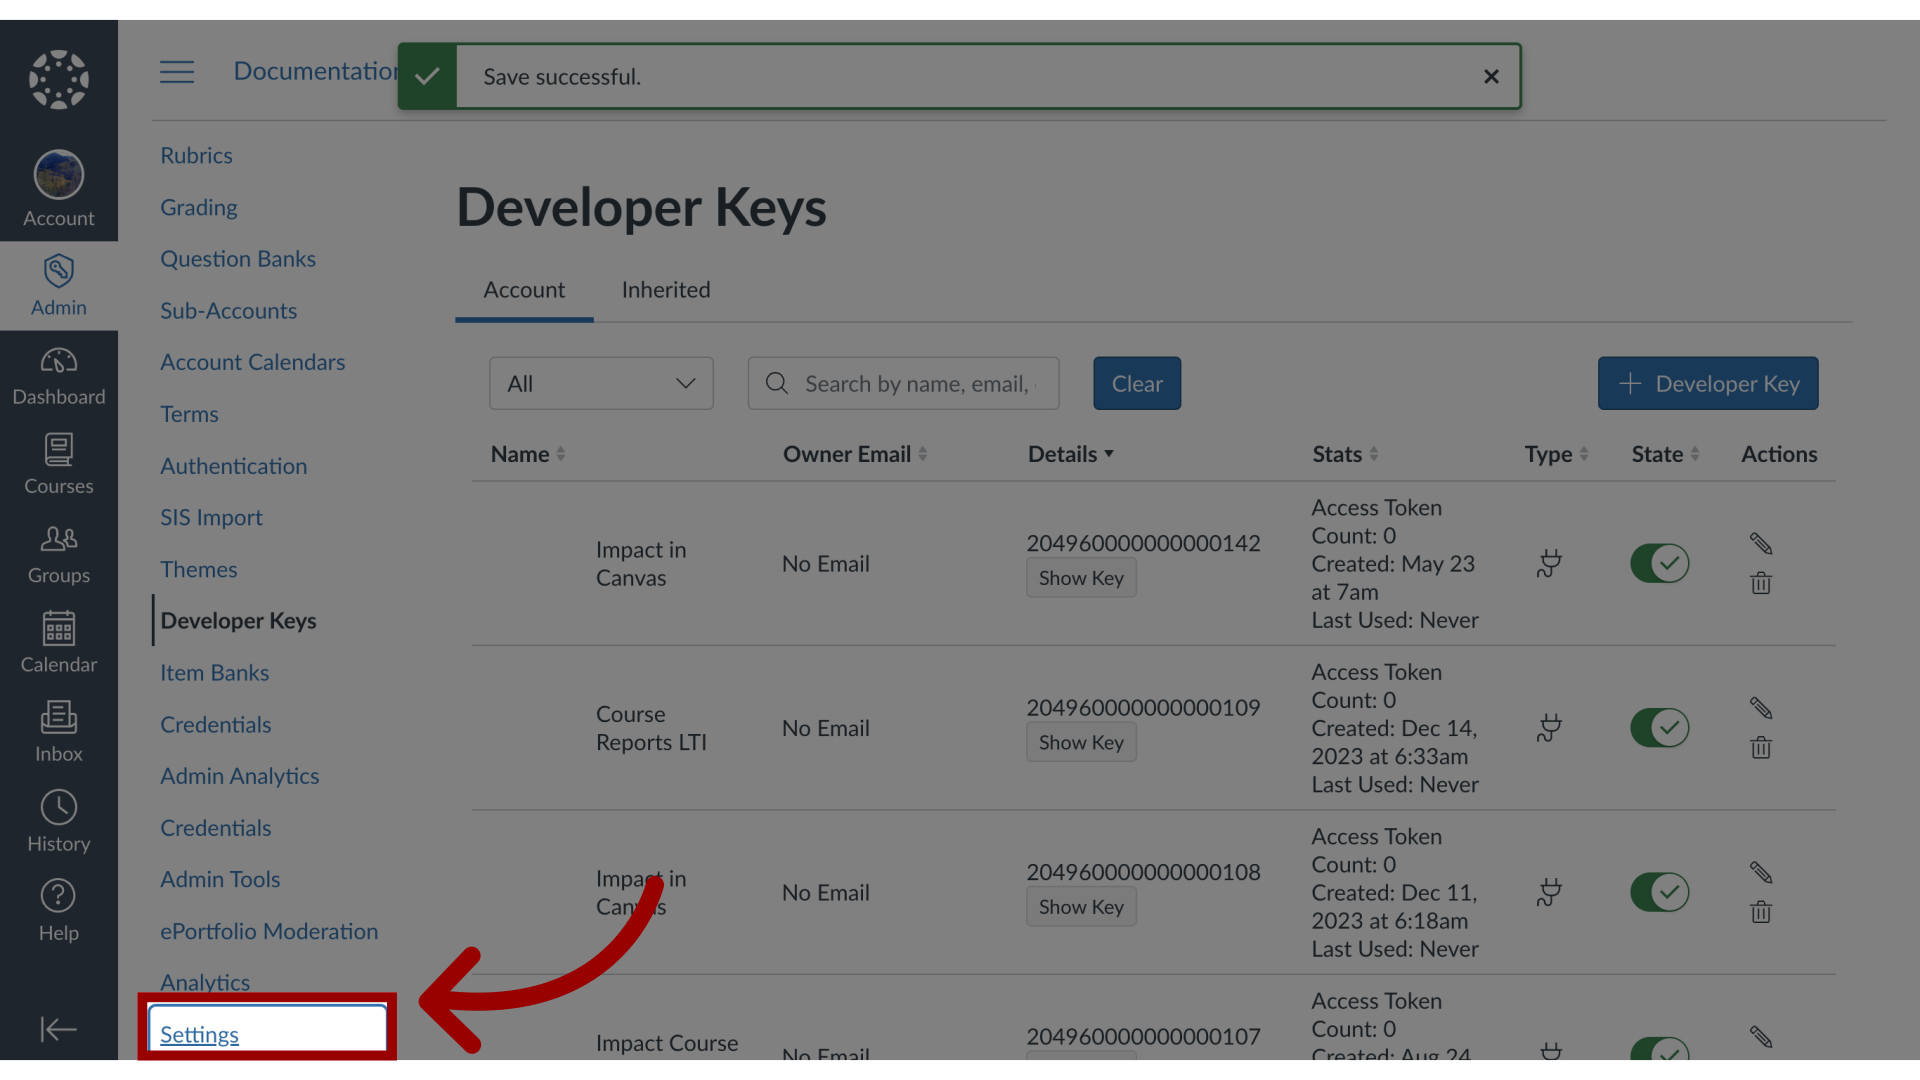
18. Create App Configuration
In the Canvas Admin Navigation Menu, click the Settings button.
19. Open Apps
In the top navigation, click the Apps tab.
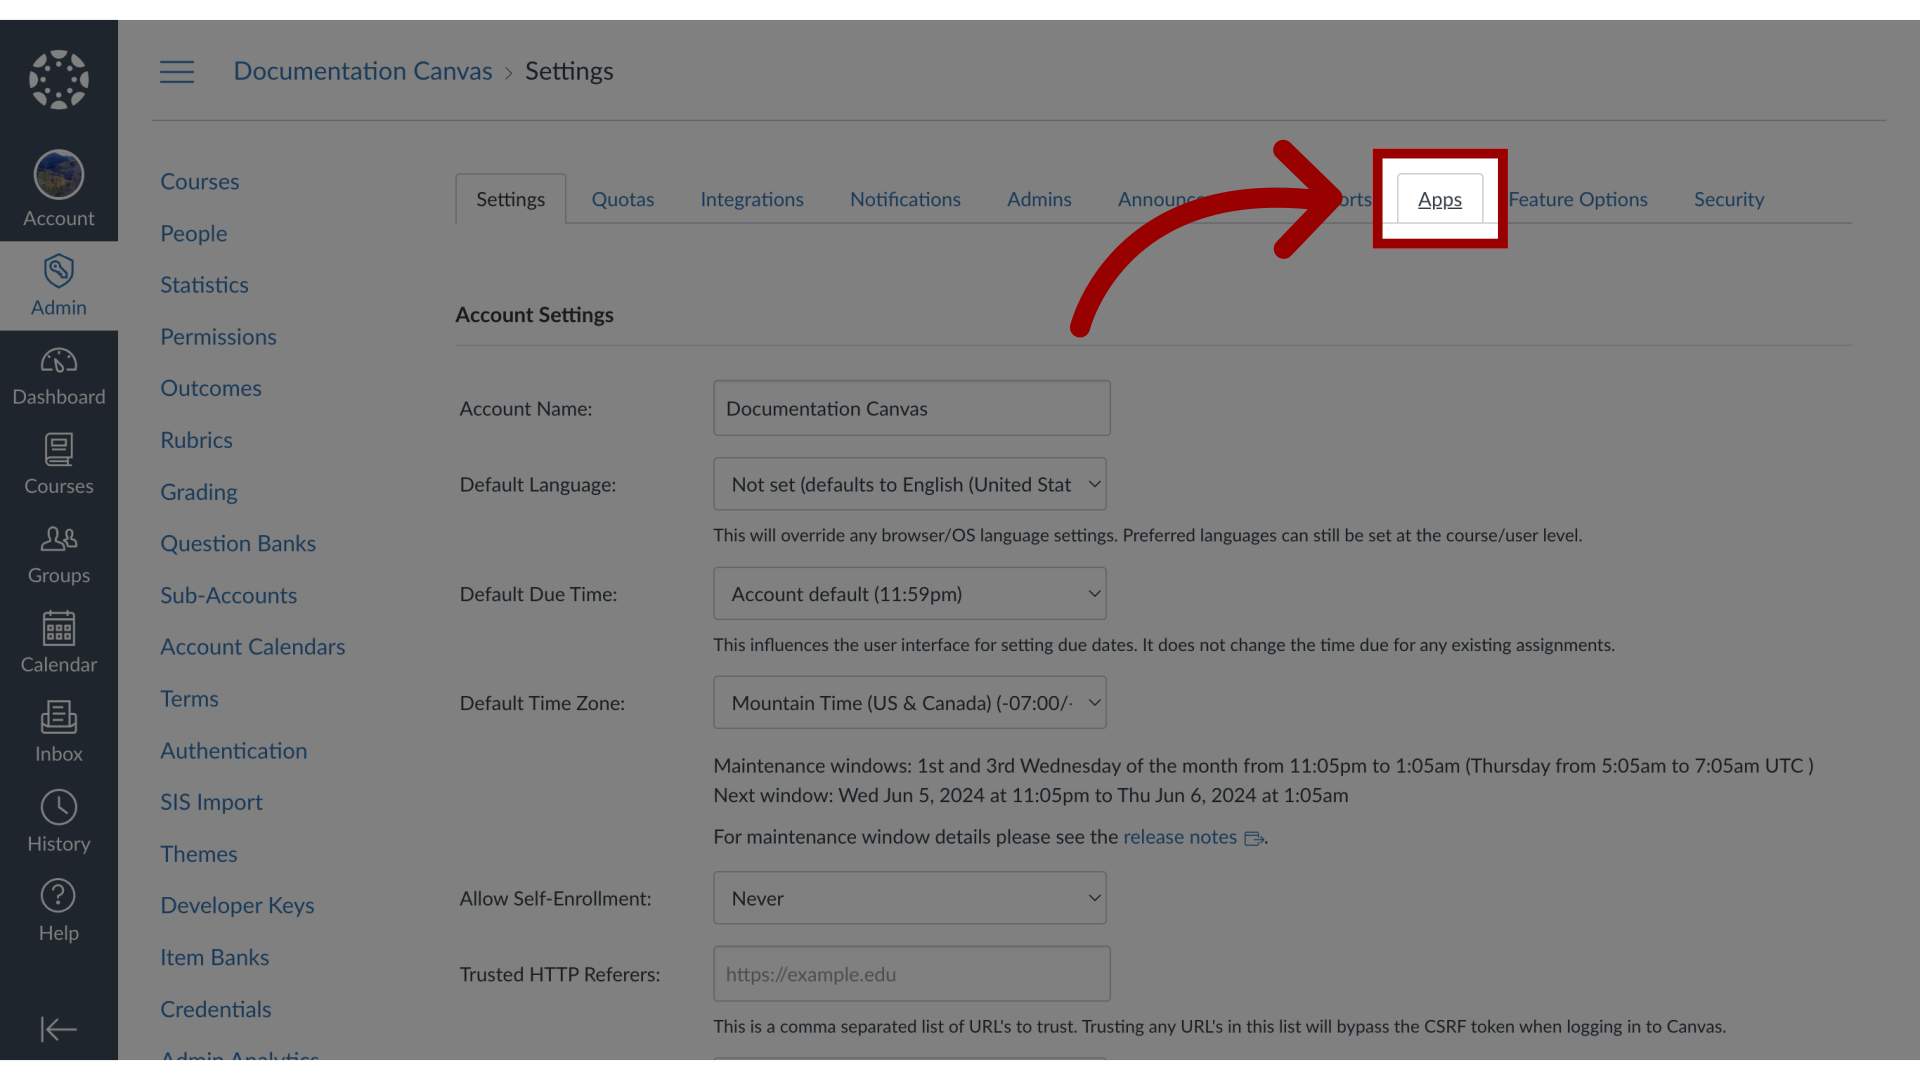
20. View App Configurations
Then click the View App Configurations button.
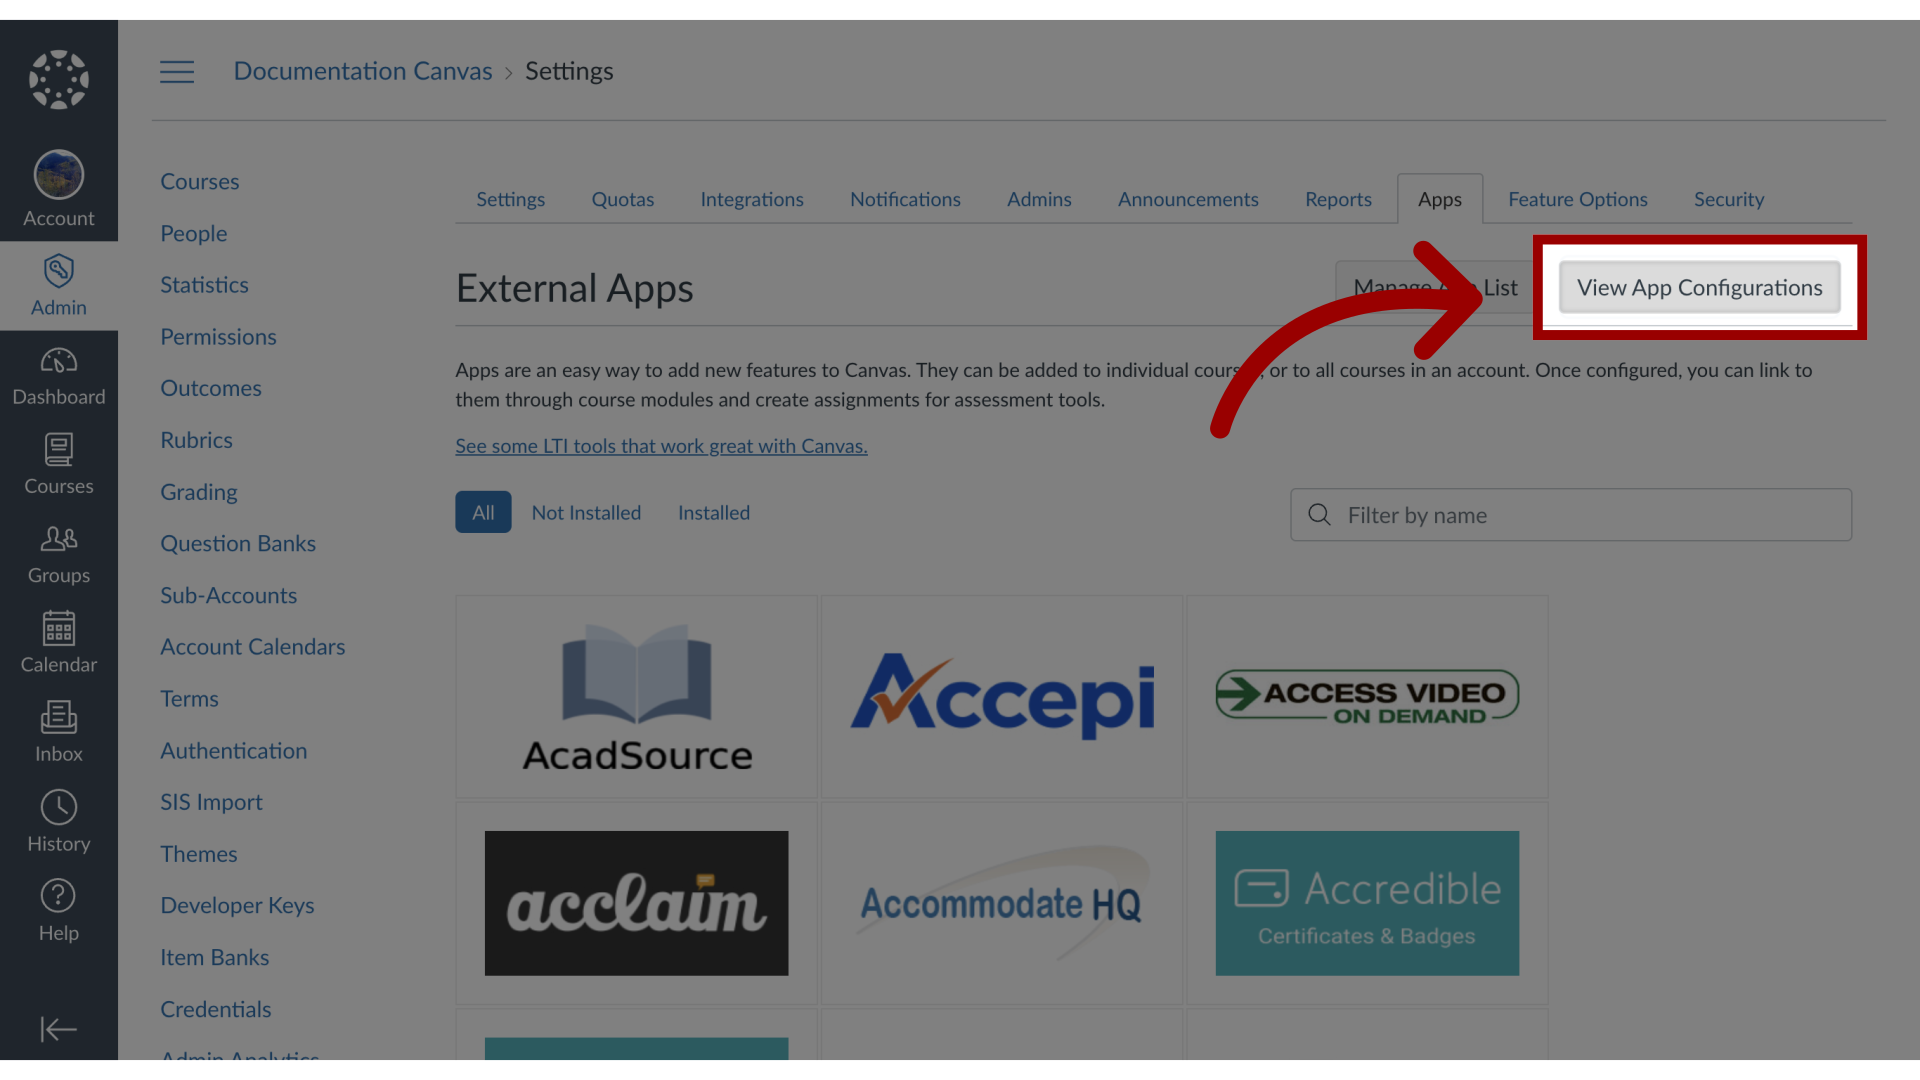
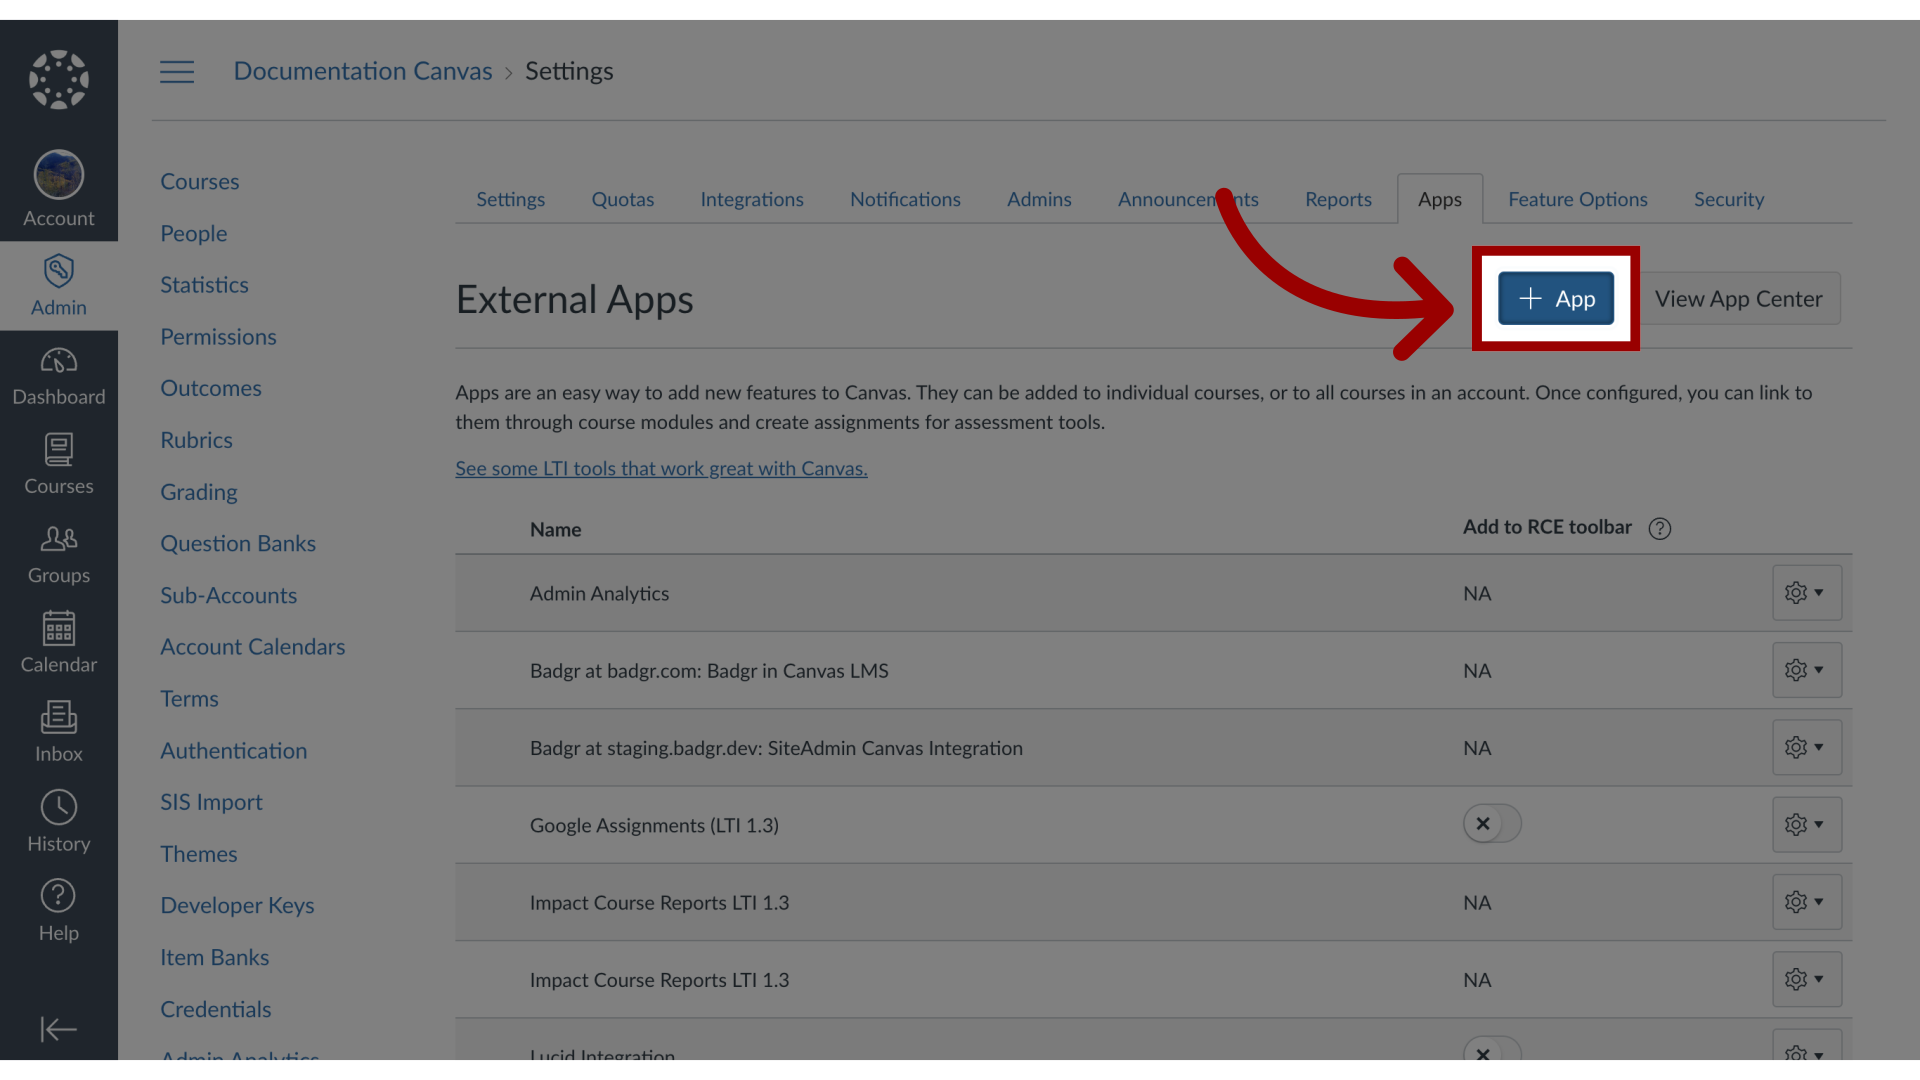
21. Add App
Click the + App button.
22. Add Configuration Type
Click the Configuration Type drop-down and select By Client ID.
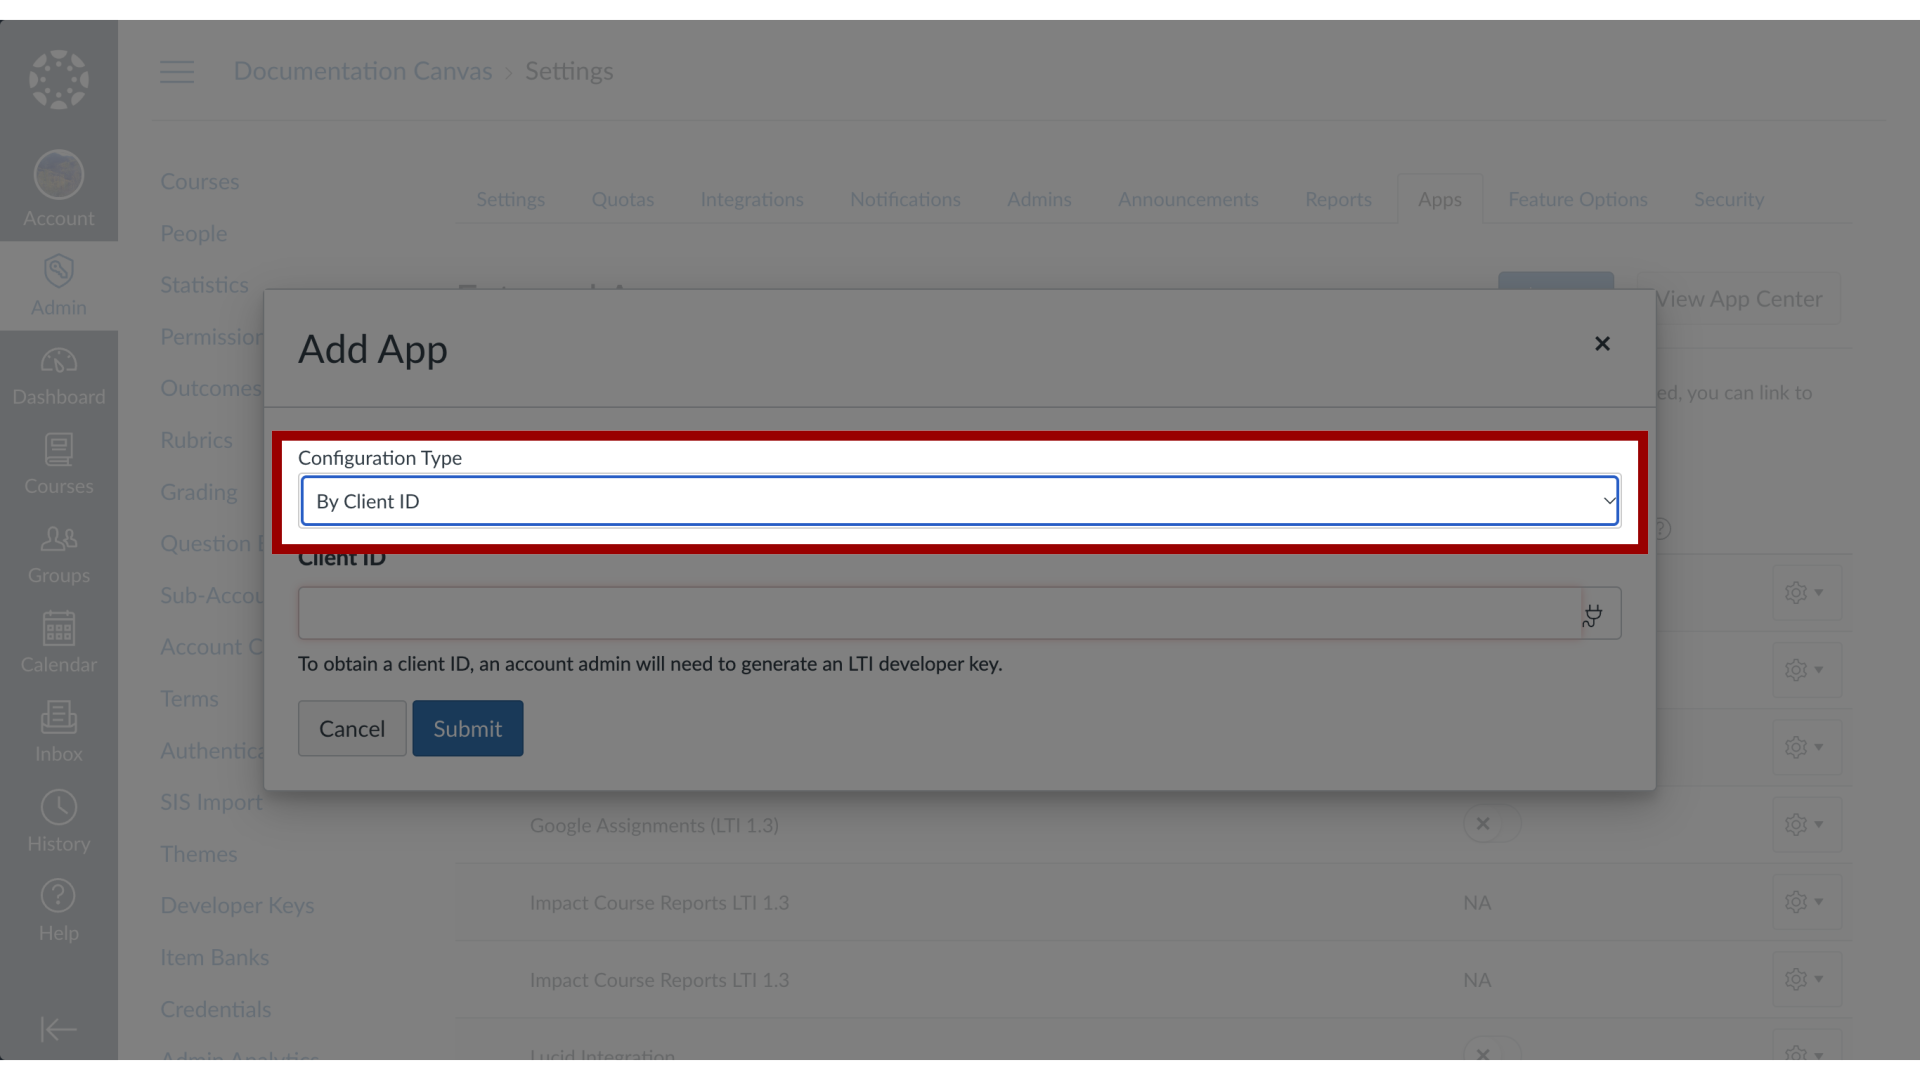
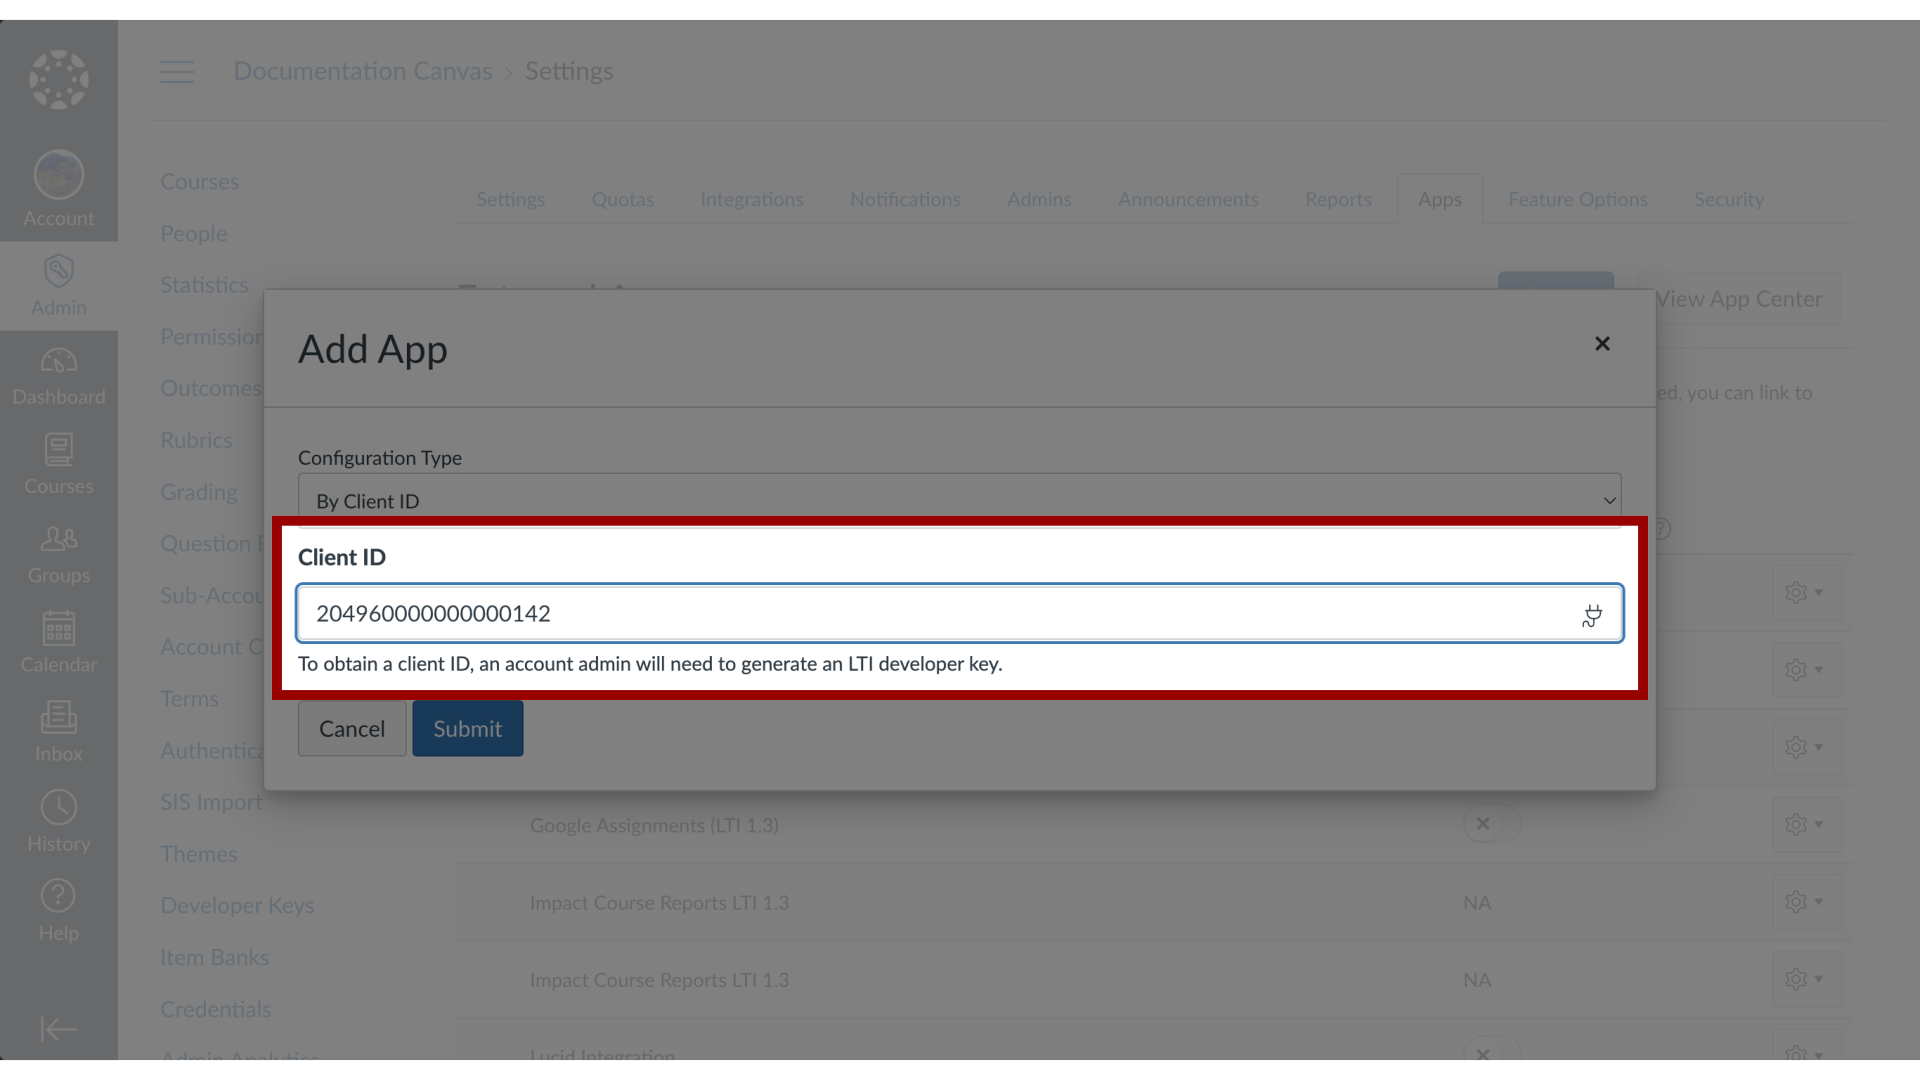
23. Add Client ID
In the Client ID textbox, paste the developer key.
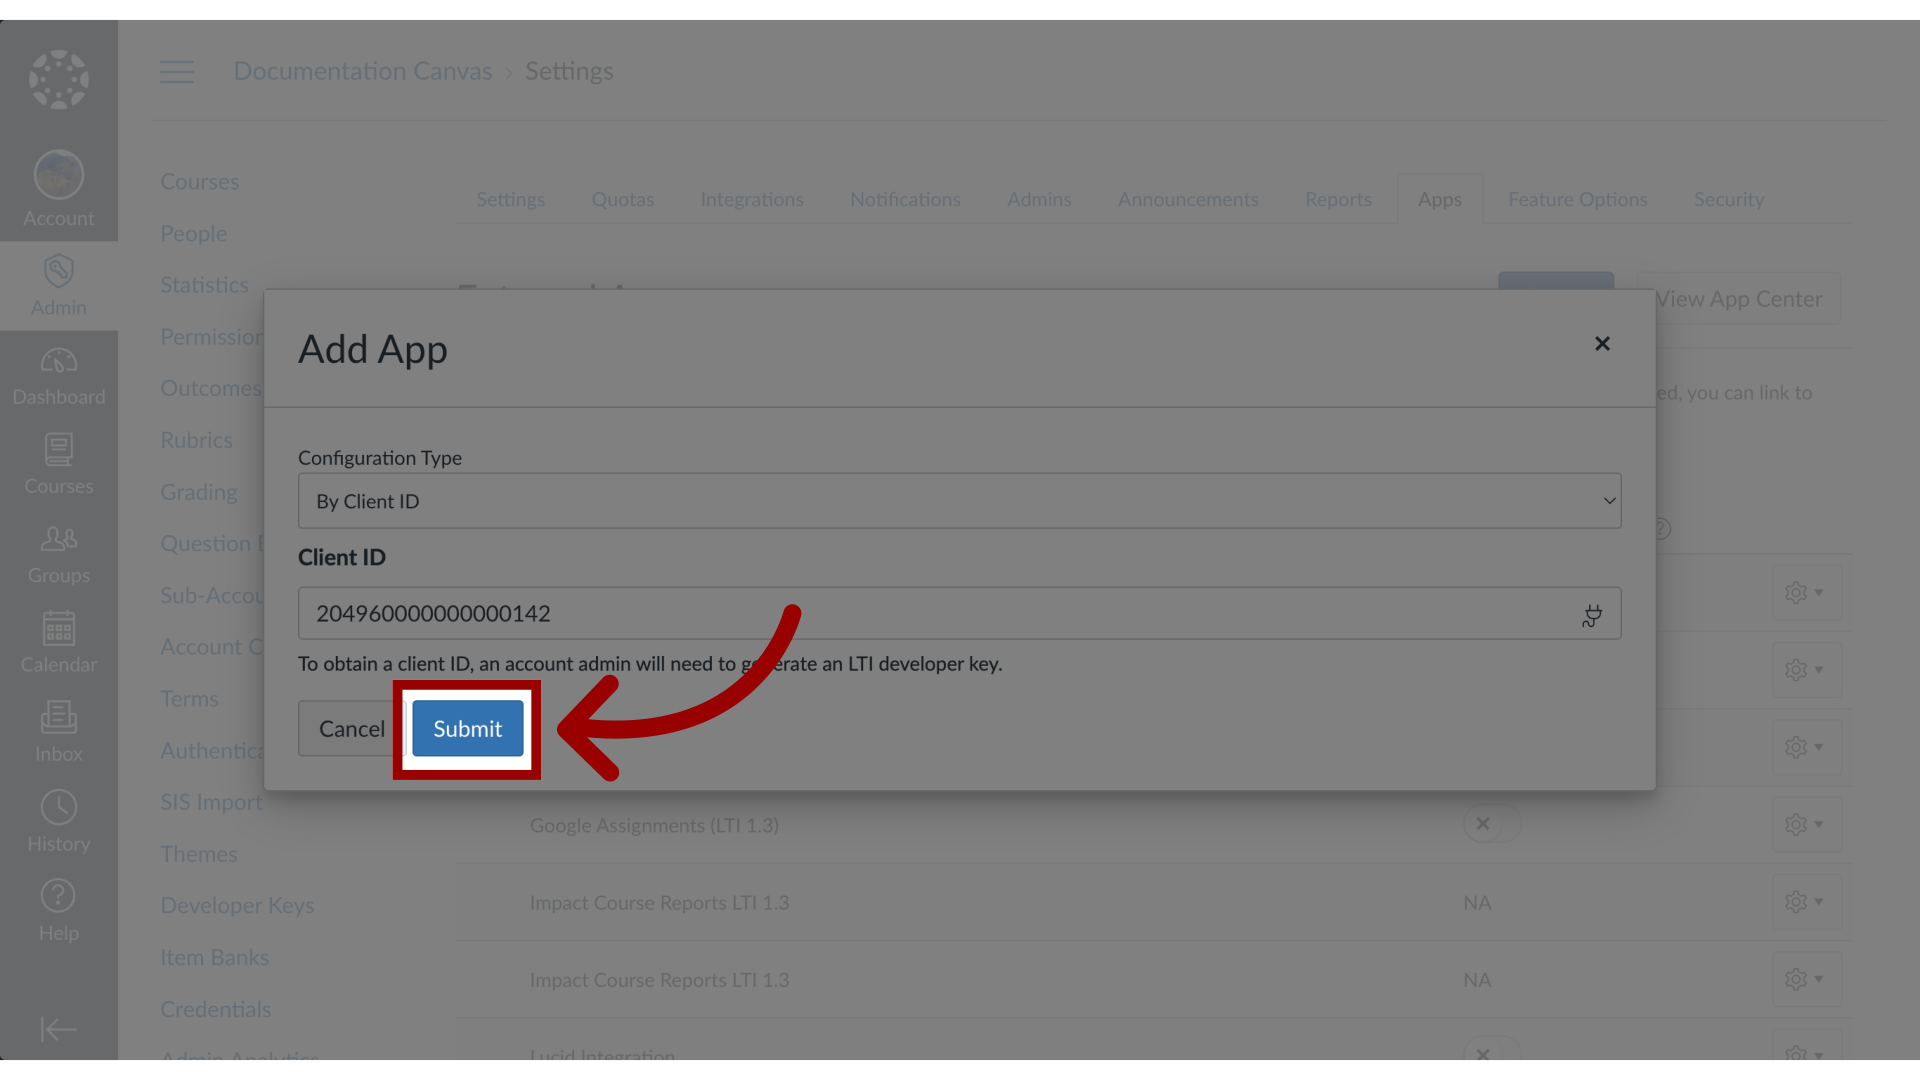
24. Submit App
Then click the Submit button.
This guide covered how to enable Impact in Canvas as a Dashboard LTI.
