How do I create a message for a sub-account?
Impact messages can be assigned to sub-accounts in your learning application. By assigning sub-accounts to a message, you control which audience sees your message.
Note: This feature is only available to Canvas customers.
How do I create a message for a sub-account?
1. Open Account Settings
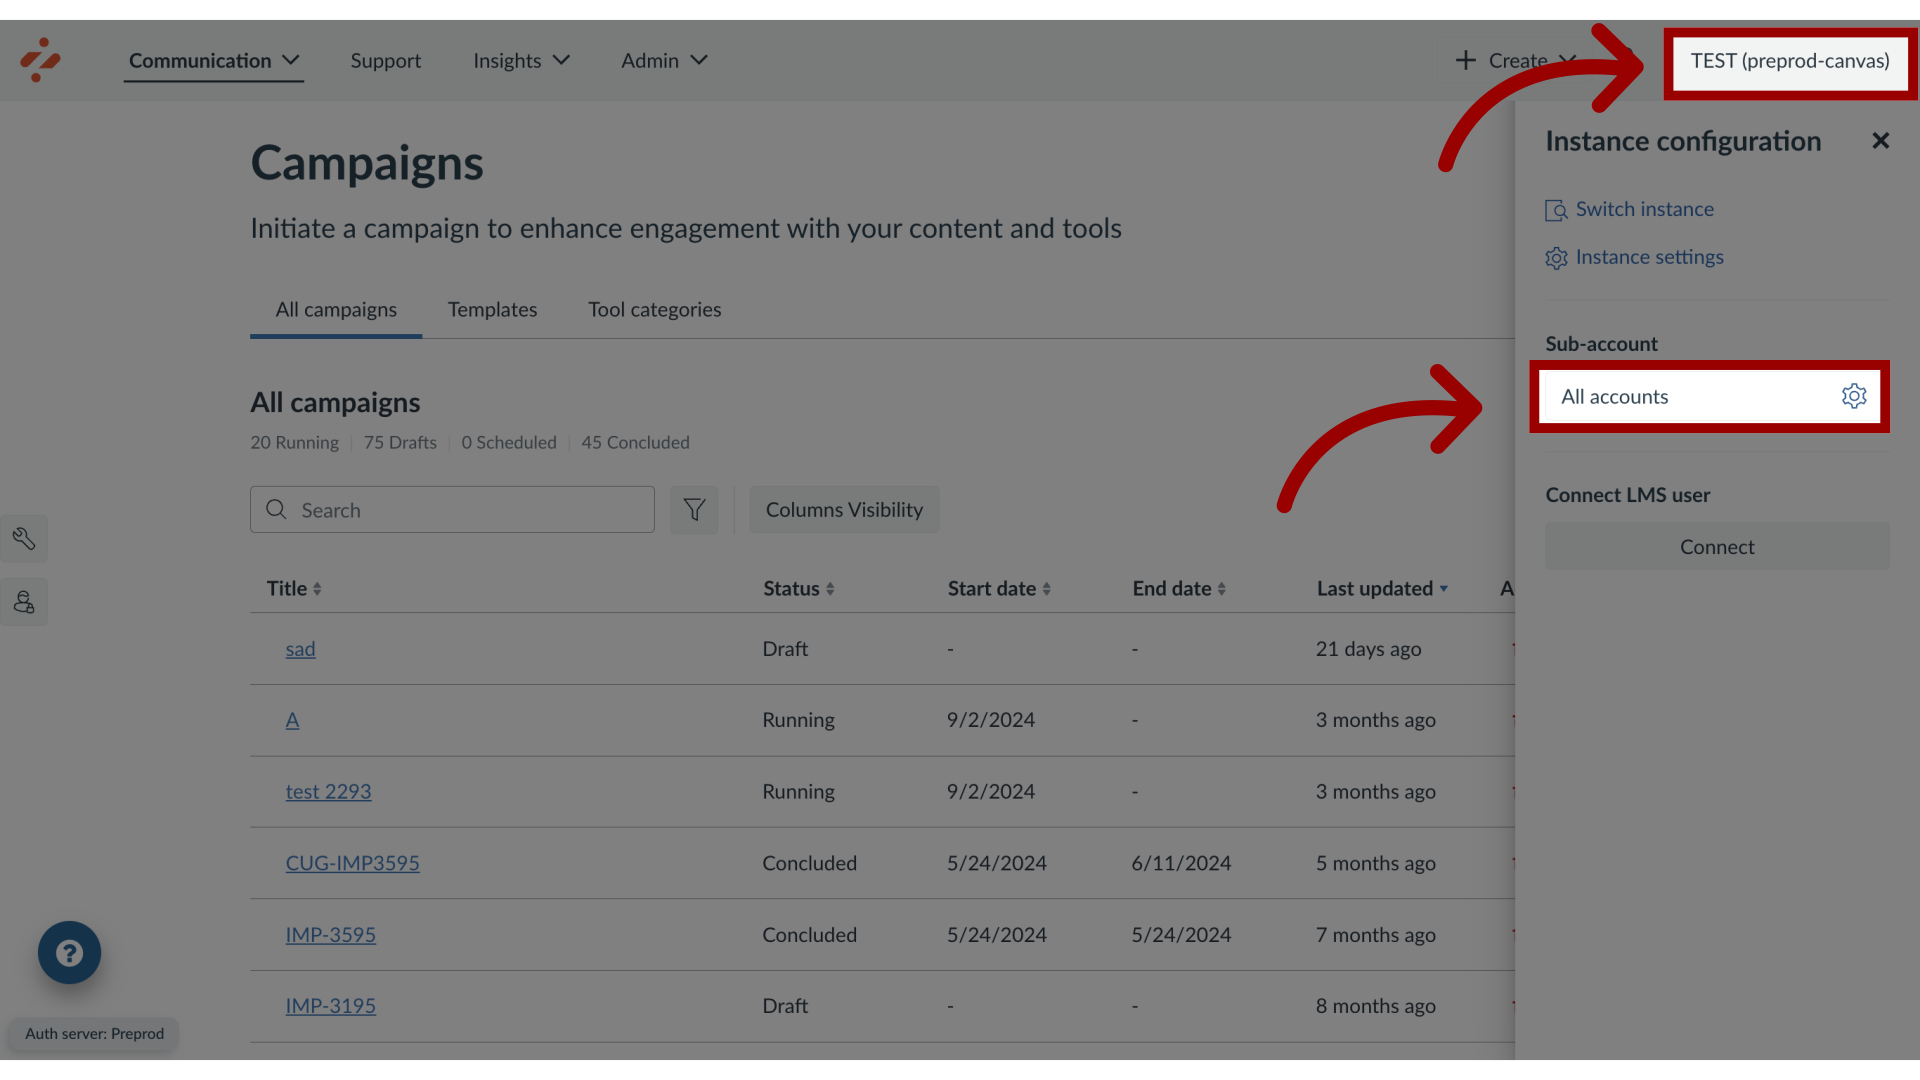
In the Global Navigation, click the Instance Configuration link. Then, click the Sub-account Settings button.
![Open Account Settings](https://static.guidde.com/v0/qg%2F3Rcx4toKQja0NtaHm0AF68PlSJF2%2FjH2LcD6xEDyTmuAS4ynH5J%2FidpfBwWjKkSRESurauNz33_doc.png?alt=media&token=2f998b66-b7be-4412-9818-ba607cb6e18f)
2. Search Sub-Accounts
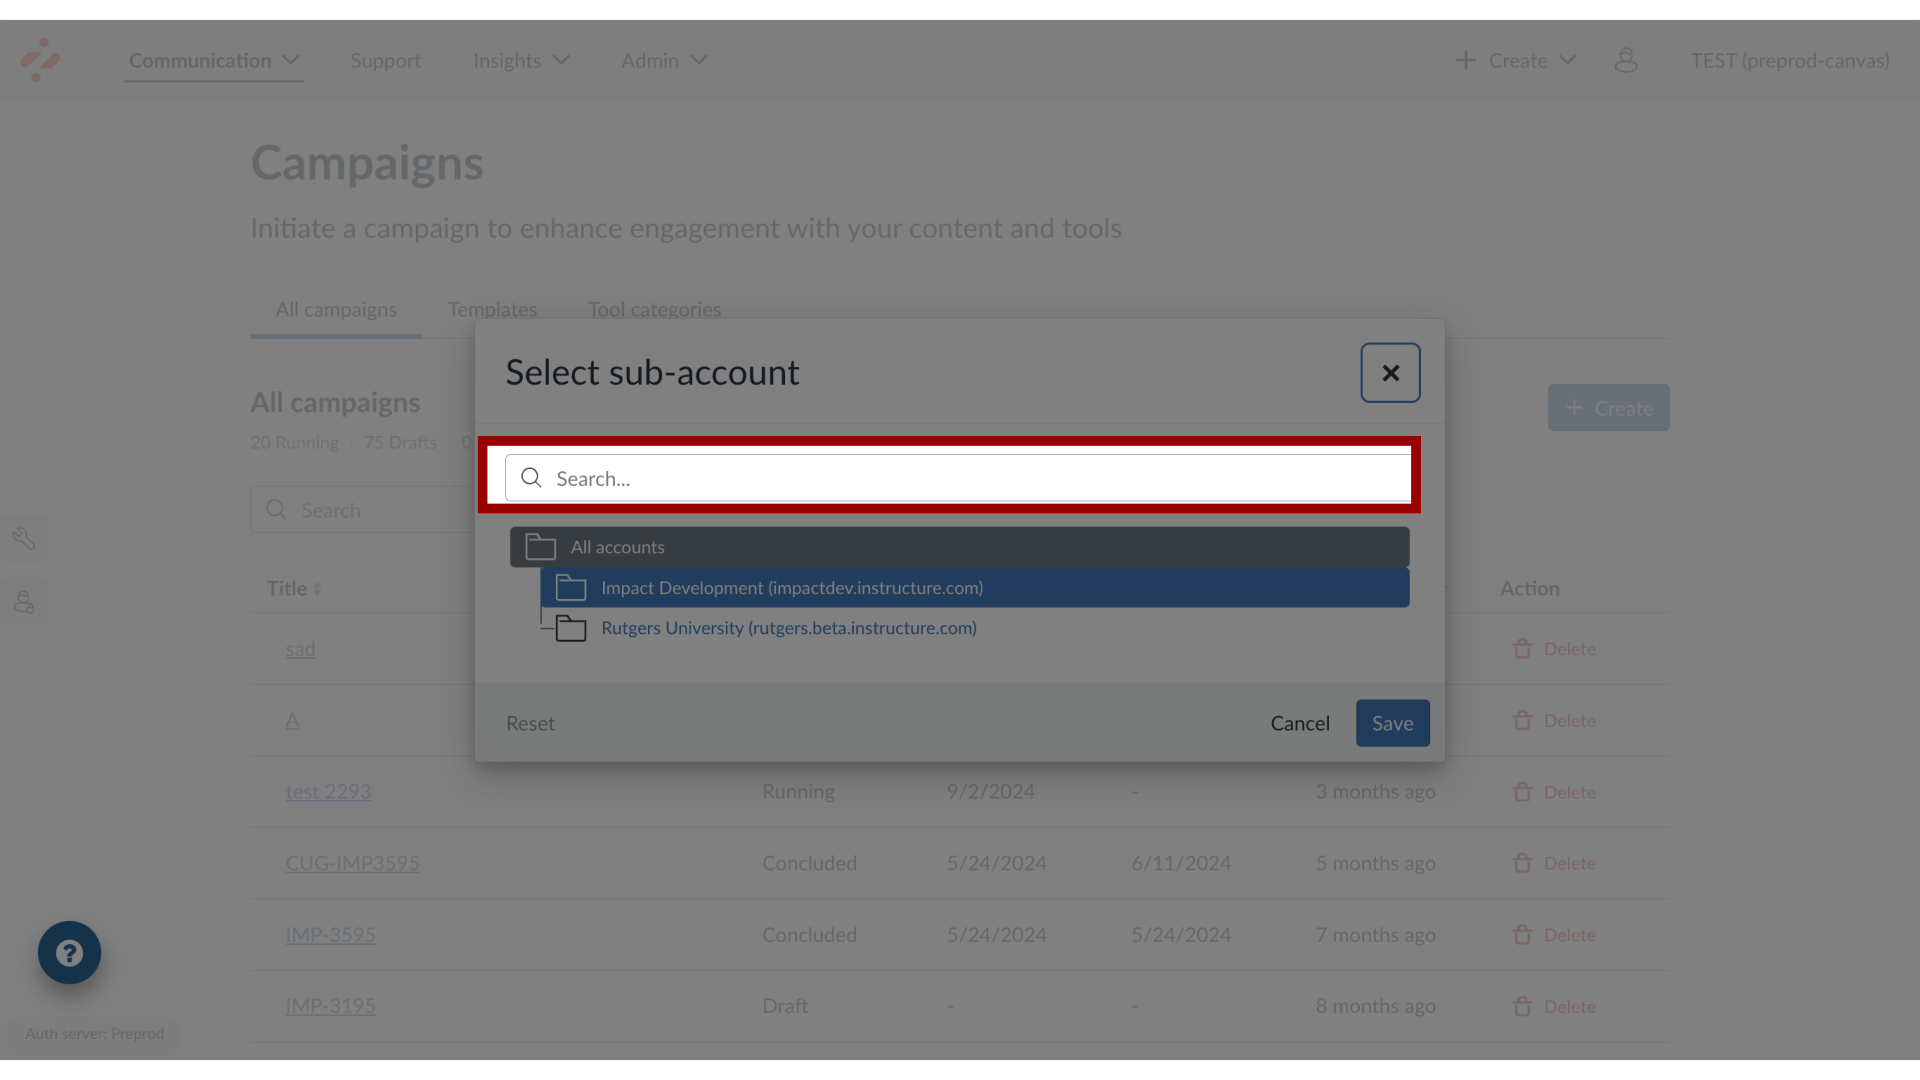
You can search for sub-accounts using the Search field.
![Search Sub-Accounts](https://static.guidde.com/v0/qg%2F3Rcx4toKQja0NtaHm0AF68PlSJF2%2FjH2LcD6xEDyTmuAS4ynH5J%2Fe8RQPeSWZtP4SWWPiBNR9T_doc.png?alt=media&token=05bbd3dc-3692-4cb2-9e54-99100c7e89fb)
3. Switch Sub-Accounts
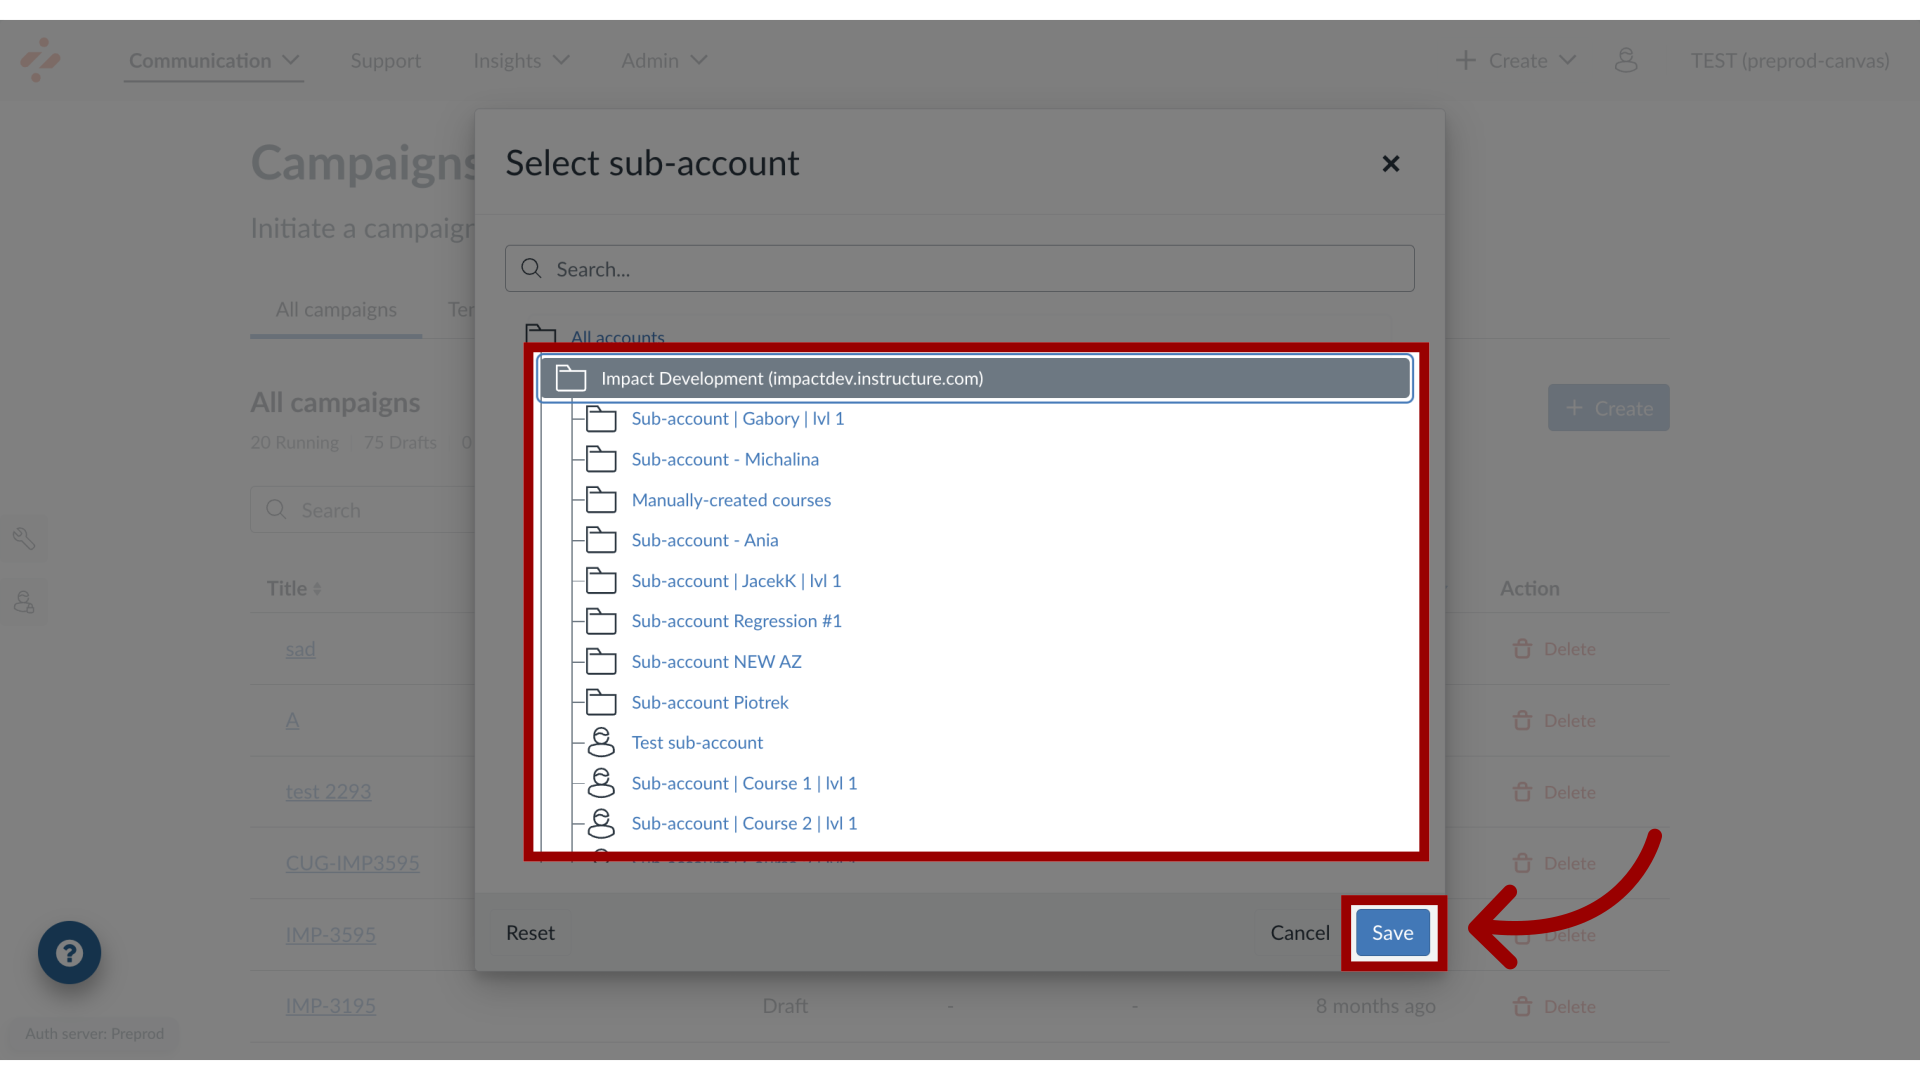
You can select the admin account [2] to locate the sub-account.
To switch sub-accounts, click the name of the sub-account. Click the Save button
![Switch Sub-Accounts](https://static.guidde.com/v0/qg%2F3Rcx4toKQja0NtaHm0AF68PlSJF2%2FjH2LcD6xEDyTmuAS4ynH5J%2Fb4LLfKzyw7n9QPviRfXvUM_doc.png?alt=media&token=c36454ec-da53-494c-bd0f-24a766139a83)
4. Open Messages
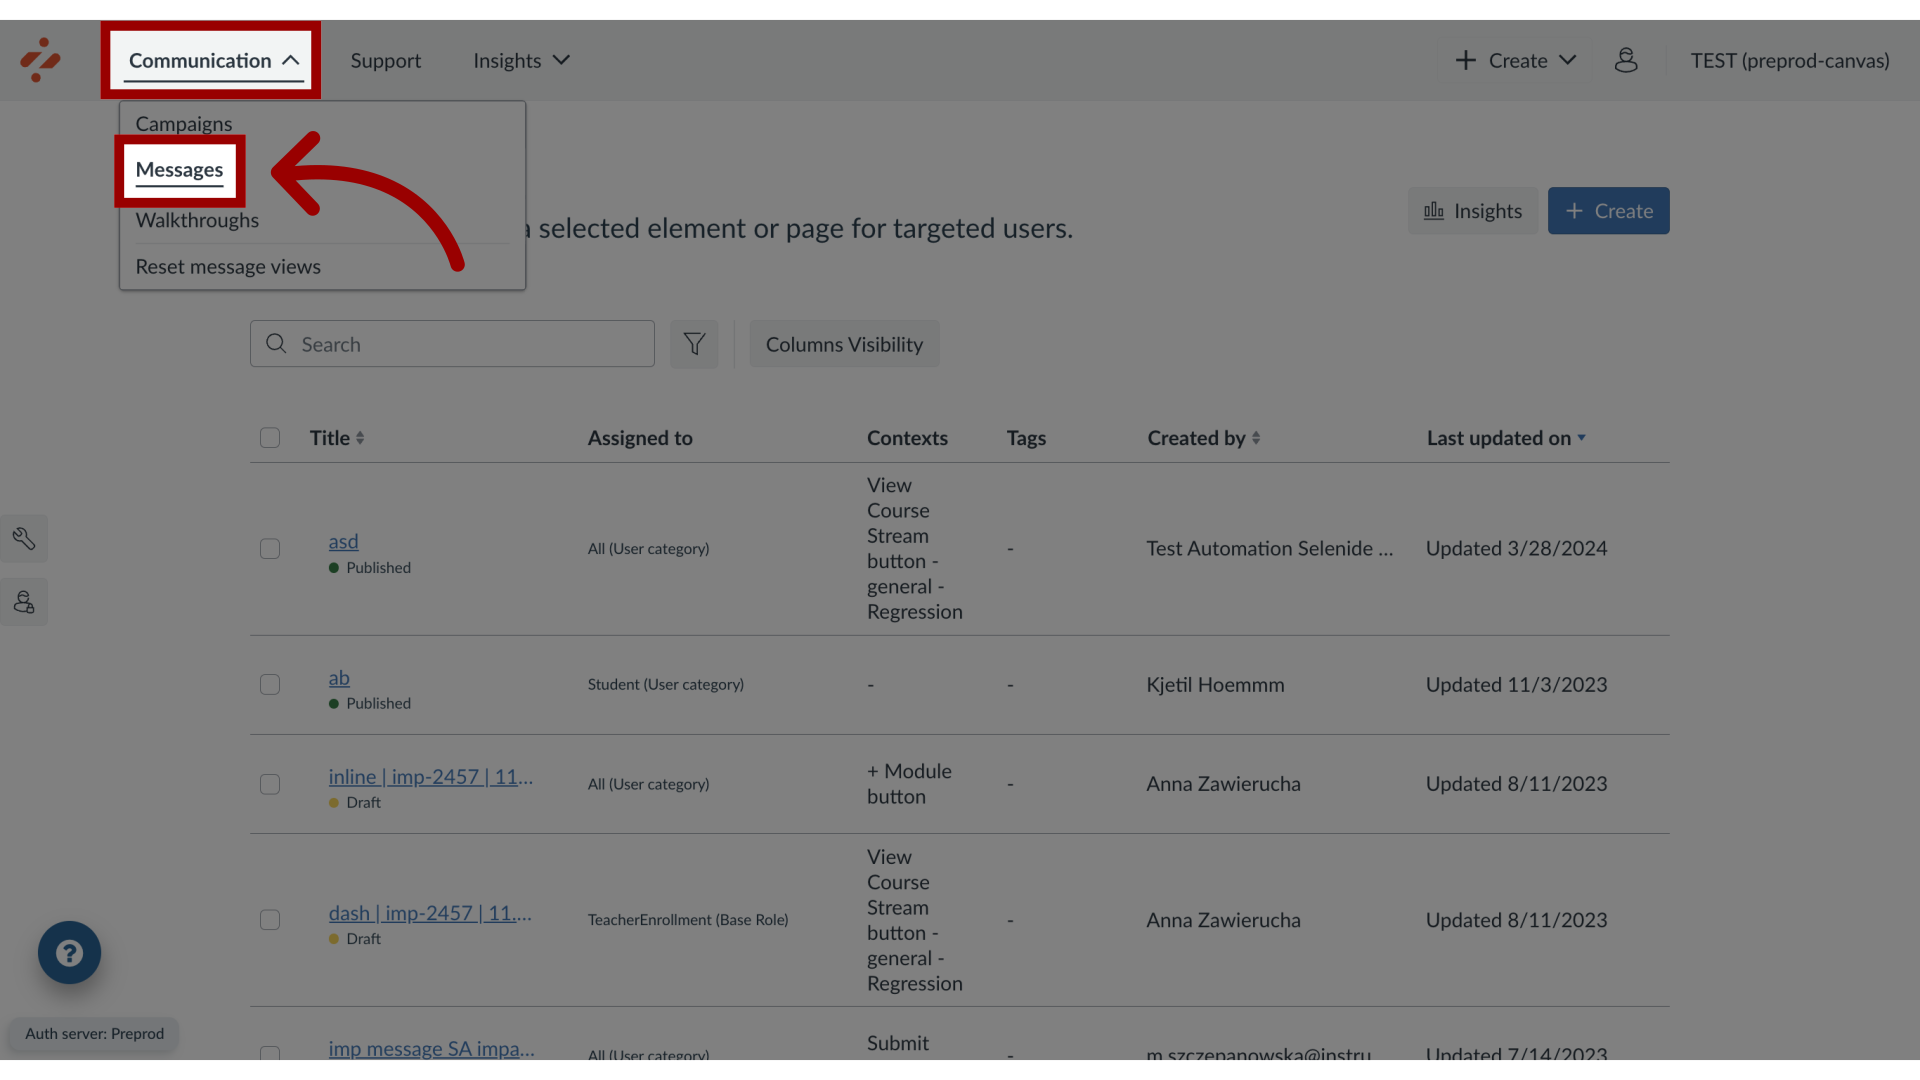
In Global Navigation, click the Communication link. Then click the Messages link.
![Open Messages](https://static.guidde.com/v0/qg%2F3Rcx4toKQja0NtaHm0AF68PlSJF2%2FjH2LcD6xEDyTmuAS4ynH5J%2FayvyLzwYtZ4iuuuQm7A5H5_doc.png?alt=media&token=9c7a3d5b-a647-404d-a313-40911303ca96)
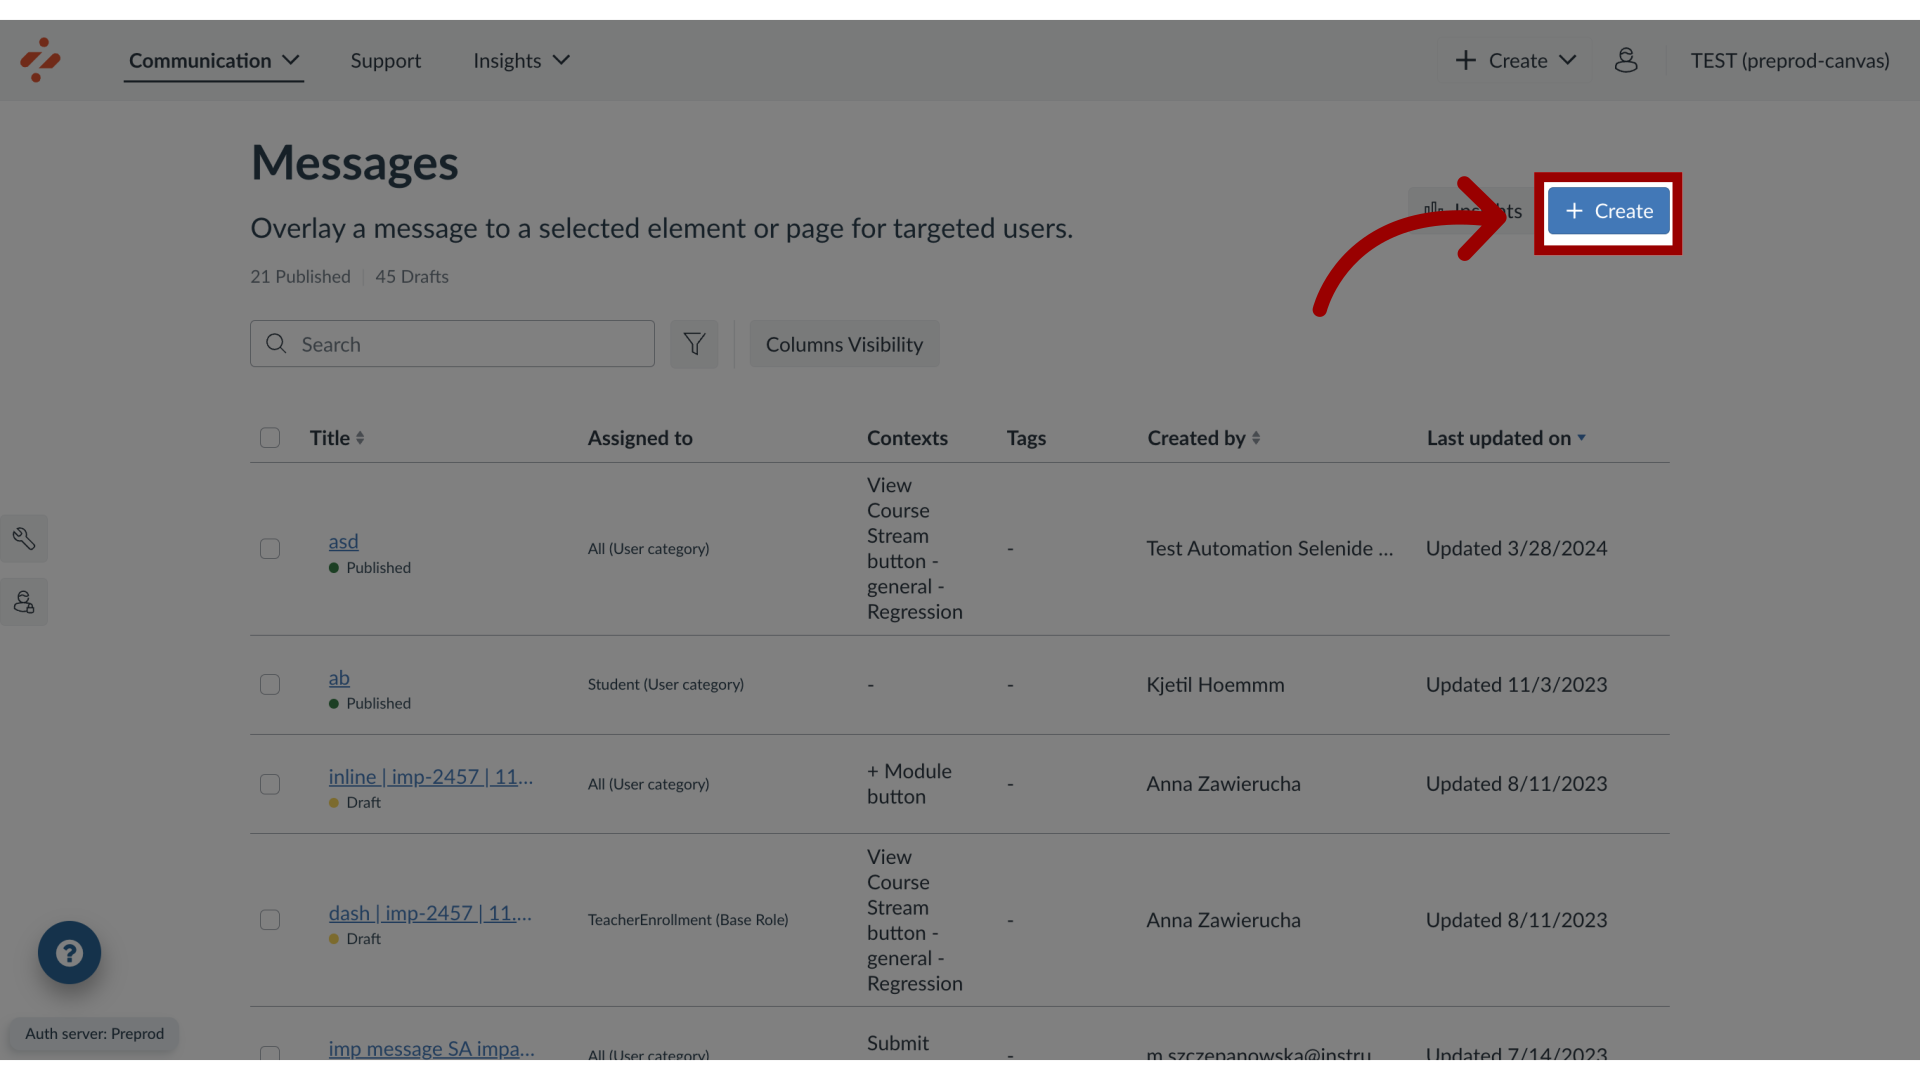
5. Create New Message
Click the Create button.
![Create New Message](https://static.guidde.com/v0/qg%2F3Rcx4toKQja0NtaHm0AF68PlSJF2%2FjH2LcD6xEDyTmuAS4ynH5J%2F7Lpddc2zi6apxFkoqHw1au_doc.png?alt=media&token=7c3b3a17-de92-45a7-9780-44f0f84f2300)
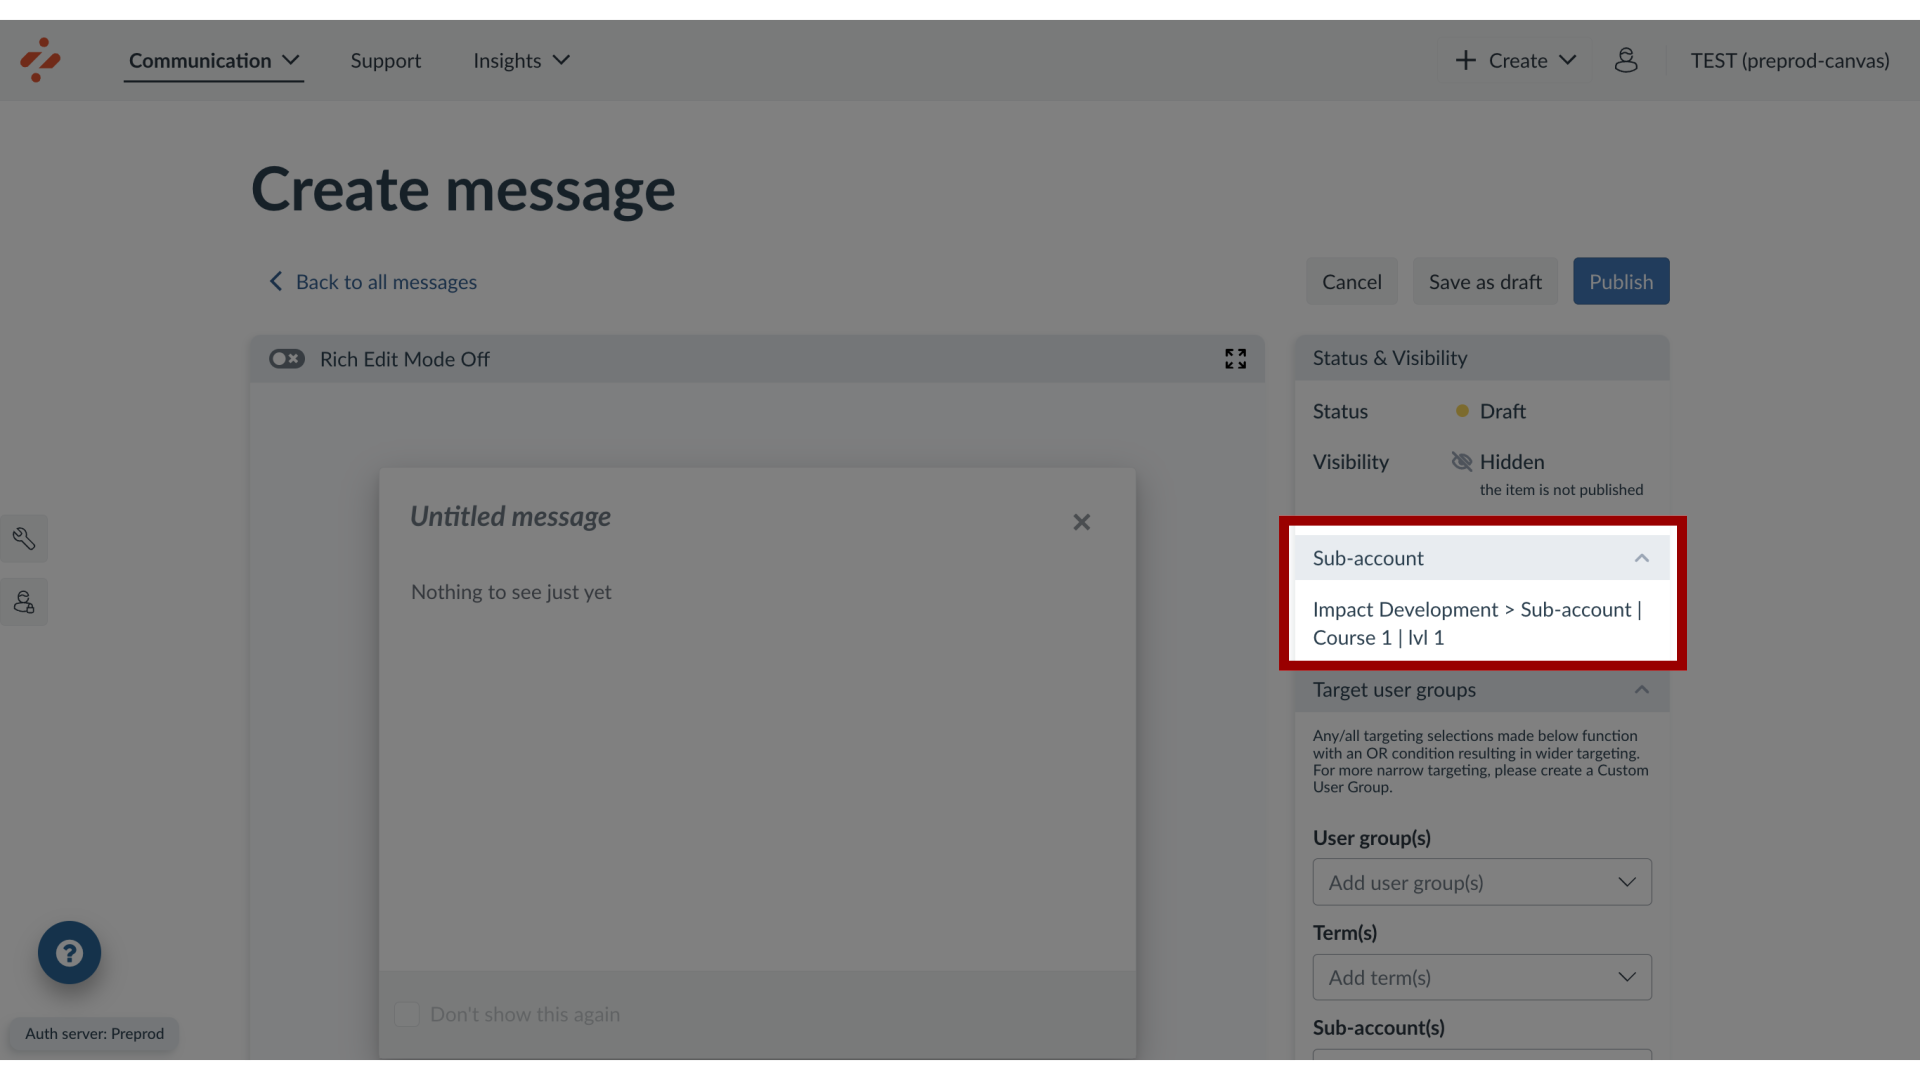
6. View Assigned Sub-Account
In the sidebar, locate and open the Sub-account section. By default, the message is created on the sub-account you are currently using.
![View Assigned Sub-Account](https://static.guidde.com/v0/qg%2F3Rcx4toKQja0NtaHm0AF68PlSJF2%2FjH2LcD6xEDyTmuAS4ynH5J%2FpeAiBZPFpV1qPt3NGr5h3J_doc.png?alt=media&token=8334e010-c7a3-4177-9ae6-67b54b149330)
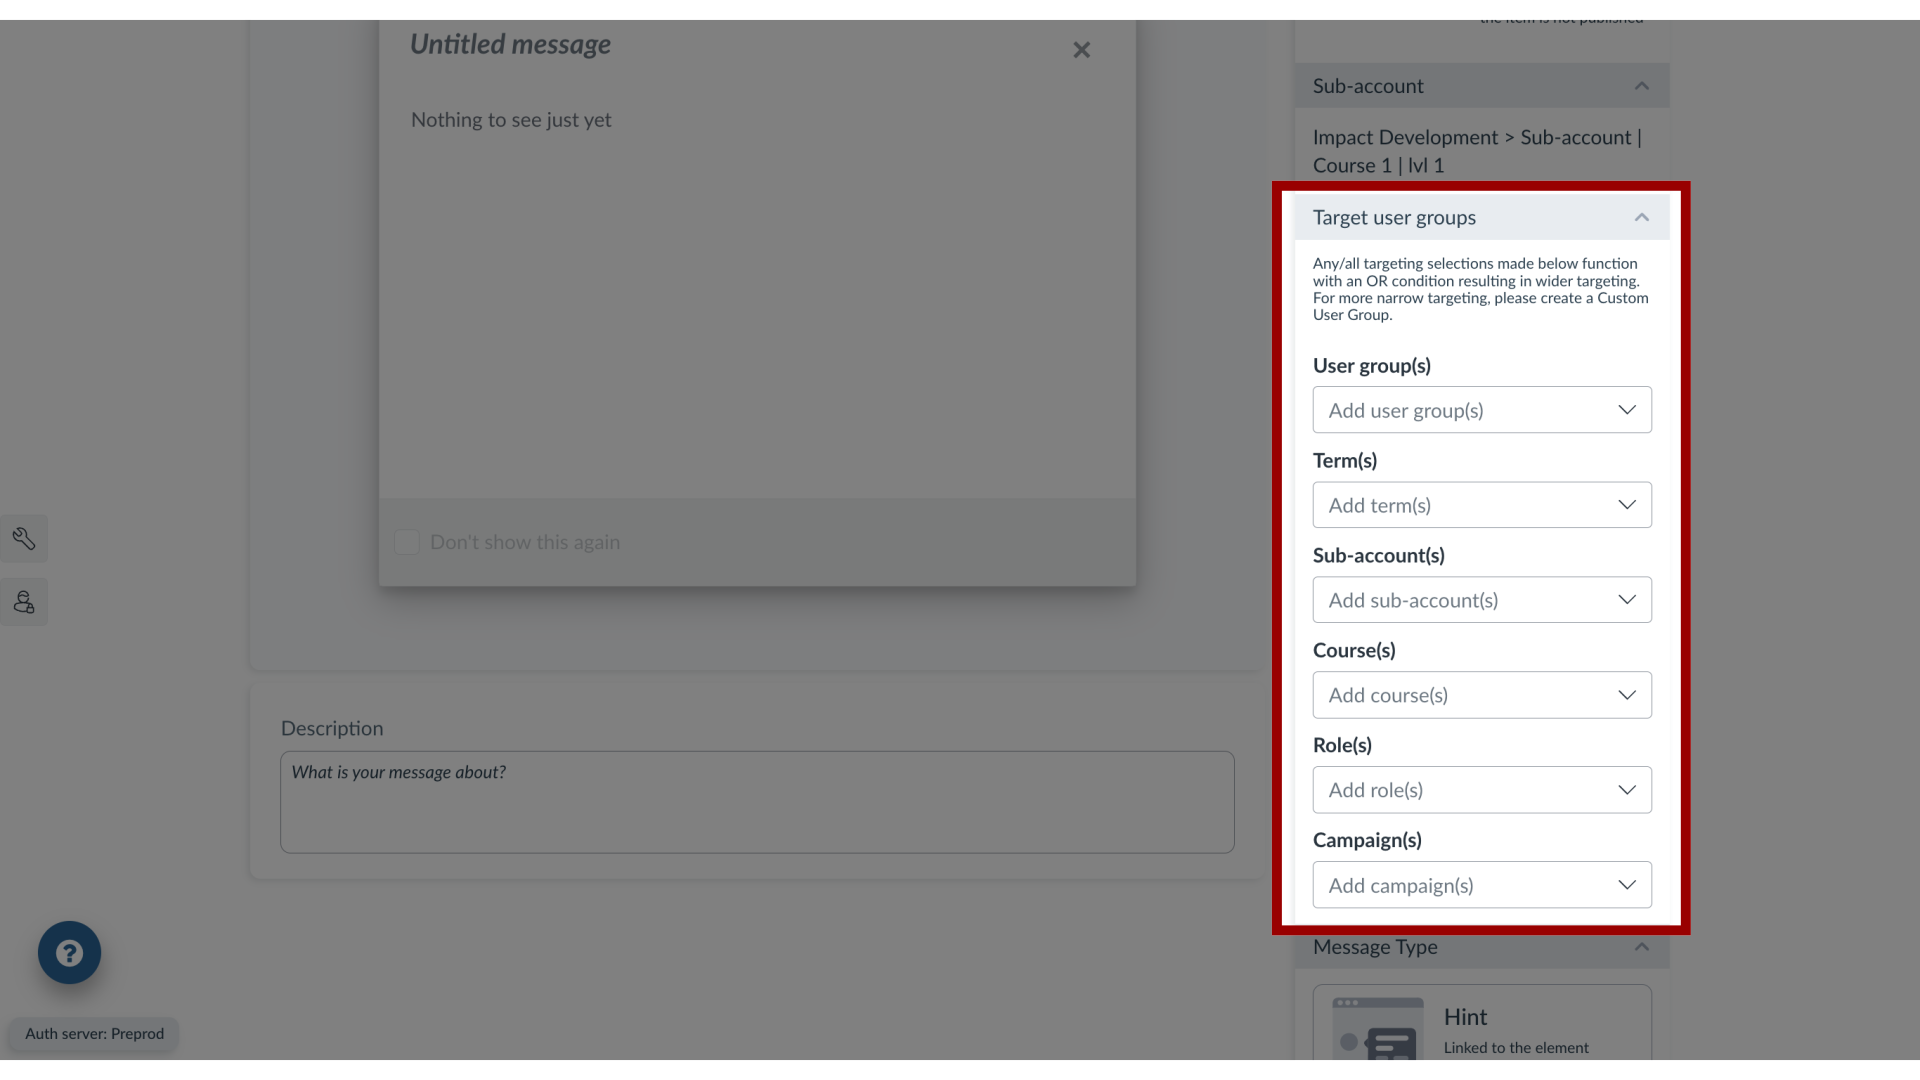
7. Target User Groups
Locate and open the Target User Groups section. Use the drop-down menus to select among the types of users.
![Target User Groups](https://static.guidde.com/v0/qg%2F3Rcx4toKQja0NtaHm0AF68PlSJF2%2FjH2LcD6xEDyTmuAS4ynH5J%2F2M1ZuiHVvZMoYvUMGNNgz1_doc.png?alt=media&token=9d7894d5-7dcd-4308-be90-d497efdf9c7b)
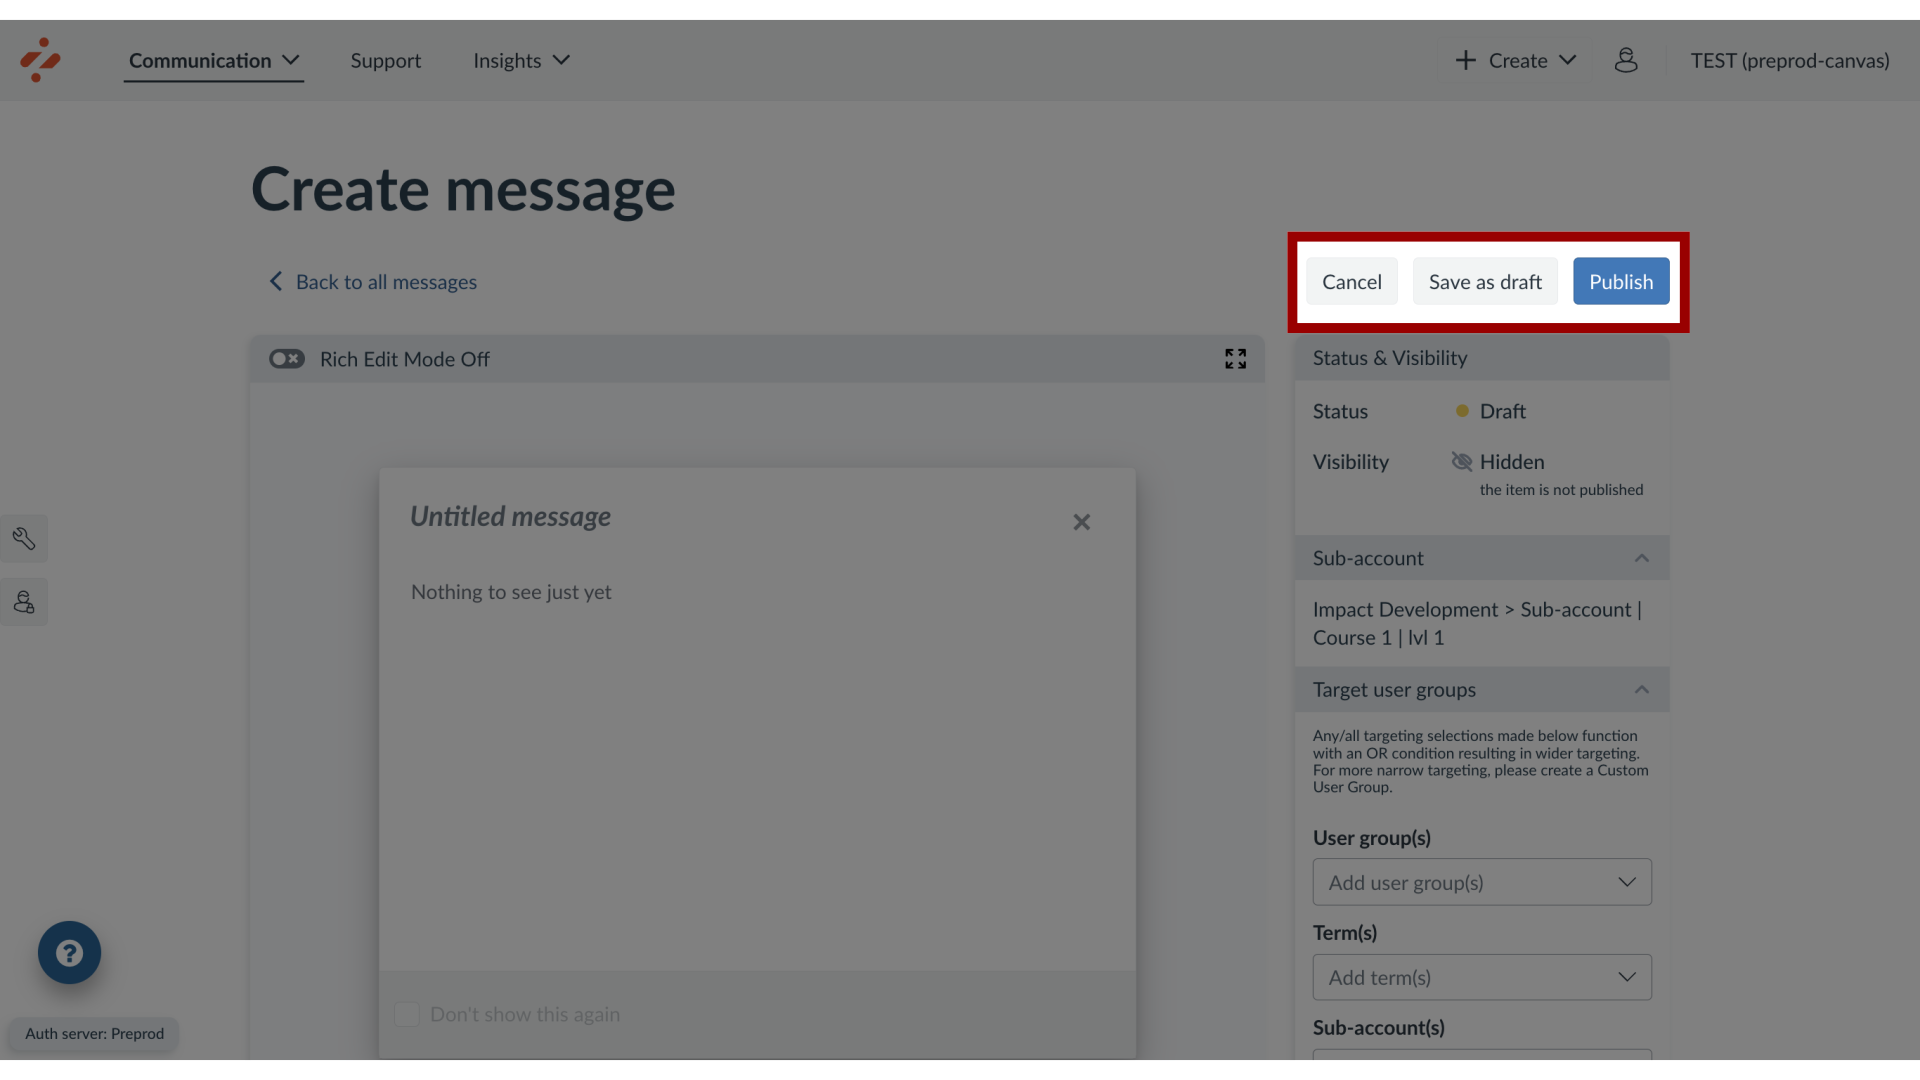
8. Publish Your Message
Now that your message content and settings are all set up, you can continue by:
Publishing your message: using the Publish button.
Saving your message as a draft: using the Save as Draft button allows you to publish the message another time but save your current changes.
Canceling: use the Cancel button to delete your message content and settings or any unsaved changes.
![Publish Your Message](https://static.guidde.com/v0/qg%2F3Rcx4toKQja0NtaHm0AF68PlSJF2%2FjH2LcD6xEDyTmuAS4ynH5J%2Fd7j7DPQy9Wte2NwbF4XBp7_doc.png?alt=media&token=28c6f7f7-ea0e-4e88-baa9-7541949558ea)
This guide covered how to create a message for a sub-account.