How do I edit a Walkthrough in the Impact Dashboard?
You can edit existing walkthroughs in the Impact Dashboard. Walkthroughs consist of multiple steps that may span multiple pages.
How do I edit a Walkthrough in the Impact Dashboard?
1. Open Walkthroughs
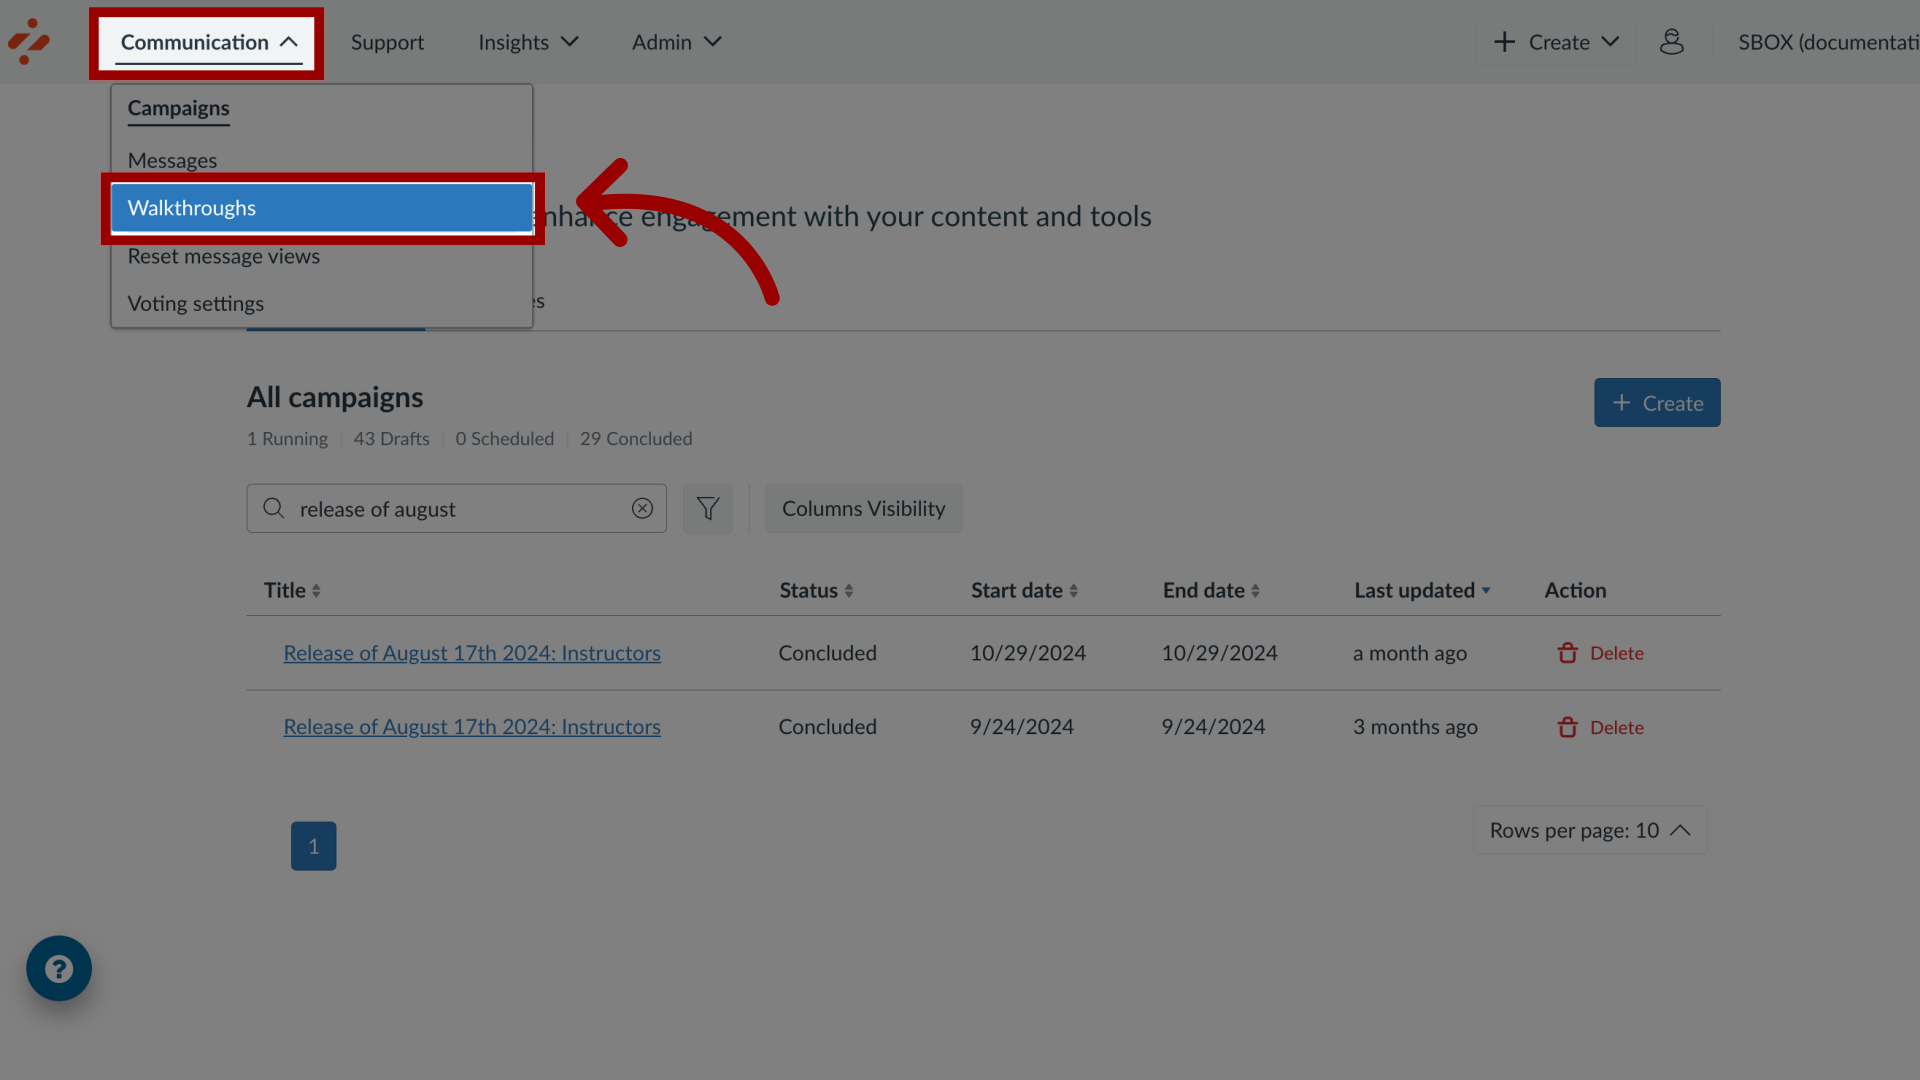
In the Global Navigation, click the Communication dropdown menu. Then click the Walkthroughs link.
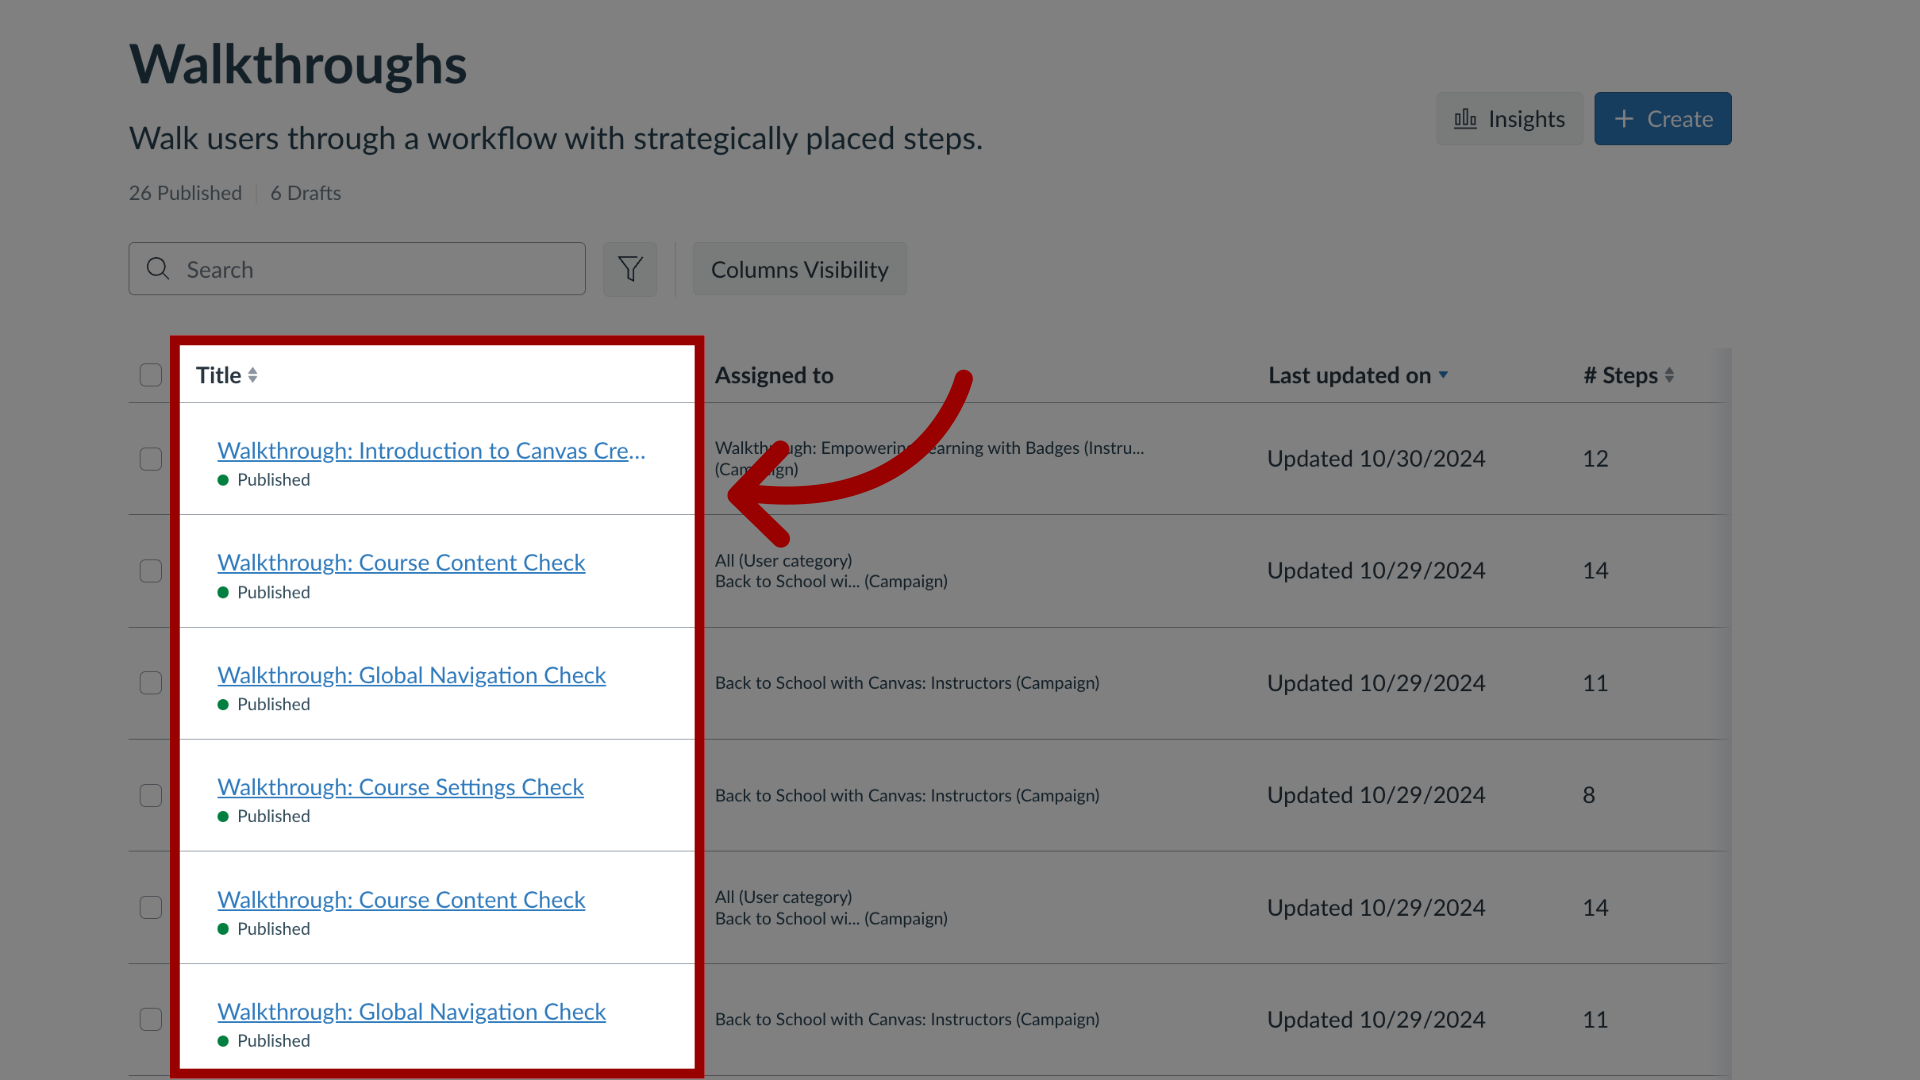
2. Open Walkthrough
3. Delete or Edit Walkthrough
To delete a walkthrough, click the Delete button. To modify the walkthrough, click the Edit button.

4. Edit Walkthrough Steps
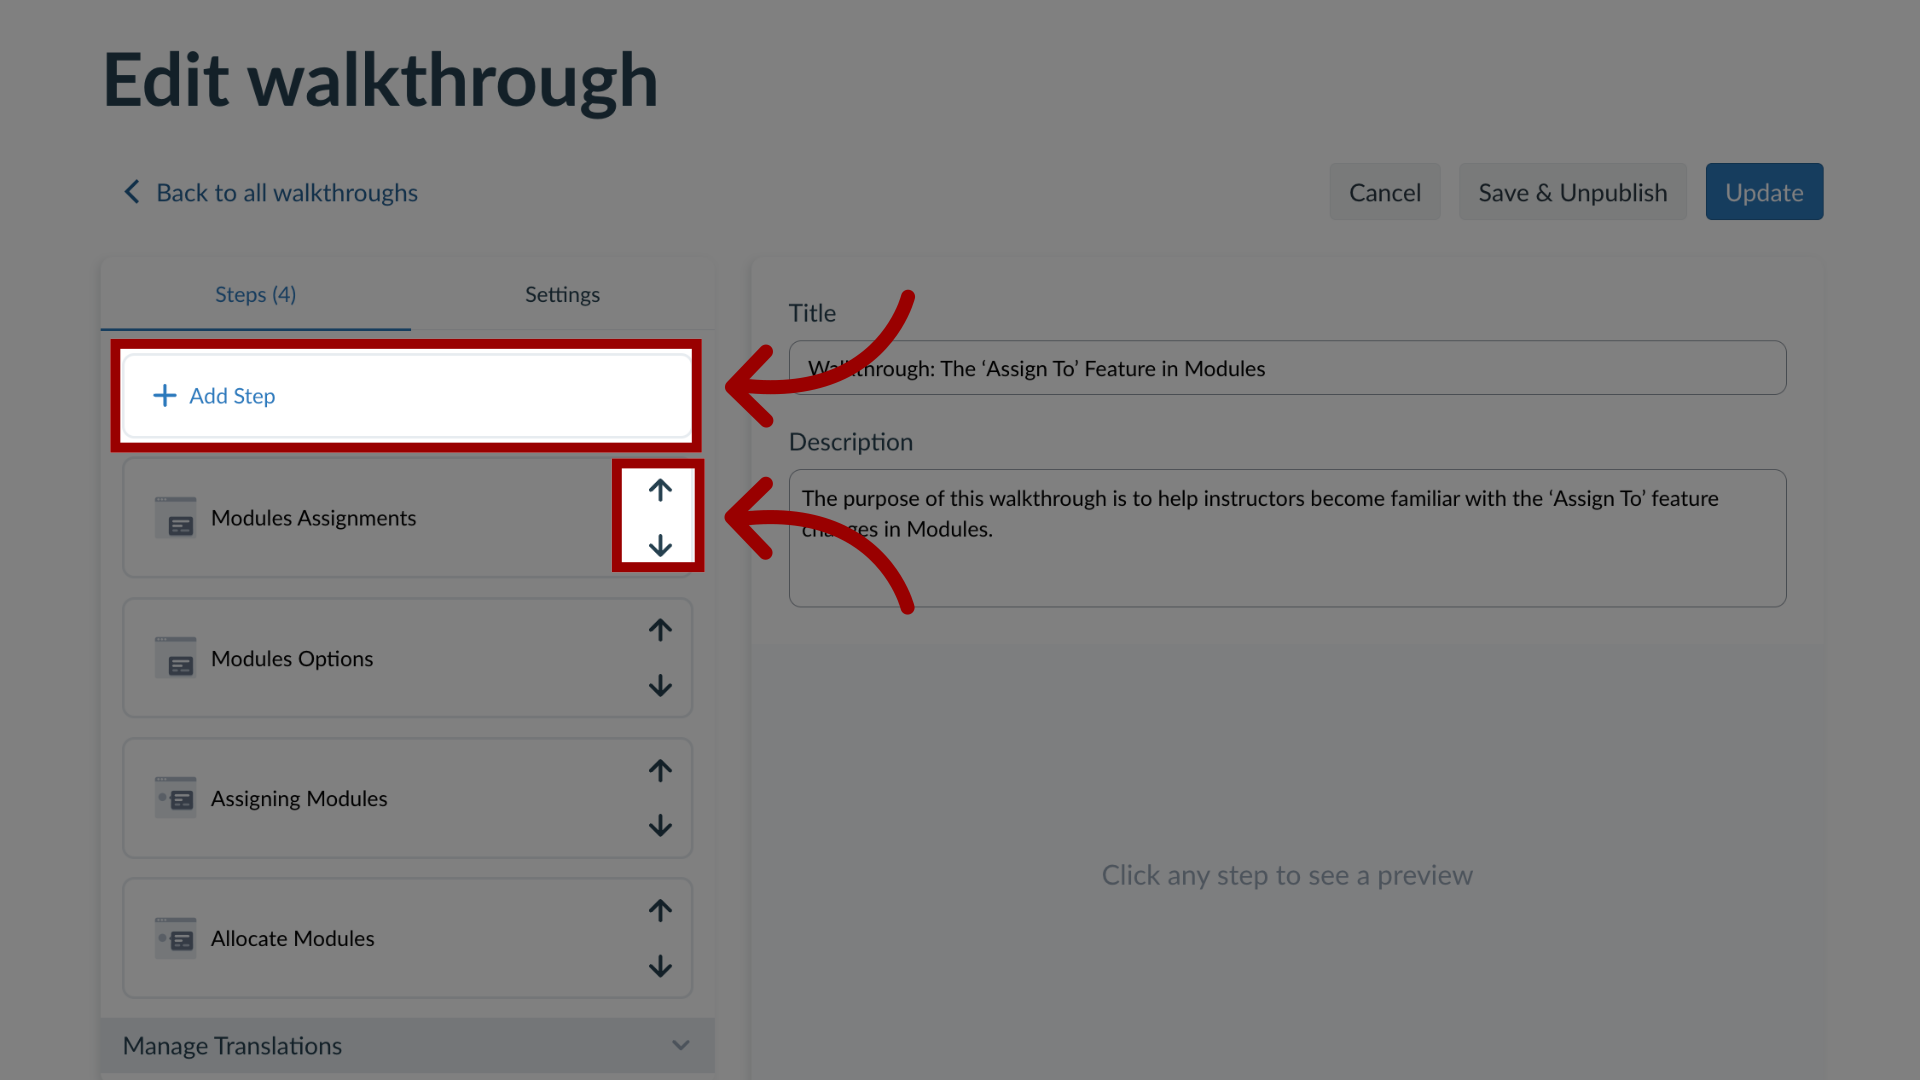
To add an additional step, click the Add Step button. To update a walkthrough step, click the Drag and Drop icon.
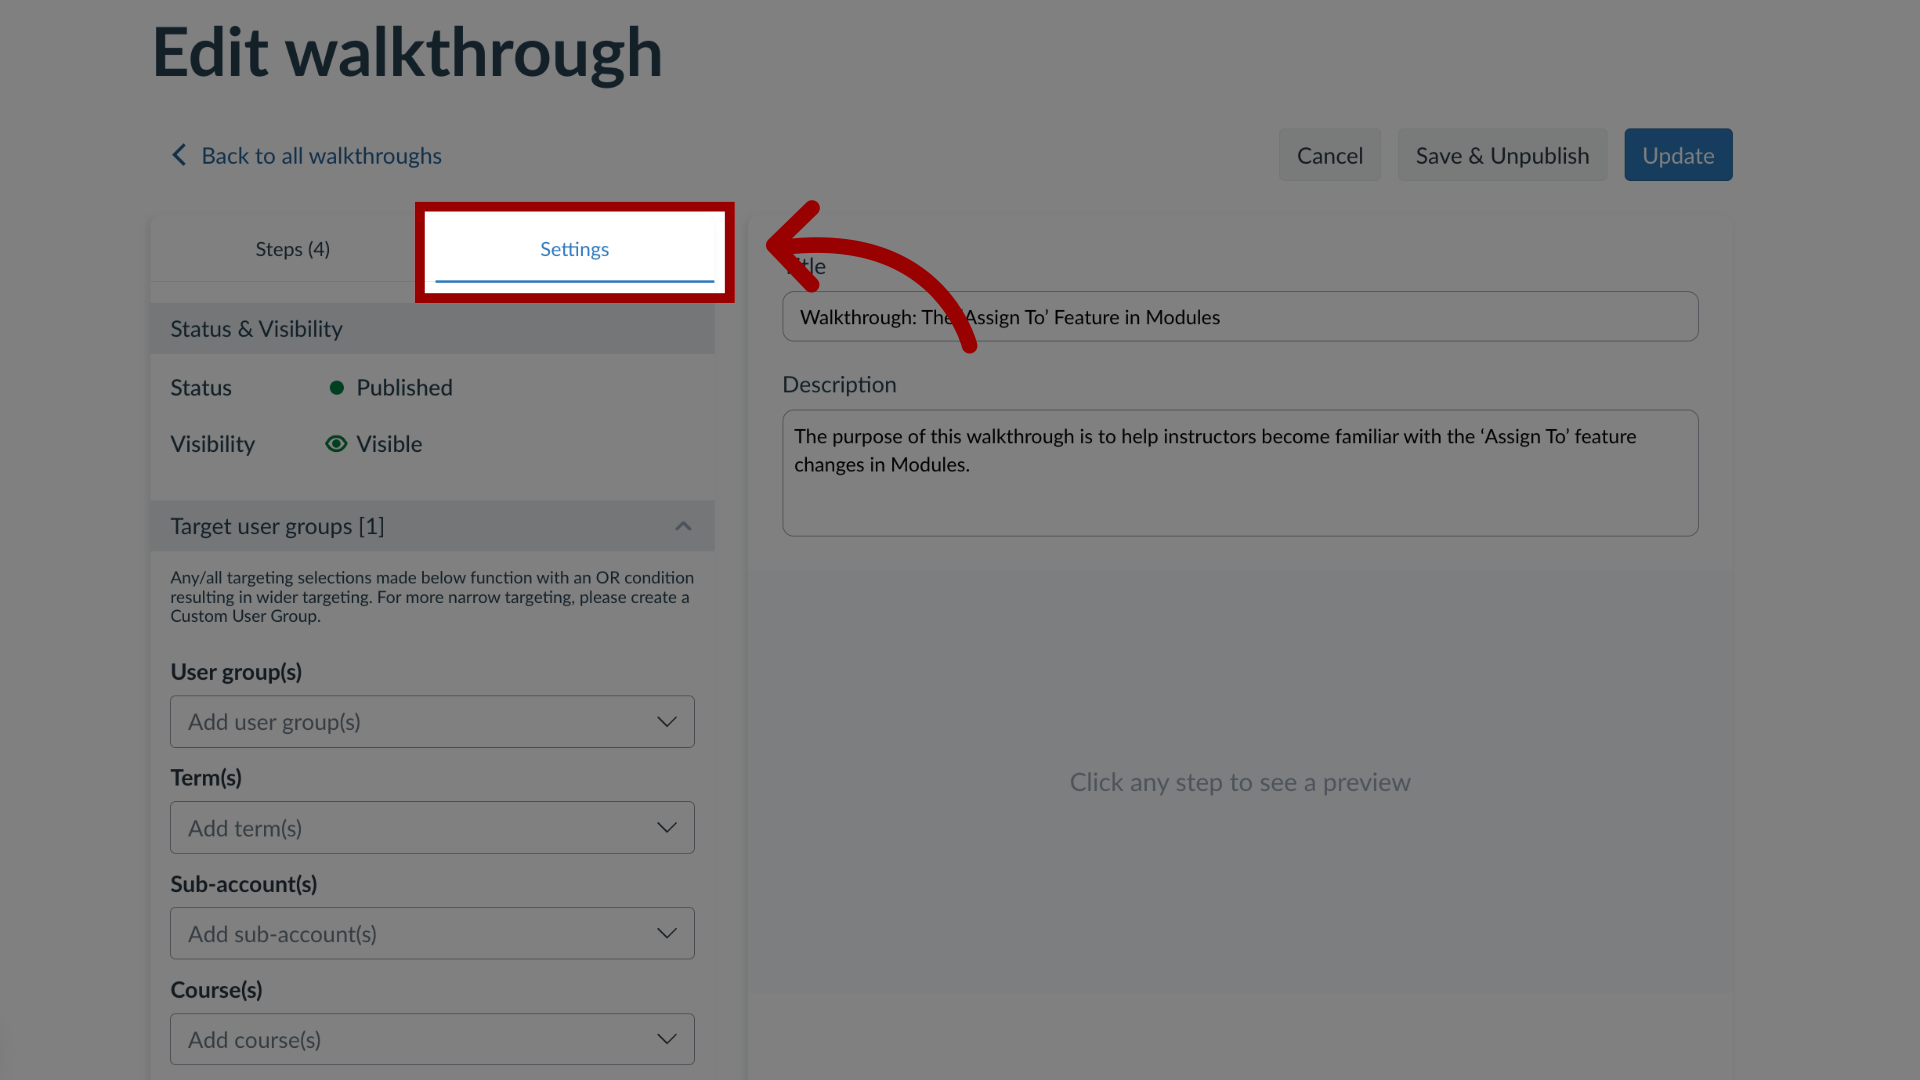
5. Edit Settings
In the Settings tab, you can edit different walkthrough settings.
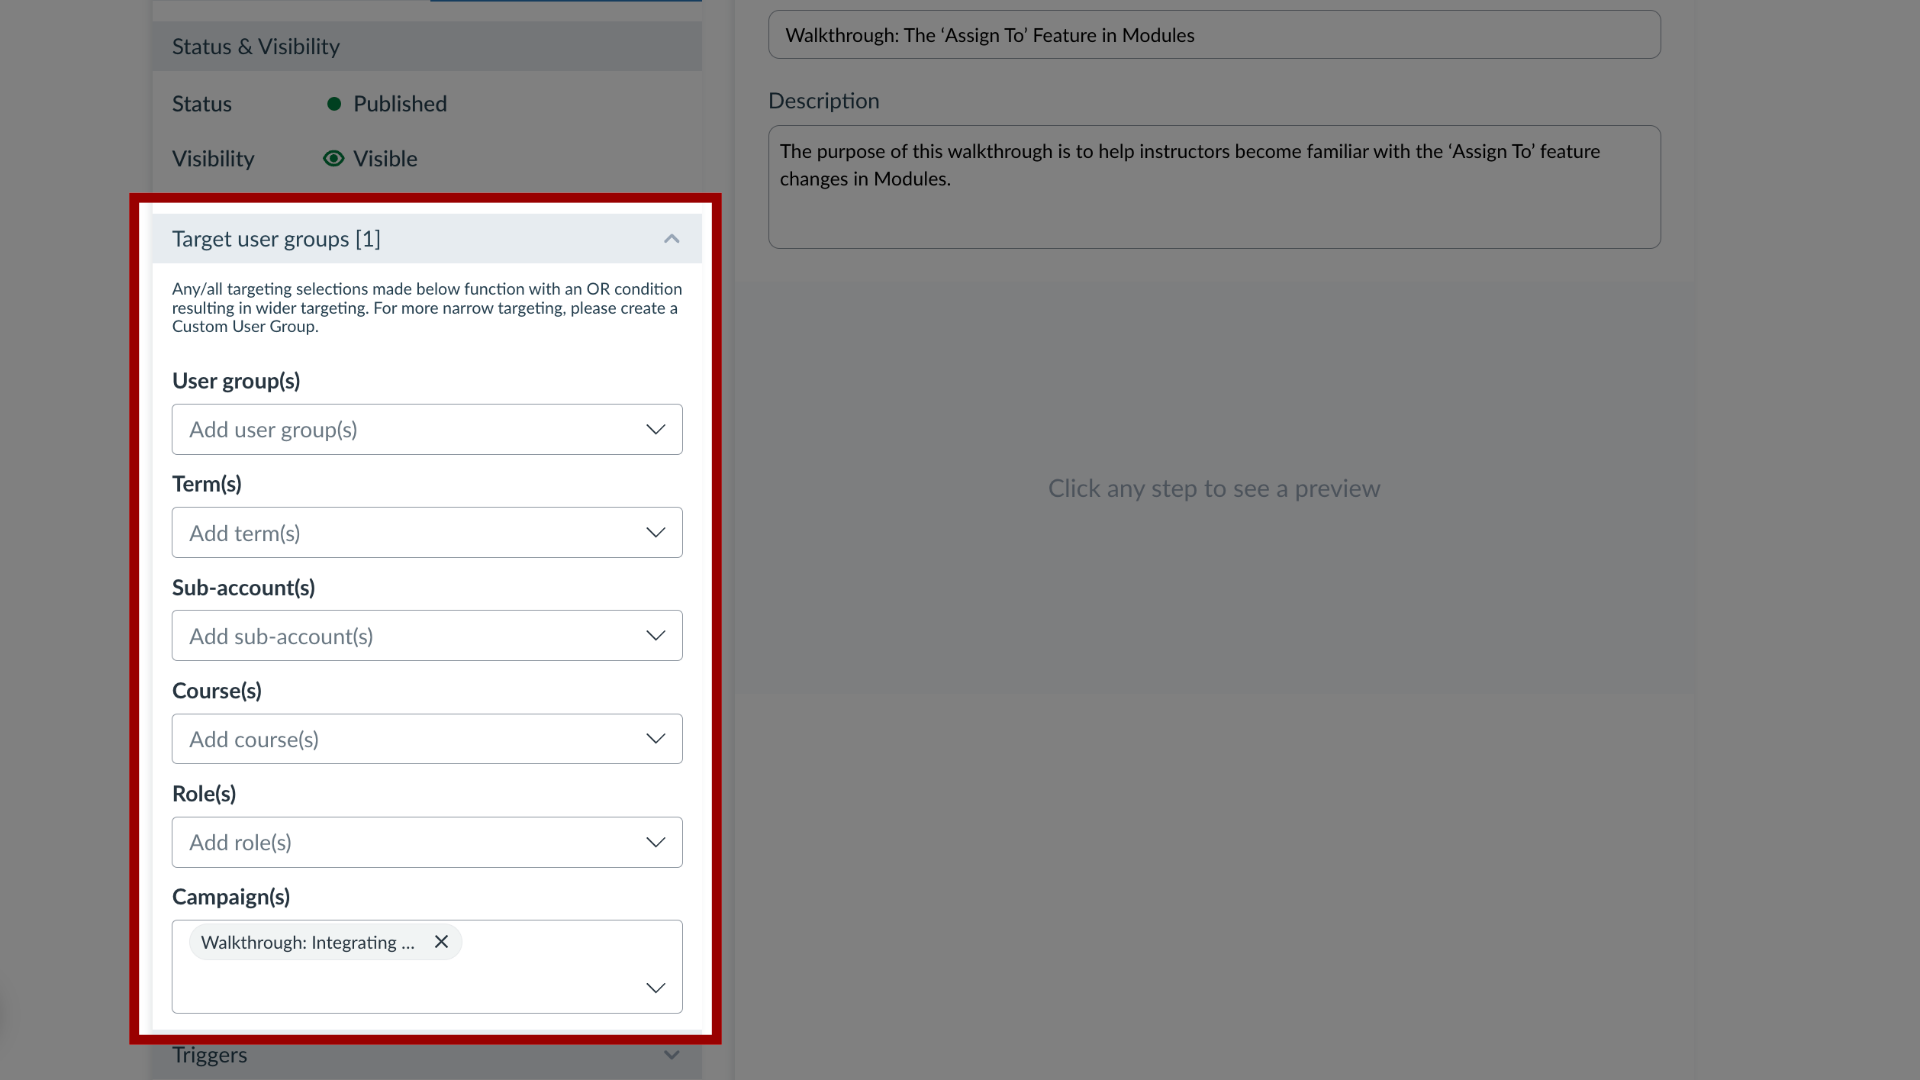
6. Target User Groups
To update who is assigned the Walkthrough, click the Target User Groups drop-down menu.
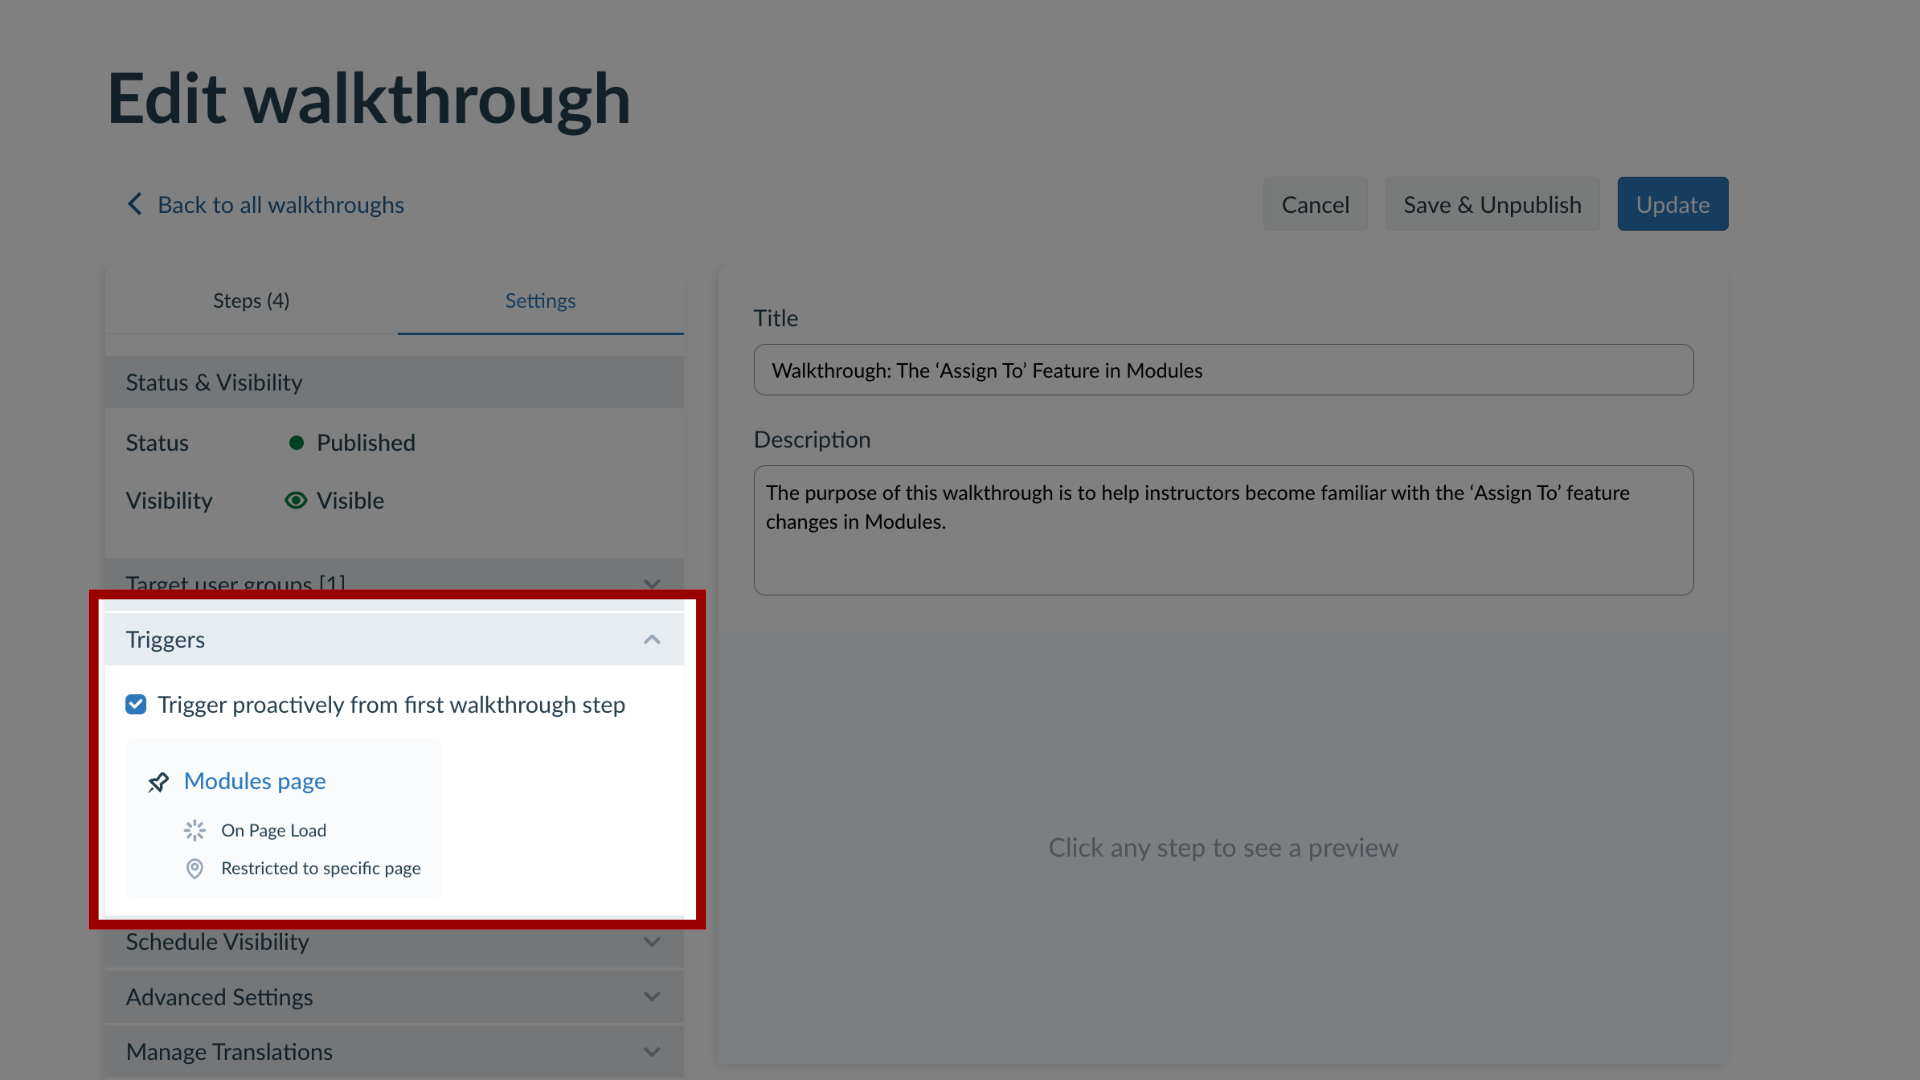
7. Triggers
To immediately begin the Walkthrough when a user opens the page, open the Triggers section and ensure the Trigger proactively from first walkthrough step checkbox is selected.
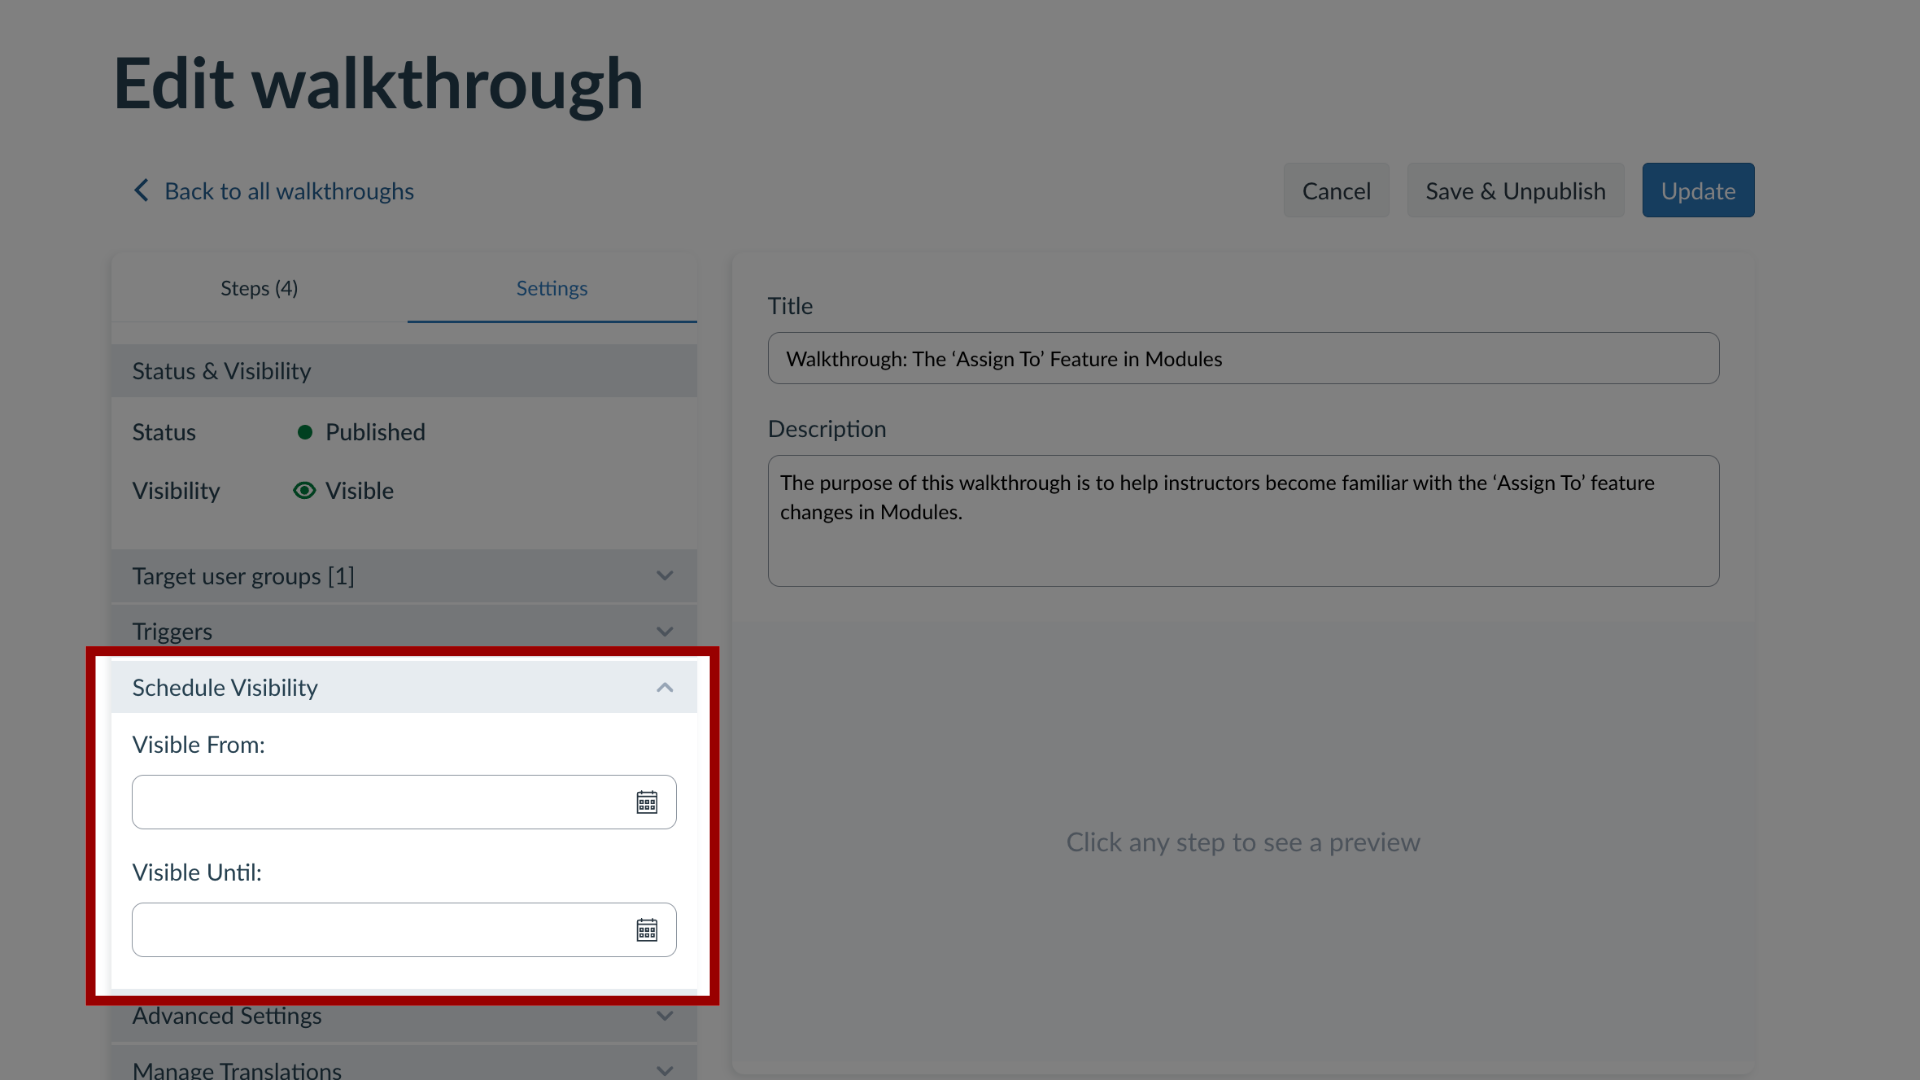
8. Schedule Visibility
To update the schedule message visibility, in the sidebar, locate and open the Schedule Visibility section.
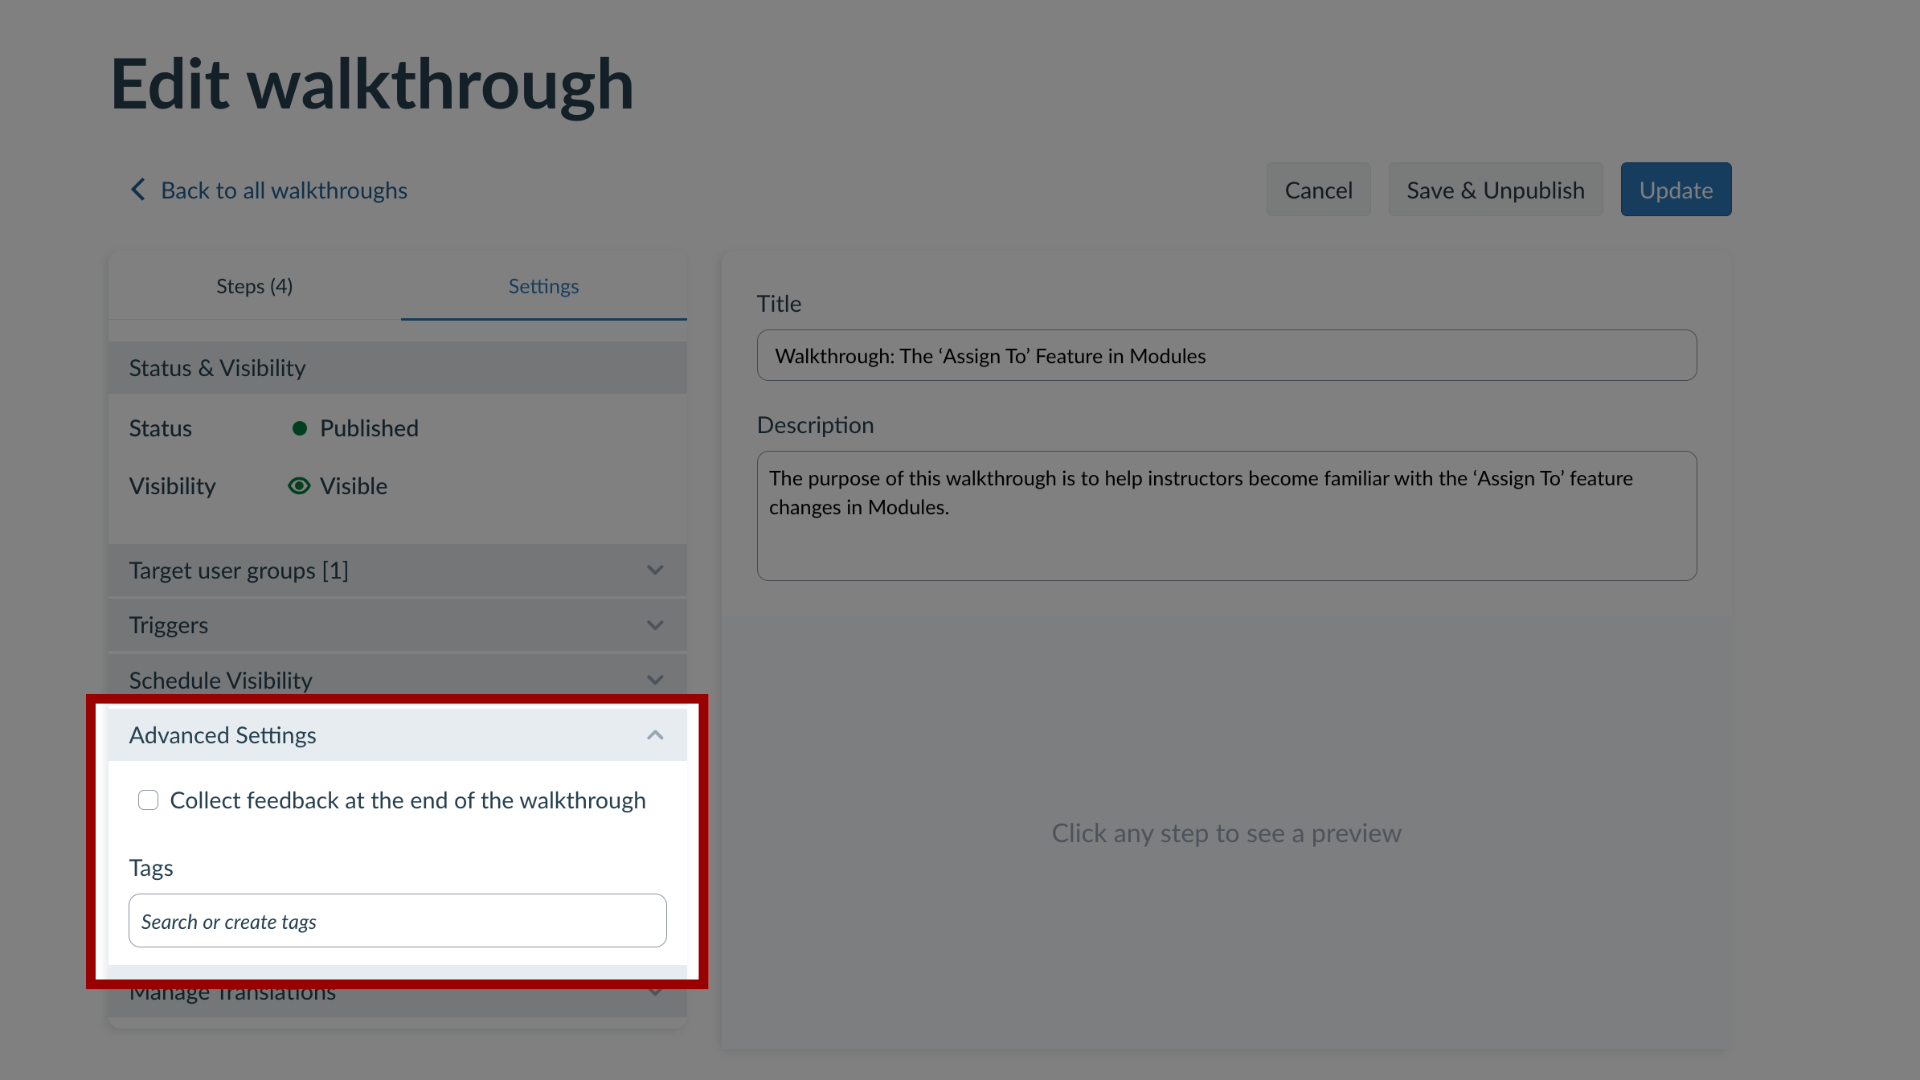
9. Advanced Settings
To collect feedback from the Walkthrough, open the Advanced Settings section and click the Collect feedback at the end of the walkthrough checkbox.
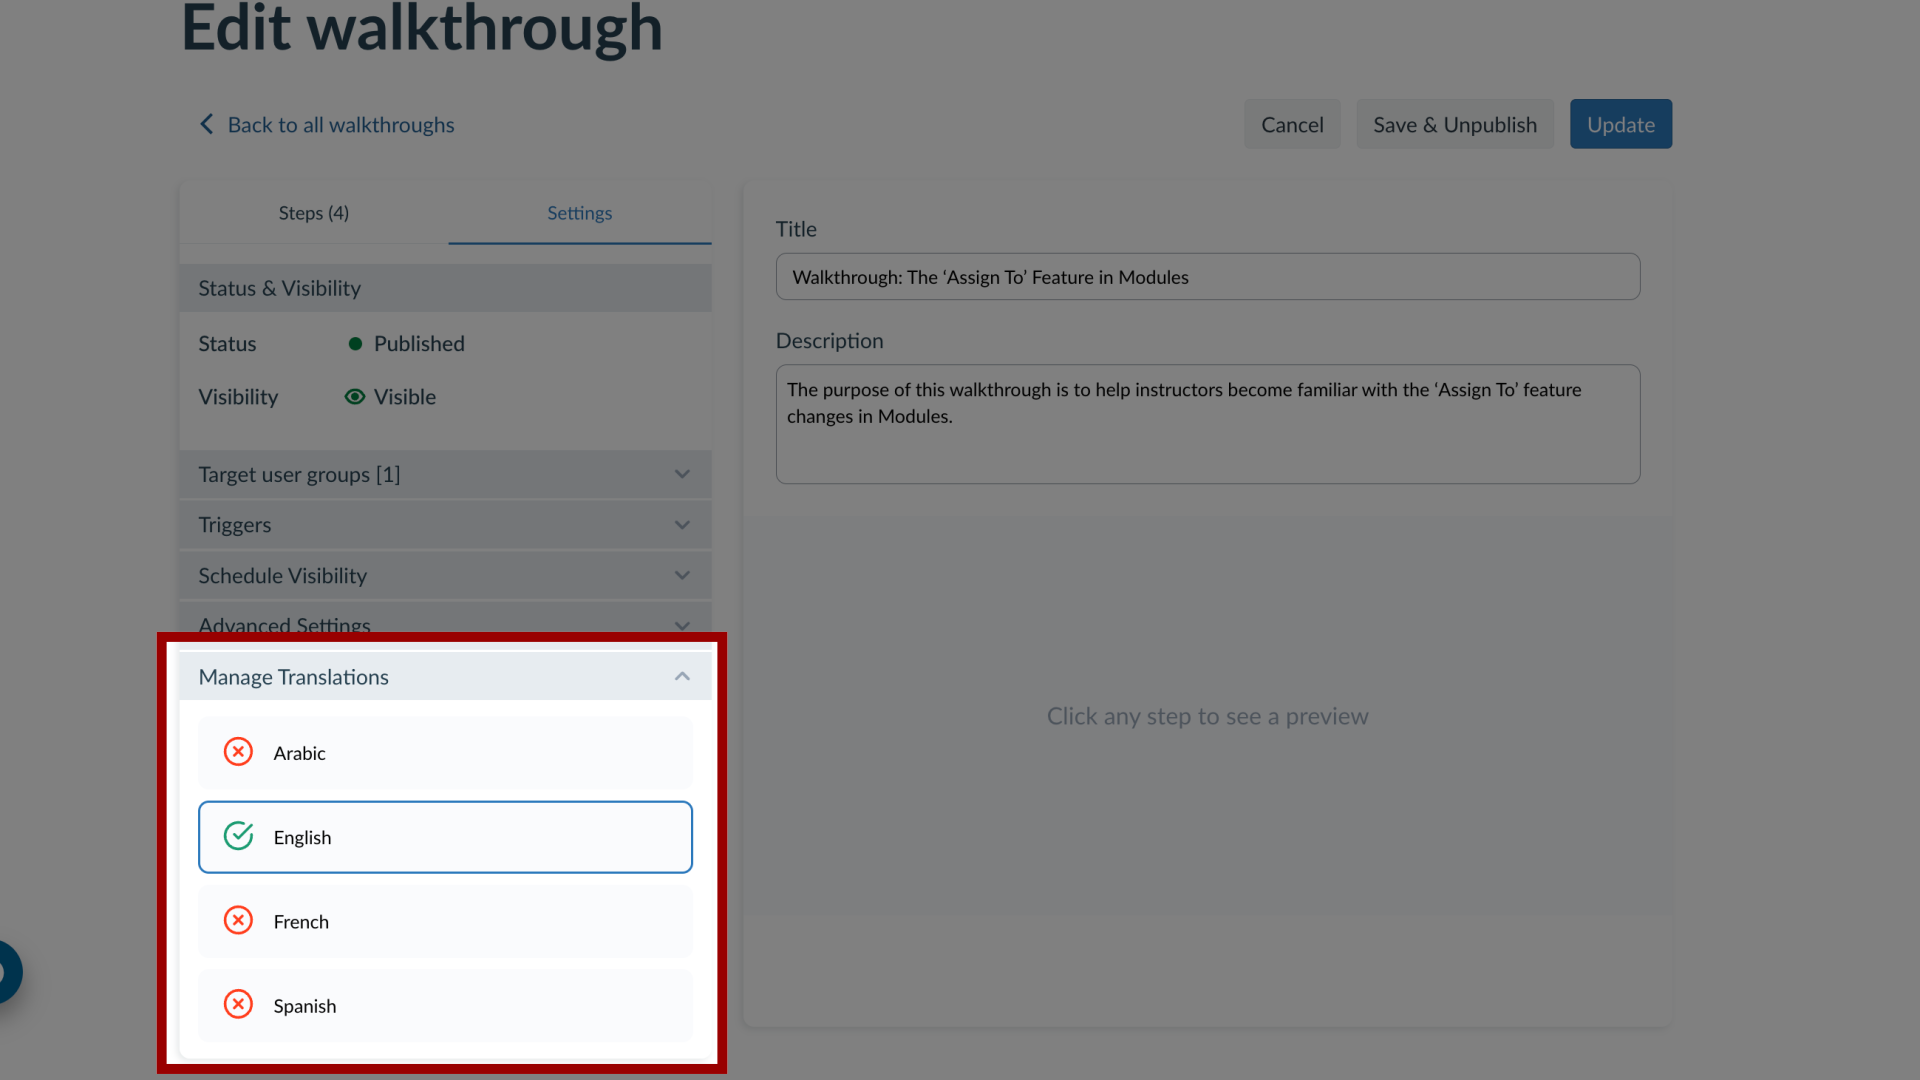
10. Manage Translations
To Manage Translations, click the Manage Translations drop-down menu
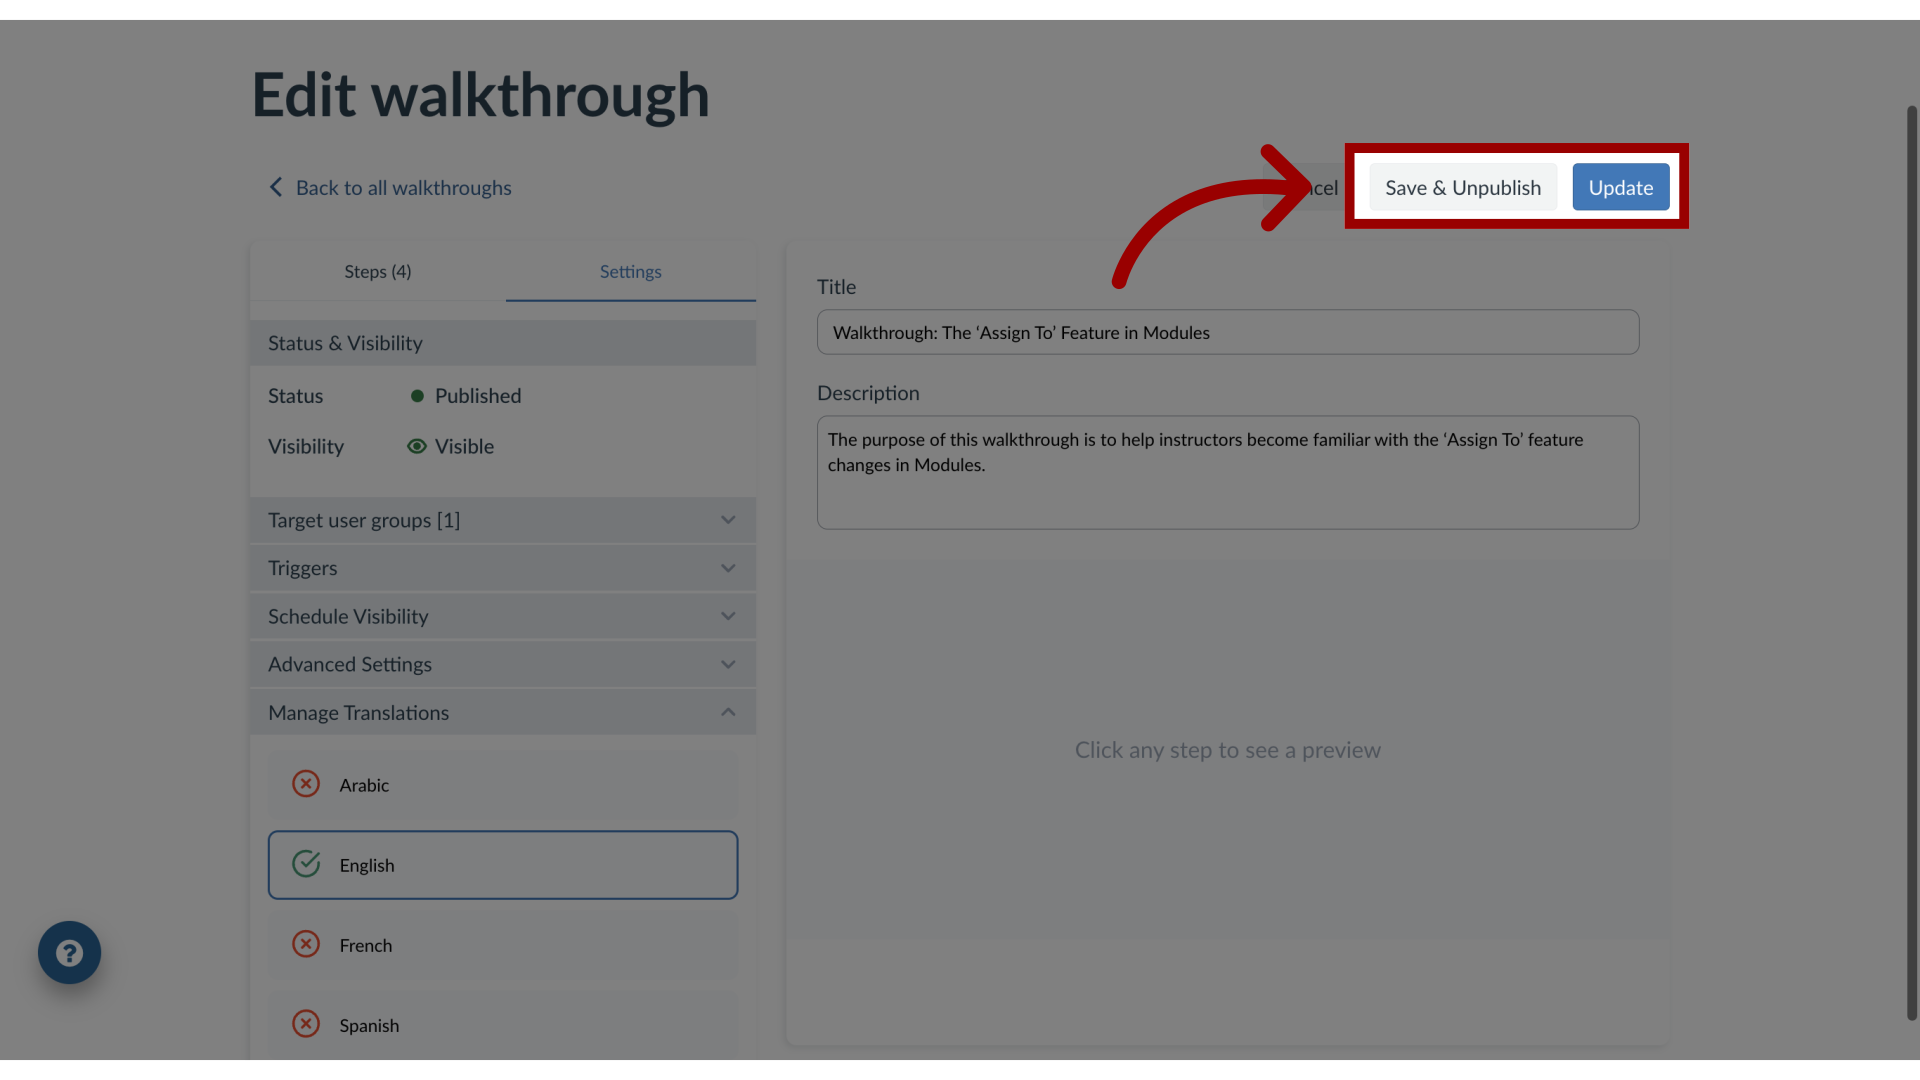
11. Update Walkthrough
To unpublish your walkthrough and save your current changes, click the Save & Unpublished button. To publish your updated walkthrough, click the Update button.
