How do I add a Walkthrough to an existing campaign in the Impact Dashboard?
Impact allows you to assign a walkthrough to an existing campaign to apply the user targeting rules (as defined for the campaign) to your walkthrough.
How do I add a Walkthrough to an existing campaign in the Impact Dashboard?
1. Open Walkthroughs
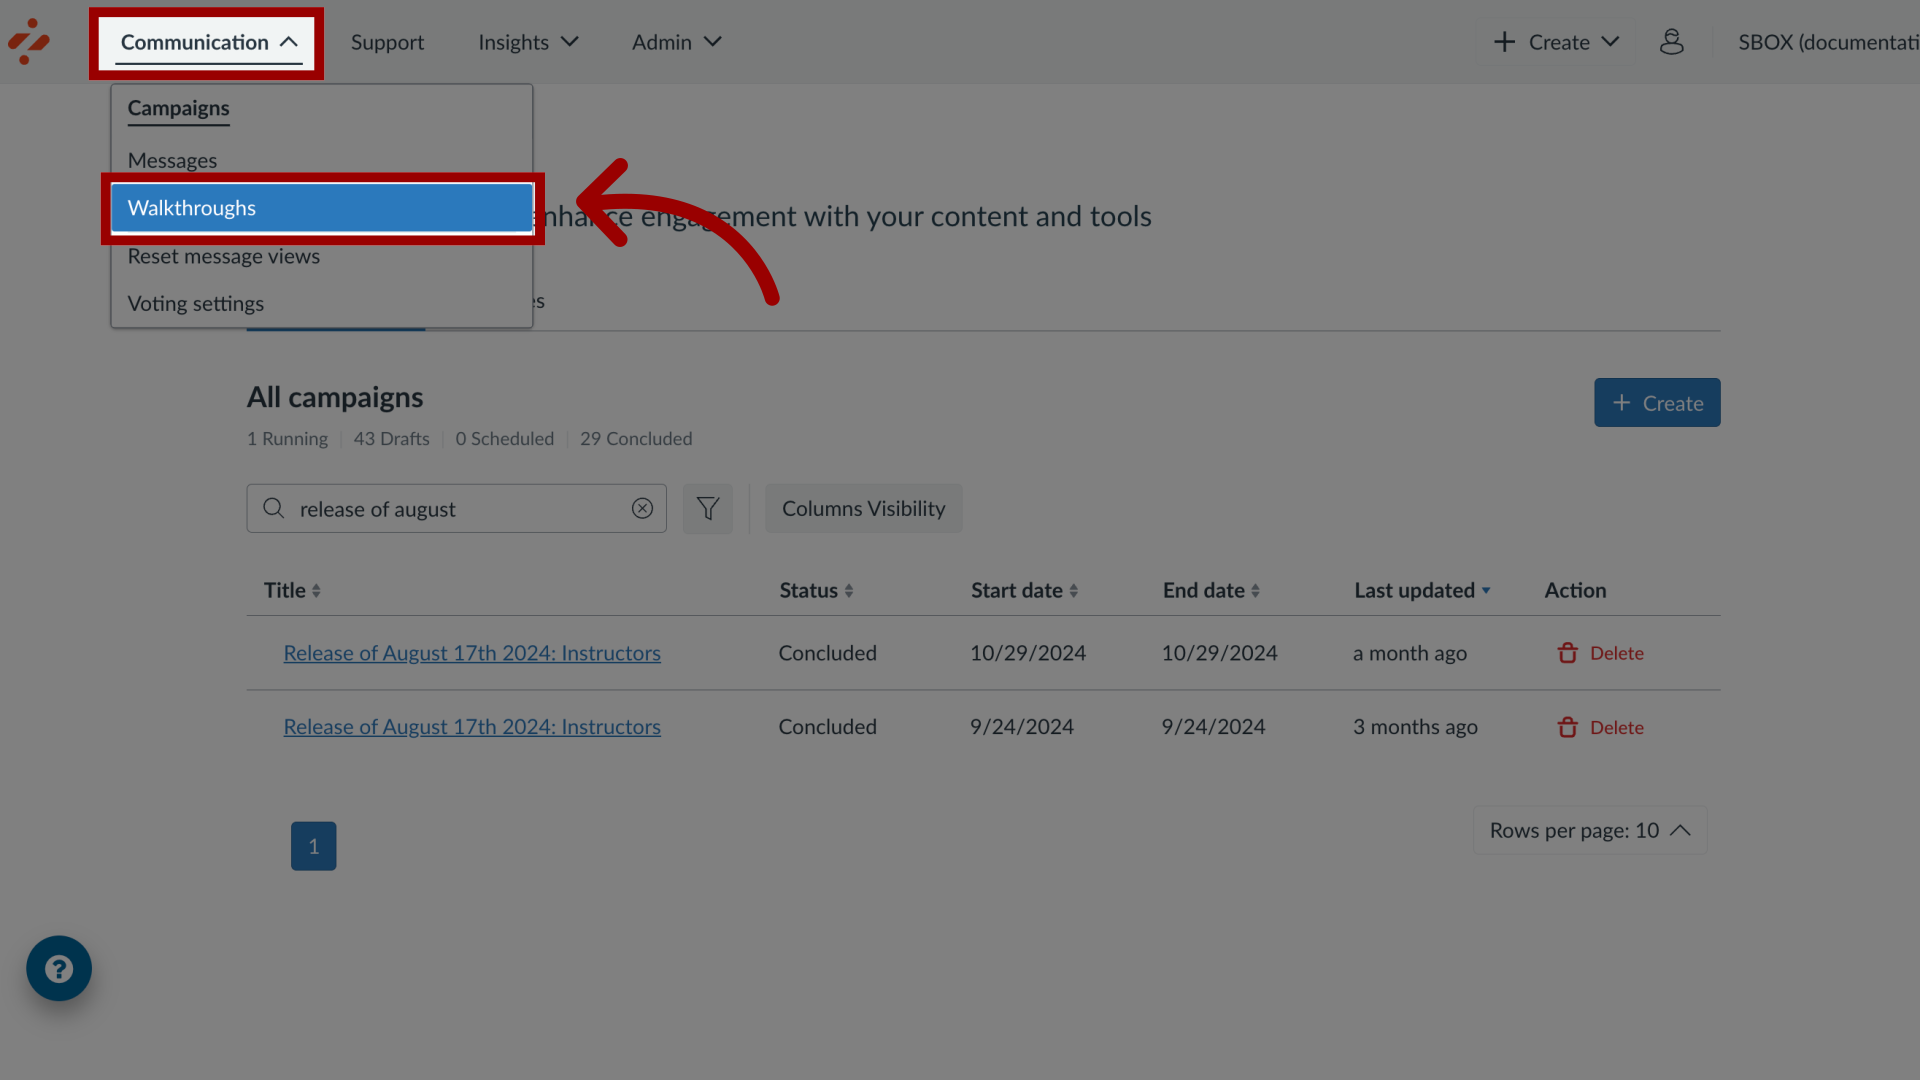
In the Global Navigation, click the Communication dropdown menu. Then click the Walkthroughs link.
2. Manage Walkthroughs
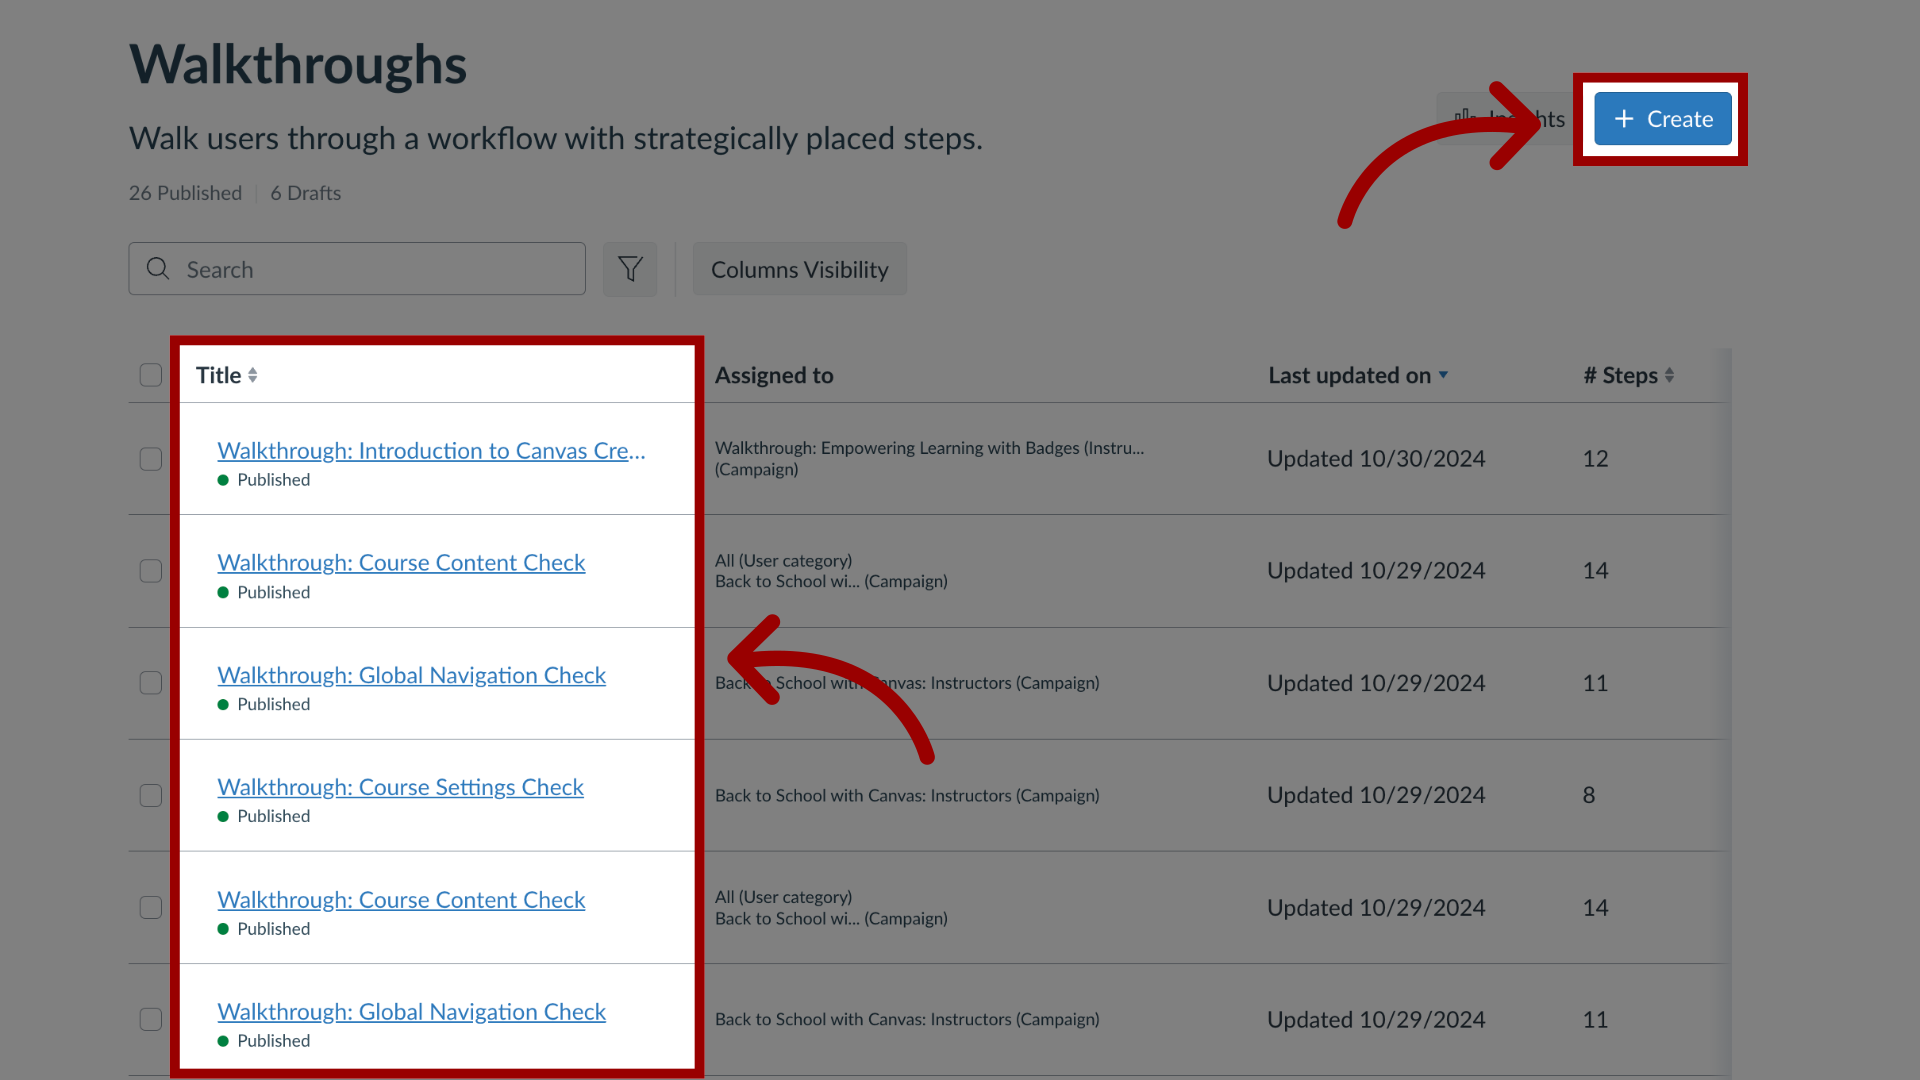
To associate a walkthrough to an existing campaign, locate and click the walkthrough you want to use.
To create a new walkthrough, click the Create button.
3. Edit Walkthrough
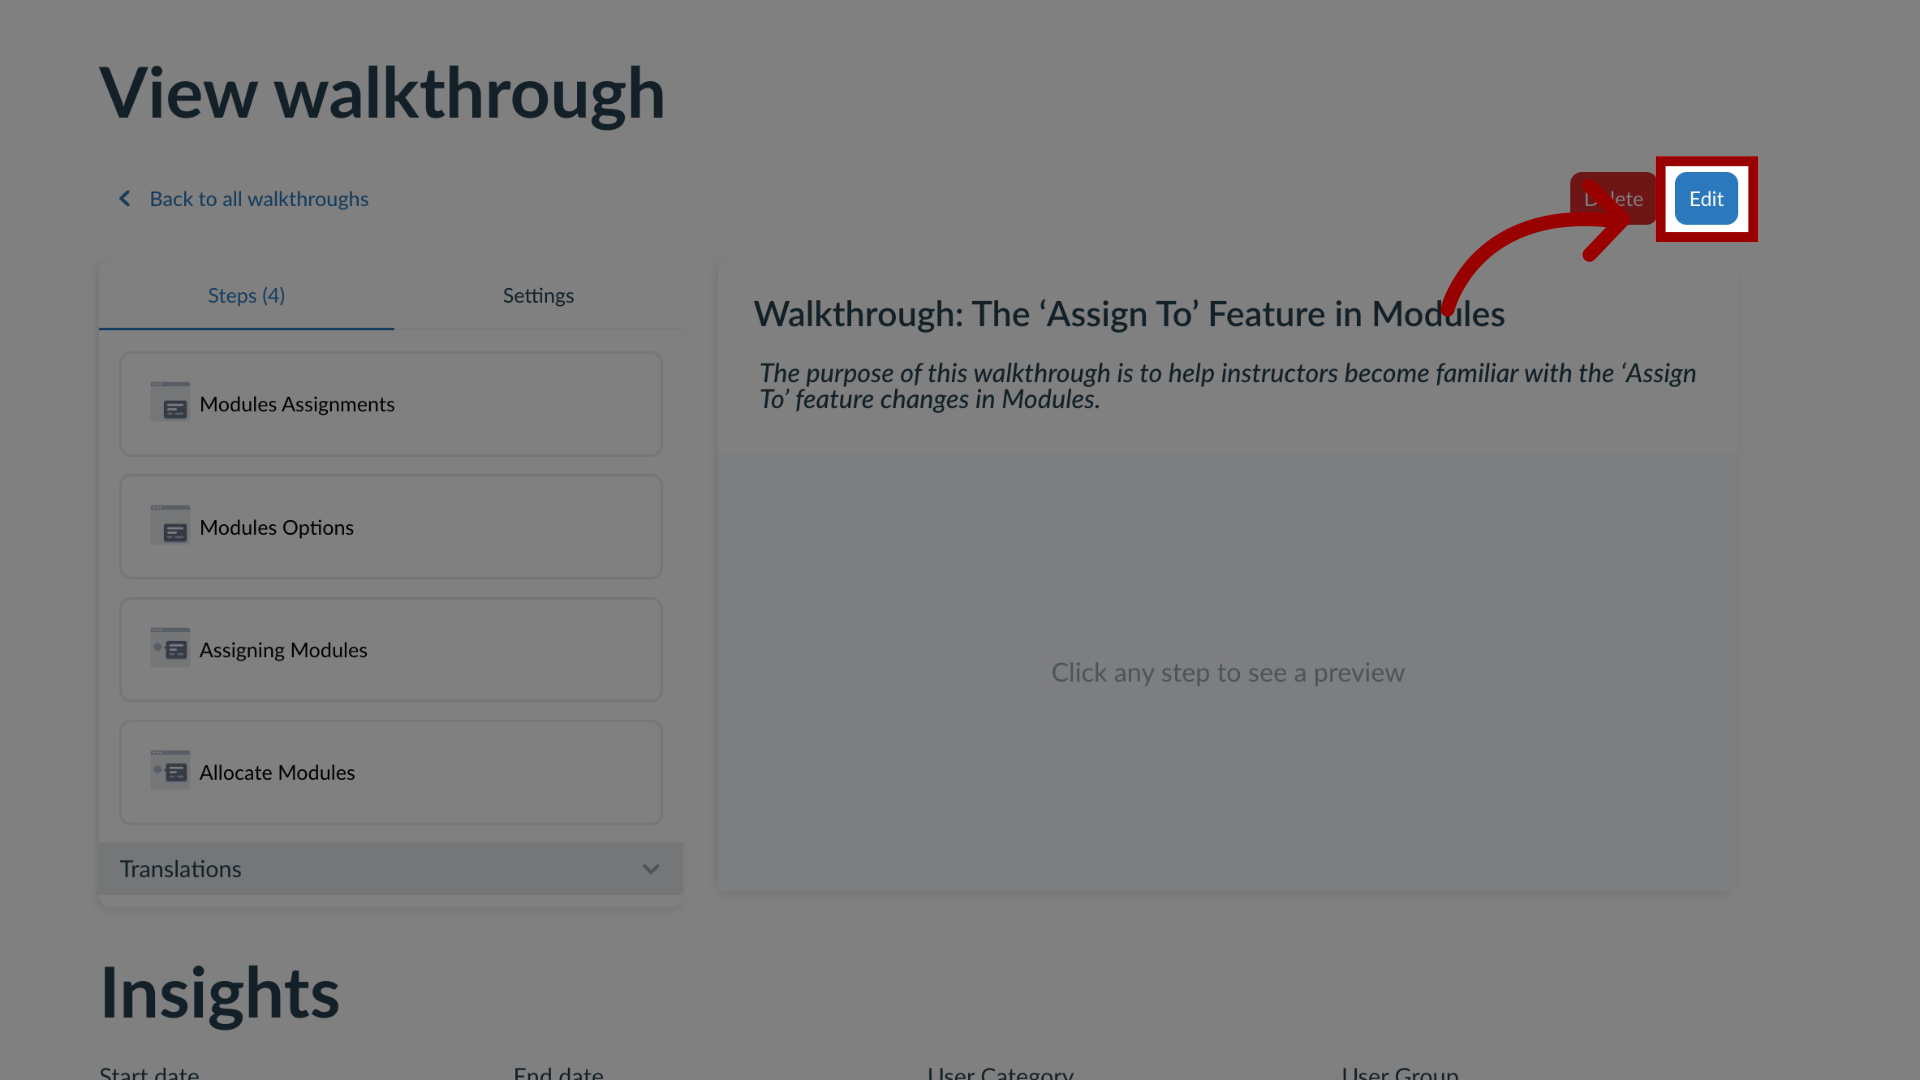
In the View Walkthrough page, click the Edit button.
4. Edit Settings
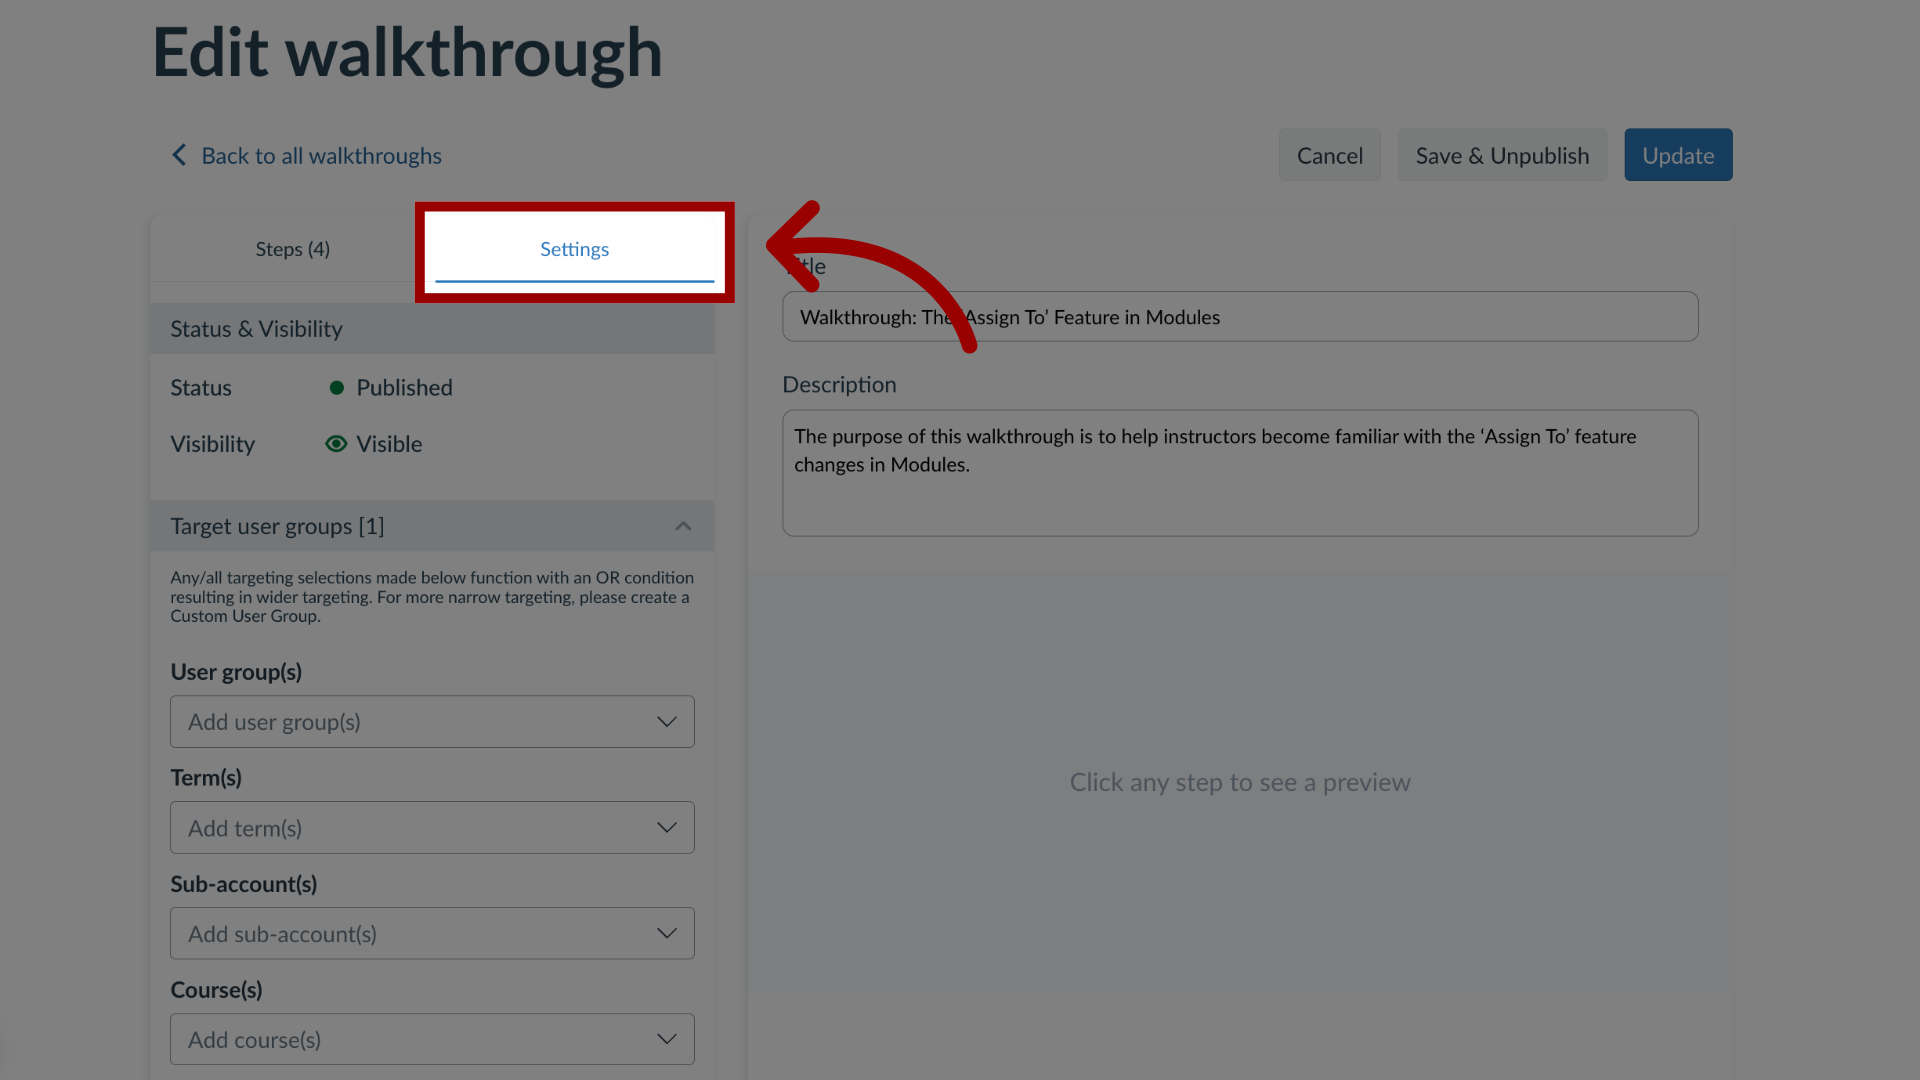
To add an existing campaign, click the Settings tab.
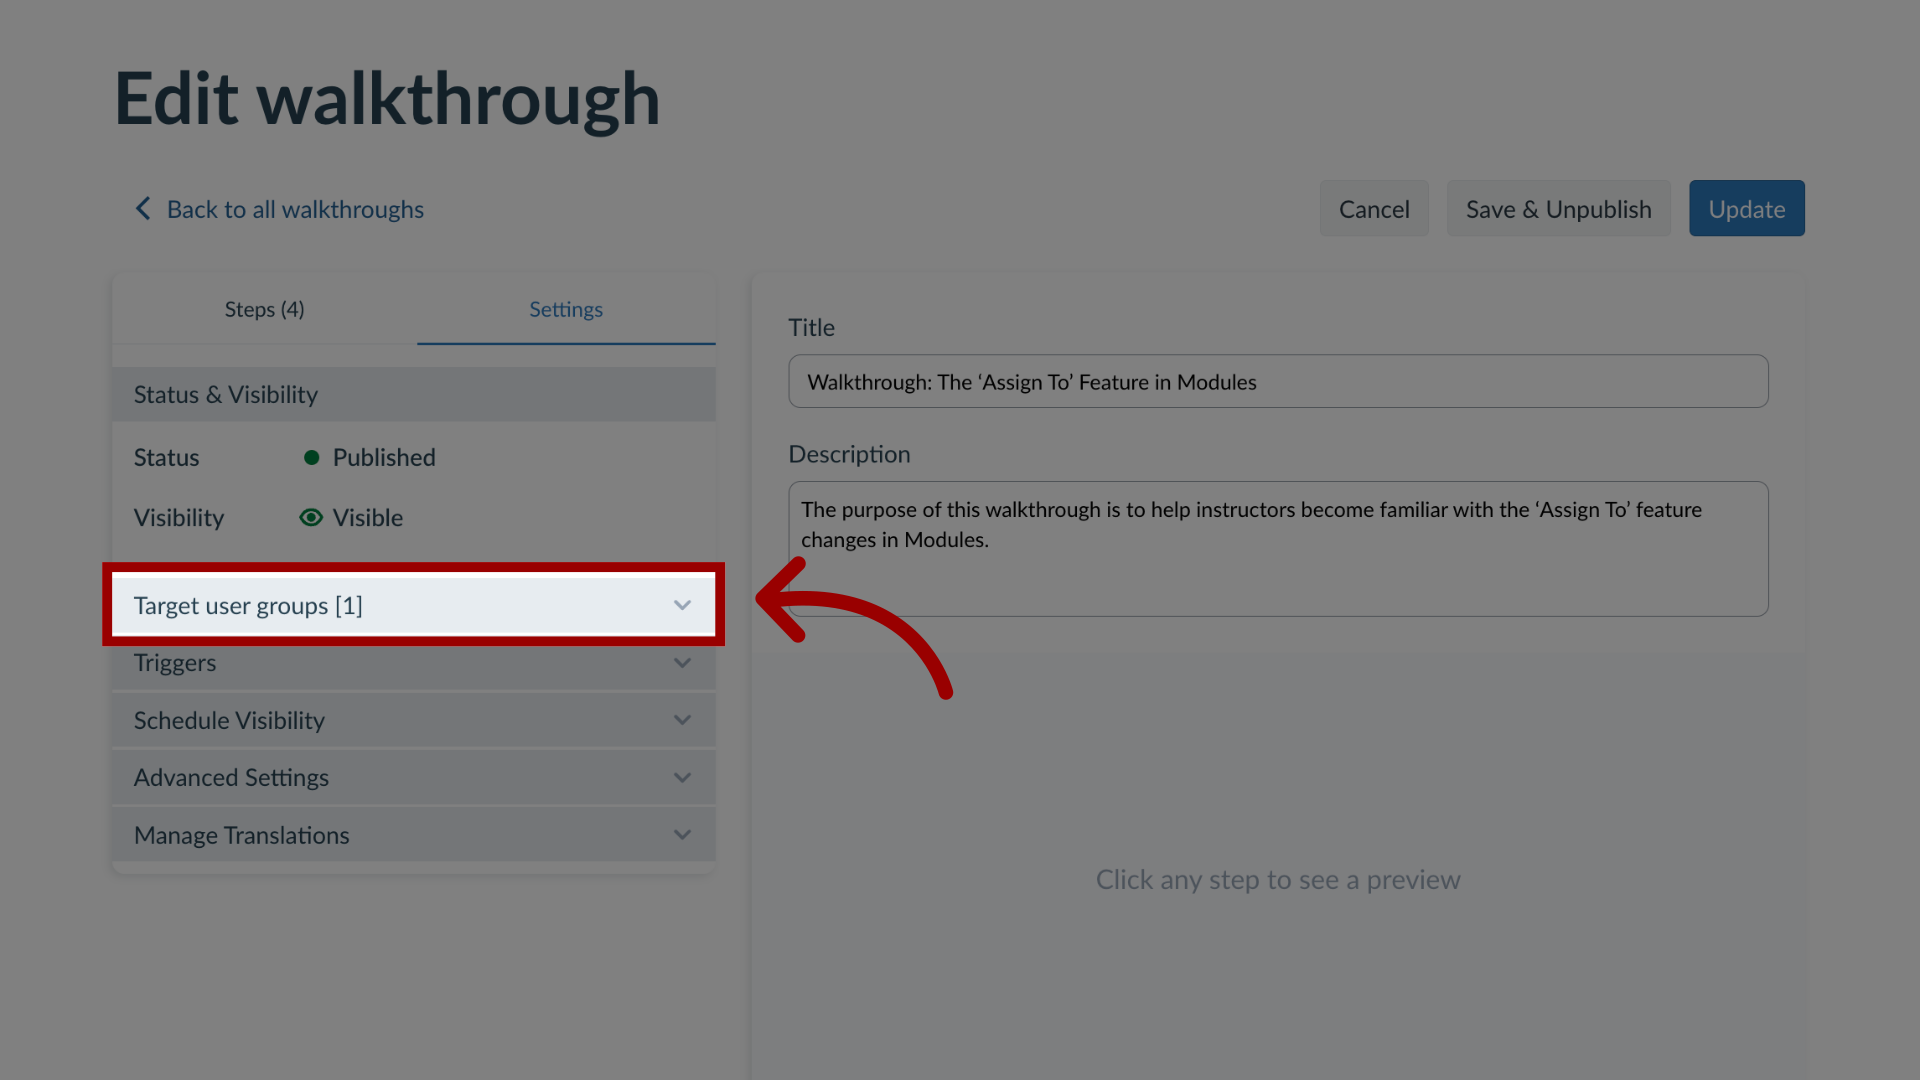
5. Open Target User Groups
In the sidebar, click the Assign to Users section.
6. Add Campaign
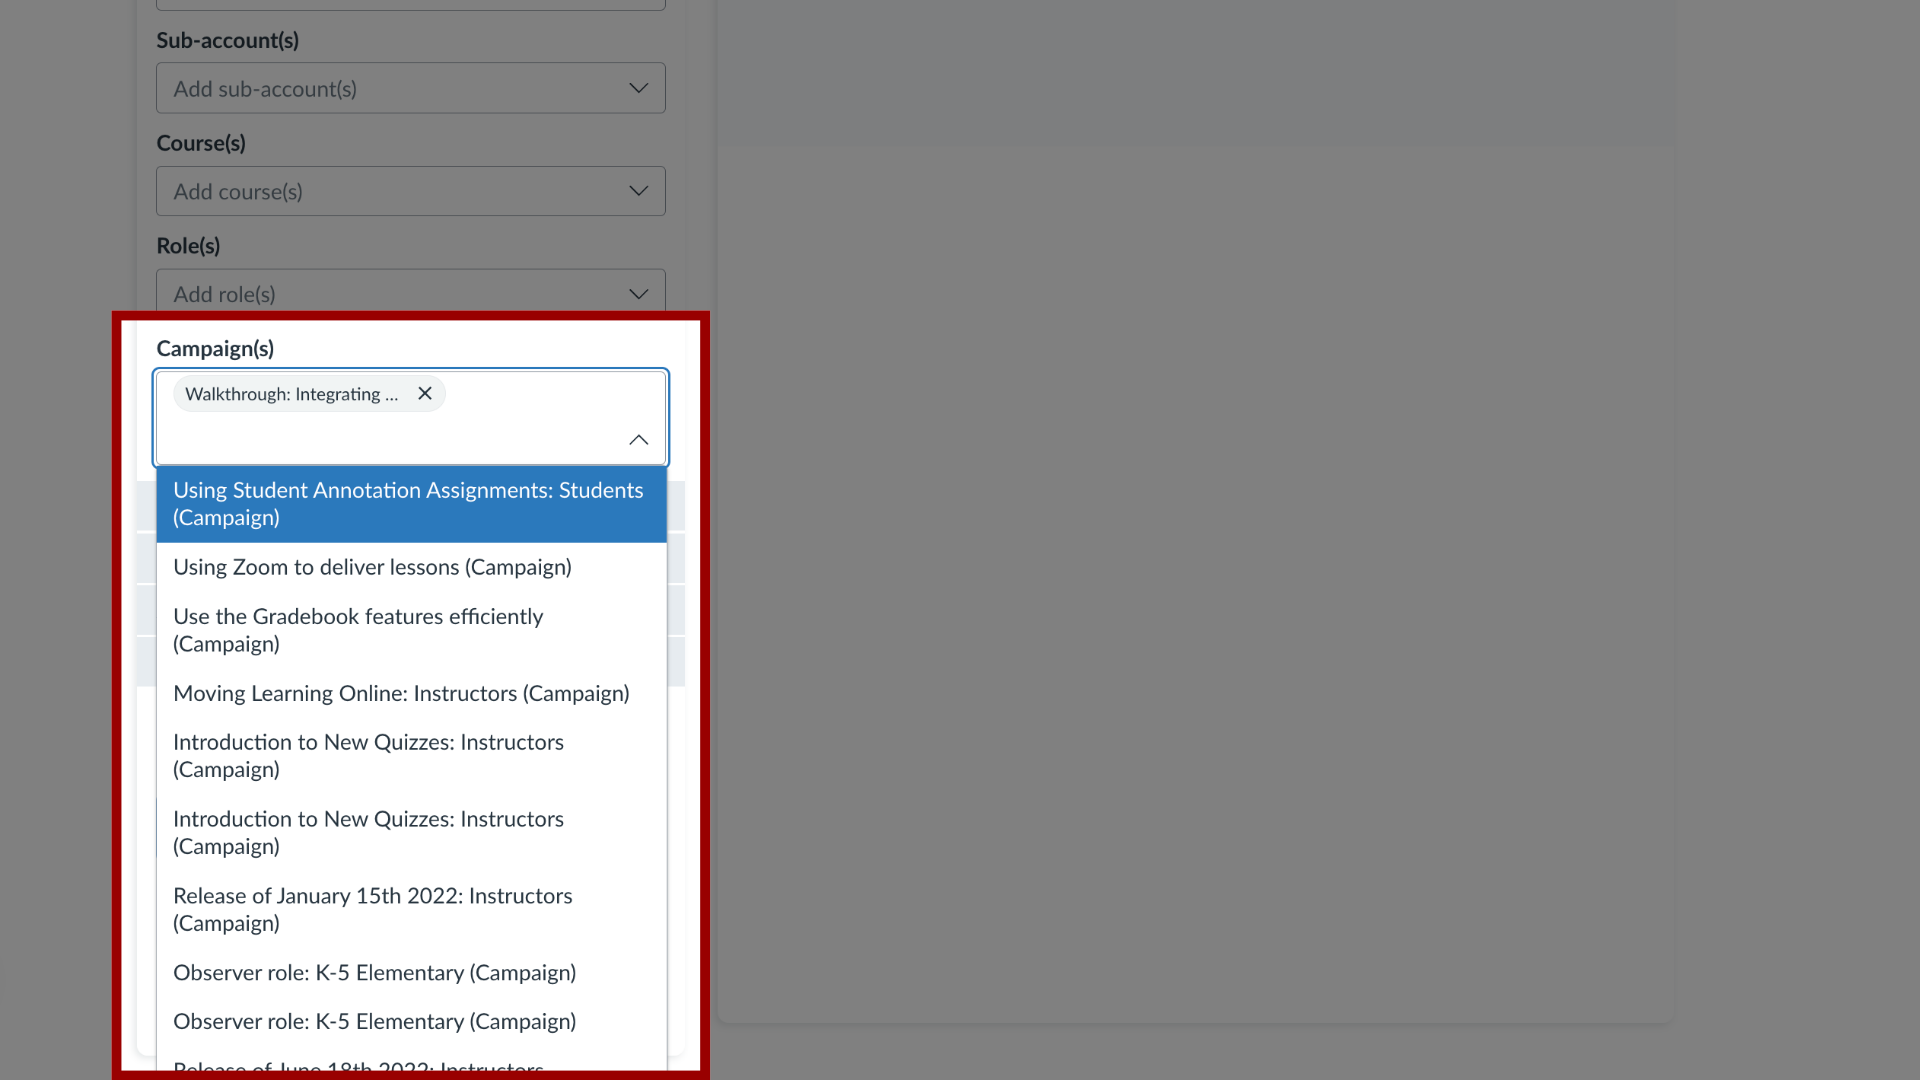
To add a walkthrough to an existing campaign, click the Campaign(s) drop-down menu. Enter the terms in the Filter field or select the name(s) of the relevant campaign. You can also select multiple campaigns.
7. Update Walkthrough
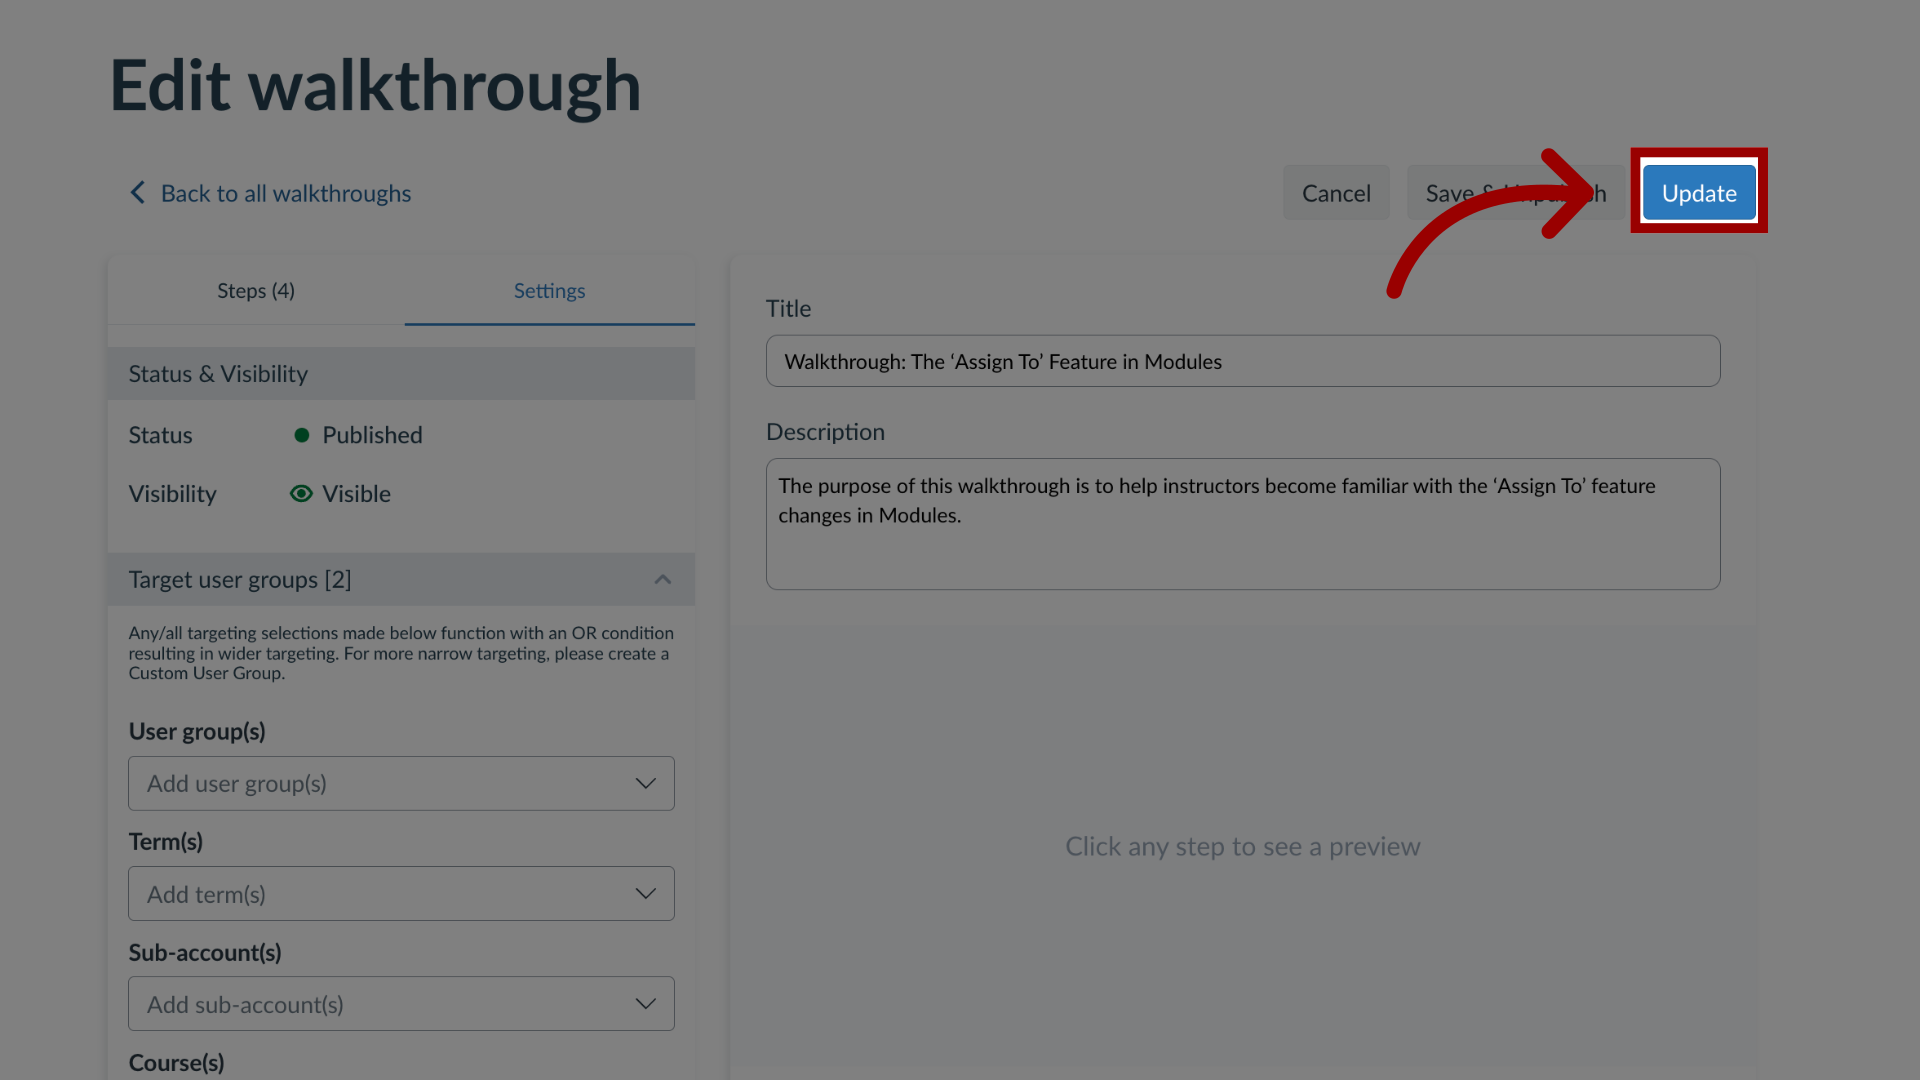
Once you have selected the relevant campaign, you can continue to edit the existing walkthrough and click the Update button.
If you created a new walkthrough click the Publish button.
For more information on the following referenced topics:
- Creating a new walkthrough: Visit How do I create a Walkthrough in the Impact Dashboard?
